Advertisement
- 1 Fast Test Guide
- 2 Know Your System
- 3 Getting Started
- 4 Testing Blood
- 5 Meter Set Up
- 6 Meter Memory
- 7 Care, Cleaning/Disinfecting and Troubleshooting
- 8 Troubleshooting
- 9 System Safety Information and Electromagnetic Compatibility
- 10 Blood Glucose Monitoring System Components
- 11 System Specifications
- 12 Documents / Resources
Fast Test Guide
- INSERT TEST STRIP
![]()
- APPLY BLOOD SAMPLE
![]()


Expected Results for people without diabetes:
| Plasma Blood Glucose Result | |
| Before Eating | <100 mg/dL |
| 2 hours after a meal | <140 mg/dL |
Know Your System
Meter

Top of Meter
- "
![]() " Button
" Button
Decrease numbers in Meter Set Up; remove ALT Symbol; move backward by date/time when viewing results and Averages in Memory; scroll through Event Tags to mark results (if feature on). - " • " Button
Turn meter on to view Average values, to view results in Memory, to access Meter Set Up, to turn on Event Tags in Meter Set Up. - "
![]() " Button
" Button
Increase numbers in Meter Set Up; add ALT Symbol; move forward by date/time when viewing results and view Averages in Memory; scroll through Event Tags to mark results (if feature on).
 " Button
 " Button
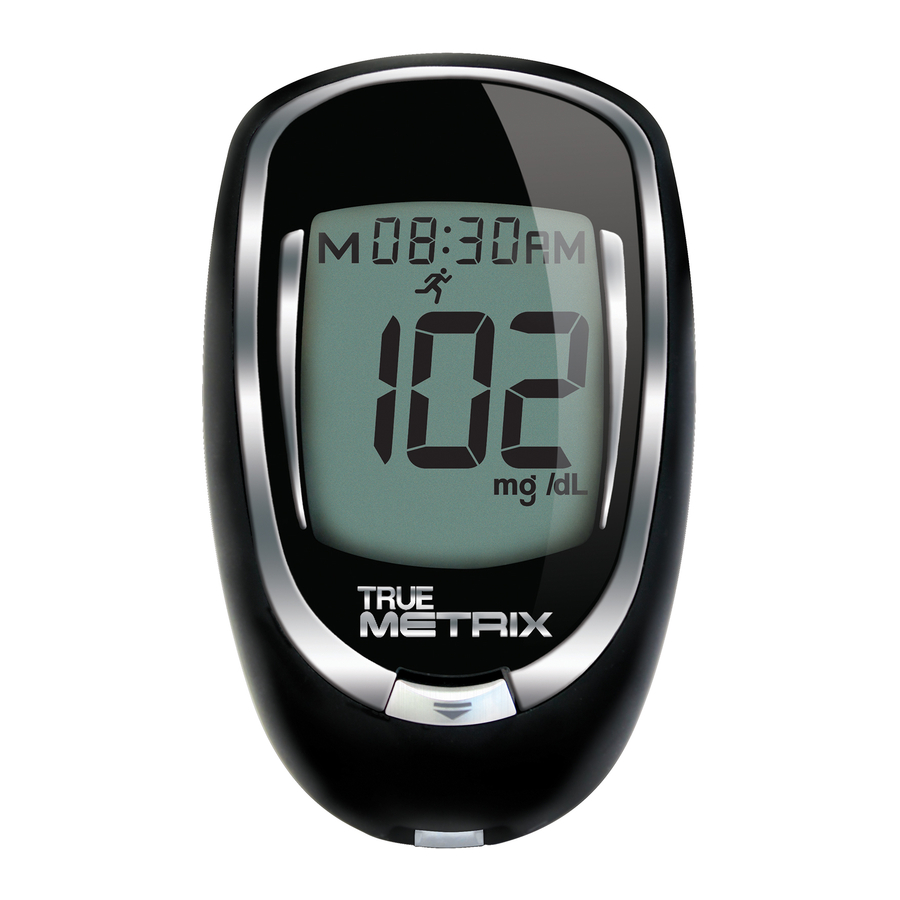
- Display Screen
Shows results, messages, user prompts, information. - Test Port
Insert TRUE METRIX Test Strip here, contact blocks facing up. - Strip Release Button
Releases test strip after testing for disposal. - Battery Door
Use one non-rechargeable 3V lithium battery
(#CR2032), positive ("+") side up (see Changing Battery). - Meter Label
Contains serial number of meter. - Data Contacts
Connects meter with computer for data upload.

Full Display Screen
- Result is from Memory
- Time, Date
- Time is AM/PM
- Event Tag Symbols
- Result is from 7, 14, or 30 day Average
- Test Result
- Control Symbol
- Battery Symbol
- Alternate Site (ALT) Symbol
- Drop Symbol - Apply blood or control solution
- Temperature Symbol
- Test Reminder Symbol
- Ketone Test Alert Symbol
- Unit of Measure (Note: Factory set to mg/dL, cannot be changed by user.)
Test Strip

Top of Test Strip
- Contact End - Insert into Test Port with contact blocks facing up.
- Sample Tip - Bring Tip of test strip to top of sample drop (blood or control solution) after Drop Symbol appears in the Display.
Note: Insert test strip into meter before touching Sample Tip to blood or control solution drop.

Correct

Incorrect
- Allow sample drop to be drawn into Sample Tip until test-ing begins (meter beeps and dashes move across Display).
- Do not smear or scrape drop with test strip.
- Do not apply more sample to test strip after testing begins.
- Do not apply blood or control solution to top of test strip.
Do not insert Sample Tip with sample into Test Port.
May damage meter.

Test Strip Vial Label
- Lot Number (LOT) - Used for identification when calling for assistance.
- Expiration Dates (EXP) - Write date first opened on vial label. Discard vial and unused test strips if either the open vial expiration date or the date printed next to EXP on vial label has passed, whichever comes first.
- See the test strip Instructions for Use for open vial expiration date.

Use of test strips or control solution past the Expiration Dates may give incorrect test results. Discard out-of-date products and test with new products.
- Control Test Range - Range of numbers in which Control Test result must fall to assure the system is working properly.
Note: Examples only. Do not represent actual Control Test ranges.
Control Solution (Control)
")
Control Solution Bottle Label
- Lot Number (LOT) - Used for identification when calling for assistance.
- Expiration Dates (EXP) - Write date first opened on bottle label. Discard bottle if either 3 months after first opening or date printed next to EXP on bottle label has passed, whichever comes first.
- Control Solution Level (1, 2, or 3) - We recommend testing at least 2 levels of control solution. Contact 1-800-803-6025, Monday - Friday, 8AM-8PM EST, for assistance with obtaining different levels of control solution.
Getting Started
Meter comes with pre-set time and date. The
Event Tag feature, Ketone Test Alert, and all Test Reminders are off. Before using the meter for the first time or after a battery change, check the time, date, Event Tags, Alert and Reminders, and update as needed (see Meter Set Up).
The meter turns on when a test strip is inserted into the Test Port or when " • " Button is pressed (see Memory and Meter Set Up).
Meter turns off when the test strip is released or removed from the meter, " • " Button is pressed, or after 2 minutes of non-use.
Turning the Ketone Test Alert on sets a reminder to check your ketones per your treatment plan when a blood glucose result is over 240 mg/dL.
Test Reminders are set like an alarm clock to sound a tone for 10 seconds to remind you to test. Up to four Test Reminders per day may be set.
Getting Started (cont.)
Event Tags allow you to tag your blood glucose results to link to the following events:
 Before meal – test was taken just before a meal,
 After meal – test was taken 2 hours after the start of a meal,
 Exercise – test was taken during or after exercise,
 Medications – medication taken may have affected test result,
 Sick – test was taken when sick,
 Other – any other reason that the test is unique or different in some way (example: stress, drinking alcohol). In your logbook, note the reason that the test result was tagged. Seeing a result with an Event Tag in the meter Memory reminds you that there is more about this test result in your log book.
Tagging results helps track the effect specific events may have on your blood glucose test results. Event Tagging may assist you and your Doctor or Healthcare Professional with managing diabetes.
Quality Control Testing
To assure you are getting accurate and reliable results, TRUE METRIX offers two kinds of quality Control Tests. These tests let you know that your System is working properly and your testing technique is good.
Automatic Self-Test

An Automatic Self-Test is performed by the meter each time a test strip is inserted correctly into the Test Port.
Insert a test strip into the Test Port. The meter is working properly if:
- the full Display appears, then
- the time appears in the upper part of the Display, and then,
- the Drop Symbol begins to blink.
If an error message appears in the Display, the meter will not perform a test.
See Troubleshooting or call 1-800-803-6025,
Monday - Friday, 8AM-8PM EST. Error Message
If any segments are missing in the Display when meter is first turned on, do not use the meter for testing. Call 1-800-803-6025, Monday - Friday, 8AM-8PM EST.
Control Test
We recommend performing Control Tests for practice before using your meter for the first time to test your blood.
Control Tests should be performed:
- For practice to ensure your testing technique is good,
- Occasionally as you use a vial of test strips,
- When opening a new vial of test strips,
- If results seem unusually high or low,
- If a vial has been left opened or exposed to extreme heat or cold, or humidity,
- Whenever a check on performance of the system is needed,
- If meter damage is suspected (meter was dropped, crushed, wet, etc.)
Note: It is important to perform Control Tests with more than one level of control solution. Three levels of TRUE METRIX Control Solution are available for Control Tests. Call 1-800-803-6025, Monday - Friday, 8AM-8PM EST, for assistance in obtaining different levels of control solution.
Ranges printed on test strip vial label are for Control Test results only and are not suggested levels for your blood glucose. Do not drink control solution.
How to Test Control Solution
Use ONLY TRUE METRIX Control Solution with the TRUE METRIX Self Monitoring Meter and Test Strips.

- Check dates on control solution label and test strip vial label. Do not use control solution or test strips if expiration dates have passed. (Control solution - 3 months after first opening or date next to EXP on bottle label; test strips - after open vial expiration date (see test strip Instructions for Use) or date next to EXP on vial label.) Discard expired products and use new products.
- Allow control solution, vial of test strips and meter to adjust to room temperature. Write date first opened on both control solution bottle label and test strip vial label when using for the first time.
- Gently swirl or invert control solution bottle to mix.
DO NOT SHAKE! - Remove one test strip from vial. Close test strip vial immediately. Use test strip quickly after removal from vial.
- Insert test strip into Test Port. Meter turns on.
Note: If test strip has been out of the vial too long before testing, an error message appears upon insertion of the test strip into the meter. Contact Blocks Face Up Release and discard old test strip. Use new test strip for testing.
- Wait until Drop Symbol appears in Display. Keep test strip in meter until testing is finished.
![]()

Note: If test strip is removed before testing is finished, an error message appears. Release and discard old test strip. Use new test strip for testing.
- With cap removed, turn control solution bottle upside down. Squeeze one drop of control solution onto a clean tissue. Wipe off bottle tip and discard tissue.
![]()
- Gently squeeze a drop of control Solution Drop on Discard Control solution onto a small piece of unused aluminum foil or clear plastic wrap. Dispose after use.
- With test strip still in meter, touch Sample Tip of test strip to top of drop of control solution. Allow drop to be drawn into test strip. Remove test strip from drop when meter beeps.
![]()
- Dashes appear across the Display to show meter is testing.


Note: If meter does not beep and begin testing soon after drawing up sample, release and discard test strip. Repeat test with new test strip. If problem persists, see Troubleshooting.
- Compare meter result to Control Test range printed on test strip vial label for level of control solution you are using.
If result is in range, System can be used for testing blood. If result does not fall within range, repeat test using a new test strip.


Note: Control Test result shows the Control Symbol in the Display.
If Control Test result is outside range, test again. If result is still outside range, system should not be used for testing blood. Call 1-800-803-6025, Monday - Friday, 8AM-8PM EST.
- After result is shown, Strip Release Button flashes. Hold meter with test strip pointing down. Press Strip Release Button to release and discard test strip into appropriate container. Meter turns off.
![]()

Note: Removing test strip before result displays cancels the test. An error message appears and the result is not stored in Memory. Retest with a new test strip and do not remove before result is displayed.
Testing Blood
Obtaining a Blood Sample

- The TRUE METRIX Self Monitoring Blood Glucose System is for one person use ONLY. DO NOT share your meter or lancing device with anyone, including family members. Do not use on multiple patients!!
- ALL parts of your blood glucose monitoring system could carry blood-borne pathogens after use, even after cleaning and disinfecting.2
- Cleaning and disinfecting the lancing device and the meter destroys most, but not necessarily all, bloodborne pathogens.
- Wash your hands thoroughly with soap and warm water before and after handling the meter, lancing device, lancets, or test strips as contact with blood presents an infection risk.
- If the meter is being operated by a second person who provides testing assistance, the meter and lancing device should be cleaned and disinfected prior to use by the second person.
- It is important to keep the meter and the lancing device clean and disinfected. For instructions on how to clean and disinfect the meter and lancing device, see Meter Care, Cleaning and Disinfecting and Lancing Device Cleaning and Disinfecting.
- Refer to lancing device Instructions for Use for detailed instructions.
- Never share lancets or lancing device. Lancets are for single use only. Do not re-use.
- Do not use venous blood for testing.
- To help prevent false high results, wash hands before using the system to test blood, especially after fruit has been handled.
From Fingertip

- Prepare fingertip by washing hands with soap and warm water. Rinse and dry thoroughly. Disinfect the clean skin with an antiseptic (e.g., 70% alcohol).
- Place end of lancing device device equipped with a lancet against tip of finger. Lance fingertip.
- Set lancing device aside. To help blood drop form, lower hand to waist level, gently massaging finger from palm to fingertip. Allow blood drop to form before attempting to apply to the test strip. Apply sample to test strip Sample Tip.
- Recap and remove used lancet from lancing device. The used lancet may be biohazardous. Please discard it carefully according to your Doctor or Healthcare Professional's instructions.
From Forearm
Important Notes Regarding Forearm Testing
- Check with your Doctor or Healthcare Professional to see if forearm testing is right for you.
- Results from forearm are not always the same as results from fingertip.
- Use fingertip instead of forearm for more accurate results:
- Within 2 hours of eating, exercise, or taking insulin,
- If your blood sugar may be rising or falling rapidly or your routine results are often fluctuating,
- If you are ill or under stress,
- If your forearm test results do not match how you feel,
- If your blood sugar may be low or high,
- If you do not notice symptoms when blood sugar is low or high.
- Select area to be lanced. Wash with soap and warm water, rinse and dry thoroughly. Disinfect the clean skin with an antiseptic (e.g., 70% alcohol).
- Rub area vigorously or apply a warm dry compress to increase blood flow.
- Place end of lancing device equipped with a lancet firmly against forearm. Press Trigger Button. Apply firm pressure on lancing device for 10 seconds. Apply sample to test strip Sample Tip.
![]()
- Recap and remove lancet from lancing device.

The used lancet may be biohazardous. Please discard it carefully according to your Doctor or Healthcare Professional's instructions.
How to Test Blood
- Check Meter time and date before each glucose test. With meter off, press and hold the " • " Button until the full Display is shown and a series of beeps sound. Release " • " Button. If time and date are incorrect, see Meter Set Up to set the correct time and date.
- Check dates on test strip vial being used. Do not use if either the open vial expiration date (see test strip Instructions for Use) or the date printed next to EXP on vial label has passed, whichever comes first.
- Wash hands (and forearm for alternative site testing). Rinse well and dry thoroughly.
- Remove one test strip from vial. Close vial immediately. Use test strips quickly after removal from vial.
- With meter off, insert test strip Contact End (blocks facing up) into Test Port. Meter turns on. Keep test strip in meter until testing is finished.
![]()
To mark test as alternative site (forearm) result, press "![]() " Button. ALT Symbol appears in Display. Press "
" Button. ALT Symbol appears in Display. Press " ![]() " Button to remove ALT Symbol. Wait until Drop Symbol appears in Display.
" Button to remove ALT Symbol. Wait until Drop Symbol appears in Display.

Note: If test strip has been out of the vial too long before testing, an error message appears upon insertion of the test strip into the meter. Release and discard old test strip. Use new test strip for testing.
- Lance fingertip or forearm.
Allow drop to form
(see Obtaining a Blood Sample). - With test strip still in meter, touch Sample Tip of test strip to top of blood drop and allow blood to be drawn into test strip. Remove test strip from blood drop immediately after the meter beeps and dashes appear across the Display
![]()

Note: If meter does not begin testing soon after touching drop to test strip, discard test strip. Repeat test with new test strip and new blood drop. If problem persists, see Troubleshooting.

Dashes appear across Display to show meter is testing.
- After the test is finished, result is displayed. The Strip Release Button flashes.
![]()

To mark the result with an Event Tag, make sure that Event Tags are turned on Test Result (see Set Event Tags, Ketone Alert and Test Reminders). The Event Tag icons flash. Press " " or "
 " Button to go to the correct Event Tag. Press " • " Button to mark the test result with an event (icon Event Tag stops flashing).
Event Tags are as follows:
![]() Before meal – test was taken just before a meal,
Before meal – test was taken just before a meal,
![]() After meal – test was taken 2 hours after the start of a meal,
After meal – test was taken 2 hours after the start of a meal,
Exercise – test was taken during or after exercise,
 Medications – medication taken may have affected test result,
 Sick – test was taken when sick,
 Other – any other reason that the test is unique or different in some way (example: stress, drinking alcohol). In your logbook, note the reason that the test result was tagged. Seeing a result with an Event Tag in the meter Memory reminds you that there is more about this test result in the log book.
Record result in log book.
- Hold meter with test strip pointing down. Press test strip Release Button to discard test strip in the appropriate container. Meter turns off. Result is stored in Memory with date and time.
![]()

Note: Removing test strip before result displays cancels the test. An error message appears and result is not stored in Memory. Retest with a new test strip and do not remove before result is displayed.
The used lancet and test strip may be biohazardous. Please discard them carefully according to your Doctor or Healthcare Professional's instructions.
TRUE METRIX Self Monitoring Blood Glucose System and Laboratory Testing
When comparing results between TRUE METRIX Self Monitoring Blood Glucose System and a laboratory system, TRUE METRIX Self Monitoring Blood Glucose System blood tests should be performed within 30 minutes of a laboratory test. If you have recently eaten, fingerstick results from the TRUE METRIX Self Monitoring Blood Glucose System can be up to 70 mg/ dL higher than venous laboratory results.5
System Out of Range Warning Messages
Meter reads blood glucose levels from 20-600 mg/dL.
If test result is less than 20 mg/dL, "Lo" appears in Display.
If test result is greater than 600 mg/dL, "Hi" appears in Display.

ALWAYS repeat blood tests to confirm Low ("Lo") and High ("Hi") results. If blood results still display "Lo" or "Hi", call your Doctor or Healthcare Professional immediately.
Note: "Lo" results are included in the Average as 20 mg/dL. "Hi" results are included as 600 mg/dL.

If blood glucose test result is greater than 240 mg/dL, and Ketone Test Alert is turned on, "Ketone" appears in Display with glucose result (see Ketone Test Alert).
When a Ketone Test Alert is shown in the meter Display, it does not mean that ketones have been detected in your blood. Perform a ketone test per your treatment plan, as prescribed by your Doctor or Healthcare Professional.
Note: Ketone Test Alert can be turned on or off during Meter Set Up.
Meter Set Up

Note: If the meter turns off at any time during Set Up, go back to Step #1 under Meter Set Up and begin again.
- With meter off, press and hold " • " Button until the full Display is shown and a series of beeps sound (after about 10 seconds). Release " • " Button. Meter goes into Set Up.
![]()

Set Time/Date
- The hour flashes. To change, press "
![]() " or "
" or " ![]() " Button on top of the meter to select the hour. Like many alarm clocks, to set "AM" or "PM", scroll through the hours until "AM" or "PM" appears in the Display. Press " • " Button to set.
" Button on top of the meter to select the hour. Like many alarm clocks, to set "AM" or "PM", scroll through the hours until "AM" or "PM" appears in the Display. Press " • " Button to set.
![]()
- The minutes flash. To change, press "
![]() " or "
" or " ![]() " Button to select the minutes. Press " • " Button to set.
" Button to select the minutes. Press " • " Button to set.
![]()
- The month (number) flashes. To change, press "
![]() " or "
" or " ![]() " Button to select the month.
" Button to select the month.
Press " • " Button to set.
![]()
- The day (number) flashes. To change, press "
![]() " or "
" or " ![]() " Button to select the day. Press " • " Button to set.
" Button to select the day. Press " • " Button to set.
![]()
- The year flashes.
![]()


To change, press "  " or "
  " Button to select the year. Press " • " Button to set.
Note: Meter beeps every time a setting is confirmed (" • " Button is pressed).
Set Event Tags, Ketone Alert and Test Reminders
Meter comes with Event Tags, Ketone Test Alert and all Test Reminders off.
Note: If the meter turns off at any time during Set Up, go back to Step #1 under Meter Set Up and begin again.
Event Tags
Event Tags are used to mark a test result that was taken during a specific event.
- After setting the year, press "
![]() " or "
" or " ![]() "
"
Button to turn Event Tags on or off. Press " • " Button to set, then the Meter goes to set Ketone Test Alert.
![]()

Ketone Test Alert
When a blood glucose result is over 240 mg/dL, the Ketone Test Alert is a reminder to check your ketones per your treatment plan.
- Press "
![]() " or "
" or " ![]() " Button to turn Alert Ketone Test on or off. Press " • " Button to set, then the Meter goes to set Test Reminder.
" Button to turn Alert Ketone Test on or off. Press " • " Button to set, then the Meter goes to set Test Reminder.
![]()

When a Ketone Test Alert is shown in the Display, it does not mean that ketones have been detected in your blood. Perform a ketone test per your treatment plan, as prescribed by your Doctor or Healthcare Professional.
Test Reminder
Up to four Test Reminders per day may be set.
Reminder sounds at set time for 10 seconds.
Meter comes with all Test Reminders off.
To set the Test Reminders:
- After pressing " • " Button to set Ketone Test Alert, Display shows first Reminder setting (A-1). To turn Reminder on, press "
![]() " Button. Press "
" Button. Press " ![]() " Button to Test Reminder turn Reminder back to off. Press " • " Button to set.
" Button to Test Reminder turn Reminder back to off. Press " • " Button to set.
![]()
- When "on" is chosen, press " • " Button. The hour flashes. Press "
![]() " or "
" or " ![]() "
"
Button to set the hour. To set AM/PM, scroll (press "![]() " or "
" or " ![]() " Button) until "AM" or "PM" is next to correct time. Press " • " Button to set.
" Button) until "AM" or "PM" is next to correct time. Press " • " Button to set.
![]()
- The minutes flash. Press "
![]() " or "
" or " ![]() " Button to set the minutes. Press " • " Button to set. Meter goes to the next Test Reminder.
" Button to set the minutes. Press " • " Button to set. Meter goes to the next Test Reminder.
![]()
- Turn Reminders on and repeat setting the time for next 3 Reminders (if needed).
![]()


Exit Set-Up
Press and hold " • " Button until meter turns off. Meter also turns off after 2 minutes of non-use. Set-Up choices are saved.

Note: If Test Reminders are set, the Alert Symbol appears in all Displays.
If battery dies or is replaced, Ketone Test Alert and Test Reminders may have to be reset.
Meter Memory
View Averages (7-, 14-, and 30-day)
The Averages feature allows you to view the average of all your blood glucose results within a 7-, 14-, or 30-day period. Control Test results are not included in the Averages.
You can review the average of your glucose 7-Day results from the last 7-, 14-, or 30-days. Average\

- With meter off press and release " • " Button. Display scrolls through 7-, 14-, and 30-day Average values.
- Meter turns off after 2 minutes Average if no buttons are pressed.
Note: If there are no Average values, three 30-Day dashes are displayed for 7-, 14-, and Average 30-day Averages.
View Memory
Meter Memory stores 500 results. When Memory is full, the oldest result is replaced with the newest result.
- Press and release " • " Button. Memory Symbol
Meter displays 7-, 14- and 30-day Averages. Press and release " • " Button again to view most recent Control Test result in Memory. If there are no results in Memory, dashes appear with Alternate Site the Memory Symbol. Symbol - Press "
![]() " Button and release to advance to the most recent blood test. Press "
" Button and release to advance to the most recent blood test. Press " ![]() " Button to scroll forward through results or "
" Button to scroll forward through results or " ![]() " Button to scroll backwards through results.
" Button to scroll backwards through results.
Test results marked as alternate site display ALT Symbol.
Control Test results display the Control Symbol. If no Control Test has been done, Display shows dashes and the Control Symbol.
Test results above 240 mg/dL display Ketone Test Alert Symbol, when Ketone Test Alert is turned on during Set Up.
Tests marked with an Event Tag shows the Event Tag icon in the Display.
Care, Cleaning/Disinfecting and Troubleshooting
- Store System (meter, control solution, test strips) in Carrying Case to protect from liquids, dust and dirt.
- Store in a dry place at room temperature (40°F-86°F) at 10%-80% relative humidity. DO NOT FREEZE.
- Do not share your meter with anyone, including family members.
- Allow system to sit at room temperature for 10 minutes before testing.
- Do not keep meter in an area where it may be crushed (i.e. back pocket, drawer, bottom of bag, etc.).
Meter Care, Cleaning and Disinfecting
Cleaning removes blood and soil from the meter.
Disinfecting removes most, but not all possible infectious agents (bacteria or virus) from the meter, including blood-borne pathogens.
- Clean and disinfect immediately after getting any blood on the meter or if meter is dirty.
- Clean and disinfect meter at least once a week. Meter may be cleaned and disinfected once a week for up to 5 years.
- If the meter is being operated by a second person who provides testing assistance, the meter and lancing device should be cleaned and disinfected prior to use by the second person. Do not clean the meter during a test.
- Cleaning (step #2) must occur before disinfecting (steps #3 and #4).
To Clean and Disinfect the Meter:
- Wash hands thoroughly with soap and water.
![]()
- To Clean: Make sure meter is off and a test strip is not inserted. With ONLY Super Sani-Cloth® Wipes (EPA* reg. no. 9480-4), rub the entire outside of the meter using 3 circular wiping motions with moderate pressure on the front, back, left side, right side, top and bottom of the meter. Discard used wipes. (*Environmental Protection Agency.)
![]()
- To Disinfect: Using fresh wipes, make sure that all outside surfaces of the meter remain wet for 2 minutes.
Make sure no liquids enter the Test Port or an other opening in the meter.
![]()
- Let meter air dry thoroughly before using to test.
- Wash hands thoroughly again after handling meter.
![]()
- Verify that the System is working properly by performing an Automatic Self-Test (see Getting Started).


Stop using the meter and call Customer Care for assistance at 1-800-803-6025, Monday - Friday, 8AM-8PM EST, if:
- Meter display appears cloudy or any display segments are missing,
- Markings on meter, including back meter label, are coming off or are missing,
- Buttons are hard to push on the meter or do not work,
- Unable to insert test strip into Test Port, • Automatic Self-Test gives an error message.
Note: Other disinfectants have not been tested. The effect of other disinfectants used interchangeably has not been tested with the meter. Use of disinfectants other than Super Sani-Cloth Wipes may damage meter.
Note: Super Sani-Cloth Wipes have been tested on the meter for a total of 260 cleaning and disinfecting cycles, which is equal to cleaning and disinfecting the meter once a week for a 5 year period. The use life of the meter is 5 years.
Lancing Device Cleaning and Disinfecting
Cleaning and disinfecting the lancing device is a two-step process. The first step is Cleaning. Cleaning removes any blood, liquids, dust or dirt. The second step is Disinfecting. Disinfecting removes most, but not all possible infectious agents (bacteria or viruses), including blood-borne pathogens. Cleaning must be done before Disinfecting.
Clean and disinfect the lancing device at least once a week. Lancing device may be cleaned and disinfected once a day for up to 3 years. If blood gets on the lancing device, clean and disinfect it before anyone else touches it. If someone is helping you test your blood or performs a test on you, do the cleaning and disinfecting before allowing anyone else to handle it.
- Wash hands thoroughly with soap and water or wear disposable gloves.
![]()
- To Clean: Using ONLY Super Sani-Cloth (EPA* Reg. No. 9480-4), thoroughly wipe the entire outside surface of the lancing device with one cloth by wiping in circles 3 times.
Discard the used cloth.
![]()
- Repeat step 2 if the lancing device is not visually clean, or safely dispose of it according to your state/local regulations.
(*Environmental Protection Agency.) - To Disinfect: Remove a fresh Super Sani-Cloth and thoroughly wipe the entire outside surface of the lancing device by wiping in circles 3 times. Make sure that you go over the entire lancing device.
- Using fresh cloths, if needed, make sure that all outside surfaces of the lancing device stay wet for 2 minutes by patting with the cloth. Discard used cloth. Let lancing device air dry completely before using.
- Gently pull back Arming Barrel and press the Trigger Button. You will hear a click if the lancing device is working properly.
- Wash hands thoroughly again.


Other disinfectants have not been tested. The effect of other disinfectants used interchangeably has not been tested with the lancing device. Use of disinfectants other than Super Sani-Cloth may damage lancing device. Do not use lancing device and call Customer Care for assistance at 1-800-803-6025, Monday - Friday, 8AM - 8PM EST, if:
- Markings on lancing device are coming off,
- Trigger Button is hard to push,
- End Cap does not go back on,
- Arming Barrel does not click when gently pulled back.
Super Sani-Cloth may be purchased at: Amazon.com, Officedepot.com (or your local Office Depot store),
Walmart.com, Super Sani-Cloth has been tested on the lancing device for a total of 1,095 cleaning and disinfecting cycles, which is equal to cleaning and disinfecting the lancing device once a day for a 3-year period. Lancing device may be cleaned and disinfected up to 7 cycles per week for 3 years.
TRUE METRIX Control Solution Care
- Write date opened on control solution bottle label. Discard if either 3 months after first opening or date printed next to EXP on bottle label has passed, whichever comes first.
- After each use, wipe bottle tip clean and recap tightly.
- Discard any control solution bottles that appear cracked or leaking.
- Store at temperatures between 36°F-86°F.
DO NOT FREEZE.
TRUE METRIX Self Monitoring Test Strip Care
- Store test strips in original vial only. Do not transfer test strips to new vial or store test strips outside of vial.
- Write date first opened on test strip vial label. Discard vial and unused test strips if either the open vial expiration date or the date printed next to EXP on vial label has passed, whichever comes first. See the test strip Instructions for Use for open vial expiration date. Use of test strips past expiration dates may give incorrect results.
- Discard any test strip vials that appear cracked or broken.
- Close vial immediately after removing test strip.
Store in a dry place at room temperature (40°F-86°F) at 10%-80% relative humidity. DO NOT FREEZE. - Do not reuse test strip.
- Do not bend, cut or alter test strips in any way.
Changing Battery

A low battery displays Battery Symbol while continuing to function. A dead battery displays Battery Symbol, beeps, and then turns off. To replace battery:
- Lift tab on Battery Door.
![]()
- Turn meter over, tap gently on the palm of your other hand to loosen and remove battery.
- Discard old battery into appropriate container.
- Insert new battery, positive ("+") side facing up. Close Battery Door.

Note: Use non-rechargeable 3V lithium battery (#CR2032).
- Press " • " Button to turn meter on. Check time, date, Ketone Test Alert and Test Reminders (see Meter Set Up). If meter does not turn on, check that battery was installed properly. If not, remove and reinsert battery. Turn meter on by pressing " • " Button. Call 1-800-803-6025, Monday - Friday, 8AM-8PM EST, if problem persists.
Battery is not rechargeable. If you have a cable or a cradle for downloading results to a computer, DO NOT plug the USB cable end into an electrical outlet. Trying to recharge the battery or power the meter by plugging into an electrical outlet will cause meter to catch on fire or melt.
Batteries might explode if mishandled or incorrectly replaced. Do not dispose of battery in fire. Do not take apart or attempt to recharge battery. Dispose according to local regulations.
Troubleshooting
- After inserting test strip, meter does not turn on
| Reason | Action |
| Test strip inserted upside down or backwards | Remove test strip. Re-insert correctly. |
| Test strip not fully inserted | Remove test strip. Re-insert test strip fully into meter. |
| Test strip error | Repeat with new test strip. |
| Dead or no battery | Replace battery. |
| Battery in backwards | Battery positive ("+") side must face up. |
| Meter error | Call 1-800-803-6025, Monday - Friday, 8AM-8PM EST. |
- After applying sample, test does not start/meter does not beep or begin testing.\
| Reason | Action |
| Sample drop too small | Repeat test with new test strip and larger drop. |
| Sample applied after two minute shut-off | Repeat test with new test strip. Apply sample within 2 minutes of inserting test strip. |
| Problem with test strip | Repeat with new test strip. |
| Problem with meter | Call 1-800-803-6025, Monday - Friday, 8AM-8PM EST. |
Messages
| Display | Reason | Action |
 | Invalid finger or forearm. If error persists, Hematocrit | Repeat with new test strip, using capillary whole blood from the call 1-800-803-6025, Monday - Friday, 8AM-8PM EST. |
 | Temperature Error | Move meter and test strips to area between 41°F-104°F; wait 10 minutes for system to reach room temperature before testing. |
 | Sample Not Detected or Using Wrong Test Strip | Retest with new test strip and larger sample. |
 | Used Test Strip, Test Strip outside of vial too long, touched top of sample drop. If error Sample on top of Test Strip. | Repeat with new test strip. Make sure Sample Tip of test strip persists, call 1-800-803-6025, Monday - Friday, 8AM-8PM EST. |
 | Meter Error | Call 1-800-803-6025, Monday - Friday, 8AM-8PM EST. |
 | Test Strip Error, or very high blood glucose result (higher than 600 mg/dL) | Retest with new test strip. If error persists, call 1-800-803-6025, Monday Friday, 8AM-8PM EST. If you have symptoms such as fatigue, excess urination, thirst, or blurry vision follow your Doctor or Healthcare Professional's advice for high blood glucose. |
 | Test Strip Removed During Test | Retest with new test strip. Make sure result is displayed before ermoving test strip. |
 | Communication Error | . |
 | Low or Dead Battery | Low: About 50 test can be done before battery dies. Dead: Battery Symbol appears and beeps before meter turns off. |
 | Broken Display | Do not use meter for testing. Call 1-800-803-6025, Monday-Friday, 8AM-8PM EST. |
 | Out of Range - High Results >600 mg/L | Retest with new test strip. If result still "Hi" (High) or "Lo" (Low) contact Doctor or Heathcare Professional immediately. |
 | - Low Results <20 mg/dL |
If error message still appears, any other error message appears, or troubleshooting does not solve the problem, call 1-800-803-6025, Monday - Friday, 8AM-8PM EST.
System Safety Information and Electromagnetic Compatibility
The TRUE METRIX meter was tested and found to comply with the electromagnetic emission and immunity requirements as specified in IEC 60601-1-2 Edition 4.0. The meter's electromagnetic emission is low.
The TRUE METRIX has met the following requirements of 60601-1-2, Edition 4:
| EMC Test | Compliance Information |
| Radiated Emissions | CISPR 11 Class B limits |
| Conducted Emissions Voltage | Not applicable |
| Radiated RF EM Fields | 10v/m, 80 MHz – 2.7 GHz, 80% AM at 1 kHz |
| Proximity fields from RF wireless communications equipment | Per table 8.10 |
| Power Frequency Magnetic Fields | 30 A/m, 50 Hz and 60 Hz |
| Electrical Fast Transients / Bursts | Not applicable |
| Surges | Not applicable |
| Conducted Disturbances induced by RF fields | Not applicable |
| Voltage Dips and Voltage Interruptions Not applicable | Not applicable |
| Electrostatic Discharge | +/-8kV contact; +/- 15kV air discharges. |
Interference from the meter to other electronically driven equipment is not anticipated. The electromagnetic environment should be evaluated prior to operation of the device.
Do not use the TRUE METRIX meter in a very dry environment, especially one in which synthetic materials are present.
Do not use the TRUE METRIX meter close to sources of strong electromagnetic radiation, as these may interfere with the proper operation of the meter.
Do not use electrical equipment, including antennas, closer than 12 inches to any part of the TRUE METRIX meter, including cables specified by the manufacturer.
Blood Glucose Monitoring System Components
- TRUE METRIX Self Monitoring Blood Glucose Meter
- TRUE METRIX Self Monitoring Blood Glucose Test Strips
- TRUE METRIX Control Solution
- Lancing Device
- Single Use Lancet
Kit may contain one or more of the components above. To obtain components, call 1-800-803-6025, Monday – Friday, 8AM-8PM EST.
Other accessories may negatively affect EMC performance.
No adverse events to the Patient and Operator are anticipated due to electromagnetic disturbances because all electrical components of the TRUE METRIX meter are fully enclosed.
System Specifications
Result Range: 20-600 mg/dL
Sample Size: 0.5 microliter (0.5 µL)
Sample: Fresh capillary whole blood from the finger or forearm, or control solution
Test Time: Results in as little as 4 seconds
Result Value: Plasma values
Assay Method: Amperometric
Power Supply: One 3V lithium battery#CR2032 (non-rechargeable)
Battery Life: Approximately 1000 tests or 1 year
Automatic shut-off: After two minutes of non-use
Weight: 1.66 ounces
Size: 3.44" x 2.16" x 0.69"
Memory Size: 500 glucose results
Operating Range (meter & test strips)
Relative Humidity: 10%-90% (Non-condensing)
Temperature: 41°F-104°F
Hematocrit: 20%-70%
Altitude: Up to and including 10,200 feet
Note: Use within specified environmental conditions only.
Chemical Composition
TRUE METRIX Test Strips: Glucose dehydrogenase-FAD (Aspergillus species), mediators, buffers and stabilizers.
TRUE METRIX Control Solution: Water, d-glucose, buffers, viscosity enhancing agent, salts, dye and preservatives.
Trividia Health, Inc
TRUE METRIX and the Trividia Heath Logo are trademarks of Trividia Health, Inc.
Fort Lauderdale, FL 33309 U.S.A.

Documents / ResourcesDownload manual
Here you can download full pdf version of manual, it may contain additional safety instructions, warranty information, FCC rules, etc.
Download Trividia Health True Metrix - Monitoring Blood Glucose System Manual
Advertisement


Need help?
Do you have a question about the Metrix and is the answer not in the manual?
Questions and answers