Table of Contents
Advertisement
Quick Links
Advertisement
Table of Contents
Troubleshooting

Subscribe to Our Youtube Channel
Related Manuals for Olivetti PGL 12en


Summary of Contents for Olivetti PGL 12en
- Page 1 LASER PRINTER PGL 12en Reference Manual p/n 506519W...
- Page 2 We will not be held responsible for any damage, direct or indirect, arising from or related to the use of this manual. © 2000 Olivetti. All rights reserved. • Centronics is a trademark of Centronics Data Computer Corporation.
-
Page 3: Table Of Contents
Contents Introduction Special Features Printer Components Setting Up Your Printer Unpack Your Printer STEP 1 : Install the Toner Cartridge STEP 2 : Load Paper STEP 3 : Connect to the Computer with a Parallel Cable STEP 4 : Turn on the Printer STEP 5 : Print a Demo Page! STEP 6 :... - Page 4 Printing Tasks Printing a Document Using Toner Save Mode Printing on Both Sides of the Paper (Manual Duplexing) Printing Multiple Pages on One Sheet of Paper 5.10 (N-Up Printing) Printing Booklets 5.11 Printing on Different Paper for the First Page 5.14 Fitting Your Document To a Selected Paper Size 5.15...
- Page 5 Contents (continued) Specifications Printer Specifications Paper Specifications Using Your Printer with a USB Cable Installing the Printer Software Frequently Asked Questions About USB Using Your Printer with Macintosh Macintosh Installation Using PCL Driver Using PS Driver C.10 Printing from DOS Applications About Remote Control Panel for DOS Installing the Remote Control Panel for DOS Users...
- Page 6 Using Your Printer on Network About Sharing the Printer on a Network Setting Up a Locally Shared Printer Setting Up a Network-Connected Printer Installing Software from Diskettes Making Installation Diskettes Installing Software from Diskette Printer Options Precautions Memory and PostScript SIMMs Network Interface Card Paper Tray 2 Using Your Printer in Linux...
- Page 7 Environmental and Safety Consideration Laser Safety Statement The printer is certified in the U.S. to conform to the requirements of DHHS 21 CFR, chapter 1 Subchapter J for Class I(1) laser products, and elsewhere, is certified as a Class I laser product conforming to the requirements of IEC 825.
- Page 8 Environmental and Safety Consideration Ozone Safety During normal operation, the PGL 12en printer produces ozone. the ozone produced does not present a hazard to the operator. OZONE However, it is advisable that the machine be operated in a well ventilated area.
- Page 9 Congratulations on the purchase of your PGL 12en printer! This chapter provides information on the following topics: N Special Features N Printer Components...
-
Page 10: Introduction
Special Features Your new Olivetti PGL 12en printer is equipped with special features that improve print quality, giving you a competitive edge. You can: Print with excellent quality and high speed • Prints at 1200 dots per inch (dpi). See page 5.19. - Page 11 • This printer meets Energy Star guidelines for energy efficiency. Expand the printer capacity • The PGL 12en printer has 4 MB of memory which can be expanded to 68 MB. • PostScript Level 3 Emulation* (PS) SIMM adds PS printing.
-
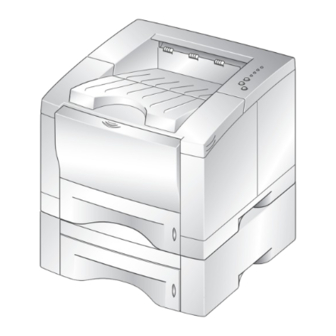
Page 12: Printer Components
Paper level Tray 2 (550-sheet paper feeder) indicators (Optional 550-sheet paper feeder) Rear View Rear output tray door Network port (PGL 12en: Option) (Face up output) USB port Power switch Parallel port Power receptacle 1 1 . . 3 NTRODUCTION... -
Page 13: Step 1 : Unpack Your Printer
chapter This chapter provides step by step information on setting up your printer. Topics included in this chapter are: Unpack Your Printer STEP 1 : Install the Toner Cartridge STEP 2 : Load Paper STEP 3 : Connect to the Computer with a Parallel Cable STEP 4 : Turn on the Printer STEP 5 :... - Page 14 Unpack Your Printer Remove the printer and all accessories from the packing carton. Make sure that your printer has been packed with the following items: Power cord Toner cartridge Notes: • If any items are missing or damaged, notify your dealer immediately. •...
-
Page 15: Install The Toner Cartridge
Install the Toner Cartridge Open the top cover door. Pull up on the handle to open the door. Handle Carefully tear one end of the plastic bag. Don’t use a knife or other sharp objects as it might scratch the drum of the cartridge. - Page 16 Install the Toner Cartridge Locate the cartridge slots inside the printer, one on each side. Grasp the handle and insert the cartridge in the printer until it drops into place. Close the top cover. Make sure that the cover is securely closed. When printing text at 5% coverage, you can expect a toner cartridge life of Note: approximately 6,000 pages (3,000 pages for the toner cartridge that is shipped with the...
-
Page 17: Load Paper
Load Paper Pull the paper tray out of the printer. Push down on the metal paper lift plate to lock it in place. Load paper with the print side facing down. Note: You can load transparencies, letterheads, or other print media using the same method. - Page 18 Load Paper Make sure that the stack goes under the metal retaining clip and the plastic tabs on the end guides. Paper overloading may cause paper jams. Note: If you want to change paper size in tray, see below: “To Change Paper Size in Tray.”...
- Page 19 Load Paper Adjust the paper length guide so the pointer matches the desired paper size. FOLIO Pointer EXEC JIS B5 After loading paper, squeeze the side guide as shown and slide it to the left flush against the paper. If necessary, use the rear width guide. Squeeze the rear width guide as shown and slide it to the left.
-
Page 20: Connect To The Computer With A Parallel Cable
Connect to the Computer with a Parallel Cable Make sure both the printer and the computer are turned off. Plug the parallel printer cable into the connector on the back of the printer. Push the metal clips down to fit inside the notches on the cable plug. -
Page 21: Turn On The Printer
Data the demo page will print. Cancel/Reprint Demo Toner Save The demo page provides a sample of the Olivetti print quality and help you verify the printer is printing correctly. PGL 12en 2 2 . . 8 ETTING RINTER... -
Page 22: Install The Printer Software
Install the Printer Software Included with your printer is a CD-ROM containing the printer drivers for some of the most popular Windows software applications. To operate your printer, you must install a printer driver, which translates data from your application into data that the printer understands. - Page 23 Install the Printer Software Before Installing the Printer Software Verify the following: • At least 16 MB or more of RAM is installed on your PC. • There is at least 30 MB of free disk space on your PC. •...
- Page 24 Install the Printer Software Click Printer Driver. The Welcome window opens. Click Next. Follow the instructions on the screen to complete the installation. 2 2 . . 11 ETTING RINTER...
- Page 25 Install the Printer Software Printer Driver Features PGL 12en printer drivers will support the following standard features: • Input tray selection • paper size, orientation and media type • number of copies Table below lists a general overview of features supported by the PGL 12en printer drivers.
- Page 26 ? of the Windows PGL 12en printing system components. Starting the Uninstaller: 1. In the Olivetti PGL 12en Program group, select Olivetti PGL 12en Driver Uninstall. 2. Click Next. 3. Select the PGL 12en printing system components you want to uninstall.
- Page 27 chapter This chapter describes how to use the printer’s control panel. It provides information on the following topics: N Control Panel Buttons N Control Panel Lights...
-
Page 28: Using The Control Panel
Control Panel Buttons The printer has three buttons: Cancel/Reprint, Demo and Toner Save. Error Manual Paper Data Cancel/Reprint Demo Toner Save Toner Save Toner Save Press Toner Save to turn the toner save mode on or (on) off. The printer must be in the ready mode. Toner Save •... - Page 29 To disable this feature: 1. From the Start menu, select Settings then Printers. 2. Click the right mouse button on the Olivetti PGL 12en PCL 6 printer icon and select Properties to open the properties window. 3. From the Printer tab, click Reprint to empty the checkbox.
- Page 30 Control Panel Buttons Print demo page and configuration sheet Demo Press and hold Demo for about 2 seconds until the control panel lights blink slowly to print a demo page. The printer must be in the ready mode. Press and hold Demo for about 4 seconds until the control panel lights blink rapidly to print a configuration sheet.
-
Page 31: Control Panel Lights
Control Panel Lights The control panel lights indicate the status of your printer. If the Error light is on, the printer is experiencing an error. See “Troubleshooting Error Messages” on page 7.22. Control Panel Light Message Light status legend symbol for “light off” symbol for “light on”... - Page 32 Control Panel Lights Paper out Error The printer is out of paper. The Paper light blinks until Manual paper is added. Paper Load paper into the printer. There is no need to press any button to reset. Data Manual feed mode Error The printer is set to Manual Feed mode.
- Page 33 This chapter will help you understand what kind of paper you can use with the PGL 12en printer and how to properly load paper in the different paper trays for the best print quality. Topics included in this chapter are:...
-
Page 34: Print Media
Choosing Paper and Other Media You can print on a variety of print media, such as plain paper, envelopes, labels, transparencies, card stocks and so on. See “Paper Specifications” on page A.2. To get the best possible print quality, use only high-quality copier-grade paper. When you choose print media, consider the followings: •... - Page 35 Choosing Paper and Other Media Media Sizes and Capacities Input Source/Capacity* Media Size Multi-Purpose Tray Manual Feed Tray 1 or Optional Tray 2 Plain Paper Letter (8.5 x 11 in.) Legal (8.5 x 14 in.) Executive (7.25 x 10.5 in.) Folio (8.5 x 13 in.) (210 x 297 mm)
- Page 36 Choosing Paper and Other Media Paper Guidelines When selecting or loading paper, envelopes, or other special media, keep these guidelines in mind: • Attempting to print on damp, curled, wrinkled, or torn paper can cause paper jams and poor print quality. •...
-
Page 37: Selecting The Output Tray
Selecting the Output Tray The printer has two output locations: the rear output tray and the top output tray. To use the top output tray, be sure the rear output tray is closed. To use the rear output tray, open it. •... - Page 38 Selecting the Output Tray To open the rear output tray: Open the rear door by pulling it down . The cover functions as the output tray. Pull the extender to extend the output tray to its full-length position to hold longer paper.
-
Page 39: Loading Paper
Loading Paper Proper paper loading helps prevent paper jams and ensure trouble-free printing. Do not remove paper tray(s) while a job is printing. Doing so may cause a paper jam. The paper level indicator on the front of the paper tray(s) shows the amount of paper currently left in the tray. -
Page 40: Using The Multi-Purpose Tray
Loading Paper Using the Multi-Purpose Tray The Multi-Purpose Tray is located in the front of your printer. It can be closed when you are not using it, making the printer more compact. The Multi-Purpose Tray can hold several sizes and types of paper, such as transparencies, cards, and envelopes. - Page 41 Loading Paper To load paper in the Multi-Purpose Tray: Pull the Multi-Purpose Tray down toward you. Slide the extender to extend the tray to its full-length position to hold longer paper. Prepare a stack of paper for loading by flexing or fanning them back and forth. Straighten the edges on a level surface.
- Page 42 Loading Paper Place paper with the print side face up, and against the left edge of the tray. Make sure that you have not Note: loaded too much print media. The stack should be under the stack height limit mark. The print media buckles if you load a stack that is too deep, or push it in too far.
-
Page 43: Using The Manual Feed
Loading Paper Using the Manual Feed When you change the print settigs, if you select Manual Feed in the Paper Source option, you can manually load paper in the Multi-Purpose Tray. Manually loading paper can be helpful when you want to check the print quality after each page is printed. This loading procedure is almost the same as the procedure for loading in the Multi-Purpose Tray except you load paper sheet-by-sheet in the Multi-Purpose Tray, send print data to print the first page, and press the Demo button to print each following page. - Page 44 Loading Paper When you print a document, you must select Manual Feed for Paper Source from the software application, and then select the correct paper size and type. For details, see page 5.3. Print the document. The Manual light on the control panel blinks.
-
Page 45: Printing On Envelopes
Printing on Envelopes Guidelines • Only use envelopes recommended for laser printers. Before you load envelopes in the Multi-Purpose Tray, make sure that they are undamaged and are not stuck together. • Do not load more than 10 envelopes into the Multi-Purpose Tray. •... - Page 46 Printing on Envelopes Flex or fan the envelopes to supply air through them for loading. Load the envelopes with the flap side down, and against the left edge of the tray. The stamp area is on the left side and the end of the envelope with the stamp area enters the Multi-Purpose Tray first.
-
Page 47: Printing On Labels
Printing on Labels Guidelines • Only use labels recommended for laser printers. • Do not load more than 25 labels into the Multi-Purpose Tray at a time. • Verify that the labels’ adhesive material can tolerate fusing temperature of 200°C (392°F) for 0.1 second. -
Page 48: Printing On Transparencies
Printing on Transparencies Guidelines • Only use transparencies recommended for use in laser printers. • Do not load more than 20 transparencies into the Multi-Purpose Tray at a time. • Make sure that the transparencies are not wrinkled or curled, and that they do not have any torn edge. -
Page 49: Printing On Preprinted Paper
Printing on Preprinted Paper Preprinted paper is a form with some type of printing on them before they are sent through the printer, such as a letterhead having a preprinted logo or text located at the top of the page. Guidelines •... -
Page 50: Printing On Card Stock Or Custom-Sized Media
Printing on Card Stock or Custom-sized Media Postcards, 3 by 5 in.(index) cards and other custom-sized media can be printed with the PGL 12en printer. The minimum size is 98 by 148 mm (3.9 by 5.83 in.) and the maximum size is 216 by 356 mm (8.5 by 14 in.). -
Page 51: Printing Tasks
chapter This chapter explains your printing options and give common printing tasks. Topics included in this chapter are: Printing a Document Using Toner Save Mode Printing on Both Sides of the Paper (Manual Duplexing) Printing Multiple Pages on One Sheet of Paper (N-Up Printing) Printing Booklets Printing on Different Paper for the First Page N Fitting Your Document To a Selected Paper Size... -
Page 52: Printing A Document
Printing a Document The following procedure describes general steps required for printing from various Windows applications. The exact steps for printing a document may vary depending on the application program you are using. Refer to your software application’s documentation for the exact printing procedure. Open the document you want to print. - Page 53 Printing a Document To take full advantage of the printer features provided by your PGL 12en printer, click Properties in the application’s Print dialog box and go to step 4. If you see Setup, Printer, or Options, click that button instead.
- Page 54 Printing a Document Make sure the Paper Source is set to Tray 1. If you use paper in the Multi-Purpose Tray or optional Tray 2, select the corresponding paper source. Manual Feed source is used when printing to special media. You have to feed one sheet at a time into the printer.
- Page 55 Printers folder. Do as follows: 1. Click the Windows Start button. 2. Select Settings, then Printers to open the Printers window. 3. Select the Olivetti PGL 12en PCL 6. 4. Click the right mouse button and select Properties to open the properties window.
- Page 56 3. From the Document menu, select Cancel Printing (Windows 9x) or Cancel (Windows NT 4.0). Printing Help Olivetti PGL 12en printer has a help screen that can be activated by the Help button in the printer Properties dialog box. These help screens give detailed information about the printer features provided by the PGL 12en printer driver.
-
Page 57: Using Toner Save Mode
This setting is not available with 1200 dpi settings. There are two ways to enable the Toner Save mode. To enable this feature from the PGL 12en printer Press the Toner Save button on the control panel. The printer must be in the ready mode (Data light is on). -
Page 58: Printing On Both Sides Of The Paper (Manual Duplexing)
You can print using the top output tray (face down tray) or the rear output tray (face up tray). Olivetti recommends using the top output tray for light-weight paper. Use the rear output tray for any heavy media or media that tends to curl when printed, such as envelopes and card stock. - Page 59 Printing on Both Sides of the Paper (Manual Duplexing) Choosing Long Edge lets you have the binding orientation along the long edge of the paper as in a magazine. Choosing Short Edge lets you have the binding orientation along the short edge of the paper as in a calendar. Long Edge in the Long Edge in the Portrait orientation...
- Page 60 Printing on Both Sides of the Paper (Manual Duplexing) After the first side has been printed, remove the remaining paper from the Multi-Purpose Tray and set it aside until after you finish your manual duplexing job. Gather up the printed pages, flip the stack, and then straighten the stack before placing it back in the Multi- Purpose Tray.
-
Page 61: Printing Multiple Pages On One Sheet Of Paper
rinting Multiple Pages on One Sheet of Paper (N-Up Printing) You can select the number of pages you want to print on a single sheet of paper. If you choose to print more than one page per sheet, the pages will appear decreased in size and arranged on the sheet. -
Page 62: Printing Booklets
Printing Booklets Booklet printing feature allows you to print your document as a 2-sided (duplex) job and arrange the pages so that the paper can be folded in half after printing to produce a booklet. To print booklet, you must use the Multi-Purpose Tray for Note: Portrait orientation the paper input source. - Page 63 Printing Booklets Select Face Down tray (top output tray) or Face Up tray (rear output tray) in which the printed media will be stacked. According to this option, the printer will determine the print page order when the second sides are printed. If you want the instruction page which tells you how to load the paper, click Printing Instruction Page.
- Page 64 Printing Booklets Gather up the printed pages, flip the stack, and then straighten the stack before placing it back in the multi- purpose tray. The following illustrations show how to put the paper back into the printer. In Portrait orientation, insert the pages with Remove the printed paper, left edge...
-
Page 65: Printing On Different Paper For The First Page
Printing on Different Paper for the First Page When you change the print settings from your software application, access the printer properties. See page 5.2 to access the printer properties. Click the Paper tab, and click Different Source for First Page. -
Page 66: Fitting Your Document To A Selected Paper Size
Fitting Your Document To a Selected Paper Size This printer feature allows you to scale your print job to any selected paper size regardless of the digital document size. This can be useful when you want to check fine details on a small document. -
Page 67: Printing Posters
Printing Posters This feature allows you to print a single-page document onto 4, 9, or 16 sheets of paper, which can be pasted together to form one poster-size document. When you change the print settings from your software application, access the printer properties. See page 5.2 to access the printer properties. - Page 68 Printing Posters To determine the scaling factor, select the Style; 2x2, 3x3, 4x4 or Custom. For example, if you select 2x2, the output will be automatically stretched to cover 4 physical pages. If you select Custom, you can adjust the scaling factor manually.
-
Page 69: Setting Graphic Properties
Setting Graphic Properties Use the following options to adjust the print quality for your specific printing needs when you access the printer properties. See page 5.2 to access the printer properties. If necessary, click the Graphic tab to display the settings shown below. - Page 70 Setting Graphic Properties You can select the printing resolution; 1200 dpi, 600 dpi, Resolution 300 dpi. The higher the setting, the sharper the clarity of printed characters and graphics. Higher settings may increase the time it takes to print a document. Some printed characters or images can appear to have jagged SRT Mode or uneven edges.
- Page 71 Setting Graphic Properties This option can be used for configuring the printer to process Graphic Mode graphics as raster or vector images. Setting this option tells Windows how to send graphic images to the printer. All graphics can be printed as raster images, however some geometric shapes or patterns print faster if they are printed as vector graphics.
-
Page 72: Printing Watermarks
There are several predefined watermarks that come with the PGL 12en printer, and they can be modified or you can add new ones to the list. To use an existing When you change the print settings from your software application, access the printer properties. - Page 73 Printing Watermarks To create or edit a When you change the print settings from your software application, access the printer properties. See page 5.2 to watermark access the printer properties. Click the Watermark tab, and enter the desired text message in the Text field. This will be displayed in the preview window.
- Page 74 Printing Watermarks If you have created a new or edited an existing watermark, the Add and Update button is enabled. To add a new watermark to the list, click Add. If you want to edit, select the desired watermark from the list, edit, then click Update.
- Page 75 Using Page Overlay What is an Overlay? An overlay is text and/or images stored in the computer HDD as a special file format that can be printed on any document you choose. Overlays are often used to take the place of preprinted forms and letterhead paper.
- Page 76 Using Page Overlay In the Create Overlay dialog box, type a name of up to eight characters in the File name box. Select the destination path if necessary. (The default is C:\FORMOVER). Click OK. You will see the name in the Overlay List box. Click OK or Yes until you complete the creation.
- Page 77 Using Page Overlay If the desired overlay file does not appear in the Overlay List box, click Load Overlay, and select the overlay file. If you have stored the overlay file you want to use into an external source, you can also load the file when you access this Load Overlay window.
- Page 78 Using Page Overlay If necessary, click the Query Page Overlay. If this box is checked, a message box will appear each time you submit a document for printing, asking you to confirm your wish to print an overlay on your document. Answering Yes to the message box means that the selected overlay will be printed with your document.
- Page 79 chapter This chapter provides suggestions for high-quality and economical printing and information for maintaining the toner cartridge and the printer. Topics included in this chapter are: N Maintaining Toner Cartridge N Cleaning the Printer...
-
Page 80: Maintaining Toner Cartridge
Maintaining Toner Cartridge Toner cartridge storage To get the most from the toner cartridge, keep the following guidelines in your mind. • Do not remove the toner cartridge from its package until you are ready to use. The shelf life of a cartridge in an unopened package is approximately 2 years. - Page 81 Toner Cartridge Redistributing Toner When toner is low, faded or light areas may appear on a printed page. You may be able to temporarily improve print quality by redistributing the toner. The following procedures may allow you to finish the current print job before replacing the toner cartridge. Open the top cover.
- Page 82 Toner Cartridge Reinsert the toner cartridge into the printer. Be sure that the toner cartridge is firmly in its place. Firmly close the cover. If the print remains light Remove the old cartridge and install a new toner cartridge. See “Install the Toner Cartridge”...
-
Page 83: Cleaning The Printer
Cleaning the Printer To maintain print quality, follow the cleaning procedures below every time the toner cartridge is replaced or whenever print quality problems occur. As much as possible, keep the printer free from dust and debris. Notes: • Do not use ammonia-based cleaners or volatile solvents such as thinner, on or around the printer. - Page 84 Cleaning the Printer Locate the long strip of glass (LSU) inside the top of the cartridge compartment, and touch the glass to see if there is dirt and debris on the glass. If dirty, gently clean it with a dry cotton swab.
- Page 85 chapter This chapter gives helpful information for what to do if you encounter a printer error. It provides information on the following topics: N Troubleshooting Checklist N Solving General Printing Problems N Printing Special Pages N Clearing Paper Jams N Solving Print Quality Problems N Troubleshooting Error Messages N Common Windows Problems N Common Macintosh Problems...
-
Page 86: Problem Solving
Troubleshooting Checklist If the printer is not working properly, complete the following checklist in order. If the printer does not pass a step, follow the corresponding troubleshooting suggestions. Check Solution Make sure that the Data light on • If no lights are on, check the power cord the control panel is on. -
Page 87: Solving General Printing Problems
Solving General Printing Problems If you have any problems with the operation of your PGL 12en printer, refer to the table for suggested solutions. Possible Cause Solution Problem The printer is not If no lights are on, check the power The printer does not receiving power. - Page 88 From the Start menu, choose Settings Spooling Setting may be and Printers. Right-click the Olivetti set incorrectly. PGL 12en printer icon, choose Properties, click the Details tab, and then choose the Spool Settings button. Select the desired spool setting from the available choices.
- Page 89 Solving General Printing Problems Solution Possible Cause Problem Install more random-access memory The computer may have Print job is extremely (RAM) in your computer. See “Memory insufficient random- slow. (continued) and PostScript SIMMs” on page H.2. access memory (RAM). Simplify the page layout and remove The page layout is too Half of the page is any unnecessary graphics from the...
- Page 90 Solving General Printing Problems Solution Possible Cause Problem Disconnect the printer cable and The printer cable is The printer prints, but reconnect it. Try a print job that you loose or defective. the text is wrong, know works. If possible, attach the garbled, or incomplete.
-
Page 91: Printing Special Pages
Printing Special Pages There are special pages within the memory of the printer that will help you to diagnose and learn about problems with your Demo printer. Use the Demo button on the printer control panel to print these special pages. The printer must be in the ready mode. Demo Page Printing the demo page will help you check if the printer is properly working. -
Page 92: Clearing Paper Jams
Clearing Paper Jams Occasionally, paper can become jammed during a print job. Some of the causes include: • The paper tray is loaded improperly or overfilled. • The paper tray has been pulled out during a print job. • The top cover has been opened during a print job. •... - Page 93 Clearing Paper Jams If the jammed paper is not visible or there is resistance when you pull the paper, open the rear output tray. Remove the stopper fastening the rear output tray, and push the tray down so that it is widely open at 90 degrees angle.
- Page 94 Clearing Paper Jams Replace the exit roller. Make sure to click the right end of the roller back in place. If you fail to do so, the printer system recognizes it as the printer cover is open or system fuser error occurs, and turn on the Error light on the control panel.
- Page 95 Clearing Paper Jams Input Area If paper has entered the toner cartridge area, follow the instructions on page 7.12. It is Note: easier to remove such jams from the inside of the printer than the paper input area. Slide out Tray 1 to expose the jammed paper.
- Page 96 Clearing Paper Jams Slide the tray back into the printer. To resume printing, open the top cover, and then close. If the Paper and the Error lights Note: do not turn off, there is still jammed paper inside the printer. Check the inside of the printer.
- Page 97 Clearing Paper Jams Inside the Printer Paper jams in this area may result in loose toner on the page. If you get any toner on Note: your clothes, wash them in cold water because hot water will set the toner into the fabric. Open the top cover and remove the toner cartridge.
- Page 98 Clearing Paper Jams Flip down the guide feed, and reinstall the toner cartridge. If the toner cartridge is Note: difficult to reinstall, make sure the guide feed has been flipped back down into position. Close the top cover. Printing can be resumed.
- Page 99 Clearing Paper Jams In the Optional Tray 2 Pull the option Tray 2 out of the printer. If you see the jammed paper, remove the paper from the tray. If you cannot find the jammed paper in the Tray 2, pull the upper Tray 1 half way out of the printer, and remove the paper as shown in the figure at right.
- Page 100 Clearing Paper Jams Tips for Avoiding Paper Jams By selecting correct paper types and loading them properly, you should be able to avoid most paper jams. If paper jams occur, follow the steps outlined in “Clearing Paper Jams” on page 7.7. If jams occur frequently, make sure you are following these tips to avoid jams.
-
Page 101: Solving Print Quality Problems
Solving Print Quality Problems Print Quality Checklist General print quality problems can be solved by following the checklist below. • Check the printer properties to make sure that you are using the best available print quality option (see page 5.18). •... - Page 102 Solving Print Quality Problems Problem Solution • The paper may not meet paper specifications (for example, Toner specks the paper is too moist or too rough). See “Paper Specifications” on page A.2. AaBbCc aBbCc AaBbCc • The transfer roller may be dirty. See “Cleaning the Inside” AaBbCc aBbCc AaBbCc...
- Page 103 Solving Print Quality Problems AaBbCc AaBbCc AaBbCc AaBbCc AaBbCc AaBbCc AaBbCc AaBbCc Solution Problem AaBbCc AaBbCc If the amount of background toner shading becomes Gray background unacceptable, the procedures below may help to clear the condition: AaBbCc AaBbCc • Change the paper to a lighter basis weight. See “Paper AaBbCc Specifications”...
- Page 104 Solving Print Quality Problems AaBbCc AaBbCc AaBbCc AaBbCc Solution Problem AaBbCc Background scatter results from bits of toner distributed on Background scatter the printed page. • The paper may be too damp. Try printing with a different AaBbCc AaBbCc batch of paper. Do not open packages of paper until AaBbCc AaBbCc necessary so that the paper does not absorb too much...
- Page 105 AaBbCc AaBbCc Solving Print Quality Problems AaBbCc AaBbCc AaBbCc AaBbCc Solution Problem AaBbCc AaBbCc AaBbCc AaBbCc AaBbCc AaBbCc • Check the paper type and quality. Both high temperature Curl or wave AaBbCc AaBbCc AaBbCc and humidity will cause paper curl. See “Paper AaBbCc Specifications”...
- Page 106 AaBbCc AaBbCc AaBbCc Solving Print Quality Problems Solution Problem • Clean the inside of the printer. Loose toner • Check the paper type and quality. See “Paper AaBbCc Specifications” on page A.2. AaBbCc • Try installing a new toner cartridge. AaBbCc •...
-
Page 107: Troubleshooting Error Messages
Troubleshooting Error Messages When the printer experiences an error, the control panel will indicate error messages by the indicator lights. Find the light pattern below that matches the printer light pattern and follow the solutions to clear the error. Printer Light Patterns Error Manual Light status legend... - Page 108 Troubleshooting Error Messages Error Paper jam Manual Paper is jammed inside the printer. Paper • Clear the paper jam. See “Clearing Paper Jams” on page 7.7. Data Door open, or no toner cartridge Error The printer top cover may be opened or the toner cartridge is not Manual installed.
-
Page 109: Common Windows Problems
• From the Start menu, select Settings, then Printers. Right-click on the Olivetti PGL 12en printer icon and select Properties. From the Details tab, click on Port Settings. Remove check from Check Port State before Printing box and click OK. -
Page 110: Common Macintosh Problems
Common Macintosh Problems Problems in the Chooser Problem Possible Cause and Solution The printer driver icon Software is not installed correctly. does not appear in the Chooser. • The LaserWriter driver should be present as a part of the Macintosh OS. Make sure that the LaserWriter driver is in the Extensions folder within the Systems folder. -
Page 111: Common Dos Problems
Environment, sometimes I If you install RCP Driver using CD-ROM, Remote Control can not get the output I Panel for Windows will be created in "Olivetti PGL 12en want. Utility" Program Folder. If you want Remote Control Panel for DOS, you have to install using CD-ROM. -
Page 112: Troubleshooting Ps Errors
Troubleshooting PS Errors The following situations are PS language specific and may occur when several printer languages are being used. To receive a printed or screen displayed message when PS errors occur, open the Print Note: Options dialog box and click the desired selection next to the PostScript errors section. Possible Cause Solution Problem... -
Page 113: Specifications
Appendix This appendix provides information on the following topics: Printer Specifications Paper Specifications... -
Page 114: Printer Specifications
Printer Specifications Specification and Description Item Print Speed 12 PPM (A4), 12.6 PPM (Letter) Resolution 1200 dpi (Memory expansion recommended) First Printing Time Less than 15 seconds WarmUp Time Less than 30 seconds Power Rating AC 100 ~ 120 V (USA, Canada) / 220 ~ 240 V (Others), 50 / 60 Hz Power Consumption 350 W average during operation / Less than 12 W in power-save mode Acoustic Noise... - Page 115 Always test paper before buying large quantities. Using paper that does not meet this CAUTION: specifications may cause problems for the printer, requiring repairs. This repair is not covered by the Olivetti warranty or service agreements. A A . . 2 PECIFICATIONS...
- Page 116 Paper Specifications Supported Sizes of Paper Tray 1 or Optional Tray 2 Dimensions Weight Capacity Letter 216 ✕ 279 mm ) 8.5 ✕ 11 in. ( 210 ✕ 297 mm (8.3 X 11.7 in.) 550 sheets of Executive 7.3 X 10.5 in. (191 X 267 mm) 16 to 28 lb Bond 20 lb Bond (60 to 105 g/m...
- Page 117 Paper Specifications Guidelines for Using Paper For best results, use conventional 90 g/m (24 lb) paper. Make sure the paper is of good quality, and free of cuts, nicks, tears, spots, loose particles, dust, wrinkles, voids, and curled or bent edges. If you are unsure of what type of paper you are loading (such as bond or recycled), check the label on the package of the paper.
- Page 118 Paper Specifications Paper Specifications Category Specifications Acid Content 5.5 ~ 8.0 pH Caliper .094 ~ .18 mm (3.0 ~ 7.0 mils) Curl in Ream Flat within 5 mm (.02 in.) Cut Edge Conditions Cut with sharp blades with no visible fray. Fusing Compatibility Must not scorch, melt, offset, or release hazardous emissions when heated to 200 °C (392 °F) for .1...
- Page 119 Paper Specifications Printer and Paper Storage Environment Ideally, the printer and paper storage environment should be at or near room temperature, and not too dry or humid. Remember that paper is hygroscopic; it absorbs and loses moisture rapidly. Heat works with humidity to damage paper. Heat causes the moisture in paper to evaporate, while cold causes it to condense on the sheets.
- Page 120 Paper Specifications Envelopes Envelope construction is critical. Envelope fold lines can vary considerably, not only between manufacturers, but also within a box from the same manufacturer. Successful printing on envelopes depends upon the quality of the envelopes. When selecting envelopes, consider the following components: •...
- Page 121 Paper Specifications Envelopes with Double Double side-seams construction has vertical seams at both ends of the envelope rather than diagonal seams. This style may be Side Seams more likely to wrinkle. Be sure the seam extends all the way to the corner of the envelope as illustrated below.
- Page 122 Paper Specifications Labels CAUTIONS: • To avoid damaging the printer, use only labels recommended for laser printers. • To prevent serious jams, always use the Multi-Purpose Tray to print labels and always use the rear output tray. • Never print on the same sheet of labels more than once or print on a partial sheet of labels.
- Page 123 If you have a USB (Universal Serial Bus) port enabled on your computer, and if your computer is running Windows 98, you can connect your PGL 12en printer to the USB chain of devices. This appendix provides information on the following topics:...
-
Page 124: Installing The Printer Software
Installing the Printer Software If you have a USB (Universal Serial Bus) port enabled on your computer, and if your computer is running Windows 98, you can connect your PGL 12en printer to the USB chain of devices. Note: To connect the printer to the USB port of the computer requires a certified USB cable. - Page 125 Installing the Printer Software Check Search for the best driver for your device and click Next. Check CD-ROM drive and click Browse, then choose x:\PGL 12en\Eng (or the desired language code, see page D.2.)\USB (where x is the drive letter for the CD-ROM drive). Click Next.
- Page 126 Installing the Printer Software 3. Set your PC printer port From the Start menu, select Settings, then select Printers. Select the PGL 12en PCL 6 printer icon in the Printers folder. Select Properties from the File menu. Click the Details tab. Select SSUSB: (PGL 12en) in the Print to the following port box.
-
Page 127: Frequently Asked Questions About Usb
Frequently Asked Questions About USB What is USB? Universal Serial Bus (USB) makes it easy to connect devices to your computer without having to open your PC. USB uses a standard port and plug combination for connecting devices like printers, modems, scanners, and digital cameras. It also offers the benefit of being able to easily add, remove, and move devices. - Page 128 Frequently Asked Questions About USB Can other users on my USB chain print to my PGL 12en printer on the USB chain? Yes. Windows 98 allows you to “share” your printer using software settings on your computer. After others on the USB chain have installed the printer software for your specific printer, they can print to your shared printer.
- Page 129 Appendix Your printer supports Macintosh system with a built-in USB interface or 10/100Base-TX network interface card (option for PGL 12en). When you print a file from Macintosh, you can use the PCL driver to support your printer’s major printing features. You can also use PostScript driver by installing the PPD file.
-
Page 130: Macintosh Installation
Macintosh Installation System Requirements To use your PGL 12en printer and its software with a Macintosh, your system should have: Macintosh Hardware • One of the following Macintosh models: Requirement -Power Macintosh series (for network connection only) -Power Macintosh G3, G4... - Page 131 Macintosh Installation Connecting To Macintosh You can connect the printer to your Macintosh using the USB interface or network interface. USB Connection USB cable is not provided in your printer. Purchase a certified USB 1.0 compliant cable. Turn off the printer and computer. Hold the USB cable so the icon faces up and connect it to your printer’s USB connector.
- Page 132 Macintosh Installation If you have a printer with 10/100Base-TX network interface Network Connection card installed (option for PGL 12en), you can connect to an Ethernet network. Use a Category 5 twisted pair cable with RJ-45 connectors for 10/100Base-T Ethernet. Plug one end of the network cable into the twisted-pair connector on the back of the printer.
- Page 133 Turn on your computer and printer. Macintosh Insert the CD-ROM which came with your printer into the CD- ROM drive. Double-click the Olivetti PGL 12en on your Macintosh desktop. Select the correct language, then click Continue. The Olivetti Laser Printer Installer opens. Select installation type.
-
Page 134: Using Pcl Driver
Click the Olivetti PCL driver, and close the Chooser window. You see the message box indicating that you have changed your current printer. Click OK. Then you see the Olivetti PCL printer icon is created as a desktop printer. Printing from a Macintosh When you print with a Macintosh, you need to check the printer software setting in each application you use. - Page 135 Using PCL Driver Choose your paper size, orientation, paper type and other options and click OK. Choose Watermark if you want to add a watermark to each page in your document to emphasize its purpose or indicate how it should be handled. For details on watermark option, see page 5.21.
- Page 136 Using PCL Driver Now open the File menu and click Print. You see the main printer settings dialog box. Choose the number of copies and indicate which pages you want to print. For advanced printing features, select the desired option. For details, see page C.8. Select the desired option for advanced printing features.
- Page 137 Using PCL Driver Advanced Printing The Page Setup dialog box contains five categories of page setup properties. Listed below is the name of each property. -Darkness/Quality -Layout -Color -Background Printing -Paper Source Figures below display each property in the Page Setup dialog box.
- Page 138 Using PCL Driver Color Select grayscale mode. Grayscale Black&White Background Printing Select a priority for your print job in the queue of jobs waiting to print, click one of the following: • Normal to print in the order the Turns job is received.
-
Page 139: Using Ps Driver
If Auto Setup does not work properly, click Select PPD and choose Olivetti PGL 12en. When the setup is completed, click the Create button. Click the Save button to save PGL 12en as a desktop printer. C C . . 10... - Page 140 When the setup is completed, you see your printer icon is created as a desktop printer. If Auto Setup does not work properly, click Select PPD and choose Olivetti PGL 12en, then click OK. Printing from a Macintosh Follow these steps to print from a Macintosh: Open a Macintosh application and select a file you want to print.
- Page 141 While your printer is primarily a Windows printer, you can also print from a DOS software program using the Remote Control Panel utility provided in the PGL 12en CD-ROM. Topics included in this Appendix are: About Remote Control Panel for DOS...
-
Page 142: About Remote Control Panel For Dos
DOS software programs. Notes: • PGL 12en printer’s Remote Control Panel for DOS can be used when the printer is connected via the parallel interface. • The PGL 12en printer’s Remote Control Panel is not a printer driver. -
Page 143: Installing The Remote Control Panel For Dos Users
COPY x:\*.* (where x is the floppy drive designator) Code Language From the CD-ROM drive, type: COPY x:\PGL 12en\xxx\RCP\*.* (where x is the CD-ROM German drive designator and xxx is the designator for your language. English See the list on the left for the designator for each language). - Page 144 Selecting Print Settings To access the Remote Control Panel Make sure that the Remote Control Panel is in your path statement. You can check your path by typing PATH and pressing Enter. If the Remote Control Panel directory is not in your path, you will have to change to the default directory C:\DOSUTIL to start the program.
- Page 145 Selecting Print Settings CONFIG • Power Save determines the length of time the printer waits after a job is printed before it goes to a reduced power state. If the printer is used frequently, select OFF which keeps the printer ready to print with the minimum warm-up time.
- Page 146 Selecting Print Settings TEST • Self test prints the configuration sheet. A list of the user default settings, the installed options, and the amount of printer memory available prints. PCL5e • Typeface allows you to select the desired typeface. This setting is ignored when the software application specifies a font.
- Page 147 Selecting Print Settings EPSON • Font : Allows you to select the desired font of EPSON. • Auto wrap : It determins the printer performs line feed automatically when the data to print are over the right margin. • International character set : It selects the set of characters printed for specific character codes.
- Page 148 Selecting Print Settings memo D D . . 7 DOS A RINTING FROM PPLICATIONS...
- Page 149 Appendix If you want to use the PostScript driver provided with your system CD-ROM or diskettes to print a document, use the information on this Appendix. Topics included in this Appendix are: Setting Up Your Printer with PS Option Installing PPD Files Accessing the PS Printer Driver Features...
-
Page 150: Using Windows Postscript Driver
• PS SIMM (Option for PGL 12en.) • 12 MB or more RAM. PGL 12en comes with 4 MB RAM, so additional 8 MB or more RAM should be added. For instructions on installing the printer options, see Appendix H, “Printer Options.”... - Page 151 Installing PPD Files Insert the CD-ROM shipped with your printer into your CD-ROM drive. If the CD-ROM drive does not automatically run: Select Run from the Start menu, and type x:\cdsetup.exe in the Open box (where x is the drive letter for the CD-ROM drive), then click OK.
-
Page 152: Accessing The Ps Printer Driver Features
1. From the File menu, select Print to open the Print dialog box. 2. Make sure that Olivetti PGL 12en PS is selected in the Name drop-down list. 3. Click Properties to open the properties window. E E . . 3... - Page 153 Appendix If you work in a networked environment, the printer can be shared by other users on the network. This appendix provides information on the following topics: N About sharing the Printer on a Network N Setting Up a Locally Shared Printer N Setting Up a Network-Connected Printer...
-
Page 154: About Sharing The Printer On A Network
Printing Across a Network Whether the printer is locally connected or network connected, you need to install the PGL 12en printer software on each computer that will print documents to the PGL 12en printer. F F . . 1 SING THE... -
Page 155: Setting Up A Locally Shared Printer
Setting Up a Locally Shared Printer Setting Up Host Computer Start Windows. From the Start menu, select Control Panel, and double- click on the Network icon. Check the File and Print Sharing box, then click OK. Close the window. Click Start and select Printers from Settings, then double-click your printer name. -
Page 156: Setting Up A Network-Connected Printer
Setting Up a Network-Connected Printer To use PGL 12en printer as a network printer, you must install an optional network card in your printer. See page H.5 for information on installing network card. After the network card is installed, you must set up your printer as a network printer using the documentation and Olivetti SyncThru software provided with the network card. - Page 157 Appendix If you need to install the printer software on a system that does not have a CD-ROM drive, use the instruction on this appendix to create the software diskettes and install the printer software from the diskettes. This appendix provides information on the following topics: N Making Installation Diskettes N Installing Software from Diskettes...
-
Page 158: Installing Software From Diskettes
Making Installation Diskettes If you do not have a CD-ROM drive and if you have access to another computer with a CD-ROM drive, you can copy software installation files from your printer software CD- ROM onto floppy diskettes, then use the diskettes instead of the CD-ROM to install the software. - Page 159 Making Installation Diskettes The Copy to Floppy dialog box appears. Select the desired components you want to copy to the diskette from the Select box. You can select PCL6 Printer Driver, PostScript Printer Description file, USB Port Driver and RCP. Select the floppy disk drive you will use to insert the diskette.
-
Page 160: Installing Software From Diskette
When copying to diskettes has been completed, click Close in the Copy to Floppy dialog box. Then click Exit in the OLIVETTI PRINTER SETUP dialog box. Installing Software from Diskettes The instructions to install a PCL 6 printer driver, PPD file and RCP are same. - Page 161 Your printer is a full-featured laser printer that has been optimized to meet most of your printing needs. Recognizing that each user may have different requirements, however, Olivetti makes several options available to enhance the printer’s capabilities. This appendix provides information on the following topics:...
-
Page 162: Printer Options
Precautions DISCONNECT THE POWER CORD: Never remove the printer control board while the printer is plugged in. To avoid the possibility of electrical shock, always disconnect the power cord when installing or removing ANY internal or external printer option. DISCHARGE STATIC ELECTRICITY: The control board and internal printer options (Memory SIMM, PS SIMM, Network interface) are sensitive to static electricity. -
Page 163: Memory And Postscript Simms
This procedure is applicable to either option. Notes: • Since PostScript setting requires 12 MB of printer memory and the PGL 12en comes with 4 MB standard, installation of the PS SIMM requires installation of a 8 MB SIMM memory as well. - Page 164 Memory and PostScript SIMMs Locate the PS SIMM slot (the lower slot on the left as shown) and the memory SIMM slot (the upper slot) on the control board. They are not interchangeable. Memory • To install the memory SIMM, continue with Step 4.
- Page 165 Memory and PostScript SIMMs Rotate it up until it snaps into place. DRAM MODULE FLASH-ROM MODULE Make sure that the SIMMs are secured in place by the metal clips and pins on both sides of the connectors. clip Reconnect the power cord and turn the printer on.
-
Page 166: Network Interface Card
Network Interface Card Review the precautions on page H.1 and then follow this procedure to install the Network card option in your printer. Unpack the network printer card. You should find the following items. CD-ROM Network card User’s guide (SyncThru) (PortThru) Turn the printer power off and unplug all cables from the printer. - Page 167 Network Interface Card Align the connector on the network card with the connector on the control board. Push the card firmly into the connector until it is completely inserted in place. Tighten the two screws as shown. Tighten the two screws, then replace the plate.
-
Page 168: Paper Tray 2
Paper Tray 2 You can increase the paper handling capacity of your printer by installing the support unit optional Tray 2. The optional paper tray consists of two components; the support unit and paper tray. paper tray Turn off the printer and unplug all cables from the printer. - Page 169 Appendix You can use Olivetti PGL 12en printer in Linux environment. This appendix provides information on the following topic: N Linux Driver Installation...
-
Page 170: Linux Driver Installation
Linux Driver Installation This Linux driver is designed for Olivetti PGL 12en printer and supports Linux Red Hat 6.0 or higher and Intel Linux. If your Linux version is not included, this driver might not work properly. • Install Setup Script file configuration a. - Page 171 Device option. Click the Select button in the Input Filter to access filter setup. Select Olivetti Printer PCL5e Compatible for the Printer Type item. Then select the default resolution and paper size. To save the setting, press the OK button.
- Page 172 INDEX Numeric 2-sided printing envelopes, print 4.12 epson error messages 7.22 booklet printing 5.11 face-down tray face-up tray features cancel, print job Cancel/Reprint button cardstock, print 4.17 clean, printer clean sheet, print graphic mode 5.20 components graphic properties 5.18 configuration page, print control panel buttons lights...
- Page 173 INDEX see paper jam network interface install network card set up a locally shared printer sharing the printer on a network n-up printing 5.10 labels, print 4.14 letterhead, print 4.16 load, paper in the multi-purpose tray option in tray 1 or the optional tray 2 memory SIMM using the manual feed 4.10...
- Page 174 INDEX (continued) printer driver see driver, PCL 6 paper level indicator printer software, install 2.10 Paper light printing paper orientation, setting booklets 5.11 paper out, indicator 7.22 cancel paper source, setting cleaning sheet paper tray configuration page change paper size in tray demo page load paper fitting to a selected paper size...
- Page 175 INDEX rear output tray uninstall, driver 2.13 remote control panel unpacking install USB cable setup in windows reprint, last page setup in macintosh resolution 5.19 watermark, print 5.21 setup printer chapter 2 specifications paper printer SRT mode 5.19, D.4 system error 7.23 toner cartridge cleaning sheet...
- Page 176 I I V V NDEX...
Need help?
Do you have a question about the PGL 12en and is the answer not in the manual?
Questions and answers