Raymarine ST5000+ Owner's Handbook Manual
Sailpilot
Hide thumbs
Also See for ST5000+:
- Quick reference (3 pages) ,
- Quick reference manual (3 pages) ,
- Owner's handbook manual (108 pages)

Related Manuals for Raymarine ST5000+


Summary of Contents for Raymarine ST5000+
- Page 1 Distributed by Any reference to Raytheon or RTN in this manual should be interpreted as Raymarine. The names Raytheon and RTN are owned by the Raytheon Company.
- Page 2 ST5000 Plus SailPilot Owner’s Handbook Document number: 81136-4 Date: May 2001...
-
Page 4: Connections
Preface SailPilot Rudder Reference Unit Boat's Electrical Distribution Panel ST5000 Plus Control Head Fluxgate Compass SeaTalk Instruments D3559-1... - Page 5 ST5000 Plus SailPilot Owner’s Handbook Raymarine, as part of its commitment to continuous improvement and updating, reserves the right to make changes, without prior notice, to the equipment, equipment specifications, and the instructions contained within this handbook. To the best of our knowledge, the information contained within this handbook was correct as it went to press.
-
Page 6: Table Of Contents
Preface Contents Preface ... ix Chapter 1: Introduction ... 1 Chapter 2: Basic Operation ... 3 How this handbook is organised ... ix Warranty ... ix Safety information ... x EMC conformance ... x 1.1 Overview ... 1 1.2 Extended systems ... 2 1.3 Specification ... - Page 7 Chapter 3: Advanced Operation ... 13 3.1 Operation in Track mode ... 13 Initiating Track mode ... 13 Automatic acquisition ... 14 Manual acquisition ... 15 Cross track error ... 16 Tidal stream compensation ... 16 Waypoint arrival and advance ... 17 Arrival ...
- Page 8 Preface Chapter 4: Customising the ST5000 Plus ... 29 3.4 Alarms ... 24 SeaTalk failure ... 24 Off course ... 24 Wind shift ... 25 Large cross track error ... 25 Drive stopped ... 25 Data not received ... 25 Waypoint advance ...
- Page 9 Chapter 5: Installation ... 41 Drive type ... 39 Variation ... 39 AutoAdapt ... 39 Latitude ... 40 Rudder damping ... 40 Cruise speed ... 40 5.1 Planning the installation ... 41 EMC installation guidelines ... 41 Suppression Ferrites ... 42 Connections to other equipment ...
- Page 10 Transmission of NMEA data on SeaTalk ... 58 6.1 Functional test ... 59 Switch on ... 59 Operating sense ... 60 Navigation interface (GPS, Decca, Loran) ... 60 Wind transducer interface ... 61 SeaTalk interface ... 61 6.2 Dockside procedure ... 62 6.3 Initial sea trial ...
- Page 11 ST5000 Plus SailPilot Owner’s Handbook viii...
-
Page 12: Preface
Preface Preface This handbook contains information on the operation and installation of your new equipment. In order to obtain the best performance from your autopilot, please read this handbook thoroughly. How this handbook is organised This handbook is divided into the following chapters: Chapter 1: Introduces the autopilot, its features and its use. -
Page 13: Safety Information
• Make sure that all members of crew are familiar with the procedures to disengage the autopilot. Your Raymarine autopilot will add a new dimension to your boating enjoyment. However, it is the responsibility of the skipper to ensure the safety of the vessel at all times by careful observance of these basic rules. -
Page 14: Chapter 1: Introduction
SailPilot linear drive steering systems, which can also repeat instrument data in a programmable selection of Data Pages. The ST5000 Plus can share all data transmitted from other Raymarine SeaTalk instruments: • Wind information from a wind instrument can be used for wind trim (Vane) steering without the need to install a separate vane. -
Page 15: Extended Systems
1.2 Extended systems The ST5000 Plus is compatible with other Raymarine SeaTalk instruments. Additional fixed and hand-held SeaTalk autopilot control units can be connected at secondary steering and control positions. 1.3 Specification • Power Supply: 10 to 15 V dc •... -
Page 16: Chapter 2: Basic Operation
Chapter 2: Basic Operation Chapter 2: Basic Operation This chapter first provides summary diagrams of the key functions and screen layout. It then gives operating instructions for engaging the autopilot and using Auto mode, changing the lighting, and displaying Data Pages. 2.1 Key functions The autopilot is controlled using simple push-button operations, all of which are confirmed with a beep. -
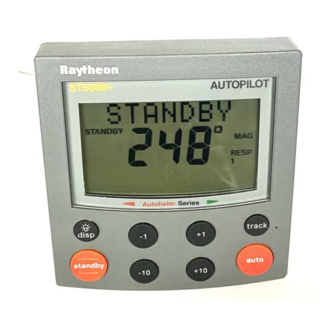
Page 17: Display Layout
2.2 Display layout The following illustration shows all the elements, together with a brief description, that make up the ST5000 Plus autopilot LCD display. • The bar graph at the bottom of the display is normally a rudder bar. If it has been set as a direction-to-steer indicator, the display depends on the current mode, as follows: Mode Standby... -
Page 18: Using Auto Mode
Chapter 2: Basic Operation 2.3 Using Auto mode Engaging the Autopilot (Auto) 1. Steady the vessel on the required heading. 2. Press auto. • In Auto mode, the display shows the locked autopilot heading. CAUTION: Passage making under autopilot control is an enjoyable experience that can, if you are not careful, lead to the relaxation of the permanent watch. -
Page 19: Changing Course In Auto Mode
Changing course in Auto mode The +1 and +10 (starboard) and –1 and –10 (port) keys are used to change the locked heading, in increments of 1° and 10°, when the autopilot has control. Example: a 30° course change to port = press –10 three times. Dodging obstacles in Auto mode In order to avoid an obstacle when your vessel is under autopilot control, select a course change in the appropriate direction (for... -
Page 20: Returning To The Previous Locked Heading
Chapter 2: Basic Operation Returning to the previous locked heading (LAST HDG) If for any reason the vessel is steered away from the selected locked heading (for example, executing a dodge manoeuvre or selecting Standby) you can return to the previous locked heading: 1. -
Page 21: Autotack To Starboard
ST5000 Plus SailPilot Owner’s Handbook AutoTack to starboard Press the +1 and +10 keys together to tack to starboard. AutoTack to port Press the -1 and -10 keys together to tack to port . Off course alarm The off course alarm will sound if the locked autopilot heading and the vessel’s current heading differ for more than 20 seconds, by more than the alarm angle set in calibration (the factory default is 20°). -
Page 22: Operating Hints
Chapter 2: Basic Operation 1. To cancel the off course alarm, press standby to return to hand steering. 2. Check whether your vessel is carrying too much sail, or whether the sails are badly balanced. Significant improvements in course keeping can usually be obtained by improving sail balance. Operating hints Making major course changes •... -
Page 23: Gusty Conditions
3. Bring the vessel onto the new heading. 4. Select auto and let the vessel settle onto course. 5. Bring the vessel to the final course with 1° increments. Gusty conditions In gusting conditions, the course may tend to wander slightly, particularly if the sails are badly balanced. -
Page 24: Data
Chapter 2: Basic Operation • Subsequent presses of the disp key cycles the possible illumination settings: L3, L2, L1, OFF, L1, L2, L3 etc. where L3 is the brightest setting. The display times out to normal operation after 7 seconds of keypad inactivity. - Page 25 Up to 7 Data Pages are available using the disp key. The number of pages, and the information displayed on each page, depends on the selections made in User Setup (see section 5.1). • If the required data for a page is not available, dashes are displayed instead of a value.
-
Page 26: Chapter 3: Advanced Operation
3.1 Operation in Track mode Track mode is used to maintain a track between two waypoints created on a GPS, Decca, or Loran navigation system. The ST5000 Plus will then compute any course changes to keep your boat on track, automatically compensating for tidal streams and leeway. -
Page 27: Automatic Acquisition
Automatic acquisition Automatic acquisition can only be achieved if the pilot is receiving cross track error and bearing to waypoint information (via SeaTalk or NMEA 0183). It is initiated as follows: 1. Bring the vessel to within 0.1 nm of track. 2. -
Page 28: Manual Acquisition
Chapter 3: Advanced Operation • The display shows the new bearing to waypoint. Manual acquisition For manual track acquisition, when only cross track error data is available: 1. Steer the vessel to within 0.1 nm of track. 2. Bring the heading to within 5° of the bearing to the next waypoint. 3. -
Page 29: Cross Track Error
Cross track error Cross track error (XTE) is the distance between the current position and a planned route. This is displayed in nautical miles (nm), statute miles (SM) or kilometres, and is taken directly from your navigator. The Large XTE alarm sounds if the XTE exceeds 0.3 nm •... -
Page 30: Waypoint Arrival And Advance
Chapter 3: Advanced Operation The autopilot takes account of vessel speed when computing course changes to ensure optimum performance over a wide range of vessel speeds. If speed data is available, the ST5000 Plus uses the measured vessel speed. Otherwise, the Speed Over Ground (SOG) or specified cruise speed is used, depending on the calibration setting (see Dealer Setup in Chapter 4). -
Page 31: Skipping A Waypoint - Seatalk Navigators Only
Skipping a waypoint – SeaTalk navigators only If you wish to advance to the next waypoint before you have arrived at the target waypoint, press track for 1 second. The Waypoint Advance information for the next waypoint is displayed. Advance While the Waypoint Advance alarm is sounding, Track mode is suspended and the ST5000 Plus maintains the current boat heading. -
Page 32: Position Confirmation At The Start Of A Passage
Chapter 3: Advanced Operation Position confirmation at the start of a passage At the start of a passage you must always confirm the fix given by the position transducer, using an easily identifiable fixed object. Check for fixed positional errors and compensate for them. Verifying computed positions •... -
Page 33: Selecting Vane Mode
• SeaTalk Wind instrument, connected to the ST5000 Plus via SeaTalk • NMEA wind information • Raymarine wind vane connected to a SeaTalk interface box Selecting Vane mode Vane mode can be selected from either Standby or Auto modes, as follows: 1. -
Page 34: Returning To The Previous Apparent Wind Angle
Chapter 3: Advanced Operation Returning to the previous apparent wind angle (LAST WND) If for any reason the vessel is steered away from the selected apparent wind angle (for example, a dodge manoeuvre or selecting Standby) you can return to the previous locked wind angle: 1. -
Page 35: Using Autotack In Vane Mode
• To cancel the alarm and retain the existing wind angle and new heading, press standby and auto together. • Alternatively, to cancel the alarm and return to the previous heading, either: adjust the locked wind angle using the -1, +1, -10 and +10 keys;... -
Page 36: Operating Hints
Chapter 3: Advanced Operation Operating hints • It is important to ensure that the amount of standing helm is minimised by careful sail trimming. • The headsail and mainsail should be reefed a little early rather than too late. • In Vane Mode the pilot will react to long-term wind shifts, but will not correct for short-term changes, such as gusts. -
Page 37: Changing The Rudder Gain
Changing the rudder gain Press the +1 and -1 keys together for 1 second to display the Rudder Gain screen, and adjust the setting in the same way as for the response level. Refer to Chapter 6, Post Installation Procedures, for instructions on how to check that the rudder gain is set correctly. -
Page 38: Wind Shift
• Track mode is engaged and the autopilot is not receiving SeaTalk navigation data. • Track mode is engaged and the position transducer (GPS, Loran, Decca) is receiving a low strength signal – this will clear as soon as the signal strength improves. -
Page 39: Waypoint Advance
Waypoint advance NEXT WPT? The Waypoint Advance alarm sounds whenever the target waypoint number changes, which occurs in the following circumstances: • Automatic acquisition is selected by pressing track from Auto • Waypoint advance is requested by pressing track for 1 second in Track mode (SeaTalk Navigators only) •... -
Page 40: Shallow Alarm
Chapter 3: Advanced Operation If you wish to set the Watch mode, the WATCH screen must be con- figured as one of the Data Pages for display, as described in section 5.1. To set and control the Watch alarm: 1. Select Auto, Track or Vane mode. 2. - Page 41 ST5000 Plus SailPilot Owner’s Handbook...
-
Page 42: Chapter 4: Customising The St5000 Plus
Chapter 4: Customising the ST5000 Plus Chapter 4: Customising the ST5000 Plus The ST5000 Plus provides setup and configuration options that are used to adjust the settings for the ST5000 Plus itself, the compass, and the autopilot. Note: You should perform the post installation procedures described in Chapter 6 before adjusting any other calibration features. - Page 43 ST5000 Plus SailPilot Owner’s Handbook Adjusting User Setup Values...
-
Page 44: Compass Deviation Correction
Chapter 4: Customising the ST5000 Plus Compass deviation correction (SWING COMPASS) The compass deviation correction option allows you to correct the compass for deviating magnetic fields. The procedure must be performed as the first item in your initial sea trial, and is described in detail in Chapter 6, Post Installation Procedures. -
Page 45: Data
Mode Standby Auto compass Track Vane Data pages (DATA PAGE) The next 7 User Setup pages allow the settings for the Data Pages to be modified. These are the SeaTalk/NMEA data pages available during normal operation (see section 2.5). Each setup page initially shows the title DATA PAGE. After 1 second, this changes to the title of the data currently set for that page. - Page 46 Chapter 4: Customising the ST5000 Plus Data Course Over Ground Speed Over Ground, Knots Cross Track Error Distance to Waypoint Bearing to Waypoint Rudder Gain Response Watch Universal Time Constant There are 3 depth pages and 2 water temperature pages. Data is displayed in the units defined by the selected page.
-
Page 47: Dealer Setup
• Press disp to move on to the next Data Page selection screen, and repeat the selection procedure. Note: If a man overboard (MOB) message is received by the autopilot, the BTW and DTW pages will display the bearing and distance to the MOB location, so it is good practice to retain these pages for display. - Page 48 Chapter 4: Customising the ST5000 Plus D3583-1a...
-
Page 49: Calibration Lock
Feature Calibration lock Pilot type Rudder gain Response Turn rate limit Align Rudder Rudder limit Off course alarm AutoTack angle AutoTrim Drive type Variation AutoAdapt Latitude Rudder damping Cruise speed Calibration lock Calibration lock controls whether User Setup and Intermediate Setup are available, and is intended for charter boat users. -
Page 50: Rudder Gain
Chapter 4: Customising the ST5000 Plus Rudder gain This is the “power-on” rudder gain setting and should be adjusted to the setting which gives the best steering performance as described in Chapter 6. Response This is the power-on response setting. The response level can be changed during normal operation (see section 3.3) or via the Response Data Page, if this is set for display (see section 2.5). -
Page 51: Off Course Alarm
2. Access the rudder limit screen (RUD LIMIT). 3. Set the autopilot rudder limit so that it is 5° less than the smallest (port or starboard) mechanical end stop angle. Off Course alarm This feature controls the alarm that warns you if the autopilot is unable to maintain its set course. -
Page 52: Drive Type
Chapter 4: Customising the ST5000 Plus Setting The default settings should provide optimum performance with the ST5000 Plus autopilots. However, depending on the vessel’s dynamic stability, an incorrect rate of trim application may result in poor course keeping due to autopilot instability. After gaining experience with the ST5000 Plus, you may wish to change the setting. -
Page 53: Latitude
Set AutoAdapt to nth in the northern hemisphere, or Sth in the southern hemisphere. You then need to enter your current latitude in the next setup screen, so that the ST5000 Plus can provide accurate course keeping by automatically adjusting the rudder gain depending on the heading. -
Page 54: Chapter 5: Installation
To minimise the risk of operating problems: • All Raymarine equipment and cables connected to it should be: • At least 1 m (3 ft) from any equipment transmitting or cables carrying radio signals e.g. VHF radios, cables and antennas. In the case of SSB radios, the distance should be increased to 2 m (7 ft). -
Page 55: Suppression Ferrites
If your Raymarine equipment is going to be connected to other equipment using a cable not supplied by Raymarine, a suppression ferrite MUST always be fitted to the cable close to the Raymarine unit. Cabling • Avoid running cables through bilges where possible •... -
Page 56: Control Head
Chapter 5: Installation 5.2 Control head Siting The control head is completely waterproof and should be sited where it • Within easy reach of the steering position • Protected from physical damage • At least 230 mm (9 in) from any compass •... -
Page 57: Surface Mounting
Note: Adjacent control heads, or instruments, must have a 6 mm (1/4 in) gap between them to allow sun covers to be fitted. Surface mounting To fit a surface mount control head: 1. Apply the surface mount template (supplied near the rear of this handbook) to the selected bulkhead. -
Page 58: Flush Mounting
Chapter 5: Installation Flush mounting To fit a flush mount control head: 1. Ensure that the panel on which you intend to mount the control head is between 3 mm and 20 mm thickness. 2. Apply the flush mount template (supplied near the rear of this handbook) to the selected location and mark out the aperture into which the control head will sit. -
Page 59: Cable Connectors
Cable connectors • All connections, except for the SeaTalk cables, are made via spade connectors. • When fitting the spade connectors, make sure the connector fits securely over the blade and not between the connector and its plastic insulating boot – incorrect fitting will give intermittent contact which will lead to faulty autopilot operation. -
Page 60: Connection To The Seatalk Bus
Connection to the SeaTalk bus SeaTalk cables are not supplied with the equipment, as different installations have different cabling requirements. SeaTalk Cables The following table lists the standard SeaTalk cables available from your Raymarine dealer: Part No: D187 D188 D284... -
Page 61: Cable Types
Cable Types Typical SeaTalk Cabling 5.3 Fluxgate compass Correct positioning of the fluxgate is crucial if ultimate autopilot performance is to be achieved. The fluxgate should, to minimise gimbal disturbance, be positioned as near as possible to the pitch and roll centre of the vessel. ST5000 Plus SailPilot Owner’s Handbook SeaTalk Bus Power Supply... -
Page 62: Mounting Location For Steel-Hulled Vessels
Chapter 5: Installation • To avoid deviation of both compasses, the fluxgate compass should be installed at least 0.8 m (2.5 ft) away from the steering compass. • The fluxgate compass must be positioned as far away as possible from large iron masses, such as the engine and other magnetic devices, which may cause deviation and reduce the sensitivity of the sensor. -
Page 63: Installing The Fluxgate Compass
ST5000 Plus SailPilot Owner’s Handbook 6ft (1.8m) 4ft (1.2m) 4ft (1.2m) Installing the fluxgate compass Attach the fluxgate compass to a bulkhead using the four self-tapping screws provided. Note: A label is supplied to warn people that the compass is mounted behind or below the bulkhead. -
Page 64: Cabling
Chapter 5: Installation Cabling 1. Route the fluxgate compass cable back to the control head. 2. Connect the five core cable (colour for colour) to the Compass terminals. 5.4 Rudder reference transducer A rudder reference transducer is supplied with the ST5000 Plus SailPilot. -
Page 65: Control Dimensions
• The base height must maintain the correct vertical alignment of the transducer arm and tiller arm. • If it is more convenient, the transducer may be mounted upside down (logo downwards). • The transducer has a built in spring to remove any free play in the linkage to the tiller. -
Page 66: Cabling
Chapter 5: Installation 2. Dimension A should, ideally, be 140 mm (5.5 in) – changes within the limits shown will not degrade the autopilot performance but will slightly alter the scaling of the rudder angle display. 3. Use the self-tapping screws to secure the tiller pin to the tiller arm. 4. -
Page 67: Sailpilot Linear Drive Installation
5.5 SailPilot linear drive installation The SailPilot Linear Drive is connected directly to the rudder stock at the specified tiller arm radius. 4 off fixing holes suitable for 10mm (0.4in) bolts • The tiller arm radius for the SailPilot should be 250 mm (10 in) •... -
Page 68: Mounting The Drive Unit
Chapter 5: Installation Mounting the drive unit When siting the drive unit, please consider the following points: • The bracket can be attached to any horizontal or vertical surface • The drive unit can, if required, be installed upside down •... -
Page 69: Drive Unit Cabling
Drive unit cabling The SailPilot drive unit has electrical connections for both the motor and the clutch. Use a suitable cable (refer to the following table) to connect the drive unit to the ST5000 Plus Control head (as shown). Cable length Up to 2.5 m (8 ft) Up to 4 m (13 ft) Up to 6 m (19.5 ft) -
Page 70: Nmea Interface
Chapter 5: Installation 5.6 NMEA interface ST5000 Plus will accept navigation data in the NMEA format for use in Track Control and Windvane modes. The required data formats are shown in the table at the end of this section. Cabling The NMEA data port is on the rear of the ST5000 Plus and should be connected to a Position Transducer or Wind Instrument. -
Page 71: Data Formats
Data formats The following NMEA 0183 wind and navigation data can be decoded by ST5000 Plus. Data Course Over Ground Speed Over Ground Cross Track Error Bearing to Waypoint Distance to Waypoint Waypoint Number Apparent Wind Speed Apparent Wind Angle Speed Through Water Depth Water Temperature... -
Page 72: Chapter 6: Post Installation Procedures
Chapter 6: Post Installation Procedures Chapter 6: Post Installation Procedures Once you have installed the system, you need to confirm that the system is wired correctly and is also set up to suit your type of boat. This chapter provides instructions for the following procedures: •... -
Page 73: Operating Sense
Rudder Damping option in Dealer Setup (see Chapter 4). Navigation interface (GPS, Decca, Loran) If the ST5000 Plus is interfaced to a navigator, via its NMEA data port, the interface can be checked by displaying the default Data Pages. -
Page 74: Wind Transducer Interface
Chapter 6: Post Installation Procedures • The signals being received by the navigator are too weak for reliable navigation. Refer to the navigator handbook for further action. Wind transducer interface If the ST5000 Plus is connected to a wind instrument via its NMEA data port or SeaTalk, then the link between the two instruments should be checked as follows: Press standby and auto together. -
Page 75: Dockside Procedure
If the illumination does not switch on then a cabling fault exists in the SeaTalk cabling between the ST5000 Plus control head and the instruments/control unit. 6.2 Dockside procedure The dockside procedure is only required if a rudder reference transducer is fitted, and ensures that the rudder reference transducer is correctly aligned with the rudder. -
Page 76: Automatic Compass Deviation Correction
Chapter 6: Post Installation Procedures • Automatic compass deviation correction • Heading alignment adjustment • Autopilot operation check • Rudder gain adjustment Note: The ST5000 Plus has a built-in calibration capability which enables it to be fine tuned to suit the individual vessel, its steering system and dynamic steering characteristics. - Page 77 To perform the deviation correction: 1. Make sure that the autopilot is in Standby mode. 2. Press and hold the standby key for 2 seconds to display the User Setup entry page. If CAL LOCK is displayed, you need to turn off the lock feature contained in Dealer Setup (see Chapter 4).
-
Page 78: What If I Turn The Boat Too Quickly
Chapter 6: Post Installation Procedures What if I turn the boat too quickly? If you turn the boat too quickly for the compass to be corrected correctly, the text TOO FAST will be displayed. Apply less helm to turn in a larger circle. D3452-1 Can I cancel the process? You can abort the correction process by pressing the disp key to... - Page 79 This shows the maximum deviation detected, and indicates that compass correction has been completed successfully. Note: If the deviation value exceeds 15° or a deviation value is not displayed at all, you should consider moving the fluxgate compass to a better location.
-
Page 80: Further Heading Alignment Adjustment
Chapter 6: Post Installation Procedures Further heading alignment adjustment You should always check the compass alignment after swinging the compass. However, once the initial deviation correction procedure has been performed, you can make adjustments to the alignment as often as you wish, without swinging the compass again. - Page 81 1. In clear water and with the autopilot in Auto, alter course to starboard by 40° by pressing the +10 key four times. • At cruising speeds, course changes of 40° should result in crisp turns followed by an overshoot of no more than 5°. If this occurs the rudder gain is adjusted correctly.
- Page 82 Chapter 6: Post Installation Procedures 4. Once you have determined the correct setting, change the default Rudder Gain setting in Dealer Setup, as described in Chapter 4, Customising the ST5000 Plus.
- Page 83 ST5000 Plus SailPilot Owner’s Handbook...
-
Page 84: Chapter 7: Maintenance
• Some products generate high voltages, and so never handle the cables/connectors when power is being supplied to the equipment. • Always report any EMC related problem to your nearest Raymarine dealer. We will use any such information to improve our quality standards. - Page 85 ST5000 Plus SailPilot Owner’s Handbook...
-
Page 86: Chapter 8: Fault Finding
Chapter 8: Fault Finding Chapter 8: Fault Finding All Raymarine products are subjected to a comprehensive test procedure prior to packing and shipping. In the unlikely event that a fault does occur with your autopilot, the following check list should help identify the problem and provide a cure. - Page 87 Position information not received • Navigator not transmitting the correct position data. The autopilot will not auto advance to the next waypoint • No bearing to waypoint information received from the navigator. A series of rotating dashes are displayed on screen •...
-
Page 88: Index
Index Index Advice 71 Alarms 24 Apparent wind angle Adjusting 20 Previous 21 Auto mode 5 AutoAdapt 39 Automatic Deadband 23 Automatic track acquisition 14 AutoSeastate 23 AutoTack 7 Default angle 38 Vane mode 22 AutoTrim Default setting 38 Bar graph 4 Cabling 71 Calibration 29–40 Calibration lock 36... - Page 89 Display layout 4 Dodging obstacles Auto mode 6 Track mode 18 Vane mode 21 Drive Stopped alarm 25 Drive type 39 Engaging the autopilot 5 Fault finding 73 Functional test 59–60 Graph use 31 Hand steering 5 Heading 7 Heading alignment 31 Heading alignment adjustment 67 Heading mode 31 Illumination 10...
- Page 90 Man Overboard (MOB) 27 Manual steering 5 Manual track acquisition 15 Minimum Deadband 23 Navigation data displays 11 Navigation interface (GPS, Decca, Loran) 60 NEXT WPT 26 No Data alarm 25 Off Course alarm 8 Default angle 38 Operating modes 1...
- Page 91 ST5000 Plus SailPilot Owner’s Handbook Testing autopilot operation 67 Testing the system 59–60 Tidal stream compensation 16 Track acquisition 13 Track mode 13–14 Turn limit 37 User Setup 29 Vane mode 19–20 Variation 39 Watch alarm 26 Waypoint arrival and advance 17 Wind Shift alarm 21 Wind transducer interface 61 WindTrim 19–20...
- Page 92 D3441-2a...
- Page 94 Flush Mount Template 4 holes 6 mm diameter Shaded area to be removed 109 mm D4437-2...
- Page 96 RUDDER POSITIONED AMIDSHIPS DRILL THREE 3MM (1/8IN) HOLES CABLE POSITION D3440-1...
-
Page 98: Warranty Limitations
During this period, except for certain products, travel costs (auto mileage and tolls) up to 100 round trip highway miles (160 kilometres) and travel time of 2 hours, will be assumed by Raymarine only on products where proof of installation or commission by authorized service agents, can be shown. -
Page 99: Factory Service Centers
Factory Service Centers United States of America Raymarine Inc 22 Cotton Road, Unit D Nashua, NH 03063-4219, USA Telephone: +1 603 881 5200 Fax: +1 603 864 4756 www.raymarine.com Sales & Order Services Telephone: +1 800 539 5539 Ext. 2333 or +1 603 881 5200 Ext.
Need help?
Do you have a question about the ST5000+ and is the answer not in the manual?
Questions and answers