Table of Contents
Advertisement
Quick Links
Advertisement
Table of Contents

Related Manuals for Bosch HBA13B2 0A Series


Summary of Contents for Bosch HBA13B2 0A Series
- Page 1 Built-in oven HBA13B2.0A [en] Instruction manual...
-
Page 3: Table Of Contents
Produktinfo Type of heating and temperature ............8 Setting the time-setting options ..........8 Additional information on products, accessories, replacement parts and services can be found at www.bosch-home.com and Timer .....................8 in the online shop www.bosch-eshop.com Cooking time ..................8 End time....................9 Clock .....................9... -
Page 4: Safety Precautions
ã=Safety precautions Please read this instruction manual Hot accessories and ovenware carefully. Please keep the instruction Risk of burns! and installation manuals in a safe Never remove ovenware or accessories from the cooking compartment without an oven cloth or oven gloves. place. -
Page 5: Your New Oven
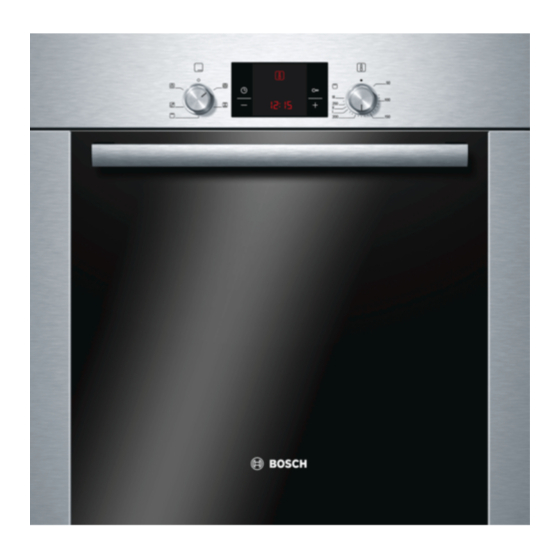
Your new oven Control panel Here you will learn about your new oven. The control panel and the individual operating controls are explained. You will find Here, you will see an overview of the control panel. All of the information on the cooking compartment and the accessories. symbols never appear in the display at the same time. -
Page 6: Accessories
Cooling fan Wire rack The cooling fan switches on and off as required. The hot air For ovenware, cake tins, joints, escapes above the door. Caution: do not cover the ventilation grilled items and frozen meals. slots. Otherwise the oven will overheat. Insert the wire rack with the curva- So that the cooking compartment cools down more quickly ture pointing downward... -
Page 7: Before Using The Oven For The First Time
Special accessories HEZ number Universal pan with non-stick coating HEZ332010 Moist cakes, pastries, frozen meals and large roasts can be removed more easily from the universal pan. Slide the univer- sal pan into the oven with the sloping edge facing the oven door. -
Page 8: Setting The Oven
Setting the oven There are various ways in which you can set your oven. Here Set the temperature or grill setting using the temperature we will explain how you can select the desired type of heating selector. and temperature or grill setting. You can select the oven cooking time and end time for your dish. -
Page 9: End Time
Use the button to set the cooking time. Press the button. Default value for button = 30 minutes The brackets are around . The time when the dish will be ready is displayed. Default value for button = 10 minutes Use the button to set a later end time. -
Page 10: Childproof Lock
Use the button to change the clock. Changing the clock No other time-setting option should have been set. After a few seconds, the time that has been set is adopted. Press the button four times. Hiding the clock The time symbols light up in the display and the brackets are You can hide the clock. -
Page 11: Detaching And Refitting The Rails
Detaching and refitting the rails Area Cleaning agents The rails can be removed for cleaning. The oven must have Oven front Hot soapy water: cooled down. Clean with a dish cloth and dry with a soft cloth. Do not use glass cleaners or Detaching the rails glass scrapers. -
Page 12: Removing And Installing The Door Panels
Fold back both locking levers (figure C). Close the oven Detaching the door door. Open the oven door fully. & Fold up the two locking levers on the left and right (figure A). Close the oven door as far as the limit stop. With both hands, grip the door on the left and right-hand sides. -
Page 13: Replacing The Bulb In The Oven Ceiling Light
Place a tea towel in the oven when it is cold to prevent Error messages damage. If an error message with “ appears, press the button. The message disappears. A time function that has been set is Unscrew the glass cover by turning it anti-clockwise. cleared. -
Page 14: Tested For You In Our Cooking Studio
Tested for you in our cooking studio Here you will find a selection of dishes and the ideal settings for Baking tray: level 1 ■ them. We will show you which type of heating and which Baking trays that are placed in the oven at the same time will temperature are best suited for your dish. - Page 15 Cakes on trays Accessories Level Type of Temperature Cooking time heating in °C in minutes Sponge with dry topping universal pan 160-180 20-30 universal pan + baking 150-170 35-45 tray Sponge with moist topping (fruit) universal pan 160-180 25-35 universal pan + baking 140-160 40-50 tray...
-
Page 16: Baking Tips
Baking tips You wish to bake according to your own Use similar items in the baking tables as a guide. recipe. How to establish whether sponge cake Approximately 10 minutes before the end of the baking time specified in the recipe, stick is baked through. - Page 17 Meat Weight Accessories and Level Type of Temperature Cooking time ovenware heating in °C, grill set- in minutes ting Beef Pot-roasted beef 1.5 kg covered 200-220 Fillet of beef, medium 1.0 kg uncovered 200-220 60-70 Sirloin, medium 1.0 kg uncovered 220-240 Steaks, 3 cm thick, medium wire rack + univer-...
-
Page 18: Tips For Roasting And Grilling
Poultry Weight Accessories and Level Type of Temperature Cooking time ovenware heating in °C, grill set- in minutes ting Chicken, halved 500 g each universal pan with 220-240 40-50 grill tray Chicken portions 150 g each universal pan with 210-230 30-40 grill tray Chicken portions... -
Page 19: Bakes, Gratins, Toast With Toppings
Bakes, gratins, toast with toppings How well cooked the bake is will depend on the size of the ovenware and the height of the bake. The figures in the table Always place ovenware on the wire rack. are only average values. If you are grilling directly on the wire rack without ovenware, you should also insert the universal pan at level 1. -
Page 20: Special Dishes
Special dishes Preheat the cooking compartment as indicated. Place the cups or jars on the cooking compartment floor and At low temperatures, 3D hot air is equally useful for incubate as indicated. producing creamy yoghurt as it is for proving light yeast dough. First, remove accessories, hook-in racks or telescopic shelves Proving dough from the cooking compartment. -
Page 21: Acrylamide In Foodstuffs
Acrylamide in foodstuffs Acrylamide is mainly produced in grain and potato products toast, bread rolls, bread or fine baked goods (biscuits, prepared at high temperatures, such as potato crisps, chips, gingerbread, cookies). Tips for keeping acrylamide to a minimum when preparing food Keep cooking times to a minimum. -
Page 22: Grilling
Grilling If you are grilling food directly on the wire rack, the universal pan should also be inserted at level 1. The liquid is then collected, keeping the oven cleaner. Dish Accessories Level Type of Grill setting Cooking time heating in minutes Toast Wire rack... - Page 24 Robert Bosch Hausgeräte GmbH Carl-Wery-Straße 34 81739 München Germany www.bosch-home.com *9000641899* 910210 9000641899...
Need help?
Do you have a question about the HBA13B2 0A Series and is the answer not in the manual?
Questions and answers