Table of Contents
Advertisement
Quick Links
Advertisement
Table of Contents

Related Manuals for RTscan RT236


Summary of Contents for RTscan RT236
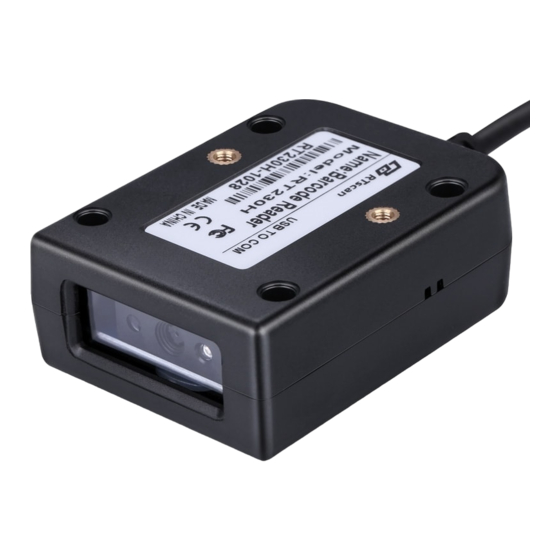
- Page 1 Fixed Mount Barcode Scanner RT230H/RT236 User Manual...
-
Page 2: Table Of Contents
Function Key Mapping ........................19 Emulate Numeric Keypad ........................ 20 Code Page ............................20 USB COM Port Emulation ........................21 Send Data to the RT230H/RT236 ..................... 21 VID/PID ............................21 RS232 Interface ............................22 Baud Rate ............................23 Parity Check............................. 24 Data Bit ............................ - Page 3 Trigger Mode ............................26 Decode Session Timeout ........................26 Auto Sleep............................27 Timeout between Decodes (Same Barcode) ..................28 Sense Mode ............................. 29 Decode Session Timeout ........................29 Image Stabilization Timeout ......................29 Continue after Good Read ........................ 30 Timeout between Decodes (Same Barcode) ..................30 Sensitivity ............................
- Page 4 Chapter 7 Data Formatting ..........................44 General Settings ............................45 Enable/Disable All Prefix/Suffix ...................... 45 Prefix Sequences ..........................45 Custom Prefix ............................46 Enable/Disable Custom Prefix ......................46 Set Custom Prefix ..........................46 AIM ID Prefix ............................47 Code ID Prefix ............................47 Restore All Default Code IDs ......................
- Page 5 Set Length Range for AIM-128 ......................58 EAN-8 .............................. 59 Restore Factory Defaults ........................59 Enable/Disable EAN-8 ........................59 Transmit Check Digit ........................60 Add-On Code ............................ 60 Add-On Code Required ........................61 EAN-8 Extension ..........................61 EAN-13 ............................62 Restore Factory Defaults ........................
- Page 6 Transmit Check Digit ........................71 Add-On Code ............................ 72 Add-On Code Required ........................72 Transmit Preamble Character “0” ..................... 73 Interleaved 2 of 5 ..........................74 Restore Factory Defaults ........................74 Enable/Disable Interleaved 2 of 5 ....................74 Set Length Range for Interleaved 2 of 5 .................... 74 Check Digit Verification ........................
- Page 7 Set Length Range for Codabar ......................87 Check Digit Verification ........................88 Transmit Start/Stop Character ......................88 Start/Stop Character Format ......................89 Code 93............................90 Restore Factory Defaults ........................90 Enable/Disable Code 93 ........................90 Set Length Range for Code 93 ......................90 Check Digit Verification ........................
- Page 8 QR Code ............................101 Restore Factory Defaults ........................ 101 Enable/Disable QR Code ........................ 101 Set Length Range for QR Code ......................101 Micro QR ............................101 QR Twin Code ..........................102 Data Matrix ............................ 104 Restore Factory Defaults ........................ 104 Enable/Disable Data Matrix ......................
- Page 9 d. Program the Timeout between Decodes (Same Barcode) ............129 e. Program the Threshold Value of Illumination Change ..............129 f. Program the Timeout between Decodes ..................129 g. Program the Central Area ......................130 h. Program the Custom Prefix/Suffix ....................130 i.
-
Page 10: Chapter 1 Getting Started
RT230H/RT236 by scanning the programming barcodes included in this manual. The RT230H/RT236 has been properly configured for most applications and can be put into use without further configuration. Users may check the Factory Defaults Table in Appendix for reference. Throughout the manual, asterisks (**) indicate factory default values. -
Page 11: Barcode Programming
Enter Setup Barcode Programming Scanning the Enter Setup barcode can enable the RT230H/RT236 to enter the setup mode. Then you can scan a number of programming barcodes to configure your RT230H/RT236. To exit the setup mode, scan the Exit Setup barcode. -
Page 12: Custom Defaults
Restore All Custom Defaults barcode. Custom defaults are stored in the non-volatile memory. Restoring the RT230H/RT236 to the factory defaults will not remove the custom defaults from the RT230H/RT236. -
Page 13: Chapter 2 Communication Interfaces
Enter Setup Chapter 2 Communication Interfaces The RT230H/RT236 provides USB HID-KBW, or USB-Virtual Com, or RS232 interface to communicate with the host device. Different interface matches relevant/corresponding cable, the cable is fixed on the scanner and it is not changeable. - Page 14 Enter Setup France Turkey_F Italy Norway ** Exit Setup...
- Page 15 Enter Setup Spain Turkey_Q Austria, Germany Belgium Russia Sweden Portugal ** Exit Setup...
-
Page 16: Beep On Unknown Character
Due to the differences in keyboard layouts, some characters contained in barcode data may be unavailable on the selected keyboard. As a result, the RT230H/RT236 fails to transmit the unknown characters. Scan the appropriate barcode below to enable or disable the emission of beep when an unknown character is detected. -
Page 17: Convert Case
Enter Setup Convert Case Scan the appropriate barcode below to convert barcode data to your desired case. ** No Case Conversion Invert Upper and Lower Case Characters Convert All to Upper Case Convert All to Lower Case Example: When the Convert All to Lower Case feature is enabled, barcode data “AbC” is transmitted as “abc”. ** Exit Setup... -
Page 18: Emulate Alt+Keypad
Enter Setup Emulate ALT+Keypad This feature allows any ASCII character (0x00 - 0xFF) to be sent over the numeric keypad no matter which keyboard type is selected. Since sending a character involves multiple keystroke emulations, this method appears less efficient. The following options are available: Disable: No ASCII character is sent in the ALT+Keypad way. -
Page 19: Function Key Mapping
Enter Setup Function Key Mapping When Function Key Mapping is enabled, function characters (0x00 - 0x1F) are sent as ASCII sequences over the keypad. For more information, see Appendix 8: ASCII Function Key Mapping Table. Enable Function Key Mapping ** Disable Function Key Mapping Example: Barcode data 0x16 Ctrl+V Enable Function Key Mapping... -
Page 20: Emulate Numeric Keypad
Enter Setup Emulate Numeric Keypad When this feature is disabled, sending barcode data is emulated as keystroke(s) on main keyboard. To enable this feature, scan the Emulate Numeric Keypad barcode. Sending a number (0-9) is emulated as keystroke(s) on numeric keypad, whereas sending other characters like “+”, “_”, “*” , “/” and “.” is still emulated as keystrokes on main keyboard. -
Page 21: Usb Com Port Emulation
USB COM Port Emulation Scan this setting code to enable the RT230H/RT236 with the USB COM Port Emulation mode, this interface allows the Host to receive data in the way as a serial port does. A driver is required for this feature. -
Page 22: Rs232 Interface
Enter Setup RS232 Interface RS232 Serial communication interface is usually used when connecting the scanner to a host device (like PC, POS) which with RS232 port. However, to ensure smooth communication and accuracy of data, you need to set communication parameters (including baud rate, parity check, data bit and stop bit) to match the host device. -
Page 23: Baud Rate
Enter Setup Baud Rate Baud rate is the number of bits of data transmitted per second. Set the baud rate to match the Host requirements. ** 9600 1200 19200 2400 38400 4800 57600 14400 115200 ** Exit Setup... -
Page 24: Parity Check
Enter Setup Parity Check When the number of data bits is set to 7, you can only select either Even Parity or Odd Parity. The None option will be regarded as Even Parity in this case. ** None Even Parity Odd Parity Data Bit When the number of data bits is set to 7, you can only select either Even Parity or Odd Parity. -
Page 25: Data Bit & Parity Check
Enter Setup Data Bit & Parity Check 7 Data Bits/Even Parity 7 Data Bits/Odd Parity ** 8 Data Bits/ No Parity 8 Data Bits/Even Parity 8 Data Bits/Odd Parity Stop Bit ** 1 Stop Bit 2 Stop Bits ** Exit Setup... -
Page 26: Chapter 3 Scan Mode
If the Trigger Mode is enabled, press the trigger to activate a decode session. The session continues until the barcode is decoded or decode session timeout expires or the active trigger signal is no longer present. For good read, the RT230H/RT236 transmits decoded data via communication port. Trigger Mode Decode Session Timeout This parameter sets the maximum time decode session continues during a scan attempt. -
Page 27: Auto Sleep
Enter Setup Auto Sleep Auto Sleep allows the RT230H/RT236 in the Trigger Mode to automatically enter the sleep or low power mode if no operation or communication is performed for a time period (user programmable). When the RT230H/RT236 is in the sleep mode, press the trigger or communication from the Host can awake the RT230H/RT236. -
Page 28: Timeout Between Decodes (Same Barcode)
To enable/disable the Timeout between Decodes (Same Barcode), scan the appropriate barcode below. Enable Timeout between Decodes: Do not allow the RT230H/RT236 to re-read same barcode before the timeout between decodes (same barcode) expires. Disable Timeout between Decodes: Allow the RT230H/RT236 to re-read same barcode. -
Page 29: Sense Mode
Enter Setup Sense Mode If the Sense Mode is enabled, the RT230H/RT236 activates a decode session every time it detects a change in ambient illumination. The decode session continues until the barcode is decoded or the decode session timeout expires. -
Page 30: Continue After Good Read
To enable/disable the Timeout between Decodes (Same Barcode), scan the appropriate barcode below. Enable Timeout between Decodes: Do not allow the RT230H/RT236 to re-read same barcode before the timeout between decodes (same barcode) expires. Disable Timeout between Decodes: Allow the RT230H/RT236 to re-read same barcode. -
Page 31: Sensitivity
Timeout between Decodes (Same Barcode) Sensitivity Sensitivity specifies the degree of acuteness of the RT230H/RT236’s response to changes in ambient illumination. The higher the sensitivity, the lower requirement in illumination change to trigger the RT230H/RT236. You can select an appropriate degree of sensitivity that fits the ambient environment. - Page 32 If the above four options fail to meet your needs, you may program the threshold value of illumination change. Illumination changes that reaches or surpasses the predefined threshold value will cause the RT230H/RT236 to start a decode session. The lower the threshold value, the greater the sensitivity of the RT230H/RT236. The default threshold value is 2.
-
Page 33: Continuous Mode
Enter Setup Continuous Mode This mode enables the RT230H/RT236 to scan/capture, decode and transmit over and over again. When the RT230H/RT236 is operating in Continuous Mode, barcode reading can be suspended/resumed through the trigger button. Press the trigger button to stop continuous scanning, press again to resume barcode reading. -
Page 34: Cellphone Read Mode
Enter Setup Cellphone Read Mode **Disable Cellphone Read Mode Enable Cellphone Read Mode ** Exit Setup... -
Page 35: Chapter 4 Scanning Preferences
The RT230H/RT236 attempts to decode barcode(s) within a specified central area and transmits the barcode that has been first decoded. This option allows the RT230H/RT236 to narrow its field of view to make sure it reads only those barcodes intended by the user. For instance, if multiple barcodes are placed closely together, central area decoding in conjunction with appropriate pre-defined central area will insure that only the desired barcode is read. -
Page 36: Specify Central Area
Specify Central Area The default central area is a (Width*20%) by (Height*20%) area in the center of the RT230H/RT236’s field of view, as shown in the figure below. You can define the central area by scanning the Specify Central Area barcode and numeric barcode(s) corresponding to a desired percentage (1-100). -
Page 37: Chapter 5 Illumination & Aiming
A couple of illumination options are provided to improve the lighting conditions during every image capture: Normal: Illumination LEDs are turned on during image capture. Always ON: Illumination LEDs keep ON after the RT230H/RT236 is powered on. OFF: Illumination LEDs are OFF all the time. -
Page 38: Aiming
Normal: The RT230H/RT236 projects an aiming pattern only during barcode scanning/capture. Always ON: Aiming pattern is constantly ON after the RT230H/RT236 is powered on. OFF: Aiming pattern is OFF all the time. -
Page 39: Chapter 6 Beep & Led Notifications
Enter Setup Chapter 6 Beep & LED Notifications Startup Beep If startup beep is enabled, the RT230H/RT236 will beep after being turned on. ** Enable Startup Beep Disable Startup Beep ** Exit Setup... -
Page 40: Good Read Beep For Non-Programming Barcode
Good Read Beep for Non-programming Barcode The RT230H/RT236 can provide a PWM output to an external driver circuit to drive a beeper after decoding a non-programming barcode. Scan the appropriate barcode below to enable or disable the emission of good read beep. -
Page 41: Beep Volume
Beep on Unknown Character Due to the differences in keyboard layouts, some characters contained in barcode data may be unavailable on the selected keyboard (USB HID-KBW). As a result, the RT230H/RT236 fails to transmit the unknown characters. Scan the appropriate barcode below to enable or disable the emission of beep when an unknown character is detected. -
Page 42: Good Read Beep For Programming Barcode
Enter Setup Good Read Beep for Programming Barcode ** Good Read Beep On for Programming Barcode Good Read Beep Off for Programming Barcode Good Read LED ** Good Read LED ON Good Read LED OFF ** Exit Setup... -
Page 43: Transmit Ngr Message
Enter Setup Transmit NGR Message Scan a barcode below to select whether or not to transmit a user-defined NGR (Not Good Read) message when a barcode is not decoded. Transmit NGR Message ** Do Not Transmit NGR Message Edit NGR Message To edit an NGR message, scan the Edit NGR Message barcode and the numeric barcodes (see Appendix 6: Digit Barcodes (numeric barcodes)) corresponding to the ASCII values (decimal) of desired characters and then scan the Save barcode (see Appendix 7: Save/Cancel Barcodes ). -
Page 44: Chapter 7 Data Formatting
Enter Setup Chapter 7 Data Formatting In many applications, barcode data needs to be edited and distinguished from one another. Usually AIM ID and Code ID can be used as identifiers, but in some special cases customized prefix and terminating character suffix like Carriage Return or Line Feed can also be the alternatives. Data formatting may include: Append AIM ID/Code ID/custom prefix before the decoded data Append custom suffix after the decoded data... -
Page 45: General Settings
Enter Setup General Settings Enable/Disable All Prefix/Suffix Disable All Prefix/Suffix: Transmit barcode data with no prefix/suffix. Enable All Prefix/Suffix: Allow user to append Code ID prefix, AIM ID prefix, custom prefix/suffix and terminating character to the barcode data before the transmission. Enable All Prefix/Suffix Disable All Prefix/Suffix Prefix Sequences... -
Page 46: Custom Prefix
Enter Setup Custom Prefix Enable/Disable Custom Prefix If custom prefix is enabled, you are allowed to append to the data a user-defined prefix that cannot exceed 10 characters. Enable Custom Prefix ** Disable Custom Prefix Set Custom Prefix To set a custom prefix, scan the Set Custom Prefix barcode and the numeric barcodes representing the hexadecimal values of a desired prefix and then scan the Save barcode. -
Page 47: Aim Id Prefix
AIM (Automatic Identification Manufacturers) IDs and ISO/IEC 15424 standards define symbology identifiers and data carrier identifiers. (For the details, see the “Appendix 2: AIM ID Table” section). If AIM ID prefix is enabled, the RT230H/RT236 will add the symbology identifier before the scanned data after decoding. Enable AIM ID Prefix... -
Page 48: Modify Code Id
Enter Setup Modify Code ID Code ID of each symbology can be programmed separately. See the following example to learn how to program a Code ID. Example: Set the Code ID of PDF417 to “p” Check the hex value of “p” in the ASCII Table. (“p”: 70) Scan the Enter Setup barcode. - Page 49 Enter Setup Modify AIM-128 Code ID Modify EAN-8 Code ID Modify EAN-13 Code ID Modify UPC-E Code ID Modify UPC-A Code ID Modify ISBN Code ID Modify ISSN Code ID Modify Code 39 Code ID Modify Code 93 Code ID Modify Interleaved 2 of 5 Code ID ** Exit Setup...
- Page 50 Enter Setup Modify ITF-14 Code ID Modify ITF-6 Code ID Modify Codabar Code ID Modify Industrial 25 Code ID Modify Standard 25 Code ID Modify Matrix 25 Code ID Modify COOP 25 Code ID Modify Code 11 Code ID Modify Plessey Code ID Modify MSI/Plessey Code ID Modify GS1 Databar Code ID ** Exit Setup...
-
Page 51: Custom Suffix
Enter Setup Custom Suffix Enable/Disable Custom Suffix If custom suffix is enabled, you are allowed to append to the data a user-defined suffix that cannot exceed 10 characters. Enable Custom Suffix Disable Custom Suffix Set Custom Suffix To set a custom suffix, scan the Set Custom Suffix barcode and the numeric barcodes representing the hexadecimal values of a desired suffix and then scan the Save barcode. -
Page 52: Terminating Character Suffix
Enter Setup Terminating Character Suffix A terminating character can be used to mark the end of data, which means nothing can be added after it. A terminating character suffix can contain one or two characters. Enable/Disable Terminating Character Suffix To enable/disable terminating character suffix, scan the appropriate barcode below. Enable Terminating Character Suffix Disable Terminating Character Suffix ** Exit Setup... -
Page 53: Set Terminating Character Suffix
Enter Setup Set Terminating Character Suffix The RT230H/RT236 provides a shortcut for setting the terminating character suffix to CR (0x0D) or CRLF (0x0D,0x0A) and enabling it by scanning the appropriate barcode below. Terminating Character CR (0x0D) Terminating Character CRLF (0x0D,0x0A) -
Page 54: Chapter 8 Symbologies
Enable All Symbologies Disable All Symbologies Enable/Disable 1D Symbologies If the Disable 1D Symbologies feature is enabled, the RT230H/RT236 will not be able to read any 1D barcodes. Enable 1D Symbologies Disable 1D Symbologies... -
Page 55: Video Reverse
Video Reverse allows the RT230H/RT236 to read barcodes that are inverted. Video Reverse ON: Read both regular barcodes and inverse barcodes. Video Reverse OFF: Read regular barcodes only. The RT230H/RT236 shows a slight decrease in scanning speed when Video Reverse is ON. Video Reverse ON ** Video Reverse OFF... -
Page 56: 1D Symbologies
Enter Setup 1D Symbologies Code 128 Restore Factory Defaults Restore the Factory Defaults of Code 128 Enable/Disable Code 128 Enable Code 128 Disable Code 128 Set Length Range for Code 128 Set the Minimum Length Set the Maximum Length ** Exit Setup... -
Page 57: Gs1-128 (Ucc/Ean-128)
Enter Setup GS1-128 (UCC/EAN-128) Restore Factory Defaults Restore the Factory Defaults of GS1-128 Enable/Disable GS1-128 Enable GS1-128 Disable GS1-128 Set Length Range for GS1-128 Set the Minimum Length Set the Maximum Length ** Exit Setup... -
Page 58: Restore Factory Defaults
Enter Setup AIM-128 Restore Factory Defaults Restore the Factory Defaults of AIM-128 Enable/Disable AIM-128 ** Enable AIM-128 Disable AIM-128 Set Length Range for AIM-128 Set the Minimum Length Set the Maximum Length ** Exit Setup... -
Page 59: Restore Factory Defaults
Enter Setup EAN-8 Restore Factory Defaults Restore the Factory Defaults of EAN-8 Enable/Disable EAN-8 ** Enable EAN-8 Disable EAN-8 ** Exit Setup... -
Page 60: Transmit Check Digit
Enable 5-Digit Add-On Code Disable 5-Digit Add-On Code Enable 2-Digit Add-On Code/ Enable 5-Digit Add-On Code: The RT230H/RT236 decodes a mix of EAN-8 barcodes with and without 2-digit/5-digit add-on codes. Disable 2-Digit Add-On Code/ Disable 5-Digit Add-On Code: The RT230H/RT236 decodes EAN-8 and ignores the add-on code when presented with an EAN-8 plus add-on barcode. -
Page 61: Add-On Code Required
Enter Setup Add-On Code Required When EAN-8 Add-On Code Required is selected, the RT230H/RT236 will only read EAN-8 barcodes that contain add-on codes. EAN-8 Add-On Code Required ** EAN-8 Add-On Code Not Required EAN-8 Extension Disable EAN-8 Zero Extend: Transmit EAN-8 barcodes as is. -
Page 62: Restore Factory Defaults
Enter Setup EAN-13 Restore Factory Defaults Restore the Factory Defaults of EAN-13 Enable/Disable EAN-13 ** Enable EAN-13 Disable EAN-13 Transmit Check Digit Transmit EAN-13 Check Digit Do Not Transmit EAN-13 Check Digit ** Exit Setup... -
Page 63: Add-On Code
Enable 5-Digit Add-On Code Disable 5-Digit Add-On Code Enable 2-Digit Add-On Code/ Enable 5-Digit Add-On Code: The RT230H/RT236 decodes a mix of EAN-13 barcodes with and without 2-digit/5-digit add-on codes. Disable 2-Digit Add-On Code/ Disable 5-Digit Add-On Code: The RT230H/RT236 decodes EAN-13 and ignores the add-on code when presented with an EAN-13 plus add-on barcode. -
Page 64: Issn
Enter Setup ISSN Restore Factory Defaults Restore the Factory Defaults of ISSN Enable/Disable ISSN Enable ISSN ** Disable ISSN ** Exit Setup... -
Page 65: Add-On Code
ISSN plus add-on barcode. It can also decode ISSN barcodes without add-on codes. Add-On Code Required When ISSN Add-On Code Required is selected, the RT230H/RT236 will only read ISSN barcodes that contain add-on codes. ISSN Add-On Code Required... -
Page 66: Isbn
Enter Setup ISBN Restore Factory Default Restore the Factory Defaults of ISBN Enable/Disable ISBN ** Enable ISBN Disable ISBN Set ISBN Format ** ISBN-13 ISBN-10 ** Exit Setup... -
Page 67: Add-On Code
ISBN plus add-on barcode. It can also decode ISBN barcodes without add-on codes. Add-On Code Required When ISBN Add-On Code Required is selected, the RT230H/RT236 will only read ISBN barcodes that contain add-on codes. ISBN Add-On Code Required... -
Page 68: Upc-E
Enter Setup UPC-E Restore Factory Defaults Restore the Factory Defaults of UPC-E Enable/Disable UPC-E Enable UPC-E Disable UPC-E Transmit Check Digit Transmit UPC-E Check Digit Do Not Transmit UPC-E Check Digit ** Exit Setup... -
Page 69: Add-On Code
Enable 5-Digit Add-On Code Disable 5-Digit Add-On Code Enable 2-Digit Add-On Code/ Enable 5-Digit Add-On Code: The RT230H/RT236 decodes a mix of UPC-E barcodes with and without 2-digit/5-digit add-on codes. Disable 2-Digit Add-On Code/ Disable 5-Digit Add-On Code: The RT230H/RT236 decodes UPC-E and ignores the add-on code when presented with a UPC-E plus add-on barcode. -
Page 70: Transmit System Character "0
Enter Setup Transmit System Character “0” The first character of UPC-E barcode is the system character “0”. Transmit System Character “0” Do Not Transmit System Character “0” UPC-E Extension Disable UPC-E Extend: Transmit UPC-E barcodes as is. Enable UPC-E Extend: Extend UPC-E barcodes to make them compatible in length to UPC-A. Enable UPC-E Extend Disable UPC-E Extend ** Exit Setup... -
Page 71: Upc-A
Enter Setup UPC-A Restore Factory Defaults Restore the Factory Defaults of UPC-A Enable/Disable UPC-A Enable UPC-A Disable UPC-A Transmit Check Digit Transmit UPC-A Check Digit Do Not Transmit UPC-A Check Digit ** Exit Setup... - Page 72 Enable 5-Digit Add-On Code Disable 5-Digit Add-On Code Enable 2-Digit Add-On Code/ Enable 5-Digit Add-On Code: The RT230H/RT236 decodes a mix of UPC-A barcodes with and without 2-digit/5-digit add-on codes. Disable 2-Digit Add-On Code/ Disable 5-Digit Add-On Code: The RT230H/RT236 decodes UPC-A and ignores the add-on code when presented with a UPC-A plus add-on barcode.
- Page 73 Enter Setup Transmit Preamble Character “0” Transmit Preamble Character “0” Do not Transmit Preamble Character “0” Note: The preamble character “0” usually does not appear in printed UPC-A barcodes. ** Exit Setup...
- Page 74 Enter Setup Interleaved 2 of 5 Restore Factory Defaults Restore the Factory Defaults of Interleaved 2 of 5 Enable/Disable Interleaved 2 of 5 ** Enable Interleaved 2 of 5 Disable Interleaved 2 of 5 Set Length Range for Interleaved 2 of 5 Set the Minimum Length Set the Maximum Length ** Exit Setup...
- Page 75 Transmit Check Digit After Verification: The RT230H/RT236 checks the integrity of all Interleaved 2 of 5 barcodes to verify that the data complies with the check digit algorithm. Barcodes passing the check will be transmitted, whereas those failing it will not be transmitted.
- Page 76 Enter Setup ITF-14 ITF-14 is a special kind of Interleaved 2 of 5 with a length of 14 characters and the last character as the check digit. Restore the Factory Defaults of ITF-14 Disable ITF-14 Enable ITF-14 But Do Not Transmit Check Digit Enable ITF-14 and Transmit Check Digit Note: It is advisable not to enable ITF-14 and Interleaved 2 of 5 at the same time.
- Page 77 Enter Setup ITF-6 ITF-6 is a special kind of Interleaved 2 of 5 with a length of 6 characters and the last character as the check digit. Restore the Factory Defaults of ITF-6 ** Disable ITF-6 Enable ITF-6 But Do Not Transmit Check Digit Enable ITF-6 and Transmit Check Digit Note: It is advisable not to enable ITF-6 and Interleaved 2 of 5 at the same time.
- Page 78 Enter Setup Matrix 2 of 5 Restore Factory Defaults Restore the Factory Defaults of Matrix 2 of 5 Enable/Disable Matrix 2 of 5 Enable Matrix 2 of 5 ** Disable Matrix 2 of 5 Set Length Range for Matrix 2 of 5 Set the Minimum Length Set the Maximum Length ** Exit Setup...
- Page 79 Enter Setup Check Digit Verification Disable Do Not Transmit Check Digit After Verification Transmit Check Digit After Verification ** Exit Setup...
- Page 80 Enter Setup Industrial 2 of 5 Restore Factory Defaults Restore the Factory Defaults of Industrial 2 of 5 Enable/Disable Industrial 2 of 5 Enable Industrial 2 of 5 Disable Industrial 2 of 5 Set Length Range for Industrial 2 of 5 Set the Minimum Length Set the Maximum Length ** Exit Setup...
- Page 81 Enter Setup Check Digit Verification Disable Transmit Check Digit After Verification Do Not Transmit Check Digit After Verification ** Exit Setup...
- Page 82 Enter Setup Standard 2 of 5(IATA 2 of 5) Restore Factory Defaults Restore the Factory Defaults of Standard 25 Enable/Disable Standard 25 Enable Standard 25 Disable Standard 25 Set Length Range for Standard 25 Set the Minimum Length Set the Maximum Length ** Exit Setup...
- Page 83 Enter Setup Check Digit Verification Disable Transmit Check Digit After Verification Do Not Transmit Check Digit After Verification ** Exit Setup...
- Page 84 Enter Setup Code 39 Restore Factory Defaults Restore the Factory Defaults of Code 39 Enable/Disable Code 39 ** Enable Code 39 Disable Code 39 Transmit Start/Stop Character Transmit Start/Stop Character Do not Transmit Start/Stop Character ** Exit Setup...
- Page 85 Transmit Check Digit After Verification Do Not Transmit Check Digit After Verification Enable/Disable Code 39 Full ASCII The RT230H/RT236 can be configured to identify all ASCII characters by scanning the appropriate barcode below. ** Enable Code 39 Full ASCII Disable Code 39 Full ASCII...
- Page 86 Enter Setup ** Exit Setup...
- Page 87 Enter Setup Codabar Restore Factory Defaults Restore the Factory Defaults of Codabar Enable/Disable Codabar ** Enable Codabar Disable Codabar Set Length Range for Codabar Set the Minimum Length Set the Maximum Length ** Exit Setup...
- Page 88 Enter Setup Check Digit Verification Disable Transmit Check Digit After Verification Do Not Transmit Check Digit After Verification Transmit Start/Stop Character Transmit Start/Stop Character Do not Transmit Start/Stop Character ** Exit Setup...
- Page 89 Enter Setup Start/Stop Character Format You can choose your desired start/stop character format by scanning the appropriate barcode below. ** ABCD/ABCD as the Start/Stop Character ABCD/TN*E as the Start/Stop Character Start/Stop Character in Uppercase Start/Stop Character in Lowercase ** Exit Setup...
- Page 90 Enter Setup Code 93 Restore Factory Defaults Restore the Factory Defaults of Code 93 Enable/Disable Code 93 ** Enable Code 93 Disable Code 93 Set Length Range for Code 93 Set the Minimum Length Set the Maximum Length ** Exit Setup...
- Page 91 Enter Setup Check Digit Verification Disable Do Not Transmit Check Digit After Verification Transmit Check Digit After Verification ** Exit Setup...
- Page 92 Enter Setup GS1-Databar (RSS) Restore Factory Defaults Restore the Factory Defaults of GS1-Databar Enable/Disable GS1 Databar ** Enable GS1-DataBar Disable GS1-DataBar Transmit Application Identifier “01” Transmit Application Identifier “01” Do Not Transmit Application Identifier “01” ** Exit Setup...
- Page 93 Enter Setup Code 11 Restore Factory Defaults Restore the Factory Defaults of Code 11 Enable/Disable Code 11 ** Enable Code 11 Disable Code 11 Set Length Range for Code 11 Set the Minimum Length Set the Maximum Length ** Exit Setup...
- Page 94 Enter Setup Transmit Check Digit Transmit Check Digit ** Do Not Transmit Check Digit Check Digit Verification Disable One Check Digit, MOD11 Two Check Digits, MOD11/MOD11 Two Check Digits, MOD11/MOD9 One Check Digit, MOD11 (Len<=10) One Check Digit, MOD11 (Len<=10) Two Check Digits, MOD11/MOD11 (Len>10) Two Check Digits, MOD11/MOD9 (Len>10)
- Page 95 Enter Setup Plessey Restore Factory Defaults Restore the Factory Defaults of Plessey Enable/Disable Plessey ** Enable Plessey Disable Plessey Set Length Range for Plessey Set the Minimum Length Set the Maximum Length ** Exit Setup...
- Page 96 Enter Setup Check Digit Verification Disable Do Not Transmit Check Digit After Verification Transmit Check Digit After Verification ** Exit Setup...
- Page 97 Enter Setup MSI-Plessey Restore Factory Defaults Restore the Factory Defaults of MSI-Plessey Enable/Disable MSI-Plessey ** Enable MSI-Plessey Disable MSI-Plessey Set Length Range for MSI-Plessey Set the Minimum Length Set the Maximum Length ** Exit Setup...
- Page 98 Enter Setup Transmit Check Digit Transmit Check Digit Do Not Transmit Check Digit Check Digit Verification Disable One Check Digit, MOD10 Two Check Digits, MOD10/MOD10 Two Check Digits, MOD10/MOD11 ** Exit Setup...
- Page 99 Enter Setup 2D Symbologies PDF 417 Restore Factory Defaults Restore the Factory Defaults of PDF 417 Enable/Disable PDF 417 ** Enable PDF 417 Disable PDF 417 Set Length Range for PDF 417 Set the Minimum Length Set the Maximum Length ** Exit Setup...
- Page 100 Enter Setup PDF 417 Twin Code PDF417 twin code is 2 PDF417 barcodes paralleled vertically or horizontally. Two of them must have the same direction and similar specifications and be placed closely together. There are 3 options for reading PDF417 twin codes: Single PDF417 Only: Read either PDF417 code.
- Page 101 Enter Setup QR Code Restore Factory Defaults Restore the Factory Defaults of QR Code Enable/Disable QR Code ** Enable QR Code Disable QR Code Set Length Range for QR Code Set the Minimum Length Set the Maximum Length Micro QR ** Enable Micro QR Disable Micro QR ** Exit Setup...
- Page 102 Enter Setup QR Twin Code QR twin code is 2 QR barcodes paralleled vertically or horizontally. Two of them must have the same direction and similar specifications and be placed closely together. There are 3 options for reading QR twin codes: Single QR Only: Read either QR code.
- Page 103 Enter Setup Transmission order of twin code Order 1: Transmit the one containing more information first. Order 2: Transmit the one containing less information first. Order 3: If the twin code is paralleled horizontally, transmite the one on the left first; if it is paralleled vertically, transmit the one in the upper position first.
- Page 104 Enter Setup Data Matrix Restore Factory Defaults Restore the Factory Defaults of Data Matrix Enable/Disable Data Matrix ** Enable Data Matrix Disable Data Matrix Set Length Range for Data Matrix Set the Minimum Length Set the Maximum Length ** Exit Setup...
- Page 105 Enter Setup Rectangular Barcode ** Enable Rectangular Barcode Disable Rectangular Barcode Mirror Image ** Decode Mirror Images Do Not Decode Mirror Images ** Exit Setup...
- Page 106 Enter Setup Data Matrix Twin Code Data Matrix twin code is 2 Data Matrix barcodes paralleled vertically or horizontally. Two of them must have the same direction and similar specifications and be placed closely together. There are 3 options for reading Data Matrix twin codes: Single Data Matrix Only: Read either Data Matrix code.
- Page 107 Enter Setup Chinese Sensible Code Restore Factory Defaults Restore the Factory Defaults of Chinese Sensible Code Enable/Disable Chinese Sensible Code Enable Chinese Sensible Code ** Disable Chinese Sensible Code Set Length Range for Chinese Sensible Code Set the Minimum Length Set the Maximum Length ** Exit Setup...
- Page 108 Normal Illuminance: applicable to most indoor/outdoor environments. High Illuminance: applicable to special enviroments with super-intense light source. Change to this settings will not take effect until the RT230H/RT236 reboots or wakes up from sleep. ** Normal Illuminance (0~60000lux) High Illuminance (60000~120000lux)
- Page 109 Enter Setup Image Flipping The user may get reversed images when the RT230H/RT236 is installed in non-standard ways. When it happens, image flipping can be used to right the “wrong”. The following figures illustrate standard image and three flipped images.
- Page 110 Enter Setup Flip ** Do Not Flip Flip Vertically Flip Horizontally Flip Horizontally and Vertically Flip Vertically Flip Vertically Do Not Flip Vertically Flip Horizontally Flip Horizontally Do Not Flip Horizontally ** Exit Setup...
- Page 111 Chapter 10 Troubleshooting Problem: Some barcodes cannot be read. Solution: 1. Find out the barcode type and verify that the barcode type is enabled. If the barcode parameters include check digit verification, select the Disable option. 2. If you do not know the barcode type, enable all symbologies. 3.
- Page 112 Problem: Illumination and aiming beams are OFF. Solution: 1. Verify that the RT230H/RT236 is properly powered up. 2. Send “?” to the RT230H/RT236. If the RT230H/RT236 returns a reply of “!”, then send programming commands to turn on illumination and aimer. Problem: Carriage Return/Line Feed settings.
- Page 113 Appendix Appendix 1: Factory Defaults Table Parameter Factory Default Remark Programming Barcode Disabled Barcode Programming Do not send Programming Barcode Data Communication Settings 9600 Baud Rate None Parity Check RS232 Data Bit Stop Bit No flow control Hardware Flow Control U.S.
- Page 114 Parameter Factory Default Remark Applicable to Trigger mode, Sense Decode Session Timeout 3,000ms mode, Continuous mode. 0~3,600,000ms Image Stabilization Timeout 500ms 0~1,600ms Sense Mode Operation after Good Read Pause after good read Disabled Timeout between Decodes (Same Barcode) 1,500ms 0~65,535ms Threshold Value of Illumination Change 1~20 Applicable to Trigger mode, Sense...
- Page 115 Parameter Factory Default Remark Data Formatting Prefix Sequence Custom Prefix+Code ID+AIM ID Disabled Custom Prefix None AIM ID Prefix Disabled Code ID Prefix Disabled Disabled Custom Suffix None Enabled Terminating Character Suffix 0x0D Carriage Return Image Control Ambient Illumination Normal illuminance Image Flipping Do not flip...
- Page 116 Parameter Factory Default Remark Symbologies Video Reverse Disabled Applicable to all symbologies. Code 128 Code 128 Enabled Maximum Length Minimum Length ( ) GS1-128 UCC/EAN-128 GS1-128 Enabled Maximum Length Minimum Length AIM-128 AIM-128 Enabled Maximum Length Minimum Length EAN-8 EAN-8 Enabled Check Digit Transmit...
- Page 117 Parameter Factory Default Remark ISBN ISBN Enabled ISBN Format ISBN-13 2-Digit Add-On Code Disabled 5-Digit Add-On Code Disabled Add-On Code Not required UPC-E UPC-E Enabled Check Digit Transmit 2-Digit Add-On Code Disabled 5-Digit Add-On Code Disabled Add-On Code Not required Extend to UPC-A Disabled System Character “0”...
- Page 118 Parameter Factory Default Remark ITF-14 ITF-14 Enabled Do not transmit Check Digit 出 Matrix 2 of 5 Matrix 2 of 5 Disabled Check Digit Verification Enabled Check Digit Do not transmit Maximum Length Minimum Length Industrial 2 of 5 Industrial 2 of 5 Enabled Check Digit Verification Disabled...
- Page 119 Parameter Factory Default Remark Codabar Codabar Enabled Check Digit Verification Disabled Check Digit Do not transmit Start/Stop Character Do not transmit Start/Stop Character Format ABCD/ABCD Maximum Length Minimum Length Code 93 Code 93 Enabled Check Digit Verification Enabled Check Digit Do not transmit Maximum Length Minimum Length...
- Page 120 Parameter Factory Default Remark MSI-Plessey MSI-Plessey Enabled Check Digit Verification One check digit, MOD10 Check Digit Do not transmit Maximum Length Minimum Length PDF 417 PDF 417 Enabled Maximum Length 2710 Minimum Length PDF 417 Twin Code Read single PDF417 only Transmission Order of Twin Code Order 1 QR Code...
- Page 121 Appendix 2: AIM ID Table Symbology AIM ID Remark Standard EAN-13 EAN-13 EAN-13 + 2/5-Digit Add-On Code Standard EAN-8 EAN-8 ]E4…]E1… EAN-8 + 2-Digit Add-On Code ]E4…]E2… EAN-8 + 5-Digit Add-On Code Standard UPC-E UPC-E UPC-E + 2/5-Digit Add-On Code Standard UPC-A UPC-A UPC-A + 2/5-Digit Add-On Code...
- Page 122 Symbology AIM ID Remark Standard Code 93 Code 93 One check digit, MOD11; transmit check digit Two check digits, MOD11/MOD11; transmit check digit Code 11 Do not transmit check digit after verification No check digit verification GS1-DataBar (RSS) Standard GS1-DataBar Plessey Standard Plessey One check digit, MOD10;...
- Page 123 Appendix 3: Code ID Table Symbology Code ID Code 128 GS1-128(UCC/EAN-128) AIM-128 EAN-8 EAN-13 ISSN ISBN UPC-E UPC-A Interleaved 2 of 5 ITF-6 ITF-14 Matrix 2 of 5 Industrial 2 of 5 Standard 2 of 5 Code 39 Codabar Code 93 Code 11 Plessey MSI-Plessey...
- Page 124 Appendix 4: ASCII Table Char (Null char.) (Start of Header) (Start of Text) (End of Text) (End of Transmission) (Enquiry) (Acknowledgment) (Bell) (Backspace) (Horizontal Tab) (Line Feed) (Vertical Tab) (Form Feed) (Carriage Return) (Shift Out) (Shift In) (Data Link Escape) (XON) (Device Control 1) (Device Control 2) (XOFF) (Device Control 3)
- Page 125 Char (Request to Send) (Unit Separator) (Space) (Exclamation Mark) " (Double Quote) (Number Sign) (Dollar Sign) (Percent) & (Ampersand) (Single Quote) (Right / Closing Parenthesis) (Right / Closing Parenthesis) (Asterisk) (Plus) (Comma) (Minus / Dash) (Dot) (Forward Slash) (Colon) (Semi-colon) <...
- Page 126 (Question Mark) (AT Symbol) (Left / Opening Bracket) (Back Slash) (Right / Closing Bracket) Char (Caret / Circumflex) (Underscore) (Grave Accent)
- Page 127 (Left/ Opening Brace) (Vertical Bar) (Right/Closing Brace) (Tilde) (Delete)
- Page 128 Appendix 5: Parameter Programming Examples The following examples show you how to program parameters by scanning programming barcodes. a. Program the Decode Session Timeout Example: Set the decode session timeout to 1500ms Scan the Enter Setup barcode. Scan the Decode Session Timeout barcode. (See the “Decode Session Timeout” section in Chapter 3) Scan the numeric barcodes “1”, “5”, “0”...
- Page 129 d. Program the Timeout between Decodes (Same Barcode) Example: Set the timeout between decodes (same barcode) to 1000ms Scan the Enter Setup barcode. Scan the Timeout between Decodes (Same Barcode) barcode. (See the “Timeout between Decodes (Same Barcode)” section in Chapter 3) Scan the numeric barcodes “1”, “0”, “0”...
- Page 130 g. Program the Central Area Example: Set the percentage of central area to 20% Scan the Enter Setup barcode. Scan the Specify Central Area barcode. Scan the numeric barcodes “2” and “0”. Scan the Save barcode. Scan the Exit Setup barcode. (If you still need to program other parameter/feature, skip this step.) h.
- Page 131 j. Program the Code ID Example: Set the Code ID of PDF 417 to “p” Check the hex value of “p” in the ASCII Table. (“p”: 70) Scan the Enter Setup barcode. Scan the Modify PDF417 Code ID barcode. (See the “Modify Code ID” section in Chapter 6) Scan the numeric barcodes “7”...
- Page 132 Program the Length Range (Maximum/Minimum Lengths) for a Symbology Note: If minimum length is set to be greater than maximum length, the RT230H/RT236 only decodes barcodes with either the minimum or maximum length. If you only want to read barcodes with a specific length, set both minimum and maximum lengths to be that desired length.
- Page 133 Appendix 6: Digit Barcodes (numeric barcodes)
- Page 135 For instance, after reading the Maximum Length barcode and numeric barcodes “1”, “2” and “3”, you scan: Delete the Last Digit: The last digit “3” will be removed. Delete All Digits: All digits “123” will be removed. Cancel: The maximum length configuration will be cancelled. And the RT230H/RT236 is still in the setup mode. Save...
- Page 136 Appendix 8: ASCII Function Key Mapping Table ASCII Function ASCII Value (HEX) No Function Key Mapping Function Key Mapping (Null char.) Null Ctrl+2 Keypad Enter Ctrl+A (Start of Header) (Start of Text) Caps Lock Ctrl+B Null Ctrl+C (End of Text) Null Ctrl+D (End of Transmission)
- Page 137 ASCII Function Key Mapping Table (Continued) The function key mappings of the last five characters in the previous table differ from one keyboard layout to another. Country/ Function Key Mapping Keyboard Layout United States Ctrl+[ Ctrl+\ Ctrl+] Ctrl+6 Ctrl+- Belgium Ctrl+[ Ctrl+<...
- Page 138 Windows 1252 (Latin I) Windows 1251 (Cyrillic) If need any technical support, feel free to contact our technical support department: Support Department ............. RTSCAN TECHNOLOGY LIMITED Add: F/7, Block C,Ying Da Li Park, Futian Tax-Free Trade Zone,Shenzhen, China Tel: +86-755-32909260 E-mail: support@rtscan.net...
Need help?
Do you have a question about the RT236 and is the answer not in the manual?
Questions and answers