Table of Contents
Advertisement
Quick Links
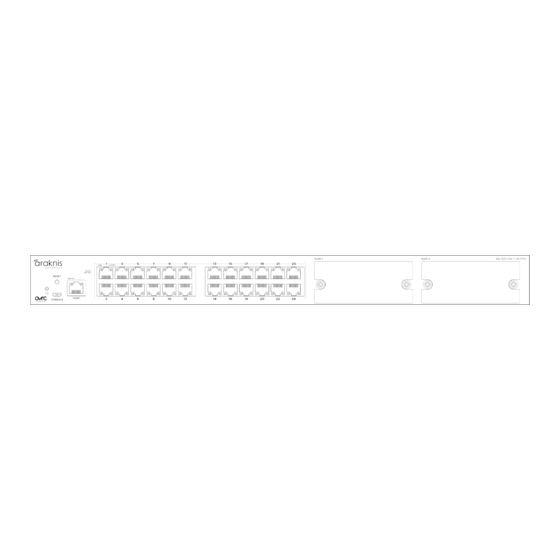
AN-920-SW
920 Series Managed Switch Quick Start Guide
Welcome to Araknis Networks™
Thank you for choosing an Araknis 920 series managed switch. With multi-gigabit
connectivity on all network ports, updated modern aesthetics, and a managed
interface, the Araknis 920 series switch is a sleek and highly capable addition to any
network.
Series overview
Each 920 series switch comes with a power module in the box. QSFP28 and additional
power modules are sold separately.
Model
AN-920-SW-F-12-POE
AN-920-SW-F-24-POE
Ethernet
Total possible
ports
QSFP28 ports
1 with QSFP28
module
12
(sold separately)
2 with QSFP28
modules
24
(sold separately)
Total possible PoE
budget (Watts)
750 with 1 power
module
1080 with 2 power
modules
750 with 1 power
module
1650 with 2 power
modules
1
Advertisement
Table of Contents

Related Manuals for Araknis Networks 920 Series


Summary of Contents for Araknis Networks 920 Series
- Page 1 Thank you for choosing an Araknis 920 series managed switch. With multi-gigabit connectivity on all network ports, updated modern aesthetics, and a managed interface, the Araknis 920 series switch is a sleek and highly capable addition to any network. Series overview Each 920 series switch comes with a power module in the box.
- Page 2 Unboxing The package contains: Switch Rubber feet for flat Rack mount kit: Quick Start surfaces (4) ears (2), screws QR card Power module AC power cord...
-
Page 3: Install The Modules
Install the modules The switch must be powered off when installing QSFP28 modules. Caution: Power module QSFP28 module To remove the power module, push the tab toward the handle and pull the Note: -__. module straight back. Do not use a Y power cable. Sometimes called a Y splitter cable. Caution: Connect each power module to separate circuits in the same phase. -
Page 4: Installing The Switch
Installing the switch Rack mount Shelf mount Caution: To avoid possible interference or damage, do not stack equipment on top of the switch. Rack mounting guidelines The maximum ambient temperature of the space the switch is installed in should not exceed 122°F/50°C. - Page 5 Do not overload the power equipment or the switch. Read our WattBox Best Practices for more information.
-
Page 6: Qsfp28 Ports
Connections All router and switch connections should be on network ports. Not the Caution: management port. QSFP28 ports The QSFP28 (Quad Small Form-Factor Pluggable Plus) ports support up to a 100Gbps connection and are typically used to connect switches. - Page 7 PoE Budgeting Total PoE device consumption = 47 Remaining Model Total PoE budget (Watts) PoE budget (Watts) 750 with 1 power module AN-920-SW-R-12-POE 1080 with 2 power modules 1033 750 with 1 power module AN-920-SW-R-24-POE 1650 with 2 power modules 1603 ...
-
Page 8: Led States
LED States RJ45 ports LED state Description Blinking The port is negotiated at 10 Gbps and/or providing PoE* 10G/PoE The port is not negotiated at 10 Gbps and/or providing PoE* Blinking Packets are flowing through the port Link/Act The port does not detect connection or the port is disabled *Configurable in the web interface... - Page 9 QSFP28 module LEDs Description state Blinking The port is negotiating at 100 Gbps and passing traffic 100G The port does not detect a connection or is disabled The port is negotiating at 50-25 Gbps and passing Blinking traffic 50/25G The port does not detect a connection or is disabled ...
- Page 10 Configuration Araknis switches can be configured through OvrC or the local interface. The local interface is accessible using OvrC’s WebConnect feature, typing the switch’s DHCP address into your browser’s address bar, or using the switch’s default IP address. Configuring the switch in OvrC OvrC provides Wi-Fi management, remote device management, real-time notifications, and intuitive customer management, using your computer or mobile device.
- Page 11 Other access methods: DHCP IP address The switch is configured to DHCP by default so that the DHCP server can assign an IP address when the switch is connected to the network (the DHCP server is usually the router). This address can be used for accessing the web interface. Use one of these methods to find the IP address of the switch: ...
- Page 12 Accessing the switch using the default IP Address If the switch is not given an IP address on the network or needs to be accessed while not connected to a network, you can configure your computer’s network connection to access the switch using the default IP address, 192.168.20.254, while connected to the MGMT port.
- Page 13 1. Connect your PC to the switch using an Ethernet cable. 2. Open the Control Panel and click Network and Internet.
- Page 14 3. Click Network and Sharing Center. 4. Click Change adapter settings.
- Page 15 5. Right-click the icon for the wired network connection, then left-click Properties. 6. Select Internet Protocol Version 4 (TCP/IPv4), then click Properties.
- Page 16 7. In the General tab, click Use the following IP address: and enter the IP address and subnet mask, then click OK. IP Address 192.168.20.253 Subnet Mask 255.255.255.252...
- Page 17 8. Open a browser and navigate to https://192.168.20.254/. Log in using the default credentials: Username araknis Password araknis 9. After configuring the switch, set your computer’s IPv4 Properties back to Obtain an IP address automatically, then click OK.
-
Page 19: Reset Procedures
Reset Procedures The reset button is on the front of the switch. Front Reset button action Description LED State Blinking Restarts the Hold for 1-9 seconds slowly switch Resets the Blinking login Hold for 10-19 seconds moderately credentails to defaults Resets the Blinking switch to Hold for more than 20 seconds... -
Page 20: Technical Support
Technical Support For chat and telephone, visit snp1.co/techsupport • Email: TechSupport@SnapOne.com. Visit snp1.co/tc for discussions, instructional videos, news, and more. - Page 21 Snap One, LLC (formerly known as Wirepath Home Systems, LLC), in the United States and/or other countries. 4Store, 4Sight, Control4, Control4 My Home, SnapAV, Araknis Networks, BakPak, Binary, Dragonfly, Episode, Luma, Mockupancy, Nearus, NEEO, Optiview, OvrC, Pakedge, Sense, Strong, Strong Evolve, Strong VersaBox, SunBriteDS, SunBriteTV, Triad, Truvision, Visualint, WattBox, Wirepath, and Wirepath ONE are also registered trademarks or trademarks of Snap One, LLC.
Need help?
Do you have a question about the 920 Series and is the answer not in the manual?
Questions and answers