Advertisement
This box contains
- Instruction manual
- Air fryer
![]()
- Drawer
- Grill Plate
![]()


Specifications
| RATED VOLTAGE | 220 - 240V |
| FREQUENCY | 50/60Hz |
| POWER CONSUMPTION | 1800W |
| CAPACITY | 7L |
| TEMPERATURE RANGE | 80°C - 200°C |
| TIME RANGE | 0-30 minutes |
| DIMENSIONS (CM) | H37 x W38 x D32 |
| WEIGHT | 5.5Kg |
Important safety information
Please read these safety NOTES carefully BEFORE using your Tower appliance
These warnings have been provided in the interest of safety. Basic safety precautions should always be followed including the following:
KEY SAFETY POINTS

During operation:
- Surfaces are hot. DO NOT touch the hot surfaces.
- Hot steam is released through the air outlet openings. Keep your hands and face at a safe distance from the steam and from the air outlet openings.
- Hot steam and air may escape when the drawer is removed from the air fryer.

![]()
It is important that this instruction manual is retained for future reference. If the appliance is given to someone else, it should always be accompanied by these operating instructions, as they form an integral part of the appliance.

GENERAL SAFETY
- DO NOT immerse cords, plugs or any part of the appliance in water or any other liquid.
- Close supervision is necessary when any appliance is used by or near children.
- Children should not play with the appliance.
- This appliance can be used by children aged from 16 years and above and persons with reduced physical, sensory or mental capabilities or lack of experience and knowledge if they have been given supervision or instruction concerning use of the appliance ina safe way and understand the hazards involved.
- Cleaning and user maintenance should not be undertaken by children without supervision.
- Take care when any appliance is used near pets.
- Switch off and unplug before fitting or removing accessories, after use and before cleaning.
- Allow the appliance to cool down for approximately 30 minutes before fitting or removing accessories or cleaning.
- If the supply cord or appliance is damaged, stop using the appliance immediately and seek advice from the manufacturer, its service agent or a similarly qualified person.
- The use of accessory attachments is not recommended by the appliance manufacturer, apart from those supplied with this product.
- DO NOT use the appliance outdoors.
- DO NOT place the appliance on or near a hot stove top or heated oven.
- Take care when moving the appliance, or removing accessories and food as hot oil or other hot liquids may be present.
- DO NOT clean the appliance with metal kitchen utensils, caustic or abrasive cleaning agents or scouring sponges.
- DO NOT place anything on top of the appliance.
- DO NOT use this appliance for anything other than its intended use.
- This appliance is for household use only.
WHILST AIR FRYING
- Please ensure that the appliance is used ona stable, level, and heat resistant surface.
- DO NOT place the appliance on or near combustible materials such as a tablecloth or curtain.
- DO NOT place the appliance against a wall or against other appliances. Leave at least 1Ocm free space on the back and sides and 10cm free space above the appliance.

- DO NOT place the appliance in the presence of explosive and/or flammable fumes.
- DO NOT cover the air inlet and outlet during operation.
- Any accessories, baking trays or oven dishes used in the appliance will become hot. Always use oven gloves when handling or removing anything from the appliance.
- DO NOT place food that is still packed in plastic wrap or plastic bags in the appliance.
- DO NOT allow food to come into contact with the heating element of the appliance.
- If the appliance begins to emit smoke, unplug it immediately. Only open the door once the smoke has cleared. Remove burnt remnants

PLUG AND CORD
- Check that the voltage of the main circuit corresponds with the rating of the appliance before operating.
![]()
DO NOT let the cord hang over the edge of a table or counter, serious burns may result from the air fryer being pulled off the counter where it may be grabbed by children or become entangled with the user.- DO NOT let the supply cord touch hot surfaces.
- DO NOT carry the appliance by the power cord.
- DO NOT use any extension cord with this appliance.
- The appliance is not intended to be operated by means of an external timer or separate remote-control system.
- DO NOT pull the plug out by the cord as this may damage the plug and/or the cable. e DONOT plug and unplug with wet hands.
WIRING SAFETY FOR UK USE ONLY


As the colours in the mains lead of this appliance may not correspond with the coloured markings identifying the terminals in your plug, please proceed as follows: The wires in the mains lead are labelled in accordance with the following code: Blue neutral [N] Brown live [L] Green/ Yellow [EARTH] 
PLUG FITTING DETAILS (WHERE APPLICABLE)
- The wire labelled blue is the neutral and must be connected to the terminal marked [N].
- The wire labelled brown is the live wire and must be connected to the terminal marked [L].
- The wire labelled green/yellow must be connected to the terminal marked with the letter [E].
- Onno account must either the brown or the blue wire be connected to the [EARTH] terminal.
- Always ensure that the cord grip is fastened correctly.
- The plug must be fitted with a fuse of the same rating already fitted and conforming to BS 1362 and be ASTA approved.
- If in doubt consult a qualified electrician who will be pleased to do this for you.
NON-REWIREABLE MAINS PLUG
If your appliance is supplied with a nonrewireable plug fitted to the mains lead and should the fuse need replacing, you must use an ASTA approved one (conforming to BS 1362 of the same rating). If in doubt, consult a qualified electrician who will be pleased to do this for you. If you need to remove the plug - disconnect it from the mains - then cut it off of the mains lead and immediately dispose of it in a safe manner. Never attempt to reuse the plug or insert it into a socket outlet as there is a danger of an electric shock.

This appliance MUST be earthed!
In the unlikely event the appliance develops a fault, stop using it immediately and seek advice from the Customer Support Team.
+44 (O) 333 220 6066
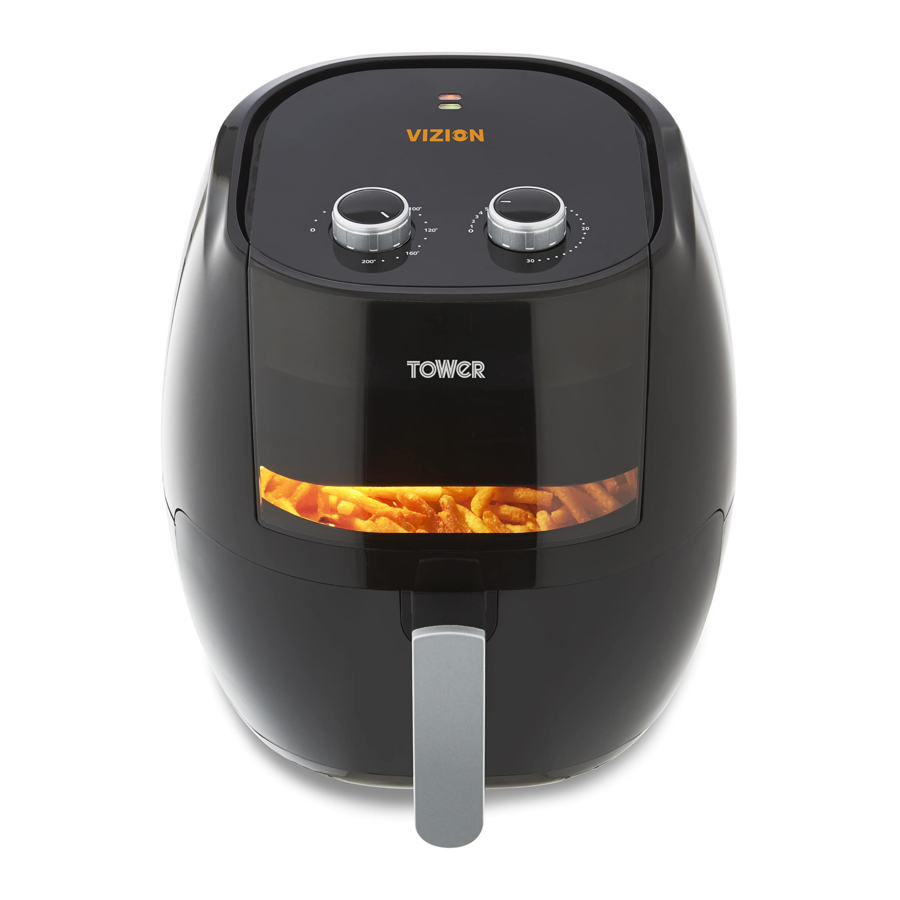
Getting to know your air fryer


- Air Inlet
- Indicator Lights
- Temperature Control Dial
- Timer Dial
- Transparent Viewing Window
- Air Outlet
- Grill Plate
- Drawer Handle
- Drawer
CONTROL PANEL

Before first use
SETTING UP
- Remove your appliance from the packaging. .
- Check that there is no damage to the cord or any visible damage to the body.
- Remove any stickers or labels from the appliance. DO NOT remove the rating plate or any warnings.
- Dispose of the packaging ina responsible manner. .
- Locate the appliance on a stable, horizontal, even and heat-resistant surface in accordance with the Important safety information section.
- Wash and dry the accessories and air fryer, following the instructions in the Cleaning and care section.
NOTE: DO NOT fill the drawer with oil or frying fat. This is an oil-free fryer that works on hot air and uses very little oil or no oil.
NOTE: The drawer is fully removable from the unit. Always pull on the handle.
TEST RUN
The appliance should be used for the first time without any food in it, in order to remove any manufacturing coating residues. The appliance may produce some smoke or odours during this process.
Allow the appliance to heat up on the highest temperature setting for approx. 15 minutes, with no food inside.
- Connect the plug to a mains wall socket.
- Close the drawer.
- Set the timer to 15 minutes.
- Set the temperature to 200°C.
- The heating element and fan will begin to operate and the timer will begin counting down.
- When the set time has elapsed, the appliance will emit an audible signal.
- Remove the plug from the mains power socket.
- Allow the appliance to cool down.
Using your air fryer
The appliance is suitable for frying, roasting, baking, grilling, or warming food.
COOKING WITH THE AIR FRYER:
DO NOT put anything on top of the appliance, as this will disrupt the airflow and the hot air frying will be affected as a result
- This air fryer operates using hot air and requires very little to no oil.
- Rapid Air technology instantly reheats the air inside the appliance therefore pulling the drawer out briefly during hot air frying barely disturbs the process.
- Connect the plug to a mains wall socket.
- Remove the drawer.
- Place food inside the drawer.
NOTE: DO NOT exceed the MAX line. - Slide the drawer back in to the air fryer.
- Determine the required cooking time for your ingredients (refer to the Settings section). Turn the time and temperature control dials to the required settings.
- The fan will start to work and the indicator light will illuminate to show that the unit is operating. The timer will start to count down the set cooking time.
NOTE: During the air frying process, the working lights will turn on and off from time to time. This indicates that the heating element is being switched on and off to maintain the set temperature
NOTE: Cooking times and temperatures can be adjusted, even while the air fryer is in operation.
![]()
During the frying process, food will get very hot and steam may escape from the appliance. - Pull the drawer out of the appliance and place it on a suitable heat resistant surface and check if the food is ready.
![]()
DO NOT touch the drawer immediately after use. Only hold the drawer by the handle Always wear oven gloves and use suitable accessories such as tongs to remove food, as required.
DO NOT turn the drawer upside down, as any excess oil that has collected may drip onto the food.
![]()
Before serving, ensure meat and poultry are thoroughly cooked. - If the food is not ready, simply place it back into the air fryer and set the timer for a few extra minutes.
- Once food is cooked and the appliance is not required for further cooking, remove the plug from the mains power socket.
- Allow the used accessories and appliance to cool down before cleaning them (refer to the cleaning and care section).
SETTINGS
- The settings table will help you to select the basic settings for the ingredients.
- Settings are indications; as ingredients differ in origin, size, shape and brand, we cannot guarantee the best settings for your ingredients.
- Settings can be adjusted to meet personal preference in the finished result. However, always ensure food is cooked and piping hot before serving.
| Min-Max Weight (g) | Time (mins) | Temp (°C) | Extra information | |
| Chips | 700-1000 | 18-25 | 200 | |
| Rib | 350-450 | 15-20 | 180 | |
| Shrimp | 300-400 | 15-20 | 160 | |
| Cake | 550-650 | 35-45 | 160 | |
| 8-10 Cups | ||||
| Drumstick | 600-800 10-13 Pieces | 20-25 | 180 | Adding 1/2 spoon of oil |
| Beef Steak | 450-500 2 Pieces | 15-25 | 160 | Adding 1/2 spoon of oil |
| Fish | 400-500 | 15-20 | 180 |
NOTE: During the process of cooking, overturning the small size food can promote the final cooking effect, and can help the food ingredients to get well-distributed frying.
NOTE: By adding small amount of oil to the fresh ingredients, the food can be made crispier. After adding the oil, the food ingredients should be shelved for several minutes before frying them in the fat-free fryer.
PRE-HEATING:
It is recommended to add 3 minutes to the cooking time if the appliance is cold. Alternatively, pre-heat the appliance without any food inside:
- Place the empty drawer into the unit.
- Adjust the timer to 3 minutes and the temperature to the required cooking temperature.
- Once pre-heated remove the drawer and add food.
- Place the drawer in to the unit and adjust the timer to the required cooking time.
GETTING THE BEST RESULTS FROM YOUR AIR FRYER:
Cooking time:
- The cooking time will depend on the size of your ingredients. Smaller sizes may require a shorter cooking time.
- In general the cooking times are shorter than in a conventional oven. Start with shorter cooking times and then adapt the cooking times to your personal taste.
- Whilst becoming familiar with the appliance it is advisable to check the condition of the food during cooking to ensure that it does not burn.
Turning and rotating food:
- "Flipping" or turning smaller sized foods halfway through the cooking process, assures that all the pieces are evenly fried.
- Some food requires shaking halfway through the cooking time (refer to the settings table). To shake the food, pull the drawer out of the appliance by the handle and shake it. Then slide the drawer back into the fryer.
Accessories:
- If using a cooking vessel in the drawer, non-stick coated or enamel coated ovenware is recommended in order to allow for greater heat transfer.
NOTE: Using cooking vessels may affect the cooking due to the reduction in air flow.
Food tips:
- Snacks that can be prepared in an oven can also be prepared in the air fryer.
- There is no need to add any oil to frozen chips as most frozen products are generally pre-fried. When preparing frozen chips or other frozen convenience products, follow the manufacturer's specifications on the packaging. Be cautious of using extremely greasy ingredients such as sausages in the air fryer.
- Add some oil to fresh potatoes for a crispy result. Fry the potatoes in the air fryer within a few minutes of adding the oil.
- The air fryer can be used to reheat food; Set the temperature to 150°C for up to 10 minutes.
WEIGHTS AND MEASURES
Check these charts for basic imperial to metric conversions of weights
| Metric | Imperial | US cups | |
| 250ml | 8 fl oz | lTcup | |
| 180ml | 6 fl oz | 3/4 cup | |
| 150ml | 5 fl oz | 2/3 cup | |
| 120ml | 4 floz | 1/2 cup | |
| 75ml | 2% fl oz | 1/3 cup | |
| 60ml | 2 fl oz | 1/4 cup | |
| 30ml | 1 floz | 1/8 cup | |
| 15ml | 1/2 fl oz | 1 tablespoon | |
| Imperial | Metric | ||
| 1/2 oz | 15g | ||
| 10z | 30g | ||
| 2 oz | 60g | ||
| 3 oz | 90g | ||
| 40Zz | 110g | ||
| 5 0z | 140g | ||
| 6 oz | 170g | ||
| 7 OZ | 200g | ||
| 8 oz | 225g | ||
| 9 oz | 255g | ||
| 10 oz | 280g | ||
| 11 oz | 310g | ||
| 12 oz | 340g | ||
| 13 oz | 370g | ||
| 14 oz | 400g | ||
| 16 oz | 425g | ||
| 1lb oz | 450g | ||
ADDITIONAL FUNCTIONS
Pausing and resuming cooking:
While the air fryer is in operation the cooking cycle can be paused. Remove the drawer from the unit. The fan and heating element will stop working. The On/Standby indicator will remain lit to show the unit is in Standby mode. When the drawer is re-inserted, the air fryer will resume operation on the latest selected settings.
Automatic switch off:
The air fryer has a built in timer, which will automatically shut down the air fryer when timer reaches zero. To manually switch off the air fryer, adjust the timer to zero.
Accessories/Spare Parts
Spare part replacements and accessories are available to purchase via:
 +44 (0) 333 220 6066
 www.towerhousewares.co.uk
| PART NO | DESCRIPTION | IMAGE |
| 11707101 | Drawer |  |
| 11707102 | Grill Plate |  |
Cleaning and care

Do not immerse the appliance in water or any other liquid.

Clean the main unit, drawer and grill plate after each use. DO NOT allow food residues to dry on. Food residue could start to burn and possibly cause faults.
- Unplug the appliance from the mains and allow it to cool down.
NOTE: Remove the drawer to let it cool down more quickly. - Wipe the main unit clean with a damp cloth and a little detergent.
- Clean the drawer and grill plate with detergent and warm water. In the case of stubborn dirt, soak them in warm water and detergent beforehand.
NOTE: DO NOT clean the appliance with metal kitchen utensils, caustic or abrasive cleaning agents or scouring sponges. NOTE: Allow all parts to air dry completely or dry with a tea towel before reusing or storing.
Storage
- Once cool, clean and dry store the appliance upright, in a cool, dry place.
Troubleshooting
| PROBLEM | POSSIBLE SOLUTION |
The air fryer does not work | Plug the appliance into an earthed wall socket. |
| Ensure the drawer is fully inserted. | |
| Ensure the timer has been set. | |
The air fryer is emitting smoke | White smoke is caused by grease heating up inside the appliance. Clean the appliance properly after each use. |
| Dark smoke suggests food is burning. Immediately unplug the appliance. Wait for smoke to clear before removing the drawer. | |
Foods are overcooked or burned | Decrease cooking temperature or time. |
| Ensure food items are not too large and are not touching the heating elements. | |
The fried ingredients are not done | Put smaller batches of ingredients in the air fryer. Smaller batches are fried more evenly. |
| The set temperature is too low. Adjust the temperature. Refer to the Settings section under Cooking with the Air Fryer for a temperature reference guide. | |
| The cooking time is too short. Adjust the cooking time (Refer to the Settings section under Cooking with the Air Fryer for a timer reference guide). | |
French fries are fried unevenly in the air fryer | Use fresh starchy potatoes and make sure they stay firm during frying. |
| Shake French Fries halfway through cooking to receive the best results | |
| Food ingredients are not baked evenly in the air fryer | The food ingredients must be overturned in the process of cooking. |
| French fries are not crispy when they come out of the air fryer | The crispiness of the fries depends on the amount of oil and water in the fries. Dry the French Fries properly before you add the oil. Cut the French Fries smaller for a crispier result. Add slightly more oil for a crispier result. |
Disposal of the unit
Appliances bearing the symbol shown here may not be disposed of in domestic rubbish. You are required to dispose of old electrical and electronic appliances like this separately, Please visit www.recycle-more.co.uk or www.recyclenow.co.uk for access to information about the recycling of electrical items. Please visit www.weeeireland.ie for access to information about the recycling of electrical items purchased in Ireland.
The WEEE directive, introduced in August 2006, states that all electrical items must be recycled, rather than taken to landfill. Please arrange to take this appliance to your local Civic Amenity site for recycling, once it has reached the end of its life.

Customer support
If you have any questions or concerns about your new product, please contact our helpful Customer Support Team:
 +44 (0) 333 220 6066
 www.towerhousewares.co.uk
Please have your Model No. available. This can be found on the front cover of this instruction manual and on the appliance''s rating label.

Documents / Resources
References
Tower Housewares | Household Appliances | 100 Years of Quality
![www.recycle-more.co.uk]() Everything you need to know to Recycle More
Everything you need to know to Recycle More![www.recyclenow.co.uk]() Recycle Now
Recycle Now![www.weeeireland.ie]() WEEE Ireland Waste Electrical and Electronic Equipment Recycling
WEEE Ireland Waste Electrical and Electronic Equipment Recycling
Download manual
Here you can download full pdf version of manual, it may contain additional safety instructions, warranty information, FCC rules, etc.
Advertisement


Need help?
Do you have a question about the T17071 and is the answer not in the manual?
Questions and answers