Table of Contents
Advertisement
FCC Information
FCC Information
EN
This device complies with Part 15 of the FCC Rules.
Operation is subject to the following two
conditions: (1) This device may not cause harmful
interference, and (2) this device must accept any
interference received, including interference that
may cause undesired operation.
In accordance with FCC requirements, changes or
modifications not expressly approved by Thomson
Inc. could void the user's authority to operate this
product.
This device generates and uses radio frequency
(RF) energy, and if not installed and used
properly, this equipment may cause interference
to radio and television reception.
If this equipment does cause interference to radio
or television reception (which you can determine
by unplugging the unit), try to correct the
interference by one or more of the following
measures:
• Re-orient the receiving antenna (that is, the
antenna for the radio or television that is "
receiving" the interference).
• Move the unit away from the equipment that is
receiving interference.
• Plug the unit into a different wall outlet so
that the unit and the equipment receiving
interference are on different branch circuits.
If these measures do not eliminate the
interference, please consult your dealer or an
experienced radio/television technician for
additional suggestions. Also, the Federal
Communications Commission has prepared a
helpful booklet, "How To Identify and Resolve
Radio TV Interference Problems." This booklet
is available from the U.S. Government Printing
Office, Washington, DC 20402. Please specify
stock number 004-000-00345-4 when ordering
copies.
This product complies with DHHS Rules 21 CFR
Subchapter J. Applicable at the date of
manufacture.
For Your Safety
The AC power plug is
polarized (one blade is wider
than the other) and only fits
into AC power outlets one
way. If the plug won't go into
the outlet completely, turn the
plug over and try to insert it the other way. If it
still won't fit, contact a qualified electrician to
change the outlet, or use a different one. Do not
attempt to bypass this safety feature.
CAUTION: TO PREVENT ELECTRIC SHOCK,
MATCH WIDE BLADE OF PLUG TO WIDE SLOT,
FULLY INSERT.
Main plug is used as the disconnect device, it shall
remain operable and should not be obstructed
during intended used. To be completely
disconnected the apparatus from supply mains,
the main plug of the apparatus shall be
disconnected from the mains socket outlet
completely.
Have a Blast- Just Not in Your
Eardrums
Make sure you turn down the
volume on the unit before you
put on headphones. Increase
the volume to the desired level
only after headphones are in
place.
Advertisement
Table of Contents

Related Manuals for RCA RS2657


Summary of Contents for RCA RS2657
-
Page 1: For Your Safety
FCC Information FCC Information This device complies with Part 15 of the FCC Rules. Operation is subject to the following two conditions: (1) This device may not cause harmful interference, and (2) this device must accept any interference received, including interference that may cause undesired operation. -
Page 2: Service Information
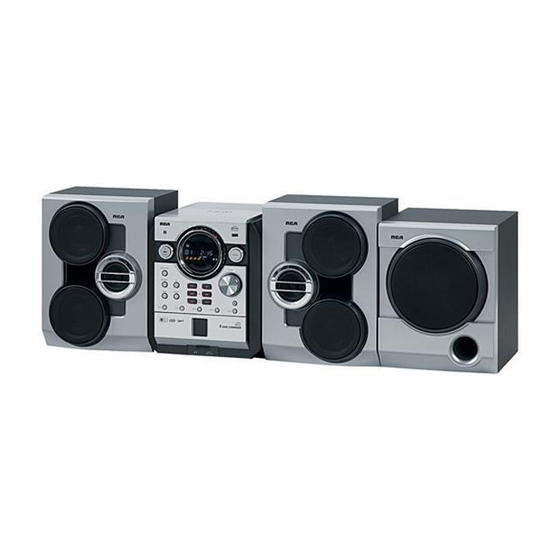
FCC Information Technical Specifications Product: 5CD Audio System Brand: RCA Model: RS2657 Electrical Consumption: Power Supply: 120V~60Hz Power consumption: 300 Watts IMPORTER Comercializadora Thomson de México, S.A. de C.V. Álvaro Obregón No. 151. Piso 13. Col. Roma. Delegación Cuauhtémoc C.P. 06700. México, D.F. -
Page 3: Safety Precautions
Important Information Safety Precautions • Never open the cabinet under any circumstances. Any repair works and internal adjustments must be conducted by trained personnel. • Never operate this product with the cabinet removed. • Do not use your unit immediately after transporting it from a cold place to a warm place, as condensation may result in malfunction. -
Page 4: Table Of Contents
Table of Contents FCC Information Important Information Table of Contents ....1 Getting Started ....2 Unpacking the system . -
Page 5: Getting Started
Getting Started Unpacking the system You should have the following: • one main unit (with 2 main speakers and a subwoofer); • one remote control; • one AM loop antenna; • one user’s guide; • one safety leaflet; • Owner registration Card. Back View 1. -
Page 6: General Controls
General Controls Main Unit ON/STANDBY - Turns power on or off (STANDBY mode). Tips: In STANDBY mode, press ON/STANDBY to turn the system on in the previously used mode. Press SOURCE to select the corresponding mode. Look at the display icons to identify the current mode. -
Page 7: Phone And Aux In
General Controls BAND/INFO - In CD mode - Uses as INFO key to select among disc details on display. In USB mode - Shows memory usage. In simple MP3/WMA mode - Shows the track play time and ID3 tags information (e.g. song title, artist, album) during playback. -
Page 8: Remote Control
General Controls Remote Control ON/STANDBY - Turns power on or off (STANDBY mode). SOURCE - Selects among CD player, Tuner, AUX and USB mode. BAND - In Tuner mode - Changes between FM or AM radio bands. Enters auto preset program in FM mode when depressed for 2 seconds. -
Page 9: Navigation Buttons
General Controls PROG - Enters program mode for CD, USB and Tuner. In rename mode - Confirms and stores new file name. INTRO - Turns intro mode on or off to play the first 10 seconds of each track in CD, USB or simple MP3/WMA mode. -
Page 10: Display
Display CD/TUNER/AUX/USB - Indicates CD, Tuner, AUX and USB modes. BASS BOOST - Bass Boost is activated. FM - FM tuner mode activated. AM - AM tuner mode activated. STEREO - In FM tuner mode, indicates stereo sound is selected. WMA - Current disc is a WMA disc. -
Page 11: Setting The Timer
Settings Setting the Timer 1. Press and hold TIMER on the remote control until the ON and clock hour flashes on the display ( ON - timer on time ). 2. For setting time, press the hour and then press TIMER to shift to minute digits. -
Page 12: Disc And Usb Playback
Disc and USB Playback Important CD and MP3/WMA Information This unit is compatible with CD-R / RW CD-RW/ CD-R discs for playback. Notes on CD-R/RW Disc: • Do not affix any type of labels to either side (recordable or labeled side) of a CD-R/RW disc as this may result in malfunction. -
Page 13: Discs Playback
Disc and USB Playback Discs Playback 1. Press SOURCE repeatedly to select CD mode. 2. Press OPEN/CLOSE compartment. 3. Insert up to 5 discs with label face up. 4. Press OPEN/CLOSE compartment. • The occupied disc tray icons light up on the display and the current disc icon animates. -
Page 14: Radio
Radio Selecting Tuner Band 1. Press SOURCE repeatedly to enter Tuner mode. 2. Press BAND to select between FM or AM radio band. Tips: Your audio system has 32 preset stations. Tuning to a Station Press to select frequencies. Using Presets Press BACK/SELECT on the main unit or on the remote control to access the previous or next preset station. -
Page 15: Recording
Recording Recording CD to USB device 1. Connect the USB device to the main unit. 2. In CD stop mode, CD navigation mode or CD pause mode, press CD REC to start CD playback and recording will begin automatically. This is indicated by the REC icon on the display. -
Page 16: Advanced Playback Controls
Advanced Playback Controls In CD and USB mode, advanced playback controls allow you to sample, repeat and random playback tracks, viewing track information and set up a Program List. In USB mode, advanced playback controls allow you to rename tracks. Sampling Tracks Press INTRO on the remote control to play the first 10 seconds of each track on the current disc,... -
Page 17: Setting Up A Program List
Advanced Playback Controls Setting Up a Program List Tips: You can create a program of up to 32 tracks. 1. In navigation mode, use the navigation navigation buttons (Refer to “Navigation Buttons” on page 6 for details.) to select the track to add to Program List. -
Page 18: Advanced Navigation Controls
Advanced Navigation Controls Tracks and Files Navigation For audio CDs: 1. When playback is stopped, press SELECT on the main unit or (navigation key) on the remote control. The display shows “TRACK” and the current number of track on the disc. 2. -
Page 19: Tips On Playback Sequence On Disc
Advanced Navigation Controls Tips on Playback Sequence of Disc • Check that the mp3/WMA disc is created with a single folder structure. Refer to the diagram below for playback sequence details on multi-level folder structure. • For example, folders and songs from level 2 are played before moving on to play folders and songs from level 3. -
Page 20: Troubleshooting Tips
Troubleshooting Tips Problem Solution System • Check power cord for a secure does not connection. turn on • Unplug the unit for a moment, and then plug it back in. • Check the outlet by plugging in another device. There is no •... -
Page 21: Maintenance
Maintenance Disconnect the audio system from the power source before performing any maintenance. Cleaning Clean the exterior of the system using a soft dust cloth. CD Player CAUTION! This unit operates with laser and may only be opened by qualified technicians to avoid accidents. -
Page 22: Limited Warranty (U.s.)
What we will do: • Pay any Authorized RCA Audio Service Center the labor charges to repair your unit. • Pay any Authorized RCA Audio Service Center for the new or, at our option, refurbished replacement parts required to repair your unit. -
Page 23: Limited Warranty (Canada)
What we will do: • Pay any Authorized RCA Audio Service Center the labor charges to repair your unit. • Pay any Authorized RCA Audio Service Center for the new or, at our option, refurbished replacement parts required to repair your unit.
Need help?
Do you have a question about the RS2657 and is the answer not in the manual?
Questions and answers