
Related Manuals for RCA VR344


Summary of Contents for RCA VR344
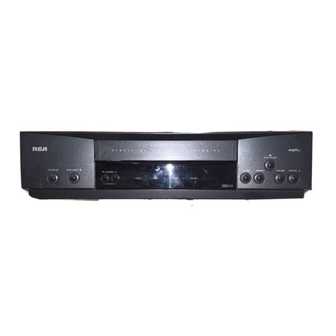
- Page 1 *Ivideo lo w Q t\ &I cassette recorder user’s guide vR519 & vR344...
- Page 2 To reduce the risk of electric shock, do not remove cover (or back). No user serviceable RISK OF ELECTRIC Refer servicing to qualified SHOCK DO NOT OPEN This symbol indicates “dangerous voltage” inside the product that presents a risk of electric shock or personal injury.
-
Page 3: Table Of Contents
First Thing First ............. . . Setting up the VCR ... - Page 4 Displays ................36 Connections Things to Know Before Connecting ConnectingYourVCR Jacks and Cables ... Choosing a VCR Connection Advantages of Audio/Video Don’t Forget About the TV/VCR TV with RF Jack Only ...
-
Page 5: First Things First
HI, MY NAME IS SUSAN... I wrote this User’s Guide. that you have a rewarding user manual And, I think you’ll be pleased can be accessed through the on-screen READTHE FIRSTTHREE first three sections of the you to yourVCR, and show you how to set theVCR up and use the on-screen... -
Page 6: Remote Control
YOUR VCR If you connect your VCR to your home antenna and then to your TV, use the VCR’s IN FROM ANTENNA and OUT TO TV jacks for a good signal as shown. If you have a TV with AUDIONIDEO better connection. -
Page 7: Step 4: Plug In The Vcr
See the 7V Owner’s Manual. STEP 6: TURN ON THE VCR The first time you connect your VCR and turn it on, a menu screen appears. This is the beginning which helps you to set up specific features choose not to use this Guide, you can set up each feature individually. - Page 8 0 EXIT See Additional Set-Up Features for detailed about the AUTO PLAY feature. STEP 8: SET UP THE VCR Once you understand how to move around go to the next section to set up your VCR. information through the menus,...
-
Page 9: Setting Upthevcr
The QuickSet Guide is a one-time takes you through specific features to set up your VCR. In addition to the Guide, there are other features you may want to set up, such as: Select a language Set upVCR channel list (AUTO... -
Page 10: Using The Quickset Guide
USING THE QUICKSET The QuickSet Guide is an automated set up your VCR. The first time you turn on your VCR, the first screen of the guide appears. SELECT LANGUAGE. SELECCIONE IDIOMA. CHOISISSEZ LANGUE. 1 ENGLISH 2 ESPAiiOL FRANFAIS Just follow... -
Page 11: Cable Box Setup
Press MENU to displav the VCR MAIN MENU. MAIN MENU 1 VCR PLUS+ 2 TIMER RECORDINGS TIME CHANNELS 5 PREFERENCES LANGUAGE EXIT Press 6 to select and display the LANGUAGE menu. LANGUAGE SELECT LANGUAGE. l>ENGLISH ESPAROL FRANCAIS PRESS MENU CONTINUE Select English, Espaiiol (Spanish), or Francais (French). -
Page 12: Vcr Channels List
Box Setup is complete. VCR CHANNELS LIST Your VCR may come with a channel Even though your VCR may come with a list, it’s possible that you may want to add or eliminate on whether they are active. To AUTO CHANNEL SEARCH Press MENU to display the VCR MAIN MENU. -
Page 13: Auto Channel Search
AUTO CHANNEL SEARCH SCANNING CHANNEL PRESS CANCEL The VCR begins scanning for the available takes about one to two minutes. once the search is complete. down should only select the active channels. If you choose detects to your VCR. -
Page 14: To Change The Signaltype
To Change the Signal Type Press MENU to display the VCR MAIN MENU. Press 4 to display the CHANNELS menu. Press 3 to change the SIGNAL TYPE between ANTENNA. To ADD or REMOVE Channels You may want to add or remove channels after you AUTO CHANNEL SEARCH, especially if some of the channels have weak signals or you don’t want to watch them. -
Page 15: Set Thetime And Date
Press 2 to turn AUTO DST: ON or OFF. Select ON if you want the VCR’s clock to automatically for daylight-saving time. Select OFF if you do not want the VCR’s clock to adjust for daylight-saving time. Set the Time and Date Press MENU to display the VCR MAIN MENU. -
Page 16: Vcr Plus+ Channels
U.S. and Canada are provided on the following Press MENU to display the VCR MAIN MENU. MAIN MENU 1 VCR PLUS+ 2 TIMER... - Page 17 PLUS WORKSHEET *Check your local or cable listing for the channel **Check your local listing broadcast or VCR Plus+ Two-DigitVCR number receive this station channel number assigned. Plus+ Channel Numbers for CableTV (USA List) American Movie Classics Arts &-Entertainment Black...
-
Page 18: What's Next--Additional
2 ADD/REMOVE CHANNELS 3 SIGNAL TYPE: CABLE 4 VCR PLUS+ CHANNEL LIST 5 CABLE SETUP 0 EXIT Press 4 to display the VCR PLUS+ CHANNEL LIST screen. VCR+ CHANNEL MY CHANNEL 3 -> -> -> CH+/- SELECT PRESS CHANGE PRESS... - Page 19 REMOTE VCRWVCR2 OPTION If you own a compatible RCA, GE, or ProScan remote a VCR2, VCRZ*LD, or DVDWCRZ button, you to set this VCR to respond to that button. Press 1 to select the REMOTE CONTROL item. Then press the...
-
Page 20: Auto Play
VCR mode, when the VCR is turned 3 to switch between ON and OFF. Select ON if you want the VCR to switch to the VCR mode when the VCR is turned on or a cassette is inserted. -
Page 21: Vcr Basics
If you want just keep VCR BASICS VCR Basics tells you what you need to know in order to watch a movie or tape your favorite show. -
Page 22: Remote Buttons
VCR. MENU Brings up VCR MAIN MENU on the TV screen. Used to select a menu item or exit a menu. Numbers (0 through 9) Select a channel two numbers. -
Page 23: Playing Atape
The VCR automatically rewinds the tape if it reaches the end of the tape during playback. While rewinding, POWER and the VCR will turn off after rewinding. such as record, playback, reduce the streaks play, slow, or pause. during stop-action... -
Page 24: Tape Eject
(PLAY-PAUSE on VCR) instead of STOP. CHECK THE SAFETYTAB No matter which recording option sure there is a tape in the VCR, and that the tape’s safety tab is in place. You cannot record on a tape with the safety tab removed. Safety Tab... -
Page 25: Recording
Now that you’ve gone through the necessary steps to operate yourVCR, I’ll explain the different recording features that are available to suit your needs. Recording Features: Recording (explained in Bcrsics section) Express Recording Timer Recording Timer Recording with VCR Plus+ Copying and EditingTapes RECORDING... -
Page 26: Recording Features
(See VCR Basics section.) Express Recording lets you start recording are watching, and then set the VCR to automatically recording after a designated Timer Recording lets you program start and stop recording at a predetermined... -
Page 27: Timer Recording
TIMER RECORDING You can set up as many as eight timer recording Press MENU to display the VCR MAIN MENU. MAIN MENU 1 VCR PLUS+ 2 TIMER RECORDINGS 3 TIME 4 CHANNELS 5 PREFERENCES 6 LANGUAGE EXIT Press 2 to display the TIMER RECORDINGS menu. -
Page 28: Setting Up The Channel List
TV signal off-air. Setting Up the Channel List If you did not set up the VCR Plus+ channel now. Display the CHANNELS menu from the VCR MAIN MENU. Display the VCR PLUS+ CHANNEL LIST menu. -
Page 29: Vcr Plus+ Recording
Enter the VCR PIusCode shown in your local television programming guide. PLUS+ ENTER PLUSCODE NUMBER (FROM LISTING) 12876 PRESS CLEAR CORRECT PRESS MENU YHEN DONE Press MENU to enter the VCR PlusCode number. ’ HOW OFTEN SHOULD THIS PROGRAM RECORD? -
Page 30: Stoppinga Timer Recording
Press and hold the STOP button button on the VCR). REVIEWING CLEARING To review programs that you have already set up: Press 2 when the VCR MAIN MENU is displayed to display the TIMER RECORDINGS menu. TIMER RECORDINGS 1 CREATE PROGRAM 2 REVIEW EXISTING PROGS. -
Page 31: Using Twovcrs For Copying And Editing Tapes
Use one VCR as the playback VCR and the other as the recording VCR. Turn on the TV and VCRs. Tune the TV to the VCR viewing video input). If you connected your VCR using the ANTENNA jacks, tune recording... -
Page 33: Other Features
FEATURES TO ENHANCE VCR OPERATION Picture Search Options Pro-Tect PlusTM Locking Tracking Time Counter On-Screen Displays OTHER FEATURES... -
Page 34: Picture Search Options
Search features work well for tapes recorded Model VR344 and the SP or SLP speed on Model VR519. FORWARD REVERSE SEARCH You can view a tape during play or play pause. Sound is turned during picture search. -
Page 35: Frame Advance
VCR) to return to normal playback. INDEX SEARCH The VCR has a “VHS Index Search System” that automatically records an index mark on the tape every time you start a recording. During playback you can locate the program to play by the number of index marks or by scanning. -
Page 36: Zero Search
Press REV to return to 0:OO:OO on the tape. Press STOP to stop zero searching. PRO-TECT PLUS” LOCKING To disable the usage of the VCR, or to protect recordings, you can lock the VCR so that the buttons or remote won’t work. -
Page 37: Tracking
TRACKING Your VCR has automatic tracking snow from the picture. Automatic insert a tape or turn on the VCR. Occasionally manually adjust tracking, especially if the tape was recorded different VCR. Just use the TRACKING buttons streaks or snow. You can also use tracking... -
Page 38: On-Screen
ON-SCREEN DISPLAYS The INFO button shows the status of the VCR (STOP, PLAY, RECORD, etc.), channel number, tape speed on the TV screen. The date and time must be set before they can be displayed. Press INFO to see the on-screen displays. -
Page 39: Thingsto Know
THINGSTO KNOW BEFORE CONNECTING COMPONENTS Protect Your Components from Power Surges Connect all components before cords into the wall outlet. Always turn off the TV and other components you connect or disconnect any cables. Position Cables Correctly to Avoid Audio Hum or Interference Insert all cable plugs firmly into their jacks. -
Page 40: Connectingyourvcr
TV. These jacks are required for antenna The RF jacks on the VCR are labeled IN FROM ANT. and OUT TO TV. The coaxial cable supplied with your VCR is used to connect the VCR’s OUT TO TV jack and your TV’s antenna... -
Page 41: Choosinga Vcr Connection
RF cable. DON’T FORGET ABOUTTHE The TVNCR switch controls whether from the VCR or the TV. Model VR344: The TVNCR feature to the VCR mode when the VCR is turned PLAY button. You can change the setting TV*VCR button on the remote. -
Page 42: Tv With Rf Jack Only
Return to First Things First, then follow Using This Connection Tune your TV to channel 3 or 4 whichever with the switch on the back of the VCR. Model VR519 Only--AUTO TV/VCR Setting: Set the AUTO TV/VCR feature To play a tape: Inset-t a tape. -
Page 43: Tv With Audio/Video
You are connecting an antenna, Your television has audio/video This connection provides: Mono sound playback from VCR. Record one channel while watching using a cable box for all channels). To use this connection, you must have: (1) coaxial cable for cable /antenna... -
Page 44: Unscramble Pay Channels Only
You are using a cable box only to unscramble channels. Your TV has audio/video input jacks. This connection provides: Mono sound playback from VCR. Recording a scrambled or unscrambled cable box while watching an unscrambled To use this connection,... -
Page 45: Appendix A: Reference
This section gives you some about theVCR, including a description controls and display. You also will find aTroubleshootingTips Appendix, which might help to resolve simple problems. Finally, this section contains information. additional information of the unit’s section in this some of those your warranty... -
Page 46: Front Panel
PANEL CHANNEbTRACKING Up or Down lower channel in the VCR’s channel when a tape is playing. FWD Forwards the tape when the VCR is stopped. Searches the picture forward during PLAY*PAUSE Plays a tape. Pauses action for viewing playback. Pauses recording to prevent scenes. -
Page 47: Back Panel
3 CH. 4 Switch Selects the channel to which you will tune the TV to see the VCR picture if you connect the VCR using one of the basic hookups. AUDIO and VIDEO IN 1 Jacks Receives signals from another... -
Page 48: Troubleshootingtips
Make sure the REMOTE VCRINCRZ can operate Poor or no picture for normal TV viewing Check to make sure the VCR indicator Check to make sure the TV is switched Check to make sure the antenna Snowy or no picture during... - Page 49 Check to make sure the VCR is not in pause mode. Press PAUSE or PLAY on the remote on the VCR) to return to normal playback. Check the ProTect PlusTM feature. Will not record Check to make sure the safety tab is intact.
- Page 50 Cassette with safety tab removed Check to make sure the AUTO PLAY ON/OFF feature TIMER indicator flashes Clock is not set. Check to make sure there is a cassette in the VCR when TIMER and RECORD indicators Time counter disappears during This is normal.
-
Page 51: Specifications
SPECIFICATIONS Format: Record/Playback Video: Video: Model VR344: 2-head System: Audio: Video Signal System: EIA standard: Antenna: 75-ohm antenna Tuner: USA: Canada: TLpe: AutoProgramming Power Requirement: 12OV AC, 60 Hz Power Consumption: 18 watts Dimensions: 3.7 inches high (93 mm) 15 inches wide (380 mm) 11.9 inches deep (300 mm) -
Page 52: Limited Warranty
What we will do: Pay any Authorized RCA VCR Servicenter Pay any Authorized RCA VCR Servicenter required to repair your VCR. How you get service: Take your VCR to any Authorized... -
Page 53: Tv With Audio/Video Jacks
Cables 38 Cables, positioning Cables, types of 38 CHAN buttons CHANNEL button Channel, viewing Channels, add or remove Channels list, VCR 10 CHANNELS menu 9, 11, 12, 16, 26 Choosing a VCR connection Cleaning the VCR 49 CLEAR button 20, 27, 28, 33, 34, 35... -
Page 54: Index
Important information IN FROM ANT. jack 45 Index search feature INDEX SEARCH menu Indicator panel INFO button 20, 35, 36 INPUT button 20, 25 Jacks, types of 38 Language feature LANGUAGE menu Limited warranty Locking feature MENU button 9, 10, 12, 13, 14, 17, 20, 26, 27, 28 Menus, accessing Number buttons... - Page 55 Tracking feature Troubleshooting tips 46 TV*VCR button 18, 21, 39, 44 cleaning VCR channels list 10 VCR indicator VCR MAIN MENU 9, 10, 12, 13, 14, 17, 25, 26, 28 VCR Plus+ channel list 26 PlusCode number setting up channels using...
- Page 56 If your VCR needs service, please contact nearest Servicenter from the yellow send any products to the Indianapolis manual or on the carton. This will only add delays in service for your product. f$ THOMSON CONSUMER ELECTRONICS 10330 North Meridian...
Need help?
Do you have a question about the VR344 and is the answer not in the manual?
Questions and answers