
Related Manuals for Chefman EASY-BREW RJ54-SS-15


Summary of Contents for Chefman EASY-BREW RJ54-SS-15
- Page 1 EASY-BREW ESPRESSO MAchine USER GUIDE • Safety Instructions • Features • Operating Instructions • Troubleshooting • Cleaning and Maintenance • Notes • Terms and Conditions • Warranty Registration RJ54-SS-15...
- Page 2 COOKING FORWARD™ Welcome! ® Whether this is your first Chefman appliance or you’re already part of our family, we’re happy to be in the kitchen with you. With your new Easy-Brew Espresso Machine, you can quickly and easily make the perfect cup of espresso right from your kitchen—its compact, sleek design is ideal for small spaces.
-
Page 3: Table Of Contents
CONTENTS Safety Instructions Features Operating Instructions Troubleshooting Cleaning and Maintenance Notes Terms and Conditions Warranty Registration... -
Page 4: Safety Instructions
6. Do not operate any appliance with a damaged cord or plug or after the appliance malfunctions or has been damaged in any manner. If this should occur, contact ® Chefman Customer Support. - Page 5 SAFETY INSTRUCTIONS IMPORTANT SAFEGUARDS ® The use of accessory attachments not recommended by Chefman may result in fire, electric shock, or injury to persons. 8. Do not use outdoors. 9. Do not let the cord hang over the edge of a table or counter, or touch hot surfaces.
- Page 6 SAFETY INSTRUCTIONS IMPORTANT SAFEGUARDS WARNING: This appliance has a polarized plug (one blade is wider than the other). This plug is intended to fit into a polarized outlet only one way. If the plug does not fit fully into the outlet, reverse the plug. If it still does not fit, contact a qualified electrician. Do not attempt to modify the plug in any way or force it into the outlet.
- Page 7 To insert the plug, grasp it firmly and guide it into the outlet. To disconnect the appliance, grasp the plug and remove it from the outlet. Never use the product if the power cord shows signs of abrasion or excessive wear. Contact Chefman Customer Support for additional guidance and support ®...
-
Page 8: Features
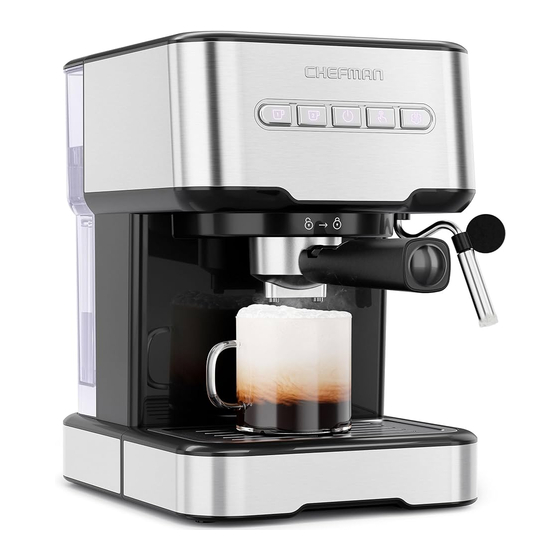
FEATURES... - Page 9 FEATURES Double Manual Water Reservoir Cover Single Power Steam 1.5L Removable Water Reservoir Control Panel Steam Control Knob Steam Wand Steam Wand Handle Brew Head Removable Drip Tray Coaster Removable Drip Tray 10. Portafi lter Portafi lter Basket Retention Clip 12.
-
Page 10: Operating Instructions
OPERATING INSTRUCTIONS BEFORE FIRST USE Remove all packaging materials and check to ensure that all parts and accessories are accounted for. Read all stickers and remove the ones that are not permanent. Remove the water reservoir from the unit (see p. 13) and remove the orange plastic tab from the bottom of the reservoir. - Page 11 OPERATING INSTRUCTIONS PRIMING THE EASY-BREW ESPRESSO MACHINE The unit must be primed before first use and after extended periods of disuse when the unit goes completely dry. This will push water into the unit’s internal parts and release air from inside the pump.
- Page 12 OPERATING INSTRUCTIONS CHOOSE THE RIGHT SIZE CUP While the espresso machine dispenses standard single and double cups of espresso, it also allows you to brew coffee manually so you can choose how much water is dispensed (see p. 17). A standard single cup of espresso yields approximately 1–1.5 fl oz, and a double yields approximately 2–2.5 fl oz.
- Page 13 OPERATING INSTRUCTIONS HOW TO FILL THE WATER RESERVOIR To fill the reservoir with water, you may either use a pitcher to fill it while on the unit or remove it from the unit to fill at the sink. To remove, gently lift the reservoir straight up from the unit. Lift the lid until the hinges are completely extended, then tilt the lid forward until it rests up over the front of the reservoir.
- Page 14 OPERATING INSTRUCTIONS HOW TO CHOOSE AND INSERT THE PORTAFILTER BASKET To insert the basket into the portafilter, align the tab on the basket with the corresponding groove in the portafilter. Drop the basket in and twist it slightly to ensure it is locked into place. Use the smaller basket for a single shot of espresso and the larger basket for a double shot.
- Page 15 OPERATING INSTRUCTIONS HOW TO PLACE THE PORTAFILTER ON THE BREW HEAD Position the portafilter underneath the brew head with its handle facing to the left. 2. With one hand on top of the unit to steady it, insert the portafilter up into the brew head, lining up the handle with the open lock icon on the unit.
- Page 16 OPERATING INSTRUCTIONS HOW TO MAKE A STANDARD ESPRESSO Espresso is a unique method of coffee brewing in which hot water is forced through finely ground coffee beans for a richer and more full-bodied brew than regular drip. Because of its strength, espresso is usually served in small portions (about 1.5 to 2.5 fl oz) in demitasse cups.
- Page 17 OPERATING INSTRUCTIONS CAUTION: To avoid possible burns from hot steam and water or damage to the unit, never remove the water reservoir or the portafilter while brewing or using the steam wand. If you intend to make a second cup, be sure the unit is in standby mode—all buttons except STEAM will be lit and solid—before removing or inserting the portafilter.
- Page 18 OPERATING INSTRUCTIONS HOW TO FROTH MILK The steam wand allows you to heat and froth milk. Frothed milk can be added to your espresso to make a macchiato, cappuccino, or latte, or to other hot drinks—such as hot chocolate—to give them a light, foamy topping. For a macchiato, add just a splash of steamed milk;...
- Page 19 OPERATING INSTRUCTIONS Continue frothing the milk for a few seconds more until there is no steam left. Then, turn the steam control knob to its OFF position. CAUTION: Turning the steam control knob OFF before exiting steam mode can trap steam in the unit and cause it to temporarily overheat.
-
Page 20: Troubleshooting
TROUBLESHOOTING PROBLEM POSSIBLE CAUSES SOLUTIONS Coffee does not come out Appliance is not turned on Plug in unit and turn it on or plugged in Add water No water in the reservoir Use a coarser grind Coffee is ground too fine Add less coffee Too much coffee in the Refill filter and tamp less... - Page 21 Not enough coffee in filter Add more coffee Water leaks from the bottom There is too much water in Empty the drip tray of the unit the drip tray Contact Chefman ® The unit’s parts are not Customer Support working properly...
- Page 22 If it does not ® come back on after cooling, contact Chefman Customer Support. To ensure a long life of your espresso machine, always allow it to rest briefly between consecutive uses and avoid heating...
-
Page 23: Cleaning And Maintenance
CLEANING AND MAINTENANCE To keep your coffee and hot water tasting fresh, we recommend rinsing the water reservoir frequently and cleaning your espresso machine often using the following instructions. HOW TO CLEAN THE PORTAFILTER AND BREW HEAD Before cleaning, turn off the unit and unplug it. Some of the metal parts might still be hot. Do not touch them with your hands until they have cooled. - Page 24 CLEANING AND MAINTENANCE DESCALING Mineral deposits that build up in the unit over time will affect the operation of the Easy-Brew Espresso Machine. After operating for 500 cycles, the unit will give the following reminder to descale: all indicator lights will quickly blink 5 times immediately after the unit heats when powered on, before entering standby mode.
- Page 25 CLEANING AND MAINTENANCE Press the DOUBLE-SHOT button to “brew” a double shot of espresso. The button will remain lit during brewing and the unit will automatically return to standby mode when brewing is complete. Discard the water from the cup. 8.
-
Page 26: Notes
NOTES... - Page 27 NOTES...
-
Page 28: Terms And Conditions
Chefman . Any changes to the Terms and Conditions ® of this Warranty must be in writing, signed by a representative of Chefman . No other party ® has the right or ability to alter or change the Terms and Conditions of this Warranty. - Page 29 ® and workmanship, under normal household use, for a period of 1 year from the date of purchase when used in accordance with the directions listed in the Chefman User ® Guide. If your product does not work as it should, please contact Customer Support at support@chefman.com so that we may assist you.
- Page 30 AC ONLY/ AC SEULEMENT NOTE: Label depicted here is an example. How do I register my product? All you need to do is fill out a simple Chefman registration form. You can easily ac- ® cess the form in one of the two ways listed below: Visit Chefman.com/register.
- Page 31 CHEFMAN WARRANTY REGISTRATION ® For product information Please visit us at Chefman.com. EXCEPT WHERE SUCH LIABILITY IS REQUIRED BY LAW, THIS WARRANTY DOES NOT COVER, AND CHEFMAN SHALL NOT BE LIABLE FOR, ® INCIDENTAL, INDIRECT, SPECIAL, OR CONSEQUENTIAL DAMAGES, INCLUDING WITHOUT LIMITATION, DAMAGE TO, OR LOSS OF USE OF THE PRODUCT, OR LOST SALES OR PROFITS OR DELAY OR FAILURE TO PERFORM THIS WARRANTY OBLIGATION.
- Page 32 ©CHEFMAN 2023 RJ54-V2-15_UG_FINAL_OTP_031623...
Need help?
Do you have a question about the EASY-BREW RJ54-SS-15 and is the answer not in the manual?
Questions and answers
How to descale chefman espresso machine RJ54-SS-15-CA
To descale the Chefman EASY-BREW RJ54-SS-15 espresso machine, follow these steps:
1. Prepare the Descaling Mixture: Fill the water reservoir with fresh, undiluted white vinegar.
2. Let It Sit: Allow the vinegar to sit in the reservoir for about 8 hours. You may leave the reservoir on the unit during this time.
3. Run the Descale Cycle:
- Press the POWER button to turn the unit on. Place a cup under the brew head.
- Press the MANUAL button to brew until no descaling mixture is left in the reservoir.
4. Rinse the Reservoir: Fill the reservoir with fresh water. Repeat steps 3–5 three times to flush out the unit, letting it rest briefly between cycles to avoid overheating.
5. Final Cleaning: Use the MANUAL button to brew until no water is left to remove any residual vinegar.
6. Reset the Descaling Alert (if applicable):
- Ensure the unit is in standby mode.
- Press and hold the DOUBLE-SHOT and MANUAL buttons for 3 seconds. The buttons will blink three times, resetting the cycle count to zero.
This ensures your machine is properly descaled and ready for fresh-tasting coffee.
This answer is automatically generated
How do I put it in storage mode before a military PCS?