
Related Manuals for Chefman RJ14-12-RO


Summary of Contents for Chefman RJ14-12-RO
- Page 1 ® Programmable COffee Maker This is your one-stop guide to using your product. From the below links, you can jump ahead to a specific document if desired. QUICK LINKS • Quick Start Guide • User Guide RJ14-12-RO...
- Page 2 QUICK START GUIDE BEFORE FIRST USE Remove all stickers. Run the coffee maker through two brew cycles Ł using just water to eliminate any residue from manufacturing and Ł packaging. Set time by holding down hour and minute buttons and choosing a.m.
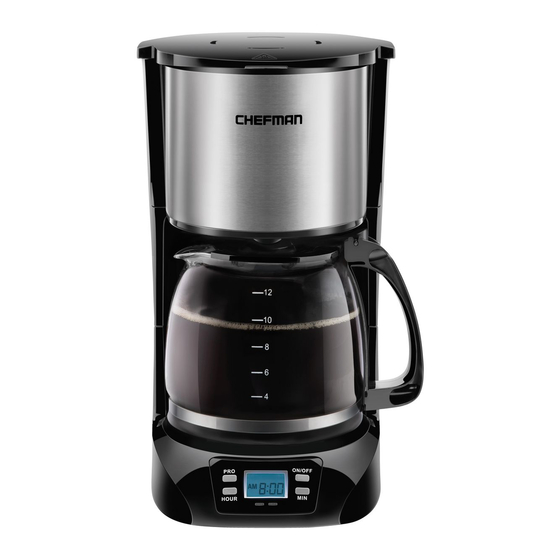
- Page 3 What’s in the box 1. Brewing chamber lid Shower head 3. Water reservoir 4. Brewing chamber 5. Water gauge window 6. Glass carafe 7. Control panel 8. Heating plate 9. Reusable coffee filter 10. Removeable filter holder...
- Page 4 How to make Coffee STEP 2 STEP Fill the carafe to desired Place the carafe on the amount, then pour the water heating plate. into the water reservoir at the back of the brewing chamber.
- Page 5 STEP 3 STEP 4 Insert removable filter or Add the desired paper filter into filter holder, amount of ground then place filter holder in coffee. brewing chamber. STEP 5 STEP 6 Shut the lid to the Press the On button. brewing chamber, pressing down on it to close securely.
- Page 6 USER GUIDE COOKING FORWARD™ Welcome! Whether this is your first Chefman appliance purchase or you’re already ® part of our family, we’re happy to be brewing with you! With your new programmable coffee maker, you can have a pot of delicious, piping hot coffee ready and waiting for you when you wake up.
-
Page 7: Table Of Contents
CONTENTS Safety Instructions Features Operating Instructions Cleaning and Maintenance Coffee Making Tips Notes Terms and Conditions Warranty Registration... - Page 8 6. Do not operate any appliance with a damaged cord or plug or after the appliance malfunctions, or has been damaged in any manner. Contact Chefman Customer Support at 1-888-315-6553 or ® support@chefman.com. 7. The use of accessory attachments not recommended by Chefman ® result in fire, electric shock or injury to persons.
-
Page 9: Safety Instructions
SAFETY INSTRUCTIONS IMPORTANT SAFEGUARDS Do not use outdoors. Do not let cord hang over edge of table or counter, or touch hot surfaces. 10. Do not place on or near a hot gas or electric burner, or in a heated oven. Plug cord into the wall outlet first. - Page 10 SAFETY INSTRUCTIONS IMPORTANT SAFEGUARDS WARNING: This appliance has a polarized plug (one blade is wider than the other). To reduce the risk of electric shock, this plug is intended to fit into a polarized outlet only one way. If the plug does not fit fully into the outlet, reverse the plug.
- Page 11 To disconnect appliance, grasp plug and remove it from outlet. Before each use, inspect the power cord for cuts and/or abrasion marks. If any are found, this indicates that the appliance should be serviced and the power cord replaced. Please contact Chefman Customer Service. ®...
-
Page 12: Features
FEATURES Brewing chamber lid Shower head Water reservoir Brewing chamber Water gauge window Glass carafe Control panel Heating plate Reusable coffee filter Removeable filter holder... -
Page 13: Operating Instructions
OPERATING INSTRUCTIONS For best results, run the coffee maker through two brewing cycles with just water (directions follow) to remove any dust or residues from manufacturing and shipping. BEFORE FIRST USE Remove all packaging materials, such as plastic bags and stickers. Ensure you have all parts and accessories before discarding packaging. - Page 14 OPERATING INSTRUCTIONS Place the carafe with its lid closed on the heating plate. Press the On button. After the carafe has filled, turn off the coffee maker by pressing Off. Let cool for at least 10 minutes. Pour water out of carafe. Refill with fresh water, and repeat steps four through eight.
- Page 15 OPERATING INSTRUCTIONS HOW TO MAKE COFFEE Fill the carafe with fresh cold water to between the 4- and 12-cup lines, then pour the water into the water reservoir at the back of the brewing chamber. Place the carafe with its lid closed on the heating plate making sure it’s fully seated in the coffee maker.
- Page 16 OPERATING INSTRUCTIONS Press the On button. A red light below the time display will blink to indicate brewing has started; the light will continue to blink until the unit is turned off. CAUTION: Never open the brewing chamber during brewing as the hot steam, water, and coffee within can cause injury.
- Page 17 OPERATING INSTRUCTIONS HOW TO PROGRAM FOR AUTO BREWING Enjoy a fresh-made pot of coffee as soon as you wake up by programming the brewing to start automatically at your choice of time up to 24 hours in advance. Before programming, be sure current time is set on the coffee maker. Prepare coffee maker with ground coffee and water as if you are going to brew right away;...
- Page 18 OPERATING INSTRUCTIONS HOW TO USE THE PAUSE AND SERVE FUNCTION The pause and serve function interrupts coffee flow to let you pour a cup before brewing has finished. To pause the flow, simply remove the carafe from the heating plate any time during brewing. When returning the carafe, be sure to reposition it firmly against the back of the coffee maker for the flow to continue.
-
Page 19: Cleaning And Maintenance
CLEANING AND MAINTENANCE Allow the coffee maker to cool completely before cleaning. Lift the brewing chamber cover and shower head. Life the filter holder out by grabbing its two handles and lifting straight up. Remove and discard the used coffee grinds and paper filter, if using. Wash carafe/carafe lid, reusable filter, scoop, and filter holder in hot, sudsy water, or place in top rack of the dishwasher. - Page 20 CLEANING AND MAINTENANCE HOW TO DECALCIFY YOUR COFFE MAKER Calcium build-up frequently occurs in drip coffee makers. This build-up is normal and is caused by minerals commonly found in drinking water. We recommend decalcifying your coffee maker four times a year, and more often as needed.
-
Page 21: Coffee Making Tips
COFFEE MAKING TIPS For best results, use a medium-fine grind of coffee—too fine can clog the coffee filter—and don’t make less than four cups. For best flavor, consider using bottled or filtered water. Experiment with the amount of ground coffee used and adjust the amount to suit your taste. -
Page 22: Terms And Conditions
TERMS AND CONDITIONS Limited Warranty Our products are backed by a limited 1-year warranty. To register, follow the instructions on the Chefman Warranty Registration page in this User ® Guide. We offer a limited 1-year warranty from the date of purchase. This warranty is void without proof of purchase within the USA, Canada, or Mexico. - Page 23 Maintenance for information on proper maintenance. • Commercial Use - Damage that occurs from commercial use. • Altered Products - Damage that occurs from alterations or modifications by any entity other than Chefman ; removal of rating label. ® • Catastrophic Events - Damage that occurs from fire, floods, or natural disasters.
-
Page 24: Warranty Registration
MADE IN CHINA/FABRIQUE EN CHINE AC ONLY/ AC SEULEMENT NOTE: Label depicted here is an exmaple. How Do I Register my Product? We offer two convenient ways to access the Chefman registration form: ® Visit chefman.com/register Scan the QR code below to access site:... - Page 25 WARRANTIES OF ANY KIND IS REQUIRED BY ANY JURISDICTION, INCLUDING MERCHANTABILITY AND FITNESS FOR A PARTICULAR PURPOSE, THE DURATION OF SUCH IMPOSED IMPLIED WARRANTY IS LIMITED TO ONE (1) YEAR. THIS WARRANTY DOES NOT COVER, AND CHEFMAN ® SHALL NOT BE LIABLE FOR, INCIDENTAL, INDIRECT, SPECIAL OR CONSEQUENTIAL DAMAGES, INCLUDING WITHOUT LIMITATION, DAMAGE TO, OR LOSS OF USE OF THE PRODUCT, OR LOST SALES OR PROFITS OR DELAY OR FAILURE TO PREFORM THIS WARRANTY OBLIGATION.
- Page 26 ®...
Need help?
Do you have a question about the RJ14-12-RO and is the answer not in the manual?
Questions and answers