
Related Manuals for Gravely HVZ


Summary of Contents for Gravely HVZ
- Page 1 Owner/Operator Manual Model 915084 - 2350 915086 - 1840 ENGLISH FRANÇAIS ESPAÑOL 00672400A 9/06 Printed in USA...
-
Page 2: Table Of Contents
THE MANUAL PRODUCT REGISTRATION Before operation of unit, carefully and completely read your The Gravely dealer must register the product at the time of manuals. The contents will provide you with an purchase. Registering the product will help the company... -
Page 3: Safety
4. Review recommended lubrication, maintenance and DISCLAIMER adjustments. Gravely reserves the right to discontinue, change, and 5. Review Limited Warranty Policy. improve its products at any time without notice or obligation 6. Fill out a product registration card and return the card to to the purchaser. - Page 4 077541 Figure 2 4. WARNING! Look down and behind before and while backing. Always stand clear of discharge area. OL1804 OL1814 Do not operate mower unless bagger is attached OL1805 Never carry children. or guards are in operating position. OL1815 5.
- Page 5 Keep children, people, and pets away. Be alert and shut off • Understand location and function of all controls. unit if anyone enters work area. Keep children under • Never allow operation by untrained persons. watchful care of a responsible adult. •...
- Page 6 Disengage PTO when attachment is not in use and when NEVER allow children or others in or on towed equipment. crossing gravel surfaces. On slopes, the weight of the towed equipment may cause DO NOT operate unit if safety interlock system is damaged loss of traction and loss of control.
- Page 7 Battery posts, terminals and related accessories contain Mower blades are sharp and can cut you. Wrap the blade(s) lead and lead compounds, chemicals known to the State of or wear gloves, and use extra caution when servicing them. California to cause cancer and reproductive harm. Wash NEVER weld or straighten mower blades.
-
Page 8: Assembly
ASSEMBLY Check function of all controls WARNING: AVOID INJURY. Read and understand See OPERATION on page 10. the entire Safety section before proceeding. Tools Required • Adjustable wrench • Petroleum jelly or dielectric grease. Unpack Unit Remove unit and all other components from the shipping container. -
Page 9: Controls And Features
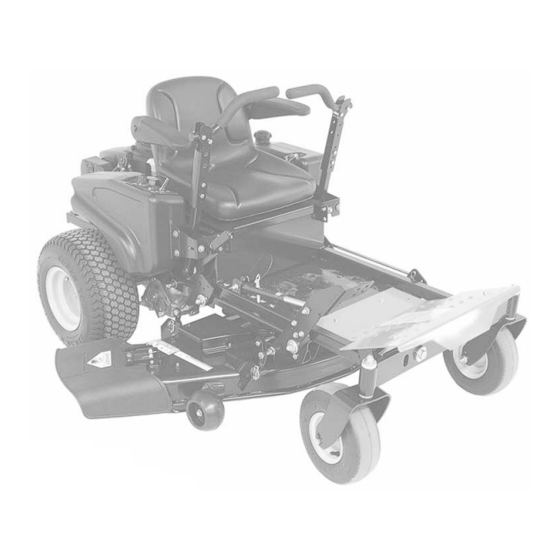
CONTROLS AND FEATURES 915084 915086 Figure 4 1. Throttle Lever 8. Mower Lift Pedal 2. Choke Control 9. Mower Deck 3. Ignition Switch 10. Discharge Chute 4. PTO Switch 11. Parking Brake 5. Seat 6. Steering Levers 7. Fuel Tank GB - 9... -
Page 10: Operation
See figure 4 for all controls and features locations. it is functioning properly. Perform the following tests to ensure the safety interlock system is working properly. If the unit does not perform as stated contact your Gravely dealer for repairs. Test Steering Lever Parking Brake... - Page 11 • Right (4) – Pull right steering lever back or push left Front Axle Locks steering lever forward or a combination of both. Install hardware to have a pivoting front axle. NOTE: To stop, return both steering levers to neutral. NOTE: The steering levers must be in the neutral position to Install hardware to have a start the engine.
-
Page 12: Maintenance Schedule
Stopping the Engine MOVING UNIT MANUALLY 1. Stop unit. WARNING: DO NOT disengage or bypass 2. Disengage PTO. transmission and coast downhill. 3. Set throttle lever to slow. 4. Turn ignition switch to off position and remove key. Disengage (2) transmission bypass levers to drive unit and 5. - Page 13 10). Check Parking Brake Engage parking brake and engage transmission bypass lever (see MOVING UNIT MANUALLY on page 12). Push unit. If unit rolls, contact your Gravely Dealer. Clean Unit Clean engine, battery, seat, mower deck, etc. of all dirt and debris. Do not use solvents, hard cleaners, or abrasives.
-
Page 14: Service And Adjustments
SERVICE AND ADJUSTMENTS MOWER DECK REMOVAL AND INSTALLATION WARNING: AVOID INJURY. Read and understand Remove (Figure 9) the entire Safety section before proceeding. 1. Remove PTO belt from electric clutch (see REPLACING PTO BELT on page 19). TIPPING SEAT FORWARD NOTE: Perform step 2 and 3 for the right and left side of unit. - Page 15 1. Rear Trunnion 4. Drag Link 2. PTO Belt 5. Front Trunnion 3. Mower Deck 6. Lift Arms Figure 9 Lowest Cutting Position LEVELLING AND ADJUSTING PITCH OF MOWER DECK NOTE: Adjust on a level surface, with the tires inflated to the correct air pressure (see SPECIFICATIONS on page 23).
- Page 16 The Forward Pitch Of The Mower Blades 2. Repeat step 1 as needed until all three measurements (Figure 11): are within the tolerances specified. • Should be 0.0 in. (0.0 mm) to 1/4 in. (6.35 mm) pitched forward. NOTE: This measurement must be taken when the mower blades ends are facing forward.
- Page 17 1. Remove mower blade from unit (see REPLACING MOWER BLADE on page 16). Gravely recommends having mower blades sharpened by a WARNING: Battery posts, terminals and related professional. Contact your Gravely dealer. accessories contain lead and lead compounds,...
- Page 18 3. Clean battery cable ends, negative (–) terminal, and Jump-Starting positive (+) terminal with a wire brush and rinse with a Gravely does not recommend jump-starting your unit. weak baking soda solution. Jump-starting can damage engine and electrical system 4. Connect positive (+) cable first, then negative (–) cable.
- Page 19 ADJUSTING STEERING LEVERS 1. Determine which way the unit turns. NOTE: The forward travel adjustment bolt adjusts the Adjusting Steering Lever Height (Figure 17) forward travel of the steering lever. The rear travel adjustment bolt adjusts the rearward travel of the steering lever.
-
Page 20: Storage
6. Remove PTO belt from mower deck and electric clutch. 4. Install belt covers on mower deck. REPLACING HYDROSTATIC BELT Remove (Figure 20) 1. Remove PTO belt (see REPLACING PTO BELT on page 19). 2. Disconnect Electric Clutch Connector from PTO. CAUTION: Use care when releasing idler spring tension. -
Page 21: Troubleshooting
5. Connect spark plug wire(s) or replace faulty. spark plug(s). Refer to Engine Manual for detailed instructions. 6. Faulty electrical system. 6. Contact your Gravely Dealer. 7. Faulty engine. 7. Contact your Gravely Dealer. Engine 1. Choke engaged. 1. Disengage choke. -
Page 22: Service Parts
REPLACING MOWER BLADE on page 16). ACCESSORIES SERVICE PARTS See your authorized Gravely dealer to add these optional Be sure to always use genuine Gravely parts to keep your accessories to your unit. unit running like new. Part no. Description Part No. -
Page 23: Specifications
SPECIFICATIONS Model Number 915084 915086 Model 2350 1840 Engine Type Kohler Engine Power – hp (kW) at Maximum RPM 23 (17.1) 18 (13.4) Governed RPM (May be different from maximum RPM) 3350 3400 Speed Forward Max. – m.p.h (km/h) 6.0 (9.6) Reverse Max. -
Page 24: Warranty
1000 hours of use, whichever comes first. An upon examination by the Ariens Company to be defective or authorized Gravely dealer will repair any defect in material or worn out. Replacements will be supplied free of charge. - Page 25 • Warranty service must be performed by a respective Ariens or Gravely authorized service representative. • Parts that are not genuine Ariens or Gravely brand service parts are not covered by this warranty. • To find an Ariens or Gravely authorized service representative, contact Ariens at: •...
- Page 26 GRAVELY A Division of Ariens Company 655 West Ryan Street P.O. Box 157 Brillion, WI 54110-0157 920-756-2141 Fax 920-756-2407 www.gravely.com...
Need help?
Do you have a question about the HVZ and is the answer not in the manual?
Questions and answers