Advertisement
- 1 Introduction
- 2 Safety information
- 3 Package Contents
- 4 Recommendations
- 5 Guarantee
- 6 Quick start guide
- 7 SHAPE 40
- 8 SHAPE 50
- 9 SHAPE 65
- 10 SHAPE TWIN
- 11 Installation
- 12 Audio Input Connections
- 13 Automatic Standby
- 14 Positioning
- 15 Stereo Positioning
- 16 Multichannel Positioning
- 17 Adjusting the Height of the Soundstage
- 18 Running In
- 19 Adjustments and Connections
- 20 Documents / Resources
Introduction
Thank you for purchasing a Focal product. We welcome you to our universe of high-fidelity sound. For 40 years, Focal has been designing, developing and manufacturing exceptional loudspeakers, and more recently, headphones. Our values are innovation, tradition, performance and pleasure. They will help you enter a new universe of emotion, to listen beyond sound. Wherever you are, our goal is to bring you together around a shared passion, rich, authentic sound. SHAPE loudspeakers are a professional audio monitoring system. These products have been designed to combine an impeccable sound image, high precision and wide frequency response in a compact format suitable for nearfield listening.

Please validate your Focal-JMlab warranty; it is now possible to register your product online: www.focal.com/warranty
A sample of this product was tested by an accredited independent laboratory in accordance with ISO/IEC 17025:2005. The laboratory declared it to be in compliance with European directives and other international standards as follows: Electromagnetic compatibility ANSI C63.4, KN35/CISPR20/EN55020, KN32/CISPR32/ EN55032, IEC/EN61000-3-2, IEC/EN61000-3-3, Electrical safety IEC/EN/K/J60065. Product meets DIRECTIVES EMC, RED, LVD, ErP, RoHS, REACH and WEEE and REGULATION (EC) No. 1275/2008.

Risk of electrical shock
Do not open
Do not expose to water or moisture
Safety information
- Read the instructions.
- Keep this manual.
- Respect the instructions.
- Follow the instructions.
- Do not expose this unit to rain or moisture.
- Clean only with a dry cloth.
- The ventilation should not be impeded by covering the ventilation openings with items, such as newspapers, table-cloths, curtains, etc.
- Allow a minimum distance of 5cm around the product for ventilation.
- Do not install near any heat sources such as a radiator, oven or other appliance that produces heat (including amplifiers).
- Use only the power cord provided. If this does not match your electrical outlet, contact an electrician to have it replaced.
- Protect the power cord to avoid walking on it or pulling it, especially near the electrical outlet.
- Only use accessories specified by the manufacturer or those supplied with the unit. Use with care.
- Unplug this unit during storms or long periods out of use.
- Refer all servicing to qualified personnel. Repair will be necessary, for example, in cases of damage to the power cord or plug, spilled liquids or collision between another object and the unit, or if the unit is exposed to rain or develops mould, or if it does not work correctly or, finally, if it is subject to a fall.
![]() to reduce the risk of fire or electrical shock, this unit must not be exposed to rain or moisture. No object containing water, such as a vase, may be placed on it.
to reduce the risk of fire or electrical shock, this unit must not be exposed to rain or moisture. No object containing water, such as a vase, may be placed on it.![]()
this product is a Class 1 device. Connect the unit only using the supplied power cord incorporating a connection to ground.- Protective earthing terminal. The apparatus should be connected to a mains socket outlet with a protective earthing connection.
![]()
![]() The plug and/or the power adapter is/are used to disconnect the system, the power cord has to be easily reachable.
The plug and/or the power adapter is/are used to disconnect the system, the power cord has to be easily reachable.- No naked flame sources, such as lighted candles, should be placed on the apparatus;
- Do not use this apparatus in tropical climates.
![caution]() The lightning flash represented by the arrow symbol in an equilateral triangle is intended to alert users to the presence of high voltage within the unit that could cause an electrical shock hazard.
The lightning flash represented by the arrow symbol in an equilateral triangle is intended to alert users to the presence of high voltage within the unit that could cause an electrical shock hazard.

 The plug and/or the power adapter is/are used to disconnect the system, the power cord has to be easily reachable.
 The lightning flash represented by the arrow symbol in an equilateral triangle is intended to alert users to the presence of high voltage within the unit that could cause an electrical shock hazard.
The exclamation mark in an equilateral triangle is intended to alert users to the existence of important instructions in the manual relating to the use and maintenance of the unit.
Our policy of continual product improvement means that Focal-JMlab reserves the right to modify the technical specifications of its products without notice. Product may vary from images.
Package Contents
In addition to this manual, your loudspeaker is supplied with the following:
- 1 power supply cord
- 4 adjustable spikes
- 1 protective grille for the tweeter (we advise it to be removed for listening as soon as possible)
- 1 protective grille for the woofer (we advise it to be removed for listening as soon as possible)
- The Shape Twin loudspeaker is supplied with two protective grilles for the two woofers.
- 1 guarantee card
Check that none of these items is missing and remove all accessories from the packaging. To avoid damage to your products during unpacking, please unpack in the following order: completely open the flaps on the cardboard packaging. Fold them back over the sides. Remove the upper protective packing. Carefully lift the loudspeaker. Check the packaging for any signs of damage. If you find any damage, inform the carrier and supplier. It is important to keep the packaging in good condition for possible future use.
Recommendations
We would like to emphasise that high sound pressure can be generated by your products, particularly in 5.1 configuration. As their distortion level is low and the level of user fatigue is minimal, it is not always easy to be aware of the real sound pressure. Do not forget that exposure to high sound pressures for more than a certain time can lead to irreversible hearing loss.
Guarantee
SHAPE loudspeakers are guaranteed for parts and labour for a period of two years within member countries of the European Union from the date of delivery to the end customer. For countries outside the European Union, please refer to the law in force in each country. During the guarantee period, Focal will repair or exchange a defective product, provided that it is returned carriage paid to an approved Focal dealer. Damage caused by modifications to the product, accidents, negligence or misuse are not covered by the guarantee. For more information, please contact your local dealer or distributor.
Quick start guide
- Before you start, make sure the loudspeakers and audio source (console, etc.) are in the off position and that all controls on the rear of the loudspeakers are set to position 0.
- Connect the audio signal from the source to the loudspeakers using the XLR and/or RCA inputs.
![warning]()
You can connect up to two sources to each loudspeaker using the two inputs available.
Both inputs (XLR and RCA) are active simultaneously.
- Check the voltage shown on the 'Voltage Selection' switch located on the rear panel matches the voltage of your area. If it does not match, do not connect the loudspeakers to mains power and contact your dealer or distributor. Use the provided power cord to connect the loudspeaker to mains power.
- Switch the audio source on and check the output sound level from the audio source connected to the loudspeaker is set to
![]() or to a very low level.
or to a very low level. - Switch the loudspeakers on. The loudspeakers are now in 'Standby' mode.
- Increase the audio source level until the loudspeakers detect the signal, automatically putting the loudspeakers into 'On' mode.
![warning]() After the loudspeakers have been switched on and after automatic activation of standby mode (see information on this function), the loudspeaker's audio signal detection circuit will change the loudspeaker from 'Standby' to 'On' after a few seconds.
After the loudspeakers have been switched on and after automatic activation of standby mode (see information on this function), the loudspeaker's audio signal detection circuit will change the loudspeaker from 'Standby' to 'On' after a few seconds.
- Once you have finished your recording, mixing or mastering session, we recommend that you switch your equipment off in the following order:
- Switch off the loudspeakers.
- Switch audio sources off.
SHAPE 40
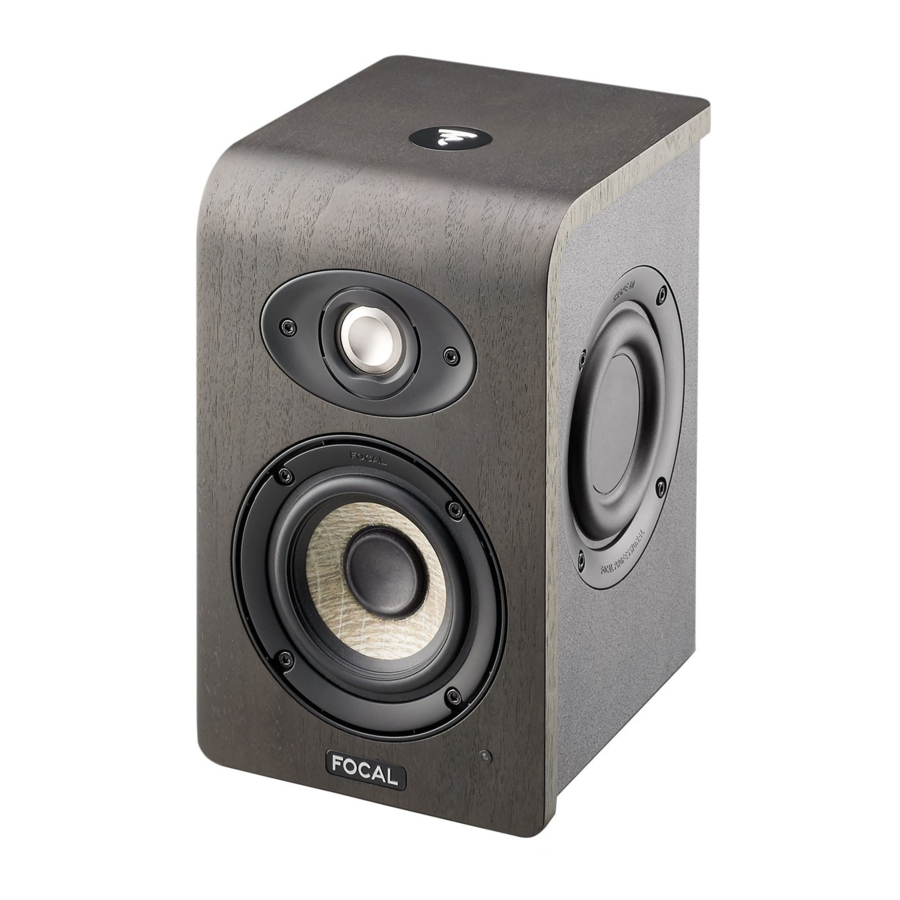
The SHAPE 40 loudspeaker is a professional nearfield monitor loudspeaker with two active channels (two internal amplifiers), composed of one 4" (10cm) low/midrange flax sandwich membrane loudspeaker driven by two passive side radiators and one 'M' profile Aluminum- magnesium tweeter (fig. A).

Fig. A
SHAPE 50
The SHAPE 50 loudspeaker is a professional nearfield monitor loudspeaker with two active channels (two internal amplifiers), composed of one 5" (13cm) low/midrange flax sandwich membrane loudspeaker driven by two passive side radiators and one 'M' profile aluminum- magnesium tweeter (fig. B).

Fig. B
SHAPE 65
The SHAPE 65 loudspeaker is a professional nearfield monitor loudspeaker with two active channels (two internal amplifiers), composed of one 6.5" (16.5cm) low/midrange flax sandwich membrane loudspeaker driven by two passive side radiators and one 'M' profile aluminum-magnesium tweeter (fig. C).

Fig. C
SHAPE TWIN
The SHAPE TWIN loudspeaker is a professional 2.5-way active nearfield monitoring loudspeaker (with three internal amplifiers), composed of two 5" (13cm) flax sandwich cone speaker drivers driven by two lateral passive radiators, and one M-shaped Aluminium-Magnesium inverted dome tweeter. The loudspeaker's lower speaker driver reproduces frequencies between 40Hz and 180Hz, whereas the upper speaker driver reproduces frequencies between 40Hz and 2.5kHz (Fig. D).

Fig. D
Installation
 Mains Power Supply
It is essential that your products have a ground connection using the power cord supplied.
Audio Input Connections
You can connect up to two audio sources using the XLR and/or RCA connectors.
With the XLR connector it is possible to connect a balanced signal source. It uses a standard cabling scheme:
Pin 1 - ground (shield)
Pin 2 - hot connection (in-phase signal)
Pin 3 - cold connection (phase-inverted signal)
The RCA connection enables connection from an unbalanced signal source. It is customary to link the 'cold' connection (Pin 3) to ground (Pin 1). This connection is usually made at the cables.

You can connect up to two sources to each loudspeaker using the two inputs available. Both inputs (XLR and RCA) are active simultaneously. In order to draw the greatest benefit from this feature, we recommend switching on just one of the two sources to avoid undesired signal noise. Furthermore, we invite you to switch your sources on and off after switching your monitor loudspeakers off.
Automatic Standby
SHAPE monitors are equipped with a 'Standby' mode. When they are switched on, 'Standby' mode is active. To deactivate it, send an audio signal to the monitor, gradually increasing the sound level of the audio source. After approximately 30 minutes without receiving an audio signal, the monitors automatically go into 'Standby' mode. In 'Standby' mode, their power consumption is less than 0.5W.
Positioning
SHAPE loudloudspeakers are nearfield monitor loudspeakers and should be positioned between 40 cm and 2 metres from and facing the listener. They are perfectly suited to being placed on top of a mixing console or on appropriate stands, be mindful that in every case it is strongly recommended that the height of the tweeter should be relatively close to that of the listener's ears. If necessary, it is perfectly acceptable to turn the loudspeakers over from the normal position and have the tweeter at the bottom in order to meet this rule. SHAPE loudspeakers must be positioned vertically, facing the listener (figs. E and F).

Once you have decided on positioning, you have 4 height adjustable decoupling spikes. These spikes enable you to significantly reduce the mechanical coupling of the loudspeakers to the surface on which they rest. They also make it possible to adjust the vertical orientation of the loudspeakers (fig. G). The spacing and left/right orientation of each loudspeaker allows you to control the width, centring and overall coherence of the soundstage (left/centre/right), the basis of the precision of your recordings.

Stereo Positioning
We recommend that you position the loudspeakers in such a way as to make an equilateral triangle. The 3 points of the triangle are the listening position, the right-hand loudspeaker and the left-hand loudspeaker (fig. H).

Multichannel Positioning
For a 5.1 installation, we recommend that you position the loudspeakers in a circle so in order to have them equidistant from the listening point. The centre channel will be at 0°, the right front channel at 30°, the right rear channel at 110°, the left rear channel at 250° and the left front channel at 330° (fig. I).

Adjusting the Height of the Soundstage
If the loudspeakers are placed higher than your listening position, we invite you to adjust the height of the decoupling spikes located at the rear of the loudspeaker (figs. J and K).

If the loudspeakers are positioned lower than the listening position, go through the same adjustment procedure, this time using the two decoupling spikes located on the front of the monitor.
Running In
The transducers used in SHAPE loudspeakers are complex mechanical assemblies which need a period of running in to operate at their best and to become acclimatised to the temperature and humidity conditions of your environment. The length of time this takes can vary according to circumstances, sometimes extending over several weeks. Avoid listening to the loudspeakers at high volume levels during their first hours of use. To speed this process up, we recommend you operate the different products for about 20 hours at medium volume, on musical programmes that are rich in low frequencies. Once the characteristics of the transducers have been stabilised, you will able to enjoy the performance of your Focal products to the full.
Adjustments and Connections
BALANCED
With the XLR connector it is possible to connect a balanced signal source. It uses a standard cabling scheme:
Pin 1 - ground (shield)
Pin 2 - hot connection (in-phase signal)
Pin 3 - cold connection (phase-inverted signal)
This input has a sensitivity of +4 dBu to match the sensitivity of balanced sources.
UNBALANCED
The RCA connection enables connection from an unbalanced signal source. It is customary to link the 'cold' connection (Pin 3) to ground (Pin 1). This connection is usually made at the cables. This input has a sensitivity of -10 dBV to match the sensitivity of unbalanced sources. The unbalanced input has 12 dB greater sensitivity than the balanced input.
HPF
The HI-PASS FILTER control is to switch on or off the 12 dB/octave high pass filter. It is recommended to set it to FR (full range: high pass filter deactivated) when the loudspeakers are used in 2.0 stereo configuration. Shape 40 has a 2-position switch: FR and 80 Hz. Shape 50, 65 and Twin have a 4-position switch: FR, 45, 60 and 90 Hz. It is recommended to use positions 45, 60, 80 (Shape 40) or 90 Hz if a system is used with one or more subwoofer(s) or if the listening room tends to strongly increase the lower frequencies.
ON/OFF
The ON/OFF control is for switching the power supply to the internal amplifiers on and off. Moving it from the OFF to the ON position has the effect of putting the loudspeaker on 'Standby'. To deactivate 'Standby' mode, send an audio signal to the loudspeaker, which will detect it and move automatically from 'Standby' to 'On'.
LF SHELVING
The LF SHELVING potentiometer is to activate or not a sound level correction below 250 Hz. We advise that you adjust the LF SHELVING potentiometer to +2 or +3 dB when the acoustics of the listening room naturally attenuate this frequency range. We advise that you adjust the LF SHELVING potentiometer to 0 when the listening room is acoustically neutral. We advise that you adjust the LF SHELVING potentiometer to -2, -4 or -6 dB when the loudspeakers are placed close to a wall or corner.
LMF EQ
The LMF EQ potentiometer is to activate or not a sound level correction at a centre frequency of 160 Hz for a Q factor of 1. It is advised to set the potentiometer to -1, -2 or -3 dB when the loudspeakers are placed on a table, console bridge or any other support that causes reflections.

HF SHELVING
The HF SHELVING potentiometer is to activate or not a sound level correction above 4.5 kHz. We advise that you adjust it to +2 dB when the acoustic of the listening room naturally attenuates this frequency range (acoustically dead environment). We advise that you adjust it to 0 when the listening room is acoustically neutral. We advise you to adjust it -2 or -3 dB when the acoustics of the listening room naturally increases this frequency range (bright environment).

MAINS POWER CONNECTOR
Plug the supplied power cord into this connector.
WALL OR CEILING MOUNTING
The attachment points enable you to mount your Shape studio monitors to the wall or to the ceiling. The Shape 40 studio monitor is supplied with a plate so that it can be used with K&M® accessories. The centre-to-centre distance is 23/4" (70 mm) for the Shape 40, 50, 65 and Twin. Use M6 screws.
MOUNTING TO A TABLE STAND OR A MICROPHONE STAND
The fastening point underneath the Shape 40 and Shape 50 is for mounting the loudspeaker to a table stand or a microphone stand.
The format required is BSW 3/8".
LED ON THE FRONT PANEL
The LED on the front panel is off when the loudspeaker is set to OFF. When the ON/OFF switch is flipped from OFF to ON, the LED lights up green. When an audio signal is detected, the loudspeaker switches from 'Standby' to 'On' and the LED lights up green. After approximately 30 minutes without detecting an audio signal, the loudspeaker automatically switches to 'Standby' to avoid unnecessary power consumption and the LED lights up red. In 'Standby' mode, power consumption is less than 0.5 W. To exit this mode, send an audio signal to the loudspeaker. It takes a few seconds for the loudspeaker to switch from 'Standby' to 'On'.
See the diagram below for more information on fixing mechanisms.
See the table below for references of compatible K&M® products.
| Wall mount | Ceiling mount | Table stand / microphone stand | |
| Shape 40 | Fixing kit K&M® 24471 | Fixing kit K&M® 24496 | Fixing kit K&M® 232 |
| Shape 50 | Fixing kit K&M® 24471 + K&M® 24359 adapter | Fixing kit K&M® 24496 + K&M® 24359 adapter | Fixing kit K&M® 232 |
| Shape 65 | Fixing kit K&M® 24471 + K&M® 24359 adapter | Fixing kit K&M® 24496 + K&M® 24359 adapter | - |
| Shape TWIN | Fixing kit K&M® 24471 + K&M® 24359 adapter | Fixing kit K&M® 24496 + K&M® 24359 adapter | - |

| System | SHAPE 40 | SHAPE 50 | SHAPE 65 | SHAPE TWIN | |
| 60Hz - 35kHz | 50Hz - 35kHz | 40Hz - 35kHz | 40 Hz - 35 kHz | |
| 102dB SPL (pic @ 1m) | 106dB SPL (pic @ 1m) | 109dB SPL (pic @ 1m) | 110,5dB SPL (pic @ 1m) | |
| Electronic section | |||||
| Type | XLR: balanced 10kOhms | |||
| Connectors | RCA: unbalanced 10kOhms with sensitivity compensation | ||||
| 25W, class AB | 60W, class AB | 80W, class AB | 2 x 80W, class AB | |
| 25W, class AB | 25W, class AB | 25W, class AB | 50W, class AB | |
| Standby on | After approximately 30 minutes with no signal | |||
| Standby off | Signal detection > 3 mV | ||||
| Voltages | 220-240V (T500mAL / 250V fuse) or 100-120V (T1.6AL / 250V fuse) | 220-240V (T800mAL / 250V fuse) or 100-120V (T1.6AL / 250V fuse) | 220-240V (T1AL / 250V fuse) or 100-120V (T2AL / 250V fuse) | 220-240V (fuse T2AL / 250V) or 110-120V (fuse 3,15AL / 250 ) |
| Connection | IEC plug and detachable power cord | ||||
| High pass filter | Adjustable Full range / 80Hz | Adjustable Full range 45/60/90Hz | ||
| Bass (0 - 250Hz) | Adjustable, +/-6dB | ||||
| Midrange/bass (160Hz, Q=1) | Adjustable, +/-3dB | ||||
| High (4.5 - 35kHz) | Adjustable, +/-3dB | ||||
| Power On/ Power Off | On/off switch on rear panel | ||||
| < 0.5W | ||||
| LED for power on/off and standby | ||||
| Transducers | |||||
| 10cm (4") Flax cone | 13cm (5") Flax cone | 16,5cm (6.5") Flax cone | 2 x 13cm (5") Flax cone | |
| 25mm (1") 'M' profile Aluminum-Magnesium | ||||
| Cabinet | |||||
| 0.5" (12mm) MDF | 0.6" (15mm) MDF | |||
| Vinyl, real walnut and black paint | ||||
| 257 x 161 x 200mm (10.1 x 6.3 x 7.9") | 312 x 191 x 242mm (12.3 x 7.5 x 9.5") | 355 x 218 x 285mm (14 x 8.6 x 11.2") | 478 x 211 x 279mm (18.8 x 8.3 x 11") | |
| 5kg (11lb) | 6,5kg (14.3lb) | 8,5kg (18.7lb) | 11kg (24lb) | |

Documents / Resources
References
Download manual
Here you can download full pdf version of manual, it may contain additional safety instructions, warranty information, FCC rules, etc.
Advertisement


Need help?
Do you have a question about the SHAPE 40 and is the answer not in the manual?
Questions and answers