
Related Manuals for CPS SCA36KTL-DO/US-480


Summary of Contents for CPS SCA36KTL-DO/US-480
- Page 1 CPS SCA Series Grid-tied PV Inverter CPS SCA36KTL-DO/US-480 CPS SCA50KTL-DO/US-480 CPS SCA60KTL-DO/US-480 Installation and Operation Manual - Rev 4.0 CHINT POWER SYSTEMS AMERICA CO. Revision 4.0 – June 2023...
- Page 2 Revision History Rev. Chap/Sec Description Date Initial Release Aug 2016 H4 Wirebox, Operating Mode Sep 2016 H4 Termination, AC Terminal Feb 2017 3, 5, 7, 8 AC Terminal, Parameters, Sept 2017 Troubleshooting, Accessories 3, 5, 6, 10 Increased kVA Ratings Feb 2018 ...
- Page 3 Updated Tigo and APS types; August, 2022 Added CPS SCA36KTL- DO/US-480; 2.11 Updated register parameters 3.3.3.5 Updated datasheet Added Tigo RSS Transmitter 3.3.3.1 Changed DC Input Feb., 2023 Specifications 3.3.3.5 Deleted the specific DC Connection for 36kw wirebox ...
-
Page 4: Table Of Contents
Table of Contents BEFORE YOU START ................. 1 IMPORTANT SAFETY INSTRUCTIONS ..........3 OVERVIEW ..................9 NVERTER FOR GRID TIED SYSTEMS .............. RODUCT EATURES ..................RODUCT ROTECTION AND UNCTIONS ............): ........12 MART NVERTER UNCTIONS DEFAULT STATE PPEARANCE AND ESCRIPTION .......... - Page 5 3.3.4 AC and Ground Connection ..........52 3.3.5 AC Connections ..............54 OMMUNICATION ONNECTION ..............3.4.1 Description of the Communication Board ......60 3.4.2 RS485 Communication ............60 3.4.3 RS485 Network Set-up ............61 3.4.4 Communication Wiring ............62 USER INTERFACE ................64 LCD P ESCRIPTION OF ANEL .................
- Page 6 ON/OFF ................ 111 OWER 6.3.1 Manual Power ON/OFF ............. 111 6.3.2 Automatic Turn ON/OFF ............ 111 ISTORY ECORD ..................EVICE NFORMATION .................. TART P ...................... OWN ....................PERATION ODE ..................TIED OWER ENERATION ..............6.10 IRMWARE PGRADE ................... FAULT SHUTDOWN AND TROUBLESHOOTING ......119 LED F AULT AND ROUBLESHOOTING ............
- Page 7 TECHNICAL DATA ................ 139 10.1 ATASHEET ....................10.2 EASUREMENT OLERANCES ................ 10.3 RODUCTION RAPHS .................. 10.3.1 High Temperature Derating Graph ........ 143 10.3.2 Altitude Derating Graph ..........142 10.3.3 Grid Voltage Derating Graph ......... 143 10.3.4 PV Voltage Derating Graph ........... 144 10.3.5 Reactive Power Capability ..........
-
Page 8: Before You Start
This Installation and Operation manual contains important information, safety guidelines, detailed planning and setup information for installation, as well as information about configuring, operating and troubleshooting the CPS SCA36KTL-DO/US-480, CPS SCA50KTL-DO/US-480 and CPS SCA60KTL- DO/US-480 3-Phase String Inverters. Here after in this manual this equipment may be referred to simply as the inverters. - Page 9 If you encounter any problems during installation or operation of this unit, first check the user manual before contacting CPS Customer Service. This user manual is applicable for the following models:...
-
Page 10: Important Safety Instructions
Important Safety Instructions (SAVE THESE INSTRUCTIONS) Please read this user manual carefully before installation of the inverter. CPS reserves the right to refuse warranty claims for equipment damage if the user fails to install the product according to the instructions in this manual. - Page 11 Warnings and Markings on the product CAUTION: Risk of electric shock from energy stored in capacitor. Do not remove cover until 5 minutes after disconnecting all sources of supply. CAUTION: Risk of electric shock, do not remove cover. No user serviceable parts inside.
- Page 12 Warnings and Markings on the product (cont'd) WARNING: For continued protection against risk of fire, replace only with same type and ratings of fuse. WARNING: HAZARDOUS VOLTAGE AREA UNDER THE PLASTIC COVER. DO NOT OPEN FUSE HOLDERS UNDER LOAD! PERSONAL PROTECTIVE EQUIPMENT MUST BE USED/WORN BEFORE ACCESSING FUSES! DO NOT OPEN FUSE HOLDERS IF BYPASS TERMINALS ARE INSTALLED!
- Page 13 The inverters are to be installed with floating or ungrounded PV arrays only. CAUTION: The main enclosure of CPS SCA36/50/60KTL-DO/US-480 inverters weigh approximately 56kg (123.5 pounds). The wirebox portion weighs approximately 15kg (33 pounds). Ensure the mounting bracket is properly installed before hanging the inverter and wirebox on the bracket.
- Page 14 INSTRUCTION: Please check with your local electric utility supply company before selecting a grid standard. If the inverter is operated with an incorrect grid standard, the electric utility supply company may cancel the interconnection agreement. Placing the inverter into operation before the overall system complies with the national codes, rules and safety regulations of the application is also not permitted.
- Page 15 WARNING: The DC Switch is rated to break loads under normal operating conditions. However, a DC short circuit could be hazardous, and the following procedures should be followed before turning OFF the DC Switch under fault conditions. If there is a fault and it is safe to access the inverter: 1.
-
Page 16: Overview
Overview INSTRUCTION: The contents of following sections are applicable to all the CPS SCA36/50/60KTL-DO/US-480 3-Phase transformerless string inverters. 2.1 Inverter for grid-tied PV systems CPS SCA36/50/60KTL-DO/US-480 3-Phase transformerless string inverters are designed for use with an UNGROUNDED PV array in carport, commercial rooftop, and large utility scale PV grid-tied systems. -
Page 17: Product Features
Power rating to +/-0.91 PF, and optional local or remote Active Power Curtailment. ▪ Flexible Communication: Supports standard CPS Modbus RS485, SunSpec Modbus, and HTTPS/XML communications via FlexOM gateway card to ensure compatibility with 3rd party monitoring and control systems. -
Page 18: Product Protection And Functions
▪ High Protection Degree: Powder coated aluminum NEMA 4X enclosure meets the demanding needs of both indoor and outdoor use. ▪ Intelligent Integration: Integrated DC/AC disconnect switches, and up to 15 fused string inputs eliminate the need for external DC combiner boxes, simplifying installation and the need for DC BOS equipment. -
Page 19: Smart Inverter Functions ( Default State )
2.4 Smart Inverter Functions: The CPS SCA36/50/60KTL-DO/US-480 3-Phase String Inverters employ Smart Inverter (Grid Support) Functions in compliance with UL1741, SA8-SA18 and UL1741-SB standards. The default activation status is indicated below. Smart Inverter Function IEEE1547-2018 Rule 21 ISO-NE Anti-islanding Enabled... -
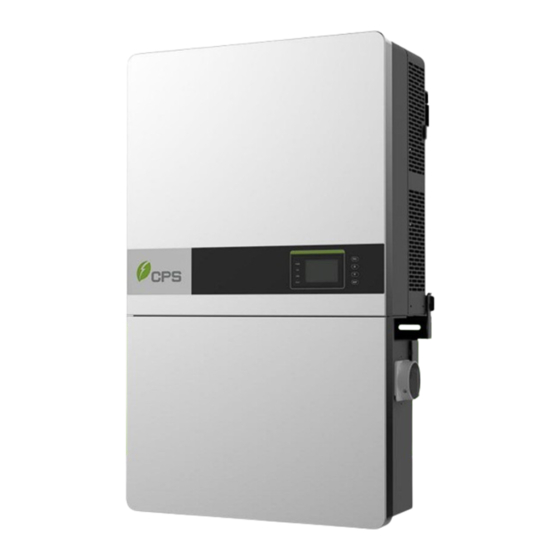
Page 20: Appearance And Main Item Description
Appearance and Main Item Description Figure 2-2 Diagram of the Inverter Assembly Main Items of the Inverter: ① Main inverter enclosure ⑥ User LCD display ② Inverter wirebox ⑦ User Key buttons ③ Inverter mounting bracket ⑧ DC switch: DC power on/off ④... -
Page 21: Schematic Diagram And Circuit Design
2.6 Schematic Diagram and Circuit Design The basic electrical schematic diagram of the CPS SCA36/50/60KTL- DO/US-480 3-Phase String Inverters are shown in Figure 2-3 and Figure 2- 4. The input from PV source circuits passes through surge protection circuitry, DC EMI wave filters, and independent DC-DC boost circuitry to achieve maximum power point tracking and boost the voltages to a common DC bus. - Page 22 APS RSD-S- PLC/RSD-D products meet 2017/2020 rapid shutdown requirements. The negative fuses have been removed from this model in accordance with NEC 2017/2020 690.9(C). Figure 2-4 CPS SCA36/50/60KTL-DO/US-480 Inverter Schematic, RSD Wirebox...
-
Page 23: Anti-Islanding Detection
2.7 Anti-Islanding Detection The CPS SCA36/50/60KTL-DO/US-480 3-Phase String Inverters include Unintentional Islanding detection as required by UL 1741/IEEE 1547. The inverter will continuously make bi-directional perturbations to the frequency of the output current by injecting a small amount of reactive power to detect a possible islanding condition. -
Page 24: Dc Arc-Fault Protection
2.10 DC Arc-fault Protection The inverters include DC Arc-fault detection compliant with UL 1699B. The inverter will detect electrical noise that is indicative of a DC series arc. Upon detection of an arc-fault, the inverter will cease operation. 2.11 Module-Level Rapid Shutdown The RSD version of the inverter wirebox includes a Sunspec powerline communication transmitter for use with following rapid shutdown listed below. -
Page 25: Installation
Installation INSTRUCTION: The contents of the following sections are applicable to all the CPS SCA36/50/60KTL-DO/US-480 3-Phase transformerless string inverters. Their mounting procedures are the very same, electrical connection methods are almost the same, the different points will be introduced separately. - Page 26 For the AC terminal block M8 Flat washer For the AC terminal block M8 Spring washer For the AC terminal block Phillips screw Spare (for wire-box cover) INSTRUCTION: Additional accessories for the CPS 36/50/60kW inverters are available and can be purchased separately.
-
Page 27: Recommendations Before Installation
All conduit entries must be sealed to prevent moisture ingress. o Sealing conduits at the other end will provide additional protection – firestop putty may be used. NOTICE: The allowable ambient temperature ranges for the CPS SCA36/50/60KTL-DO/US-480 3-Phase String Inverters are defined based on the following conditions: Condition 1: -40°C to 70°C, Inverter not installed, and in storage (in... - Page 28 PRE-INSTALLATION CHECKLIST ✓ Check that the inverter environmental specifications (protection degree, operating temperature range, humidity and altitude, etc.) meet the requirements of the specific project location. ✓ Make sure that the electric utility grid voltage is within range for the grid standard chosen.
- Page 29 Without inspection, customers will run the risk of having inverter electronic circuit damage when power is applied to inverter during startup. It is advised that customers contact CPS for further advice and to arrange schedule for CPS service personnel to perform inspection of inverter on site.
-
Page 30: Mechanical Installation
15° from horizontal. (c) When tilted backward at ≤75° from horizontal in an outdoor environment, the CPS Shade Cover (SSC-60ST) accessory is required to be installed. See Section 9.2 for more information. (d) Do not mount the inverter leaning forward. - Page 31 SHADE COVER >15 b.) SHADE COVER REQUIRED a.) NO SHADE COVER REQUIRED c.) NOT > 90° TILTED FORWARD d.) NOT UPSIDE DOWN Figure 3-2 Inverter Mounting Options...
-
Page 32: Installation Space Requirement
NOTICE: When the inverter is mounted tilted backward at ≤75° from horizontal in an outdoor environment, the CPS Shade Cover (SSC-60ST) accessory must be installed on the inverter to avoid direct sunlight. NOTICE: The spacing between two adjacently mounted inverters must be ≥19.7in (500mm). - Page 33 ≥16in (406mm) provided a baffle is installed. Installing an aluminum or galvanized steel baffle (Not supplied by CPS) with the dimensions detailed above is intended to divert or deflect warm exhaust air from entering the adjacent inverter.
- Page 34 8in. 24in. 12in. 12in. 12in. Figure 3-5 Inverter Pillar or Column Mounting Dimensions INSTRUCTION: If the inverter is installed on a pillar or column (instead of solid wall), the space from the bottom of one inverter to the top of the inverter below may be as small as 11.8in (300mm).
- Page 35 12" 12" 14" WALL OR PASSIVE CABINET BAFFLE MUST: 1. EXTEND 8” MIN. ABOVE AND BELOW FANS 2. EXTEND 4" MIN. PAST FRONT OF INVERTER 3. LOCATED 7" MIN. FROM BOTH INVERTERS...
-
Page 36: Mounting The Inverter Onto The Bracket
3.2.4 Mounting the Inverter onto the Bracket Step 1 Locate and mark the 8 holes on the wall, PV racking structure, or bearing surface for attaching the inverter mounting bracket as shown in Figure 3-6. Figure 3-6 Dimensions of the Bracket Anchoring Holes for Mounting (a) PV Racking Mount: Locate holes or anchors at the marked positions;... - Page 37 (b) Concrete Wall Mount: Drill holes at the marked positions with a 0.4in. (10mm) masonry bit and insert M8 Expansion Anchors into the holes (expansion anchors not provided); Fasten the Mounting Bracket with the M8x25 Assembling Bolts (not supplied). Figure 3-7 and Figure 3-8.
- Page 38 Figure 3-10 and mount it onto the bracket. CAUTION: The main enclosure of the CPS SCA36/50/60KTL-DO/US-480 3- Phase String Inverters weighs approximately 56kg (123.5 pounds). Ensure the mounting bracket is properly installed and secured before hanging the inverter on the bracket.
- Page 39 Figure 3-10 Grab Handle Position Step 3 Install the wirebox: Remove the cover plate at the bottom of the main enclosure. Tool required: No. 2 Phillips head screwdriver Figure 3-11 Main Enclosure Cover Plate...
- Page 40 Remove screws securing the bulkhead cover at the top of the wirebox – COVER IS NOT WATER-TIGHT. Figure 3-12 Wiring Bulkhead Cover Save the bulkhead cover and screws, and attach the cover to the left side of the wirebox after the wirebox is attached to the inverter enclosure.
- Page 41 Figure 3-13 Installation of the Wiring Box Step 5 Attach the main enclosure and the wiring box to the mounting bracket with the M6x18 screws (6 pcs). (see Figure 3-14). Tool required: No.3 Phillips head screwdriver, torque value of 4N.m (35.4in-lbs) Figure 3-14 Secure the Main Enclosure and Wiring Box to the Bracket...
- Page 42 Step 6 Attach the bulkhead cover shown in Figure to the left side of the 3-12 wiring box. (See Figure ). Tool required: No. 2 Phillips head screwdriver, 3-15 torque value of 1.6N.m (14.2in-lbs) Figure 3-15 Attach the Cover to the left side of the Wiring Box Step 7 Optional - Install an anti-theft padlock when the installation is complete.
- Page 43 Figure 3-16 Location of the Anti-Theft Padlock The anti-theft padlock should meet the dimensional requirements shown in Figure 3-17. Recommended lock size: A: Shackle diameter 3~6mm B: Shackle width 20~50mm C: Shackle height 20~50mm Figure 3-17 Dimensions of Anti-Theft Padlock Shackle...
-
Page 44: Electrical Installation
Array sizing tool is available for download at http://www.chintpowersytems.com and is obtainable by selecting the Product Downloads link to acess the CPS String Sizing tool. This is an optional design tool to help guide designers by matching the PV panel type and quantity to the inverter’s power rating. - Page 45 Step 1 Use a No. 3 Philips head screwdriver to remove the 4 screws on the wiring box and remove the cover. (See Figure 3-19) Figure 3-19 Removing the Wiring Box Cover To reinstall the cover, replace cover and align the screws. Use a No.
-
Page 46: Wiring Boxes
3.3.2 Wiring Boxes ④ ① ② ③ ② ③ Figure 3-20 Conduit Knock-out Locations on the wirebox ① Three Knock-outs for DC inputs, 1-1/2 inch Trade Size (1.98" Dia) on a removable gland plate for custom size conduit (i.e. when use of 2 inch or 2-1/2 inch Trade Size conduit is required) –... - Page 47 Figure 3-21 Internal Connection Points within the Standard wirebox Figure 3-22 Internal Connection Points within the RSD wirebox ⑤ DC Input fuse holder/terminal ⑥ DC SPD (Surge Protective Device) ⑦ Internal ground terminal(s) ⑧ AC output terminal block ⑨ Negative DC input busbar ⑩...
-
Page 48: Dc Connection
3.3.3 DC Connection 3.3.3.1 Working mode These inverters are factory configured with three MPPTs which are electrically divided into separate PV input zones: PV Input-1, PV Input-2, and PV Input-3. Each 5-string PV input zone operates as a separate and independent Maximum Power Point Tracker (MPPT). Independent mode can be very useful for sites with partial shading of the array or with arrays consisting of different tilt or azimuth. - Page 49 Table 3-3 DC Input Specifications (Independent Mode) Specification (Independent Mode - per MPPT) SCA60KTL- Model SCA50KTL- SCA36KTL- DO/US-480 DO/US-480 DO/US-480 33kW 33kW 22.44kW (Combined ≤ (Combined ≤ (Combined ≤ Max PV Power 90kW) 90kW) 61.2kW) Max PV Voltage 1000Vdc Start-up 330 / 80W Voltage / Power Operating Voltage...
- Page 50 AFCI and may increase the possibility of false DC Arc-Fault trips. Setting to Parallel Mode must be approved in advance by CPS and must be performed by a CPS Service Technician. Contact CPS Customer Service for further information. Select the DC conductor size and material for the inverters according to...
- Page 51 3.3.3.2 DC Fuse Configuration/Selection The CPS SCA36/50/60KTL-DO/US-480 inverter Standard and RSD wire boxes include touch safe fuse holders and preinstalled 20A DC fuses as factory standard. Ensure that the appropriate fuse values are used depending on the configuration of the PV array and by performing PV fuse sizing calculations for each string.
- Page 52 Y branch connectors are used with DC field wiring to reduce PV source circuit home runs. CPS allows replacement of the factory installed 20A fuses with appropriate ampere ratings, however CPS does not provide nor stock these fuses.
- Page 53 3.3.3.3 DC Conductor Connection To ensure the optimum performance of the inverter, please read the following guidelines before performing any DC connections. Confirm the maximum open circuit voltage of the PV modules is lower than 1000VDC under any conditions. Confirm that the PV modules for each MPPT within the inverter are of the same type and specification before connection.
- Page 54 Sinofuse. The touch safe fuse holders have unique terminal torque values specified by their manufacturers. See Table 3-7 for specified torque values. Table 3-7 DC Fuse Holder and Busbar Torque Value by Manufacturer Sinofuse TSA1038-S-HR CPS Neg Busbar Single Conductor Single Conductor Specified Torque: Specified Torque:...
- Page 55 3.3.3.5 DC Connection for Standard and RSD Wirebox Using the 1-1/2 inch knockouts. Remove the factory installed liquid-tight hole plugs from the DC knockout holes in the wiring box and install 1-1/2 inch Trade Size conduit and conduit fittings. If the use of smaller conduit is desired, proper weather-tight reducing bushings may be installed.
- Page 56 Terminate at fuseholders. The RSD wirebox only contains fuseholders for the positive DC conductors. Follow instructions in step 3 for the negative conductors. Strip approximately ½ inch of the cable jacket from the end of the string conductor. Insert the conductor into the fuseholder terminal ensuring the stranding of the conductor remains firmly twisted and does not separate.
- Page 57 Figure 3-25 Bypass Terminal option installed within the Standard wirebox The DC input connection diagrams for SCA36/50/60KTL-DO/US-480 inverters are as follows: Figure 3-18-1 SCA36/50/60KTL RSD wiring box...
- Page 58 Figure 3-28-2 SCA36/50/60KTL Standard wiring box NOTICE: To maximize production, reduce clipping losses, and optimize thermal performance, the DC input power should be distributed across all MPPTs as evenly as possible (e.g. difference in number of strings per MPPT not larger than 1). Before terminating the PV conductors to the Bypass Terminals, verify connector specifications (Table 3-9) and always verify polarity to avoid risk of reverse polarity.
-
Page 59: Ac And Ground Connection
TRANSFORMER TRANSFORMER PER CODE PER CODE PER UT ILITY REQUIREMENTS OPTIONAL PER CPS NOTE: If the transformer neutral is not NOTE: If the transformer neutral is not connected to ground, additional ground connected to ground, additional ground fault detection must be added external to fault detection must be added external the inverter per NEC 250.21... - Page 60 The transformer VA rating should be at least 100% of the sum of the connected inverter VA ratings. CPS recommends the transformer VA rating be selected based on IEEE C57.159-2016 Guide on Transformers for application in Distributed Photovoltaic (DPV) Power Generation Systems. It is...
-
Page 61: Ac Connections
3.3.4.2 AC Connections This section includes instructions to connect the AC conductors to the inverter and grounding options. Table 3-10 Tools Required for Cable Termination Tools Remark 5mm flat screwdriver Internal grounding bar #3 Phillips head screwdriver External grounding 14mm hex socket wrench AC terminal block Diagonal pliers or cable cutters Cut cable... - Page 62 Grounding/Bonding. The inverter provides 1 grounding connection on the AC side and one bonding location. These configurations are illustrated below Figure 3-28). (a) Grounding via the ground busbar (left) [1] This is required for grounding the equipment by running the EGC with the ungrounded conductors.
- Page 63 Table 3-11 Torque and Conductor Specifications Connection Point Conductor Range Torque Value 14.2 N-m AC output terminal L1/L2/L3/N: #6~3/0AWG (75/90℃ (126 in-lbs) block CU/AL) 5.6 N-m Internal grounding bar 6-4 AWG (CU/AL) (50 in-lbs) External grounding 5.6 N-m 6-4 AWG (CU/AL) (50 in-lbs)...
- Page 64 INSTRUCTION: The neutral conductor from the inverter to point of interconnection (POI) is optional. The function of the neutral, when used, is to provide a point of reference for measurement purposes that is essentially at ground potential. The neutral conductor is for control or measurement purposes only, and therefore may be sized according to NEC section 705.95(B).
- Page 65 Figure 3-30 External Ground Point Location of wirebox NOTICE: Always connect the Ground conductor (EGC) before terminating any of the AC conductors. When the output of the inverter is connected to the grid, an external AC circuit breaker is required to be installed to safely disconnect the inverter from the grid should an over current event occur.
-
Page 66: Communication Connection
50kVA = 80A CPS SCA50KTL-DO/US-480 110A 55kVA = 90A 60kVA = 100A 125A CPS SCA60KTL-DO/US-480 66kVA = 100A CPS SCA36KTL-DO/US-480 125A 3.4 Communication Connection CPS SCA36/50/60KTL-DO/US-480 inverters support industry standard Modbus RS485 communication. 485_GN RS485 485_GND RS485_B- RS485 RS485_A+ 12VGND 12VG +12V... -
Page 67: Description Of The Communication Board
Figure 3-32 Communication Connection Interfaces 3.4.2 RS485 Communication CPS recommends the following cable for inverter RS485 communications: CAT-5e or (3) 18-22AWG communication cables. It is recommended that industrial grade shielded twisted pair RS485 cable be used in lieu of unshielded twisted pair. Communication cable such as... -
Page 68: Rs485 Network Set-Up
RS485 communication cables are connected via the 5-pin connector to the port labeled (2) in above figure 3-32. When creating a network of multiple inverters, the cables are terminated to the same 5-pin connector and 3-pin connector. Figure 3-34 shows a single inverter communication connection in (1) and a network configuration in (2). -
Page 69: Communication Wiring
Datalogger Figure 3-34 RS485 Network Connection DANGER: Disconnect the inverter from the AC grid and PV modules before removing covers or opening the equipment. Wait at least 5 minutes after disconnecting from the DC and AC sources before servicing or maintaining the inverter. - Page 70 If the inverter is the last Modbus device in the daisy chain, make sure the Modbus termination switch S1 is in the ON position enabling Modbus termination. Do not turn the switch to the ON position in any other inverters of the daisy chain. If there is only one inverter, the Modbus termination switch S1 should be set to ON.
-
Page 71: User Interface
User Interface This section is intended to orient the user with the inverter interface prior to turning the system on and commissioning. 4.1 Description of LCD Panel The inverter’s LCD panel consists of the LCD screen, four LED status indicator lights, a buzzer, and four user keys, as shown in Figure 4-1. POWER GRID FAULT... - Page 72 Table 4-1 LED Indication Name Status Indication light Working Energized (control panel starts to Light on work) POWER power light Light off Power supply not working Light on In grid-tied power generation state Grid-tied Derated running status (light up 0.5s, operation Flash light off 1.6s)
-
Page 73: Operation State
Table 4-2 Definition of the Keys Description Definition of function Escape key Back/end/mute Confirm entering the menu/confirm set Enter key value/Switch to parameter setting mode Page up in selection menu/+1 when setting parameters. Press more than 1 second to go to the last number when setting the parameters. -
Page 74: Interface Types
4.3 Interface Types Users can perform the corresponding operations with the 4 function keys, described in Table 4-2, according to the indications of the LCD display. The LCD screen will display different interfaces based on the operation modes of the inverter. There are four operation modes: Logo interface mode (as shown in Figure 4-2 LOGO Interface), Normal operation and Standby modes (as shown in Figure 4-3 Default Display Interface for Normal Operation), and Fault mode (as shown in Figure 4-4 History Record... - Page 75 The inverter will enter Standby mode when the output voltage and power of PV modules do not meet the startup conditions or PV voltage and input power are lower than the set value. The inverter will check automatically whether it meets the startup conditions in this mode until it turns back to normal mode.
-
Page 76: Commissioning
Commissioning Before powering up the PV system it is important to check the installation for any hazards that may be present. For convenience, a commissioning checklist is included in this manual and can be found in the Appendix. 5.1 Mechanical Installation check ▪... -
Page 77: Commissioning Steps
5.4 Commissioning Steps Complete the list above before commissioning the inverter as follows: Turn on the AC circuit breaker. Turn “ON” the external DC switch(s)/circuit breaker(s). Skip these two steps if there are no switches or circuit breakers. Switch the Inverter’s DC Switch to the “ON” position. When the energy supplied by the PV array is sufficient, the LCD screen of inverter will light up. - Page 78 Language setting ENGLISH 中文 Figure 5-2 Language Setting Set the grid standard. From the previous menu press ESC to return to the System Parameters menu. If the display had been previously returned to the main menu, follow the steps in (4) to access System Parameters again.
- Page 79 Grid Connection Rule IEEE1547 CA Rule-21 HECO-HM HECO-ML ISO-NE IEEE1547_2018 Figure 5-3 Set up Grid Standard Setting the Time. From the previous menu, press ESC to return to the System Parameters menu. Select Time and press ENT. Scroll up/down to select the numerical value, then press ENT to go to next option. e.g.: Year to Month, press ESC to go to last option.
- Page 80 Choose PV Input working mode. The factory default working mode of the DC input connection and MPP Tracker is set for Independent. Contact CPS if parallel mode is required. PV Input Mode Independent Figure 5-5 Independent Mode Setting...
- Page 81 Neutral Line Setting. From the previous menu, press ESC to return to the System Parameters menu. Select Neutral Line Setting and press ENT. Use the arrow keys to highlight “Yes” or “No” in regard to whether a neutral conductor is present. Press ENT. This setting will allow the inverter to display L-N voltages on the LCD.
- Page 82 Choosing the communication data. From the previous menu, press ESC to return to the System Parameters menu. Scroll to Communication Setting and press ENT. Select Baud rate and press ENT. The default setting is 9600. Depending on the data acquisition/SCADA system being used, the baud rate may need to be increased or decreased.
- Page 83 11. When the LCD screen shows the normal operation status (Figure 5-8) and the “RUN” light on the LED panel is illuminated, this is an indication that the grid connection and power generation are successful. E-T:0.0kWh E-D:0.0kWh PV1:0.0V 0.0A Standby Addr:001 2015-10-22 12:00:00 Figure 5-8 Normal Operation Status 12.
-
Page 84: Main Menu And Operation
Main Menu and Operation INSTRUCTION: The contents of following sections are applicable to all the CPS SCA36/50/60KTL-DO/US-480 3-Phase Transformerless String Inverters. Their main menus are almost the same, the following contents will take the CPS SCA60KTL-DO/US-480 inverter as instance, and different points will be introduced separately. -
Page 85: Setting
PV Information Independent PV Input Mode PdcTotal(kW) Vdc(V) Idc(A) P1/4 AC Output L1-N L2-N L3-N V(V) I(A) Main Menu F(Hz) Measurement Data Pac(Kw) P Ref 100.0% Setting PF Ref 1.000 Power On/Off P2/4 Energy History Record E-Today(kWh) Device Information E-Month(kWh) E-Year(kWh) E-Total(kWh) Thdv(L1~L3) - Page 86 number. Once all four digits are entered, press the ENT key to confirm the password or Press the ESC key to go back to Setting. Password Please enter Password: 1 1 1 1 Figure 6-3 Input Password Number The Setting menu contains eight submenus: System Parameters, Control Command, Protection Parameters, LVRT/HVRT Setup, Power Derating Setting, Reactive Power Derating Setup, ARC Parameters, and Other Parameters.
-
Page 87: System Parameters
6.2.1 System Parameters The System Parameter selection contains nine submenus. Language Setting. Two languages, i.e. Chinese and English are available in Language menu. Language setting ENGLISH 中文 Figure 6-5 Language Setting Grid Connection Rule. Multiple grid standards are available. Press to select the corresponding grid standard required for the installation and press the ENT key. - Page 88 “Independent" or "Parallel" mode. The inverter is factory set in Independent mode. If this needs to be set to Parallel contact CPS to have this setting changed. Neutral Line Setting. This option allows the user to select “Yes/No”...
- Page 89 LCD Contrast Setting. Press to increase/decrease the LCD contrast. Press ENT to accept changes. 标题 Figure 6-7 LCD Contrast Grade Setting Clear Running Record. Clear the running information. This contains normal operating information such as when the inverter starts up and shuts down. Clear Fault Record.
-
Page 90: Control Command
6.2.2 Control Command There are five submenus in the “Control Command” menu: Control Command Control Command Force Restart Time Factory Defaults Vmppt(V) ARC Detect ARC Clear Pmppt(kW) Udc(V) Idc(A) MPPT Scan P2/2 P1/2 Figure 6-8 Control Command Setting Force Restart. If a fault shutdown happens, a severe fault may have occurred inside the inverter. - Page 91 ARC Detect. Manually begin an arc-fault test. The inverter will cease power production and test ARC. Arcing check and protection is mainly divided into two parts, the Arcing check board is responsible for whether there is Arcing in line, and transfer an Arc protection signal to the DSP in the dominating control board.
- Page 92 MPPT Scan. Manually execute the MPPT scan. Move the cursor to this item and press the ENT key to initiate the scanning. The LCD screen will skip to normal operation interface if the MPPT scanning succeeds or remain on the MPPT Scan menu interface if the scanning fails.
-
Page 93: Protect Parameters
6.2.3 Protect Parameters This interface is used to display and set the Protect parameters of the AC grid voltage, frequency and recovery, etc, as shown in Figure 6-9. Grid Over Voltage Protection Grid Under Voltage Protection 110.00% 88.00% GridVolMax1 GridVolMin1 Enable Enable VolMaxTripT1(S) - Page 94 Table 6-1 Protection Parameters (IEEE1547-2018, Rule21 and ISO-NE) Grid Voltage Protection Setting Range IEEE1547-2018 ISO-NE Description Rule21 Parameter name (Threshold Value Min Default Max Min Default Max Min Default Max Level 1 Max. grid GridVoltMax1(%) 135 100 135 100 voltage Level 1 Max.
- Page 95 Table 6-2 Protection Parameters (IEEE1547-2018, Rule21 and ISO-NE ) Cont'd Grid Frequency Protection Setting Range IEEE1547-2018 Rule21 ISO-NE Parameter name Description Min Default Max Min Default Max Min Default Max GridFrqMax1(Hz) Protection threshold 61.2 60.5 61.2 value of Level 1 Max. grid frequency FrqMaxTripT1(S) Trip time of Level 1...
- Page 96 Table 6-3 Protection Parameters (IEEE1547-2018, Rule21 and ISO-NE ) Cont'd Grid Recovery Setting Range IEEE1547-2018 Rule21 ISO-NE Parameter Description name Min Default Max Min Default Max Min Default Recovery Max VoltMax(%) threshold of grid voltage protection Recovery Min VoltMin(%) threshold of grid 91.7 voltage protection Recovery time of...
- Page 97 Grid Voltage Balance Threshold value of GridVolUnbala grid voltage 0.01 0.01 0.01 imbalance PhaseLoseCo The trigger value of Zig-Zag protection The recovery value PhaseLoseRc of Zig-Zag vCoeff protection Threshold value of PhaseLoseVUn Zig-Zag voltage 0.01 0.01 0.01 balabce imbalance The trigger voltage Phase- 0.01 100 0.01...
-
Page 98: Lvrt/Hvrt Parameters
6.2.4 LVRT/HVRT Parameters “LVRT/HVRT” is used to set the LVRT and HVRT parameters. Move the cursor to this item and press the ENT key to set the parameters. There are 7 pages of LVRT/HVRT parameter settings. These can be changed in the menu tree or by the LVRT (Figure 6-11) and HVRT (Figure 6-12) graphs. - Page 99 Figure 6-2 The LVRT Curve 1.25 Through 1.15 5,6,7,8 Trip 1.05 Time/S 2 4 6 8 10 12 14 16 18 20 22 Figure 6-3 The HVRT Curve...
- Page 100 Table 6-4 LVRT Parameters (IEEE1547-2018, Rule21 and ISO-NE ) LVRT Setting Range IEEE1547-2018 Rule21 ISO-NE Parameter Description Name Min Default Max Min Default Max Min Default Max Threshold value LVRTVolt (1,2) of Low voltage ride through (1 & 2 point) Time of Level LVRTTime (1,2) Low voltage ride...
- Page 101 Table 6-5 HVRT Parameters (IEEE1547-2018, Rule21 and ISO-NE ) HVRT Setting Range IEEE1547-2018 Rule21 ISO-NE Parameter Description Name Min Default Max Min Default Max Min Default Max Threshold value of HVRTVolt high voltage ride (1,2) through (1 & 2 point) Time of Level high HVRTTime voltage ride through...
- Page 102 Table 6-6 LVRT and HVRT Parameters (IEEE1547-2018, Rule21 and ISO-NE) Grid Frequency Protection Setting Range IEEE1547-2018 Rule21 ISO-NE Parameter Name Description Min Default Max Min Default Max Min Default Max 0: Disable 1: Enable, no reactive power LVRTModeSetting output 2: Enable, reactive power output Threshold value...
-
Page 103: Power Derating Setup
6.2.5 Power Derating Setup “Power Derating Setup” menu is used to set the active power derating parameters including Active Power Derating, Over frequency derating, Low frequency derating, High temperature frequency derating, etc. The parameters are shown in Figure 6-13. Active Power Derating CtrMode 0:disable Percentage... - Page 104 Power vs Grid Frequency:The active power output shall be as defined by the relevant formula below, plus any inertial response to the rate of change of frequency, until frequency returns to within the dead band.(See Figure 6-14) P/W(%) 100% SysFre FreDroop_DbUf(Hz) FreDroop_DbOf(Hz) Freq(Hz)
- Page 105 Table 6-7 Power Derating Setup Power Derating Setup Setting Range IEEE1547-2018 Rule21 ISO-NE Parameter Description Name Min Default Max Min Default Max Min Default Max The control mode of active power CtrMode 0: Disable dispatch 1: Remote dispatch 2: Local control Local electric Percentage(%) dispatch Active...
- Page 106 Power Derating Setup Setting Range IEEE1547-2018 Rule21 ISO-NE Parameter Description Name Min Default Max Min Default Max Min Default Max The dead zone of FreqDroop_DbUf underfrequency 0.036 0.036 (Hz) active power regulation Coefficient of overfrequency FreqDroop_kOf 0.02 0.05 0.1 0.02 0.05 0.1 0.02 0.05...
-
Page 107: Reactive Power Derating Setup
6.2.6 Reactive Power Derating Setup The Reactive Power Derating menu is used to set the Grid reactive power derating parameters including PF parameters, Qu parameters, etc. The parameters as shown in Table 6-8. Grid Reactive Power Derating PF vs Grid Voltage CtrMode 3:PFset 50.0%... - Page 108 Table 6-8 Reactive Power Control (IEEE-1547, Rule21, and ISO-NE) Grid Reactive Power Derating Setting Range IEEE1547-2018 Parameter Description Rule21 ISO-NE Name Min Default Max Min Default Max Min Default Max The control mode of reactive power 0: Disable dispatch mode. 1: Remote dispatch mode.
- Page 109 Note: The PF and Q value can be adjusted by remote software if the “Remote” setting is selected. PFSetValue:Set the PF value. This function changes the reactive power by adjusting the Power Factor. PFpCurve functions:PFp curve mode. Using the curves to set the PFp setpoints (See Figure 6-16).
- Page 110 Q (%) ( QuCurveU 2 i , QuCurveQ 2 i ) Inductive ( QuCurveU 1 , QuCurveQ 1 ) ( QuCurveU 1 i , U ( V ) QuCurveQ 1 i ) Capacitive ( QuCurveU 2 , QuCurveQ 2 ) Figure 6-17 Q(U) Curve Mode Table 6-9 lists the parameters for Q(U) Curve modes.
- Page 111 Reactive power of QuCurveQ1i (%) Q(U) Curve point 1i Voltage of Q(U)Curve QuCurveU2i (%) point 2i Reactive power of QuCurveQ2i (%) Q(U)Curve point 2i QuCurveTriPowe The trigger of r (%) Q(U)Curve QuCurveUndoPo The end of wer (%) Q(U)Curve The rated reference QuCurveVref(%) voltage of Q(U) curve The rated reference...
- Page 112 Table 6-10 lists the parameters for PF Set and Q(P) Curve modes. Press ENT to start the modes after the parameters are set. Table 6-10 Reactive Power Control (IEEE1547-2018, Rule21 and ISO-NE) Grid Reactive Power Derating Setting Range IEEE1547-2018 Rule21 ISO-NE Parameter Description...
-
Page 113: Arc Parameters
6.2.7 Arc Parameters ARC Parameters is used to enable/disable the ARC function and set the ARC parameters. These settings are only to be changed by CPS personnel with approval from the AHJ. Setting ARC Bandwith Setting System Parameters Enable ARCEnable... - Page 114 Table 6-11 Other Parameters Other Parameters Setting Range IEEE1547-2018 Parameter Name Description Rule21 ISO-NE Min Default Max Min Default Max Min Default Max Startup delay PowerOnDelay (s) 1200 1200 1200 time Reactive power ReactivePowerStep 0.01 600 0.01 600 0.01 (%/P) adjustment step Power startup eErrSoftStarTms...
- Page 115 Other Parameters Setting Range IEEE1547-2018 Parameter Name Description Rule21 ISO-NE Min Default Max Min Default Max Min Default Max Leakage current The dynamic trigger coefficient GFCIDynProFactor of Leakage current Maximum DCI DCIProtection1 0.01 0.50 0.01 0.50 0.01 0.50 value1 DCIProtectionT1 Trip time 1 of DCI DCIProtection2 Maximum DCI...
- Page 116 Other Parameters Setting Range IEEE1547-2018 Parameter Name Description Rule21 ISO-NE Min Default Max Min Default Max Min Default Max Island enable/disable Island Protect control 0: Disable 1: Enable Fan detection enable/disable FAN Detect control 0: Disable 1: Enable Operating OperationOverVol overvoltage 135 100 135 100...
- Page 117 Other Parameters Setting Range IEEE1547-2018 Parameter Name Description Rule21 ISO-NE Min Default Max Min Default Max Min Default Max delay LCD anti- backflow Anti reflux(LCD) communication delay Fast Shutdown Enable control RapidShutdownEn 0: Disable 1: Enable Note: Compatibility among the functions: Once the grid voltage is lower than LVRT trigger voltage, i.e.
-
Page 118: Power On/Off
6.3 Power ON/OFF 6.3.1 Manual Power ON/OFF Restarting the inverter is required after regulation setting or manual (fault) shut-down. Press ESC or ENT to access the Main Menu. Scroll the cursor down to highlight POWER ON/OFF and press ENT to select. Move the cursor to “ON”... -
Page 119: History Record
6.4 History Record Move the cursor to History Record in the main menu interface. Press ENT to check the history information. There are 3 submenus in the History Record menu: Current Error, Running Record and Fault Record. See Figure 6-21. Current Error Date Time... -
Page 120: Device Information
This menu provides the information to identify the version of boards in the inverter, model number, serial number and data logger information. This information may be required when contacting CPS service. WARNING: Please follow the guidelines below before on-grid operation to... -
Page 121: Start-Up
6.6 Start-Up Automatic start-up: The inverter will start up automatically when the output voltage and power of PV arrays meet the set value, AC power grid is normal, and the ambient temperature is within allowable operating range. Manual Power ON/OFF: Manual Power ON/OFF is required after regulation setting or manual (fault) shut-down. -
Page 122: Operation Mode
Errors and reference the “Troubleshooting” table in section 7 to determine the cause of the error. 6.9 Grid-tied Power Generation The CPS SCA36/50/60KTL-DO/US-480 series inverters have an automatic grid-tied power generation process. It will check constantly whether AC power grid meets the conditions for grid-tied power generation, and test whether the PV array has adequate energy. -
Page 123: Firmware Upgrade
6.10 Firmware Upgrade Contact CPS Service about upgrading the inverter firmware. The inverter firmware can be upgraded remotely if a CPS FlexOM Gateway is installed. To update the firmware by using the USB flash: Prepare a USB flash drive (Capacity less than 8G) and format the drive to FAT32. - Page 124 485_ RS485 485_GND RS485_B- RS485 RS485_A+ 12VGND 12VG + 12V +12V USB Port Figure 6-23 USB Port for Firmware Upgrades Using the password to enter the Setting menu and select Firmware Update. Choose the firmware to be updated (LCD or DSP) and follow the prompts on the screen.
- Page 125 Firmware Update LCD firmware DSP firmware UPGRADE FIRMWARE OK, PLEASE Main Menu WAIT! Measurement Data Setting Power On/Off History Record Device Information Please Confirm UPGRADE FIRMWARE FAILURE,PLEASE Setting WAIT! System Parameters Control Command Protection Parameters LVRT/HVRT Setup Power Derating Setup Reactive Power Derating Setup ARC Parameters P1/2...
-
Page 126: Fault Shutdown And Troubleshooting
Fault Shutdown and Troubleshooting If a fault occurs within the system, the inverter will recognize and report via the LED or LCD panel. If this occurs, reference the following section prior to contacting post-sales service. This will ensure the quickest time to resolution possible. -
Page 127: Lcd Fault And Troubleshooting
7.2 LCD Fault and Troubleshooting The inverter will shut down automatically if the PV power generation system fails, such as output short circuit, grid overvoltage/undervoltage, grid overfrequency/underfrequency, high environmental temperature or internal malfunction of the machine. The fault information will be displayed on the LCD screen. - Page 128 Recommended solutions: Observe temperature display. Warn0050 Switch off external AC disconnect, (TempSensorErr) then back on to reboot the system. Contact post-sales service if not corrected Recommended solutions: Visually check the DC Surge Protection Device (SPD) Warn0100 If the indicator is "red" --> Replace the SPD module.
- Page 129 Definition: Internal alarm Possible causes: Internal memory has a problem EepromErr Recommended solutions: Observe for 5 minutes to see whether the alarm will be eliminated automatically Contact post-sales service if not corrected Table 7-4 LCD Troubleshooting PROTECTION Type Error/Stat Fault Description / Instruction Restart inverter by turning both AC and DC switches off.
- Page 130 If the inverter can start up, then recalibrate Protect0180 (The sampling If the inverter consistently reports this alarm offset of DCI) and can not start up, then replace inverter Raise limit of DCImax (for example, 400mA) to Protect0170 allow inverter more room to adjust in transient (DCI high) condition to cope with imbalance of impedance and voltage between grid phases...
- Page 131 OFF. Wait for 1 minute for all (The sensor fault of energy to discharge and turn both switches leakage current) If inverter cannot clear fault, contact CPS Service to replace filter board or inverter. Turn DC Switch OFF Open Fuse holders to isolate PV strings...
- Page 132 Table 7-7 LCD Troubleshooting FAULT Type Error/State Fault Description / Instruction Restart inverter by turning both AC and Fault0020 DC switches OFF. Wait for 5 minutes for (Bus over all energy to discharge and turn both volt switches ON Hardware) If inverter cannot clear fault, replace inverter Restart inverter by turning both AC and...
- Page 133 Restart inverter by turning both AC and Fault0130 DC switches OFF. Wait for 5 minutes (Bus over total voltage) for all energy to discharge between OFF and turn both switches ON If inverter cannot clear fault, replace inverter Restart inverter by turning both AC and DC switches OFF.
-
Page 134: Maintenance And De-Installation
Maintenance and De-installation This section defines the activities required to properly maintain the inverter and must be facilitated by qualified personnel, trained in the installation, de- installation and maintenance of inverters. 8.1 Product Maintenance Maintenance is required to ensure the inverter remains in proper condition, prolonging service life and prevent potential issues. -
Page 135: Clean The Air Vent Grate
8.1.2 Clean the Air Vent Grate The inverter can become hot during normal operation. It uses built in cooling fans to provide sufficient air flow and help in heat dissipation. Check the air vent grate regularly to make sure it is not blocked. Clean the grate with a soft brush or vacuum cleaner attachment if necessary. - Page 136 Figure 8-1 Replacing Cooling Fans...
-
Page 137: Replace The Inverter
DANGER: Disconnect the electrical power sources in strict accordance with the following steps. Otherwise, the inverter will be damaged and the service personnel’s life will be endangered. 8.1.4 Replace the Inverter Please confirm the following items before replacing the inverter: ▪... - Page 138 Use a No. 3 Phillips head screwdriver to unscrew the 2 screws on both sides of the inverter. Figure 8-3 Remove the screws on both sides Use a No. 10 Hex wrench to remove the 4 screws between the inverter and the wiring box. Lift the inverter enclosure and disconnect from the wiring box.
- Page 139 If the replacement inverter is on hand and to be installed immediately, skip this step and refer to section 3.2 for installation of the inverter. Otherwise, use a No. 2 Phillips head screwdriver to remove the 2 screws on the left side of the wiring box, and remove the bulkhead cover.
-
Page 140: D E - Installing The Inverter
8.2 De-installing the Inverter De-install the inverter and wire box assembly according to the following steps when the inverter needs to be removed: Turn off the external AC breaker and/or system disconnect switch using lock-out/tag-out procedures. Turn off the external DC breaker and/or disconnect switch, if present, and use lock-out/tag-out procedures. -
Page 141: Accessories
Accessories The CPS SCA36/50/60KTL-DO/US-480 inverters have several optional accessories that allow the inverter to support a wide range of real-world applications. 9.1 Fuse Bypass Terminals (36/50/60 Kit, Product Code 1.0107.0131) The Fuse Bypass Terminals allow for a reduction in the number of DC homeruns by combining the PV source circuits outside of the inverter wirebox and terminating with one pair of DC inputs to each of the three MPPTs. - Page 142 Figure 9-2 Remove Plastic Touch-safe Figure 9-1 Remove Wirebox Cover Finger Guards...
- Page 143 Figure 9-3 Bypass Terminals Installed Figure 9-4 Bypass Terminals Installed on POS Input on NEG Bus...
-
Page 144: Shade Cover (Ssc-60St)
Field testing at PVEL showed up to 15% reduction in operating temperatures of inverters with shade covers installed in direct sunlight. This report can be found on the CPS America website under application notes. https://www.chintpowersystems.com/downloads/application- notes/PVEL-Field-Testing-Report-28kW-Inveter-Shade-Plate.pdf... -
Page 145: Y-Comb Terminal Block (Optional)
9.3 Y-Comb Terminal Block (Optional) The Y-Comb is intended for use in the SCA36/50/60KTL-DO/US-480 inverters. This accessory is applied between two adjacent fuseholders within the inverter wire-box and distributes current between the two fuseholders. When products such as Y-branch connectors are used in the array field to combine the output of two strings the current is as much as 30 or 40A. -
Page 146: Technical Data
10 Technical Data 10.1 Datasheet SCA50KTL- SCA60KTL- SCA36KTL-DO/US-480 Model Name DO/US-480 DO/US-480 DC Input 90kW 61.2kW Max. PV Power (33kW per MPPT) (22.44kW per MPPT) Max. DC Input Voltage 1000VDC Operating DC Input 200-950VDC Voltage Range Start-up DC Input Voltage /... - Page 147 Display and Communication User Interface and Display LCD + LED Inverter Monitoring SunSpec, Modbus RS485 Site Level Monitoring CPS FlexOM Gateway (1 per 32 inverters) Modbus Data Mapping Remote Diagnostics / FW Standard / with FlexOM Gateway Upgrade Functions Mechanical Data Dimensions (WxHxD) 39.4 x 23.6 x 10.24 in.
-
Page 148: Measurement Tolerances
±5% for real-time measurements with output power below 20% nominal power ▪ ±3% for real-time measurements with output power above 20% nominal power ▪ ±4% for all statistical data CPS inverter tolerances are specified below: ▪ Voltage tolerances: ±1% ▪ Current tolerances: ±2% ▪ Frequency tolerances: ±0.5% ▪... -
Page 149: Production Graphs
10.3 Production Graphs The following sections illustrate the inverter production/derating in terms of ambient temperature, altitude and grid voltage. 10.3.1 High Temperature Derating Graph When the ambient temperature is higher than 113℉ (45℃), the inverter output power (Pn) will begin to derate, as shown in Figure 10-1: Pin/Pn 100% -3%/℃... -
Page 150: High Temperature Derating Graph
10.3.2 Altitude Derating Graph When the altitude is higher than 9842.5ft (3000m), the rated output power (Pn) of the inverter will decrease, as shown in Figure 10-2: Pin/Pn 100% -30%/km 3000 4000 Altitude(m) Figure 10-2 SCA36/50/60KTL Derating Curve with High Altitude... -
Page 151: Pv Voltage Derating Graph
10.3.3 Grid Voltage Derating Graph When the Volt-Watt function is disabled, and grid voltage is within 100%~110% (Un ~ 1.1*Un) of the Rated Output Voltage, the inverter output power (Pn) may reach 100%. When the grid voltage is lower than the Rated Output Voltage, the inverter will limit the AC Output Current and the output power (Pn) will begin to derate, as shown in Figure 10-3-1. - Page 152 (Pn) will begin to derate, as shown in Figure 10-4 and 10-5: 100% 41.5% 850 920 950 100 200 300 400 500 600 700 800 900 1000 PV Voltage (V) Figure 10-4 CPS SCA60KTL derating curve of PV input voltage...
- Page 153 PV Voltage (V) Figure 10-5 CPS SCA50KTL derating curve of PV input voltage For CPS SCA36KTL-DO/US-480, when the DC input voltage is lower than 400V or higher than 850V, the inverter output power (Pn) will begin to derate, as shown in Figure 10-6.
-
Page 154: Reactive Power Capability
The Reactive Power Overload function is disabled by factory default (Max. AC Apparent Power is 50/60kVA and Max. AC Output Current is 60.2A/72.2A). Contact CPS Customer Service if you want to enable the function. Figure 10-7 SCA50/60KTL Reactive Power Capability... -
Page 155: Limited Warranty
The warranty policy of this product is specified in the contract; otherwise, the standard warranty is 10 years. For service, Chint Power Systems America will provide local support. For Warranty terms, please refer to the CPS America standard warranty policy in place at time of purchase. - Page 156 CHINT POWER SYSTEMS AMERICA CO., LTD. Address: 1380 Presidential Drive, Richardson, Texas 75081 Service Hotline: 855-584-7168 Email: AmericaSales@chintpower.com Website: www.chintpowersystem.com SHANGHAI CHINT POWER SYSTEMS CO., LTD. Headquarters: Building 4, No. 3255, Sixian Road, Songjiang District, Shanghai, China Tele: +86 -21 -3779 1222 -866300 Fax: +86 -21 -3779 1222 -866001 This manual is subject to change without prior notification.
Need help?
Do you have a question about the SCA36KTL-DO/US-480 and is the answer not in the manual?
Questions and answers