CPS SCH Series Installation And Operation Manual
Grid-tied pv inverter
Hide thumbs
Also See for SCH Series:
- Installation and operation manual (119 pages) ,
- Installation and operation manual (86 pages) ,
- Installation and operation manual (116 pages)

Subscribe to Our Youtube Channel
Related Manuals for CPS SCH Series


Summary of Contents for CPS SCH Series
- Page 1 CPS SCH Series Grid-tied PV Inverter SCH125KTL-AIO/US-600 Installation and Operation Manual - Rev 1.2 CHINT POWER SYSTEMS AMERICA CO. REVISON 1.2 SEPTEMBER 2020...
- Page 3 Revision History Chap/Sec Rev Date Description Number Mar 2020 Initial Release 05/27/2020 Clean-up 08/15/2020 Clarification of LCD-LESS Set-up...
-
Page 4: Table Of Contents
Table of Contents Before You Start… ................... 1 Chapter 1 IMPORTANT SAFETY INSTRUCTIONS ........2 Chapter 2 Overview .................. 6 2.1 Inverter for Grid-tied PV Systems ..........6 2.2 Product Features ................6 2.3 Product Protection Functions ............7 2.4 Smart Inverter Functions ..............7 2.5 Schematic Diagram and Circuit Design .........8 2.6 Appearance and Main item Description .........9 2.7 Anti-islanding Detection .............. -
Page 5: Before You Start
SCH125KTL-AIO/US-600 Utility Grid-tied PV Inverter. Be sure to read this manual carefully before using. Thank you for choosing a CPS Grid-tied PV Inverter. This PV Inverter is a high performance and highly reliable product specifically designed for the North American Solar market. -
Page 6: Chapter 1 Important Safety Instructions
Chapter 1 IMPORTANT SAFETY INSTRUCTIONS (SAVE THESE INSTRUCTIONS) Please read this user manual carefully before product installation. CPS reserves the right to refuse warranty claims for equipment damage if the user fails to install the equipment according to the instructions in this manual. - Page 7 Markings on the product HIGH VOLTAGE: This inverter works with high voltages. All work on the product must only be performed as described in this document. HOT SURFACE: The equipment is designed to meet international safety standards, but surfaces can become hot during operation. Do not touch the heat sink or peripheral surfaces during or shortly after operation.
- Page 8 Do not connect the AC output of this equipment directly to any private AC power equipment. CAUTION: CPS SCH125KTL-AIO/US-600 inverter are approx. 72kg (158 lbs). Please ensure the mounting bracket is properly installed before hanging the inverter and wire-box on the bracket.
- Page 9 WARNING: The DC Switch is rated to break loads under normal operating conditions. However, a DC short circuit could be hazardous and the following procedures should be followed before turning OFF the DC Switch under fault conditions. If there is a fault and it is safe to access the inverter: 1.
-
Page 10: Chapter 2 Overview
Chapter 2 Overview 2.1 Inverter for Grid-tied PV Systems CPS SCH125KTL-AIO/US-600 3-Phase String Inverters are designed for use with carport, commercial rooftop, and large-scale PV grid-tied systems. The system is generally made up of PV modules, DC power distribution equipment, PV inverter and AC power distribution equipment (Figure 2-1). -
Page 11: Product Protection Functions
2.3 Product Protection Functions Reverse polarity protection of DC input ✓ ✓ AC and DC Short circuit protection ✓ Anti-islanding protection with bi-directional frequency perturbation ✓ DC Input and AC output over-voltage protection ✓ DC Input over-current protection DC input insulation against ground monitoring ✓... -
Page 12: Schematic Diagram And Circuit Design
2.5 Schematic Diagram and Circuit Design The basic electrical schematic diagram of CPS SCH125KTL-AIO/US-600 inverters are shown in Figure 2-2. PV Input Fuse PV1+ PV2+ PV3+ Switch PV4+ PV5+ PV6+ BUS+ PV7+ Output PV8+ Relay LCL Filter PV9+ PV10+ PV11+... -
Page 13: Appearance And Main Item Description
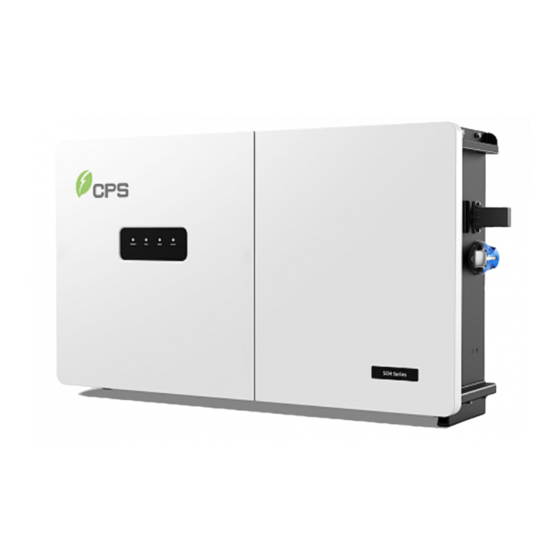
2.6 Appearance and Main item Description Figure 2-3 Appearance of the CPS SCH125KTL-AIO/US-600 Inverters Main items of the Inverter: 1) Main inverter enclosure 2) LED indicator lights 3) Communication module 4) Cooling fans 5) DC switch: DC power on/off 6) DC Input cable hole... -
Page 14: Anti-Islanding Detection
2.7 Anti-islanding Detection The CPS SCH125KTL-AIO/US-600 inverters include Anti-Islanding detection as required by UL1741/IEEE1547. The inverter will continuously make bi-directional perturbations to the frequency of the output current by injecting a small amount of reactive power in order to detect a possible islanding condition. If the grid is stable, these small perturbations will have negligible effects on the system voltage frequency. -
Page 15: Chapter 3 Installation
Chapter 3 Installation Below is the installation procedure for the SCH125KTL-AIO/US-600 inverters. Please read carefully and install the products following the step-by-step instructions. The inverter and other main items are shipped in two separate packages, consisting of A: The main inverter enclosure; B: The mounting bracket, user manual and accessory kit. - Page 16 Table 3-1 Main Items Item Figure Note Main enclosure of Inverter the PV inverter Bracket upon which Mounting the PV inverter is hung bracket and mounted Quick installation User manual manual Kit contains all necessary hardware Accessory kit and accessories for installation...
- Page 17 M10 nut with flat gasket and For AC terminal block spring washer For AC terminal (customized for big- M10 big flat gasket hole lug) Connect and commission though CPS Wi-Fi Communication Module Connect Application Hex socket screw Spare (for wiring box cover) INSTRUCTION: The items in the Accessory Kit Table 3-2 above are for the standard configuration.
-
Page 18: Recommendations Before Installation
3.1 Recommendations before Installation See Chapter 8, Technical Data for specification ranges and limits ✓ Check that the product environmental specifications (protection degree, operating temperature range, humidity and altitude, etc.) meet the requirements of the specific project location. ✓ Make sure that the power grid voltage is within range for the grid standard chosen. -
Page 19: Mechanical Installation
42.7in(1085mm) 11.2in(283.5mm) 23.4in(594mm) 19.3in(489.5mm) Figure 3-1 Dimensions of CPS SCH125KTL-AIO/US-600 Inverter 2) Installation Method (see Figure 3-2): Make sure that the mounting structure (bearing wall, rack, etc.) is suitable to support the inverter weight. Follow the mounting guidelines below: (a) If the location permits, install the inverter vertically. - Page 20 VERTICAL 15° Figure 3-2 Inverter Mounting Options NOTICE: If the installation environment allows, avoiding direct sunlight from the inverter, avoiding direct rain and snow, can extend the life of the inverter (See Figure 3-3). Direct sun install does not impact warranty. Figure 3-3 Inverter Mounting Suggestion...
- Page 21 3) Installation Space Requirement (see Figure 3-4a, b, and c): The distances between the inverters or the surrounding objects should meet the following conditions: (A) Minimum Height from the ground (12 Inches minimum): MUST Prevent Water damage in flood prone areas. SHOULD Allow for ease of fan replacement MUST meet NEC 6’...
- Page 22 OVERHEAD STRUCTURE NOT REQUIRED NOT REQUIRED (F1) (F2) 6" or 12" MINIMUM (C) 6' - 7"MAX (D) 18" MIN 6"MIN 10" 10" (G1) 22" MIN (with) 10" WIRE WAY WIRING WIRING (G2) 18" MIN (without) TROUGH (WITH OR WITHOUT) TROUGH 6"MIN (D) 18"...
- Page 23 Figure 3-5 Omitted 4) Mounting the Inverter onto the Bracket (1) Mark the position for the 5 holes drilling according to the holes position of the mounting bracket as shown in Figure 3-6 (11.8in.) (11.8in.) (31in.) (15.5in.) (1.5in.) (21.8in.) Figure 3-6 Dimensions of holes on the Bearing Surface...
- Page 24 Figure 3-7 Wall brackets Installation...
- Page 25 A. Lift mounting: Use sling rope or bar (inserted through the holes on the handle) to lift the inverter onto the bracket. The minimum angle between the two sling ropes should be more than 90 degrees. (Figure 3-8). Warning hands pinching Figure 3-8 Mount the Main Enclosure on the Bracket by Lifting Sling...
- Page 26 B. Manual mounting: Three people are needed to properly lift by the handle positions marked in Figure 3-9, and mount the inverter onto the bracket. Figure 3-9 Grab Handle Position CAUTION: The main enclosure of the SCH100/125KTL-AIO/US-600 inverters is approx. 72kg (158 lbs). Ensure the mounting bracket is properly installed before hanging the inverter on the bracket.
- Page 27 (3) Push the enclosure to the predetermined position according to Figure 3- 10 and fix it with M6x18 combination screw (torque: 6 N.m, 52.8 lbf-in). CAUTION: The total weight of the CPS SCH125KTL-AIO/US-600 inverter is approx.72kg (158 lbs). Please ensure the mounting is properly installed before hanging the inverter on the bracket.
- Page 28 Install the WI-FI Module As shown in Figure 3-11、Figure 3-12, Remove the two M4x10 fixing screws on the DB9 connector cover, rotate the DB9 connector cover to expose the connector, and install the Wi-Fi module with the two screws just removed. Pay attention to ensure that the seal remains waterproof.
-
Page 29: Electrical Installation
3.3 Electrical Installation 3.3.1 Removing the Wiring Box Cover (1) Use a No.3 Philips head screwdriver to remove the 2 screws on the wiring box and remove the cover. (see Figure 3-13) CAUTION: Turn off Inverter and DC Switch before you open the Cover. Figure 3-13 Turn off the Switch and Removing the Wiring Box Cover INSTRUCTION: It is important to use hand tools (e.g. - Page 30 3.3.2 Wire-box details For more details please see the user manual. WARNING: High touch current . Earth connection essential before connecting supply. 404.3mm (16in.) 45mm 139mm 242.7mm (9.5in.) (5.5in.) (1.8in.) Figure 3-14 Locations of Waterproof plug ① The waterproof plugs for DC input (2” Conduit); ②...
- Page 31 Figure 3-15 Internal Connection Points ⑤ DC input copper row + ⑥ DC input copper row -. ⑦ L1/L2/L3 of AC terminal (10mm Threaded Stud) N of AC terminals. ⑧ ⑨ Internal grounding...
- Page 32 Figure 3-16 Internal Grounding Points Table 3-3 Cable Specifications DC Cable Specifications for Standard wire-box Terminal Conductor #12-8AWG Cu Only (90°C fuse holder rating) DC input(﹢/﹣) Cable overall diameter: <7.3mm AC and Ground Cables specifications Position Conductor Wire Gauge determined by NEC calculations and the maximum terminal lug dimensions in Figure 3-19.
- Page 33 Table 3-4 Tools Required for Cable termination Tools Remark DC Cable for wire-box #2 Phillips head screwdriver 16mm hex socket wrench AC terminal block(L1-L3) 5mm socket head wrench AC terminal block(N) 10mm hex socket wrench External grounding/bounding 5mm flat screwdriver Internal grounding bar 1.5mm flat screwdriver RS485 communication terminal...
- Page 34 3.3.3 Ground and AC Connection The following describes how to connect the AC and ground cables between the inverter and the AC grid: Connect the Ground cable in Figure 3-14 item 3 – Bond the Inverter to local grounding point – drive ground rod or equivalent. Remove the waterproof plugs from the AC output of the wiring box and install appropriately sized conduit and conduit fittings into the hole.
- Page 35 Figure 3-18 Ground Cable Connection 37 Max Figure 3-19 AC Output Cable Connection...
- Page 36 The internal temperature of the AC Panel must be considered and appropriate derate applied to prevent nuisance tripping. Table 3-6 Specification of AC breaker selection Inverter Max AC OCPD CPS SCH125KTL-DO/US-600 200A NOTICE: Transformer Configurations: 3W Wye and 4W Grounded Wye is recommended.
- Page 37 3.3.4 DC Connection DC fuse configuration CPS SCH125KTL-AIO/US-600 inverters are equipped with 20A DC fuses. Customers must verify that the appropriate fuses are installed depending on the actual configuration of PV strings. Each DC input from the PV strings requires fuse protection.
- Page 38 DC Cable Connection To ensure the optimum performance of the inverter, please read the following guidelines before performing any DC connections: (a) Confirm the DC configuration and ensure that the maximum open circuit voltage of the PV modules is lower than 1500Vdc under any conditions;...
- Page 39 Table 3-8 Tools Required for Conductor Termination Tools Remark No. 2 Phillips bit and a PV String connections (Standard wire-box) Torque driver Diagonal pliers Cut cable Wire stripping pliers Remove jacket Choose the conductor size and material for the inverters according to the following configuration table: Table 3-9 Cable Specifications Terminal...
- Page 40 3.3.5 Communication Connection CPS SCH125KTL-AIO/US-600 inverters support industry standard SunSpec and Modbus RS485 communication. Below is a description of the components of the communication card and its location in the inverter wire- boxes. Communication board description Figure 3-21 Communication Board...
- Page 41 ② RS485 communication cable connection: Choose the RS485 communication cables according to the following table: Table 3-11 Cables specifications Cable RS485 UTP CAT-5e or 3x 22 - 18AWG communication cable communication (e.g. Belden 3106A) Figure 3-22 RS485 Connection 1. Cable connection of RS485 communication: 2+6 pin connectors 2.
- Page 42 When the inverters are monitored via the RS485 communication, a unique RS485 address for each inverter can be set up through the APP interface. Use the CPS Connect app to assign an address to each inverter on the network. Up to 32 inverters can be connected together in the RS485 communication network.
- Page 43 INSTALLATION PROCEDURE 1. Open the inverter wiring box. 2. Bring the communication cables into the wiring box through the provided knockout holes at the bottom. 3. Connect the RS485 wires to the green Phoenix connector ensuring correct polarity and using a shielded twisted pair cable. 4.
-
Page 44: Chapter 4 Commissioning (Via Wireless )
The inverter settings are accessed through the Chint Connect application. and users can download iOS version at Apple store or Android version in Google store named “CPS CONNECT PRO” (Support Android 4.1 and IOS 9.0 or later). 4.2 Commissioning Checklist 4.2.1 Mechanical Installation... -
Page 45: Connection To The Inverter - Wireless
Access Point from the user devices (tablet, smartphone, etc.), connection to the inverter via Wi-Fi . Open the APP (“CPS CONNECT PRO” previously mentioned) Enable the wireless connection on the device which is being used for... - Page 46 Figure 4-1 System setting...
- Page 47 Grid Code: 3 Standard codes are available – IEEE1547, Rule21, ISO-NE. Other SRDs can be implemented by manual configuration of settings. PV Link Type : (N/A – 1 MPPT) Neutral Line Setting : Select if a neutral is connect or not RS485: Choosing communication...
- Page 48 Figure 4-2 Normal Operation Status (Summary Screen)
- Page 49 If the inverter fails to operate normally, the “FAULT” light will illuminate and the fault information will show on the Device screen and you can skip to History check the detail as shown in the Figure 4-3. Figure 4-3 Fault Information Interface...
-
Page 50: Chapter 5 App Interface
Chapter 5 APP Interface 5.1 Overview Choose APP function Setup the product Activate a site Manage my site Wifi Setting Main menu Running Data Settings History Turn ON/OFF Month Year Password: 1111 Alarm Running Status Inverter Parameters Read/Write Register Fault Recording Upgrade Firmware Regulation PV Link Type Neutral Line... -
Page 51: Main Section
5.2 Main section In the MAIN section it’s possible to access the following sub-menus: ⚫ Running Data ⚫ Settings ⚫ History ⚫ Turn ON/OFF You can view the main information related the status and the DC,AC, OTHERS and VERSION information in the Main section:... -
Page 52: Running Data
5.3 Running Data In the Running Data sub-menu you can view the Power generation with Current, Day, Month, Year and Total as Following:... -
Page 53: Settings
5.4 Settings Choosing the Settings and input the password“1111”as following: In the Settings section it’s possible to access the following sub-menus: ⚫ Inverter Parameters ⚫ Read/Write Register ⚫ Upgrade Firmware... - Page 54 5.4.1 Inverter Parameters In the Inverter Parameters section it’s possible to access the following sub-menus: GridStandard, PV Link Type, Neutral Line, RS 485, Inverter Clock and Change Password as following Figure:...
- Page 55 5.4.2 Read/Write Register In the Read/Write Register section it’s possible to access the following sub-menus: Protect ActivePowerDerating ReactivePowerDerating LVRT/HVRT Others Enable/Disable Commands Back Read/Write Register Prote ct ActivePower Derating ReactivePowe r Derating LVRT/HVRT Oth ers Enab le/Disab le Co mman d...
- Page 56 5.4.2.1 Protect This interface is used to display and set the Protect parameters of the AC grid voltage, frequency and recovery, etc as following: Each of the 3 protection levels for OV, UV, OF and UF can be independently disabled. The function in Table 5.7.
- Page 57 Table 5-1 The Protection Parameters (IEEE1547, Rule21 and ISO-NE) Grid code Grid code Grid code Parameter name Description Range IEEE-1547 RULE-21 ISO-NE Grid Over Voltage Protection (Table 5.7 (13-15)) Threshold Level 1 GridVoltMax1 {100.00%,135.00%} 110.00% 110.00% 110.00% Max. grid voltage Trip Time Level 1 VoltMaxTripTime1(S) {0, 655}...
- Page 58 Table 5-1 The Protection Parameters (Continued) Grid code Grid code Grid code Parameter name Description Range IEEE-1547 RULE-21 ISO-NE Grid Over Frequency Protection (Table 5.7 (19-21)) Threshold Level 1 Max. GridF.Max1 {60, 66} {60.5} {60.5} {61.2} grid frequency Trip time of Level 1 Max. FMaxTripTime1(S)...
- Page 59 Table 5-1a Parameter Grid code Grid code Grid code Description Range name IEEE-1547 RULE-21 ISO-NE MOVING AVERAG PARAMETERS (Table 5.7 (25, 26)) Threshold max move VMaxMovAvg {100.00%,135.00%} {110.00%} {110.00%} {110.00%} average Voltage Trip time of max move VMaxMovAvgT {0, 655} {600} {600} {600}...
- Page 60 5.4.2.2 Active Power Derating “Active Power Derating” menu is used to set the active power derating parameters including Active Power Derating, Over frequency derating and High temperature frequency derating, etc. The parameters are shown in Table 5-2. To make permanent changes to these settings either on-site or via the Flex Gateway Portal, the Active Power Mode in Table 5.7 (3) must be set to ”Local Control”.
- Page 61 Table 5-2 Active Power Derating Setup Grid code Grid code Grid code Parameter name Description Range IEEE-1547 RULE-21 ISO-NE OVER-VOLTAGE DERATE (Table 5-7 (34) to Enable) The trigger Voltage of OVDeratStart {100%, 135%} {110%} {110%} {110%} Overvoltage derating Rate of Overvoltage OVDeratRate {0%, 100%} {0%}...
- Page 62 5.4.2.3 Reactive Power Derating “Reactive Power Derating” menu is used to set the Grid reactive power derating parameters including PF parameters and Q(u) parameters, etc. The parameters as shown in Table 5-5. These functions are enabled according to the mode selected in Table 5-7 (2).
- Page 63 (PFCurveP1,PFCurvePF1) Inductive (P%) Capacitive (PFCurveP2,PFCurvePF2) Figure 5-4 PF(P) Curve Mode (3). Q(U) Curve:Q(U) curve mode Note: The reactive compensation changes according to the grid voltage change, as shown in Figure 5-5. INSTRUCTION: The Q(U) curve function is only available for IEEE-1547 grid standards. Q/Pn (QuCurveU2i, QuCurveQ2i)
- Page 64 Table 5-3 Parameters of reactive power control (IEEE-1547,Rule-21 and ISO-NE) Grid Reactive Power Derating Grid code Grid code Grid code Parameter name Description Range IEEE-1547 RULE-21 ISO-NE FIXED POWER FACTOR Local Power Factor PF_Local {-1, 1} { -0.95} Setting PF(P) POWER FACTOR VS. POWER Power of PF(P) PF_PCurveActPw1(%)...
- Page 65 5.4.2.4 ARC The ARC Fault detection parameters should ONLY be adjusted by CPS or Qualified representative. Enabled by Table 5-6 (5, 6). Arc Fault is not an operational function for the 100/125kW Inverters.
- Page 66 5.4.2.5 LVRT/HVRT Low voltage ride-through “LVRT/HVRT” is used to set the LVRT ( ) and HVRT High voltage ride-through ) parameters as following: These functions are enabled with settings in Table 5.7-9 and 5.7-10.
- Page 67 Figure 5-6 The LVRT Curve 1.25 Through 5,6,7,8 1.15 Trip 1.05 Time/S 2 4 6 8 10 12 14 16 18 20 22 Figure 5-7 The HVRT Curve...
- Page 68 Table 5-4 LVRT and HVRT Parameters LVRT (Enable Table 5.7 - 9) Grid code Grid code Grid code Parameter name Description Range IEEE-1547 RULE-21 ISO-NE LVRTVoltPara Threshold LVRT {0%, 100 -%} {0%} {0%} {0%} (1,2) or 2 point) {0%, 100%} {0%} {0%} {0%}...
- Page 69 5.4.2.6 Others The REF column is reference to Table 5-7 Enable functions.
- Page 70 Table 5-5 Other Parameters Grid code Grid code Grid code Parameter name Description Range IEEE-1547 RULE-21 ISO-NE StartDelay (s) Startup delay time (0,1200) PVStartVolt(V) PV start-up voltage (860,950) (900) (900) (900) PVPowerMutate Increasing Irradiation {0.01%, 10%} {5.00%} {5.00%} {5.00%} Ratio (HECO) Power Ramp Rate GridFaultPStaStep Pwr Ramp after Fault...
- Page 71 5.4.2.7 Enable/Disable Enable/Disable is used to enable or disable the function and protect parameters as following:...
- Page 72 Table 5-6 The Enable/Disable Parameters (IEEE1547, Rule21 and ISO-NE) Grid code Grid code Grid code Parameter name Description Range IEEE-1547 RULE-21 ISO-NE Control Loop CtrlParaGroup {0,1,2,3,4} Parameters Disable Dispatch Remote Dispatch CtrMode Reactive power Local Q {Disable} {Disable} {Disable} mode Locat PF ReactivePwMode PF(P)
- Page 73 Grid code Grid code Grid code Parameter name Description Range IEEE-1547 RULE-21 ISO-NE Moving Avg Function VMaxMovAvgEn {Disable, Enable} {Disable} {Disable} {Disable} VMinMovAvgEn Moving Avg Function {Disable, Enable} {Disable} {Disable} {Disable} GFCIStaEn Static GFCI {Disable, Enable} {Enable} {Enable} {Enable} GFCIDynEn Dynamic GFCI {Disable, Enable} {Disable}...
- Page 74 5.4.2.8 Commands In the Read/Write Register section it’s possible to access the following sub- menus: ⚫ Power On/Off ⚫ Force Restart ⚫ Factory Reset ⚫ Auto Test ⚫ MPPT Scan ⚫ “Power On/Off” menu: Manual Turn ON/OFF: Manual Power ON/OFF is required after regulation setting or manual (fault) shut-down.
- Page 75 “MPPTScan” menu: “MPPTScan” is used to execute the MPPT scanning manually. The device screen will skip to normal operation interface if the MPPT scanning succeeds, or remain on the “MPPTScan menu” interface if the scanning fails. MPPT scan function is used for multi-MPP tracking, and is useful if the PV panels are partly shadowed or installed with different angles.
- Page 76 5.4.3 Fault Recording The last record can store up 128 fault record in “ Fault Record ” menu. 5.4.4 Firmware Upgrade ⚫ Installer open the APP – Chint Power Connect and select Firmware. Make sure the mobile phone can access the Internet. ...
- Page 77 INTERNET CONNECTION Firmware released to Cloud Firmware downloaded in-Pocket. WiFi to Inverter...
- Page 78 WiFi to Inverter...
- Page 79 5.4.4.1 Upgrade the Inverter ⚫ Click Upgrade and connect to LinKIT ⚫ Select the firmware file, enter the password and click Start to upgrade the Inverter. WiFi to Inverter 5.4.4.2 Upgrade the LinKIT ⚫ Connect to Chint Power Connect Click Upgrade to upgrade the linKIT ⚫...
-
Page 81: History
5.5 History There are 2 submenus in the “ History” menu: “Alarm” and “Running Status”. - Page 82 5.6 Turn ON/OFF Manual Turn ON/OFF: Manual Power ON/OFF is required after regulation setting or manual (fault) shut-down. Touch to submenu “Turn ON/OFF”. Then move the cursor to “Turn ON” to start the inverter, the inverter will start up and operate normally if the start-up condition is met.
-
Page 83: Chapter 6 Fault Shutdown And Troubleshooting
Chapter 6 Fault Shutdown and Troubleshooting 6.1 LED Fault and Troubleshooting LED information of CPS SCH125KTL-AIO/US-600: Interpretation for the indicator lights is shown in Table 6-1 Table 6-1 LED Indication LED light Name Status Indication Light PV Energized (control panel starts to... - Page 84 Table 6-2 Troubleshooting of LED Lights LED fault status Solutions Turn off the external AC breaker The Power LED does Switch the DC switch to “OFF” position not light up. Check the PV input voltage and polarity Turn off the external AC breaker Switch the DC switch to “OFF”...
-
Page 85: Fault And Troubleshooting
6.2 Fault and Troubleshooting The inverter will be shut down automatically if the PV power generation system fails, such as output short circuit, grid overvoltage / undervoltage, grid overfrequency / underfrequency, high environmental temperature or internal malfunction of the machine. The fault information will be displayed on the APP interface. - Page 86 Table 6-3 Troubleshooting Alarm Codes ALARM CODES Definition: Communication inside inverter fails Possible causes: Terminal block connecters of internal communication wires have poor contact Recommended solutions: 1.CommErr Observe for 5 minutes and see whether the alarm will be eliminated automatically; Switch off 3-phase working power supply and then reboot the system;...
- Page 87 Table 6-4 Troubleshooting Warning Codes WARNING CODES Definition: Internal alarm Recommended solutions: Warn0030 Observe for 5 minutes and see whether the alarm will (EepromErr) be eliminated automatically; Contact after-sales service personnel. Recommended solutions: Warn0040 The alarm is reserved now. The alarms in field can be (DC SPD fault) ignored.
- Page 88 Table 6-5 Troubleshooting Protection Codes PROTECTION CODES Recommended solutions: Restart inverter by recycle both AC and DC switches. Protect0090 Wait for 1 minute between OFF and ON for all energy to (Bus over voltage) discharge. If inverter cannot clear fault, replace inverter. Recommended solutions: 1.
- Page 89 PROTECTION CODES start up, then replace inverter. Recommended solutions: 1. Raise limit of DCImax (for example, 400mA) to allow inverter more room to adjust in transient condition to cope Protect0170 with imbalance of impedance and voltage between Grid (DCI high) phases.
- Page 90 PROTECTION CODES Recommended solutions: Protect0100 1. Restart inverter by recycling both AC and DC switches. Wait (The sensor fault for 1 minute between OFF and ON for all energy to of leakage current) discharge. 2. If not cleared, replace Filter board or inverter. Recommended solutions: 1.
- Page 91 Table 6-6 Troubleshooting Fault Codes FAULT CODES Recommended solutions: 1. Restart inverter by recycle both AC and DC Fault0130 switches. Wait for 1 minute between OFF and (Bus over total voltage) ON for all energy to discharge. 2. If inverter cannot clear fault, replace inverter. Recommended solutions: 1.
- Page 92 FAULT CODES Recommended solutions: 1. Restart inverter by recycling both AC and DC Fault0060 switches. Wait for 1 minute between OFF and (CPLD Fault) ON for all energy to discharge. 2. If inverter cannot clear fault, replace Control Board or inverter. Recommended solutions: 1.
-
Page 93: Chapter 7 Product Maintenance
Chapter 7 Product Maintenance 7.1 GENERAL MAINTENANCE To ensure optimal performance keep the Air Inlets Clean. Check the heat sink for debris using a flashlight though the fan inlets. Clogged heat-sinks will cause the fan duty-cycle to increase and reduce the life expectancy of the fans. The heat-sink can be cleaned by forcing pressurized are through the fan openings. - Page 94 Repair or replace the cables if necessary. 7.1.2 Clean the Air Vent Filter The inverter can become hot during normal operation. CPS SCH125KTL-AIO/US-600 uses built in cooling fans to provide sufficient air flow to help in heat dissipation.
- Page 95 (4) Attached the new cooling fans on the fan tray and fasten the cable on the fan tray with cable ties. Torque value: 16kgf-cm (14lbf-in) (5) Install the assembled fans back to the inverter. Torque value: 16kgf-cm (14lbf-in) Figure 7-1 Replace cooling fans...
- Page 96 7.1.4 Replace the inverter Please confirm the following things before replacing the inverter: (1) The AC side of inverter is turned off. (2) The DC switch of inverter is turned off. Then replace the inverter according to the following steps: Remove the screws which are connect between the main housing and installation rail, then move out the inverter from the rail.
- Page 97 Warning hands pinching Figure 7-2 Remove the 2 screws between main housing and rail b) Please refer to Chapter 3.2 Mechanical Installation 4) Mounting the Inverter onto the Bracket of the installation procedure.
-
Page 98: Chapter 8 Technical Data
Chapter 8 Technical Data (for Reference Only – Refer to Datasheet on website for latest information) SCH125KTL-AIO/US-600 DC Input – UNGROUNDED ARRAY Max. PV Power 187.5kW Max. DC Input Voltage 1500Vdc MPPT Voltage Range 860-1450Vdc MPPT Full Load Range 870-1300Vdc Start-up DC Input Voltage 900V Number of DC Inputs... - Page 99 Display and Communication User Interface and Display LED Indicators, APP Inverter Monitoring Modbus RS485 / PLC Option Site Level Monitoring CPS Flex Gateway (1 per 32 inverters) Modbus Data Mapping SunSpec/CPS Remote Diagnostics / FW Standard with CPS Flex Gateway Upgrade Functions...
- Page 100 Po/Pn(%) 100% 860 900 1300 1450 PV Voltage (V) Figure 8-1 CPS SCH125KTL-AIO/US-600 derating curve of PV input voltage When the DC input voltage is higher than 1300V, the inverter begins derating, as shown in Figure 8-1.
- Page 101 Po/Pn(%) 100% 2%/℃ Ambient Temperature(℃) Figure 8-2 CPS SCH125KTL-AIO/US-600 Derating Curve with High Temperature When the ambient temperature is higher than 113℉/ 45℃, the inverter output power will begin to derate, as shown in Figure 8-2.
- Page 102 1.0Un 1.1Un Figure 8-3 CPS SCH125KTL-AIO/US-600 Derating Curve of Grid Voltage When the grid Voltage is within 100%~110% of the rated output voltage, the inverter output power may reach 100%. When the grid voltage is lower than 100%, the inverter will limit the AC Output Current and the...
-
Page 103: Chapter 9 Limited Warranty
5 years. For service, Chint Power Systems America will provide local support. For Warranty terms, please refer to the CPS America standard warranty policy in place at time of purchase. CHINT POWER SYSTEMS AMERICA CO., LTD.
Need help?
Do you have a question about the SCH Series and is the answer not in the manual?
Questions and answers