Table of Contents
Advertisement
Available languages
Available languages
Quick Links
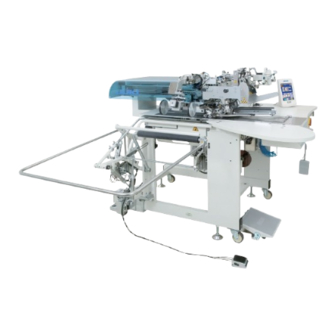
APW-896N
基本操作説明書 BASIC OPERATION MANUAL
基本操作说明书
注意 : 本説明書は、ミシンの準備 , 操作パネルについて、基本的な縫製を行うための使い方をまとめたも
のになります。
その他のミシンの取り扱い方法についての詳細は、付属の CD 取扱説明書を参照ください。
NOTE : This manual will be preparation of the sewing machine, about the operation panel,
summarizes how to use for performing the basic sewing.
For a detailed description of how to handle sewing machine Other, please refer to the CD
instructions provided.
注意 : 本说明书将缝纫机的准备,对操作面板、总结了如何使用用于执行基本的缝制。
对于如何处理缝纫机其他的详细说明,请参阅相关的 CD 的说明书。
/IP-420
No.00
40152481
Advertisement
Chapters
Table of Contents

Related Manuals for JUKI APW-896N/IP-420


Summary of Contents for JUKI APW-896N/IP-420
- Page 1 APW-896N /IP-420 基本操作説明書 BASIC OPERATION MANUAL 基本操作说明书 注意 : 本説明書は、ミシンの準備 , 操作パネルについて、基本的な縫製を行うための使い方をまとめたも のになります。 その他のミシンの取り扱い方法についての詳細は、付属の CD 取扱説明書を参照ください。 NOTE : This manual will be preparation of the sewing machine, about the operation panel, summarizes how to use for performing the basic sewing. For a detailed description of how to handle sewing machine Other, please refer to the CD instructions provided.
- Page 3 *コンパクトフラッシュ(TM)は米国サンディスク社の登録商標です。...
-
Page 5: Table Of Contents
目 次 I. ミシンの準備 ..................... 1 1. ミシン頭部の取り扱い ............................ 1 (1) 針の取り付け方 ............................1 (2) 使用糸 ................................ 1 (3) 上糸の通し方 ............................2 2. 縫製テーブルの取り外し方..........................3 (1) 下糸を交換する時 ............................. 3 (2) 縫製テーブルを取り外した場合の注意 ....................4 3. 下糸の巻き方 ..............................5 4. ボビンケースの糸の通し方..........................6 5. ボビンケースの取り付け方..........................6 6. 糸調子の取り方 ..............................7 7. 縫製布のセット ..............................8 8. -
Page 6: ミシンの準備
I. ミシンの準備 1. ミシン頭部の取り扱い (1) 針の取り付け方 注意 ・不意の起動による事故を防ぐため、電源を切ってから行ってください。 ・針交換時、センターメス刃部に指を触れないように注意してください。 使用針は DP × 17 #14 ~ 18(標準 #16) です。指定の針を使用してください。 左右針とも、長溝❶が内側に向き合うようにし ❶ て、針取り付け穴の奥につき当たるまで差し込 ❷ ❷ んで、針止めねじ❷で止めてください。 (2) 使用糸 • 上糸は、左よりの糸をご使用ください。 • 下糸は、左より、右よりのいずれでもご使用 になれます。 使用する糸は、よりむらのない新しい糸 右よりの糸 を使用してください。 左よりの糸 − 1 −... -
Page 7: 上糸の通し方
(3) 上糸の通し方 注意 不意の起動による事故を防ぐため、電源を切ってから行ってください。 ① バインダー❶を A 方向に持ち上げてから、B 部を手で支えてバインダー全体を C 方向に旋 回させてください。 バインダーを押して、C 方向に旋回する と、玉幅が狂うことがありますので、必 ず B 部を押してください。 バインダーはボールプランジャーでロッ クされているので、強めに C 方向に旋回 させてロックを解除します。 ❶ ② その後は、下図の通り上糸を図の順序に通してください。 糸案内フェルト C を定期的に交換してください。縫製中の糸あばれによる縫い不良を防止 することができます。 上糸は図の順序に通してください。 ミシンに向かって左側の針糸 A ミシンに向かって右側の針糸 B − 2 −... -
Page 8: 下糸を交換する時
2. 縫製テーブルの取り外し方 注意 不意の起動による事故を防ぐため、電源を切ってから行ってください。 (1) 下糸を交換する時 ① 大押えを後進端に移動させてください。 ② 左、右縫製テーブル❶、❷をテーブル側面切 欠き A より指で縫製テーブルを上げます。 ❷ ❶ ③ その状態で、矢印方向に移動させるとボビン ケースが見えます。 この時、縫製テーブルが針に当たらない ように移動させてください。 ピン ④ 下糸を交換したら、逆の要領で縫製テーブル を針板およびピンに確実にセットしてくださ い。 − 3 −... -
Page 9: 縫製テーブルを取り外した場合の注意
(2) 縫製テーブルを取り外した場合の注意 注意 不意の起動による事故を防ぐため、電源を切ってから行ってください。 縫製テーブル❶、❷を外した場合、次の要領で確実にセットしてください。 ① ピン後ろ(左) (右)をピン穴に確実にセッ ピン後ろ トします。 ❶ ② ピン穴前(左) (右)をピンに確実にセット します。 ピン穴前 ❷ 板ばね 1. SA-120N(芯地自動供給装置)付き の機械の場合は、板ばね部を曲げてし まわないように上に持ち上げながら縫 製テーブル❶、❷を元に戻してくださ い。 芯地供給の出口 2. 下記の仕様で、縫製テーブル❶、❷の取り外しを行う場合、袋布押え、および芯地押えを曲 げないように注意してください。 ①袋布押え(標準) ②袋布押え(芯地供給用) − 4 −... - Page 10 3. 下糸の巻き方 注意 損傷を防ぐため、運転中はボビンに触れないでください。 ① ボビンを糸巻軸の奥まで差し込み ます。 ② 糸案内板❽に糸を通し、糸調子皿 ❹ ❼を開いて、糸調子棒❹のスリッ トに入れます。 ③ 糸を図の順に通しボビンに 4 ~ 5 ❽ ❼ 回巻き付けます。 (矢印方向がボビ ❷ 回転方向 ンの回転方向になります。 ) ❶ ❸ ④ ボビン糸案内❶を押しますと、ボ ビンが回転します。 ⑤ 所定量巻き終った後、自動的に停 止します。 ❺ ❻ ❾ 1. ボビンに糸を巻き始める時は、上図のように溝部❺から巻き始めてください。❻から巻き始 めた場合は、下糸無し検知が誤動作する場合があります。 2. 下糸の残り量を安定して確保するために、ボビンに糸が均一に巻かれていることが大切です。 特に巻き始めの部分にご注意ください。...
-
Page 11: ボビンケースの糸の通し方
4. ボビンケースの糸の通し方 ① 糸が右巻きになるようにボビンを持ち、ボビ ンケースに入れます。 ボビンケース ② 糸をボビンケースの糸通し溝❶に入れます。 ③ そのまま、糸調子ばねの下を通します。 ボビン ❶ 5. ボビンケースの取り付け方 注意 不意の起動による事故を防ぐため、電源を切ってから行ってください。 ① ボビンケースは釜のレバー❶を起こして、ボ ビンと一緒に取り出してください。 ❷ ② 入れる時は、 釜の軸に正しく差し込み、 レバー ❶を倒してください。 ボビンケース❷を左右入れ替えた時は、 必ずオープナーの最後退時とボビンケー スのすき間量が 0.2 〜 0.3mm であるこ とをを確認してください。 すき間量が 0.2 ❶ 〜 0.3mm ではない時は、止めねじ❸を ゆるめ調整してください。 ❸ − 6 −... -
Page 12: 糸調子の取り方
6. 糸調子の取り方 ① 下糸張力の調整 ボビンケース 下糸調子ねじを右に回すと強く、左に回すと 弱くなります。 ボビン 下糸調子ねじ 左図のようにテンションゲージを使用した測 定方法で、 下糸の標準張力は 0.25 ~ 0.35N になります。 ② 上糸張力の調整 まず右、左の下糸張力を、調整します。 右、左の下糸張力に合わせて、右針糸調子は、 糸調子ナット❶を、 左針糸調子は、 糸調子ナッ ト❷を調整します。右へ回せば糸張力は強く なり、左へ回せば糸張力は弱くなります。 ❶ ❷ − 7 −... -
Page 13: 縫製布のセット
7. 縫製布のセット 縫製する身生地は、左右の身 頃クランプの下に張ってある 身頃クランプゴムの大きさよ り、大きな生地をご使用くだ さい。 身頃クランプより小さな生地 で縫うと、ゴムのはがれや故 障の原因となります。 小さな生地を縫う場合は、敷 身頃クランプ(左) 身頃クランプ (右) 板仕様(オプション)を装着 身生地 身頃クランプゴム してください。 8. 生地ガイドの調整 生地ガイドは、縫製時に玉布をミシン針際で安定させる働きをします。 生地の厚さにより生地ガイド❶の高さ、押え圧を調整してください。 ① 生地ガイド高さの調整はナットを❷ゆるめ、 ❹ ❷ ねじ❸により調整できます。 生地ガイドばね ( 生地ガイドと玉布定規とのすき間は出荷時 0.5 ~ 1.0mm に調整しております ) 生地ガイドアーム ❸ ② 押え圧はばね圧調整ねじ❹で調整できます。 ❶ ( 生地通過時に無理な抵抗がない程度に調整 してください。) 0.5 〜... -
Page 14: 操作パネルの使用方法
II. 操作パネルの使用方法 1. 操作パネル(IP-420)の基本操作 (1) IP-420 の各部の名称 [ 前面 ] [ 右側面 ] ❻ ❼ ❽ ❾ ❶ ❷ ❸ ❹ ❺ 記号 名称 説明 ❶ タッチパネル・液晶表示部 ❷ 準備完了キー データ入力画面と縫製画面の切り替えを行います。 データ入力画面とインフォメーション画面の切り替えを行 ❸ インフォメーションキー います。 ❹ 通信キー データ入力画面と通信画面の切り替えを行います。 データ入力画面と各種詳細設定を行うモード切り替え画面 ❺ モード切り替えキー の切り替えを行います。 ❻ コントラストボリューム ❼ 明るさボリューム ❽ コンパクトフラッシュ (TM) 取り出しボタン ❾... -
Page 15: Ip-420 の各部の名称
(2) 共通で使用されるボタン IP-420 の各画面で共通の操作を行うボタンは下記の通りです。 ピクト 名称 説明 ポップアップ画面を閉じます。 キャンセルボタン データ変更画面の場合は、変更中のデータをキャンセルします。 エンターボタン 変更したデータを確定します。 上スクロールボタン ボタンもしくは表示を上方向にスクロールします。 下スクロールボタン ボタンもしくは表示を下方向にスクロールします。 リセットボタン エラーの解除等を行います。 数字入力ボタン テンキーが表示され、数字の入力を行うことができます。 文字入力ボタン 文字入力画面を表示します。 (3) 基本操作 ① 電源スイッチを入れる 最初に、電源スイッチを入れてください。 ウェルカム画面表示後に、リセットポップアップ画面が表示 されます。リセットボタン A を押します。 リセットボタンを押すと、バインダーが上がりますので注 意してください。 次に言語選択ポップアップ画面が表示されます。表示させた い言語を選択後、エンターボタン B を押すと、下図の 単独縫い入力画面(画面 A)が表示されます。 言語選択を行わずにキャンセルボタン またはエンター ボタン にて選択画面を終了してしまうと、言語選択... - Page 16 ② 縫製したいパターン No. を選択する パターン No. ボタン C を押すとパターン No. の選択が できます。パターン No. の選択方法は、APW-896N 取扱説 明書 "VI-7. (1) パターンの選択を行うには " p.42 を参照し てください。 ご購入時は、パターン No.1 ~ 10 が登録されていますので、 縫製仕様に合わせて、縫製データを変更してご使用ください。 ( パターンが登録されていない番号は表示されません。) 入力画面の詳細説明については、APW-896N 取扱説明書 "VI-3. 基本画面の説明 " p.28 を参照してください。 単独縫い入力画面(画面 A) ③ 縫製を開始する 単独縫い入力画面 (画面 A) で準備完了キー D を押すと、...
- Page 17 この時、エラー画面が表示され、停止スイッチが押されたこ とを知らせます。リセットボタン F を押すと、エラー が解除され、入力画面に戻ります。 ⑤ 胸箱装置実装時に、ペダルを踏み返す 胸箱装置実装時、緑色の縫製画面 ( 画面 B) において、 ペダルを踏み返すと左記の確認画面が表示されます。 ペダル踏み返しによる大押え後退時は、フラップ押えを閉じ て後退するため、大押え上に生地が置かれている状態でない かを確認する画面です。 「フラップ押えを閉じたまま後退します。大押え上の生地を取 り除いてください」という確認メッセージが表示されます。 大押え上に生地が無い場合、大押え後退ボタン G を押 すと、フラップ押えを閉じたまま、大押えが後退します。同 時に確認画面が解除され、縫製画面に戻ります。 大押え後退を取り消す場合、キャンセルボタン H を押すと、フラップ押えが開き、大押えは 後退しません。同時に確認画面が解除され、縫製画面に戻ります。 大押え上に生地がある場合は、 必ずキャンセルボタン H を押して生地を取り除いてください。 その後、もう一度ペダルを踏み返して、大押えを後退させてください。 − 12 −...
- Page 19 * "CompactFlash(TM)" is the registered trademark of SanDisk Corporation, U.S.A.
- Page 21 CONTENTS I. PREPARATION OF THE SEWING MACHINE ..............1 1. HOW TO OPERATE THE SEWING MACHINE HEAD ................1 (1) How to attach the needles ........................ 1 (2) Thread used ............................1 (3) How to pass the needle thread ......................2 2.
-
Page 22: Preparation Of The Sewing Machine
I. PREPARATION OF THE SEWING MACHINE 1. HOW TO OPERATE THE SEWING MACHINE HEAD (1) How to attach the needles CAUTION • Turn OFF the power before starting the work so as to prevents accidents caused by abrupt start of the sewing machine. -
Page 23: How To Pass The Needle Thread
(3) How to pass the needle thread CAUTION Turn OFF the power before starting the work so as to prevent accidents caused by abrupt start of the sewing machine. ① Lift binder ❶ in the direction A, Hold section B by hand and turn the whole binder in the direc- tion C. -
Page 24: How To Remove The Sewing Table
2. HOW TO REMOVE THE SEWING TABLE CAUTION Turn OFF the power before starting the work so as to prevent accidents caused by abrupt start of the sewing machine. (1) When replacing the bobbin thread ① Move the clamp foot to the rear end of its stroke. ②... -
Page 25: Cautions To Be Taken When The Sewing Tables Are Removed
(2) Cautions to be taken when the sewing tables are removed CAUTION Turn OFF the power before starting the work so as to prevent accidents caused by abrupt start of the sewing machine. When you remove the sewing tables ❶ and ❷ , be sure to accurately set them by following the points below. ①... -
Page 26: How To Wind The Bobbins
3. HOW TO WIND THE BOBBINS CAUTION To prevent damage, avoid contact with bobbins while the machine is in operation. ① Put bobbin into the thread winder shaft until it will go no further. ② Pass thread through thread guide ❹... -
Page 27: How To Thread The Bobbin Case
4. HOW TO THREAD THE BOBBIN CASE ① Hold in hand a bobbin in the way that it spins clockwise and put it into the bobbin case. Bobbin case ② Pass the thread through slot ❶ in the bobbin case. ③... -
Page 28: How To Adjust The Thread Tension
6. HOW TO ADJUST THE THREAD TENSION ① Adjusting bobbin thread tension Bobbin case Turn bobbin thread tension adjustment screw clockwise to increase the bobbin thread tension or turn the screw counterclockwise to decrease Bobbin Bobbin thread tension adjustment screw As shown in the left-hand figure, standard bobbin thread tension is 0.25 to 0.35N when measuring with the tension gauge. -
Page 29: Setting The Material To Be Sewn
7. SETTING THE MATERIAL TO BE SEWN Use a garment body that is larger than the garment body clamp rub- ber piece adhered under the right and left garment body clamps. If a garment body of which size is smaller than the garment body clamp rubber piece, the rubber piece can come off or the machine can malfunction. -
Page 30: How To Use The Operation Panel
II. HOW TO USE THE OPERATION PANEL 1. BASIC OPERATION OF THE OPERATION PANEL (IP-420) (1) Configuration of IP-420 [ Front ] [ Right side ] ❻ ❼ ❽ ❾ ❶ ❷ ❸ ❹ ❺ Name Symbol Description ❶ TOUCH PANEL, LCD display section Change-over of the data input screen and the sewing screen is ❷... -
Page 31: Buttons Used In Common
(2) Buttons used in common Buttons that perform common operation in the respective screens of IP-420 are as described below. Pictograph Name Description Pop-up screen is closed. In case of the data change screen, the data during CANCEL button changing can be cancelled. ENTER button Data changed are determined. - Page 32 ② Select pattern No. you desire to sew. C is pressed, the pattern No. When PATTERN NO. button can be selected. For the selecting procedure of pattern No., refer "VI-7.(1) Performing the selection of pattern" p. 42 of APW- 896N Instruction Manual . At the time of your purchase, pattern Nos.
- Page 33 At this time, the error screen is displayed to inform that stop switch F is pressed, the error is is pressed. When RESET button released and the screen returns to the input screen. ⑤ Depress back the pedal at the time of mounting the breast box device.
- Page 35 *「CompactFlash(TM)」是美国 SanDisk 公司的注册商标。...
- Page 37 目 录 I. 缝纫机的准备..............1 1. 缝纫机机头的使用 .................1 (1) 机针的安装方法 ...............1 (2) 使用机线 ................1 (3) 上线的穿线方法 ...............2 2. 缝制机台的拆卸方法 ...............3 (1) 更换底线时 ................3 (2) 卸下了缝制机台后的注意事项 ............4 3. 底线的卷绕方法 ................5 4. 梭壳的穿线方法 ................6 5. 梭壳的安装 ................6 6. 线张力器的取下方法 ...............7 7. 缝制布料的安放 ................8 8.
-
Page 38: 缝纫机的准备
I. 缝纫机的准备 1. 缝纫机机头的使用 (1) 机针的安装方法 注意 ·为了防止突然的起动造成事故,请关掉电源之后再进行操作。 ·更换机针时,请注意手指不要碰到中心刀的刀刃。 使用机针是 DP×17 #14 ~ 18(标准 #16) 。请 使用指定的机针。 左右机针均让长槽❶朝向内侧,并插入到顶到机 ❶ 针安装孔的最里面,然后请用机针固定螺丝❷拧 ❷ ❷ 紧固定。 (2) 使用机线 · 上线请使用左捻线。 · 底线左捻线和右捻线均可以使用。 使用的机线,请使用拧得整齐的新线。 右捻线 左捻线 − 1 −... -
Page 39: 上线的穿线方法
(3) 上线的穿线方法 注意 为了防止突然的起动造成事故,请关掉电源之后再进行操作。 ① 向 A 方向拿起滚边器❶之后,再用手托着 B 部, 让整个滚边器向 C 方向旋转。 按滚边器,向 C 方向旋转之后,有可能袋 盖宽度发生变动,因此请一定按 B 部。 滚边器被球塞锁定着,用力向 C 方向转动 就可以解除锁定。 ❶ ② 然后,请按照下图所示的顺序穿上线。 请定期地更换线导线毛毡 C。可以防止缝制中由于机线乱跳而发生的缝制不良。 请按照图中所示的顺序穿上线。 面向缝纫机时左侧的机线 面向缝纫机时右侧的机线 − 2 −... -
Page 40: 缝制机台的拆卸方法
2. 缝制机台的拆卸方法 注意 为了防止突然的起动造成事故,请关掉电源之后再进行操作。 (1) 更换底线时 ① 请把大压脚移动到后退端。 ② 用手指从机台侧面缺口 A 抬起左、右缝制机 ❷ ❶ 台❶、❷。 ③ 在此状态下,向箭头方向移动之后就可以看到 梭壳。 此时,请注意移动时不要让缝制机台碰到 机针。 销子 ④ 更换了底线之后,请按照相反的顺序把缝制机 台确实地安放到针板和销子上。 − 3 −... -
Page 41: 卸下了缝制机台后的注意事项
(2) 卸下了缝制机台后的注意事项 注意 为了防止突然的起动造成事故,请关掉电源之后再进行操作。 卸下了缝制机台❶、❷后,请按照以下的要领确实地安装。 ① 把后销子 ( 左 )( 右 ) 确实地安装到销孔。 后销子 ② 把前销孔 ( 左 )( 右 ) 确实地安装到销子上。 ❶ 前销孔 ❷ 板弹簧 1. 对于带有 SA-120N( 芯布自动供给装置 ) 的缝纫机,请注意不要让板弹簧弯曲向 上抬起,把缝制机台 ❶、❷ 返回到原来 的位置。 供给芯布的出口 2. 对于以下的规格拆卸缝制机台 ❶、❷ 时,请注意不要弄弯袋布压脚和芯布压脚。 ①袋布压脚... -
Page 42: 底线的卷绕方法
3. 底线的卷绕方法 注意 为了防止受伤,运转中请不要触摸。 ① 把旋梭插入到绕线轴的最里面。 ② 把机线穿过导线板❽,打开线张力 盘❼,然后放入线张力杆❹的狭条 ❹ 里。 ③ 按照图的顺序穿线,并在旋梭上卷 绕 4 ~ 5 圈。( 箭头方向是旋梭转 ❽ ❼ 动方向。) ❷ ④ 按了旋梭导线器❶之后,旋梭转动。 ❶ 转动方向 ❸ ⑤ 卷绕完规定量的线之后,自动停止 绕线。 ❺ ❻ ❾ 1. 开始向旋梭卷绕线时,请从上图所示的槽❺开始卷绕。从❻开始卷绕后,底线用完的检测有可 能发生误动作。 2. 为了稳定地确保底线的残量,旋梭上的线必须均匀地卷绕。特别是要注意开始卷绕的部分。 如果线卷绕得不均匀的话,请调整线张力座❸的左右位置。 3. -
Page 43: 梭壳的穿线方法
4. 梭壳的穿线方法 ① 手拿旋梭,在线右卷的状态下放入梭壳里。 ② 把线放入梭壳穿线槽❶。 梭壳 ③ 然后把线从线张力弹簧下面穿过。 旋梭 ❶ 5. 梭壳的安装 注意 为了防止突然的起动造成事故,请关掉电源之后再进行操作。 ① 请拔起旋梭拨杆❶,把梭壳和旋梭一起取出来。 ② 放入时,请正确地插入旋梭轴,然后放倒拨杆 ❶。 ❷ 左右更换梭壳❷时,请一定确认开放器在 最后退位置时和梭壳的间隙量是否为 0.2 ~ 0.3mm。如果间隙量不是 0.2 ~ 0.3mm 的话,请拧松固定螺丝❸进行调整。 ❶ ❸ − 6 −... -
Page 44: 线张力器的取下方法
6. 线张力器的取下方法 ① 底线张力的调整 梭壳 向右转动底线张力器螺丝张力变强,向左转动 则张力变弱。 梭芯 底线张力器螺丝 如左图所示那样,使用张力计进行测定时, 底线的标准张力应为 0.25 ~ 0.35N。 ② 上线张力的调整 首先调整右、左的底线张力。 根据右、左的底线张力,需要调整时右线张力 器调整线张力器螺母❶,左线张力器调整线张 力器螺母❷。向右转动线张力变强,向左转动 则线张力变弱。 ❶ ❷ − 7 −... -
Page 45: 缝制布料的安放
7. 缝制布料的安放 缝制的衣片布料请根据左右衣片 夹下的衣片夹橡胶的大小,使用 较大的布料。 用比衣片夹小的布料缝制的话, 会发生橡胶脱落的故障。 缝制小布料时,请安装衬板规格 ( 选购品 )。 衣片夹 ( 左 ) 衣片夹 ( 右 ) 衣片布料 衣片夹橡胶 8. 布料导向器的调整 布料导向器具有缝制袋盖布时稳定缝纫机机针的作用。 请根据布料的厚度,调整布料导向器❶的高度和压脚压力。 ① 拧松螺母❷,然后用螺丝❸调整布料导向器的 ❹ ❷ 高度。 ( 有关布料导向器和袋布直尺的间隙,出货时 布料导向器弹簧 调整为 0.5 ~ 1.0mm) ❸ 布料导向器机臂 ② 压脚压力可以用弹簧压力调整螺丝❹进行调 ❶... -
Page 46: 操作盘的使用方法
II. 操作盘的使用方法 1. 操作盘(IP-420)的基本操作 (1) IP-420 各部的名称 [ 前面 ] [ 右侧面 ] ❻ ❼ ❽ ❾ ❶ ❷ ❸ ❹ ❺ 符号 名称 说明 ❶ 触摸操作盘液晶显示部 ❷ 准备完了键 进行数据失入画面和缝制画面的变换。 ❸ 信息键 进行数据输入画面和信息画面的变换。 ❹ 通讯键 进行数据输入画面和通讯画面的变换。 进行数据输入画面和进行各种详细设定画面的模式变换画面 ❺ 模式变换键 的变换。 ❻... -
Page 47: 通用的按钮
(2) 通用的按钮 在 IP-420 的各画面上通用操作的按钮如下所示。 图标 名称 说明 关闭凸起画面。 取消按钮 变更数据画面时,取消变更中的数据。 确定按钮 确定变更的数据。 上滚动按钮 向上方滚动按钮或显示。 下滚动按钮 向下方滚动按钮或显示。 复位按钮 解除异常错误等。 数字输入按钮 显示十数字键,可以进行数字的输入。 文字输入按钮 显示文字输入画面。 (3) 基本操作 ① 打开电源开关 请首先打开电源开关。 欢迎画面显示后,复位凸起画面显示出来。请按复位按钮 A。 按了复位按钮之后,滚边器上升,因此请注意安全。 接着,语言选择凸起画面被显示。选择了想显示的语言,按确定 B 之后, 下图的单独缝制输入画面 ( 画面 A) 被显示。 按钮 不选择语言用取消按钮... - Page 48 ② 选择想缝制的图案 No. C 之后,可以选择图案 No.。有关图 按了图案 No. 按钮 案 No. 的选择方法,请参阅 APW-896N 使用说明书 "VI-7.(1) 选择图案时 " p.42。 购买时,图案 No.1 ~ 10 被登记着,因此请根据缝制规格的情 况变更缝制数据之后使用。( 没有登记的图案号码不显示。) 有关本画面的详细说明,请参阅 APW-896N 使用说明书 "VI- 3. 基本画面的说明 " p.28。 单独缝制输入画面 ( 画面 A) ③ 开始缝制 D 之后, 在单独缝制输入画面...
- Page 49 此时,错误画面被显示出来,通知停止开关被按。按了复位按 F 之后,错误被解除,然后返回到输入画面。 钮 ⑤ 实装了胸箱装置时,回踩踏板 选择 胸箱装置实,在绿色的缝制画面 ( 画面 B) 上,回 踩踏板之后,左侧的确认画面被显示出来。 回踩踏板让大压脚后退时,为了关闭袋盖压脚进行后退,确认 在大压脚上是否防止了布料的画面。 「关闭袋盖压脚的状态下进行后退。请取下大压脚上的布料」的 确认信息被显示出来。 G,然后取下 在大压脚上有布料时,请一定按取消按键 布料。之后,请再次回踩踏板,让大压脚后退。 H 之后,袋盖压脚打开,大压脚就不后退了。同时,确认画 取消大压脚后退时,按了取消按键 面被解除,返回缝制画面。 大压脚上没有布料时,按了大压脚后退按键 H 之后,关闭袋盖压脚,大压脚后退。同时,确 认画面被解除,返回到缝制画面。 − 12 −...
- Page 52 ※ この取扱説明書は、仕様改良のため予告なく変更することがあります。 Please do not hesitate to contact our distributors or agents in your area for further information when necessary. Copyright © 2014 JUKI CORPORATION * The description covered in this instruction manual is subject to change for improvement of the • 本書の内容を無断で転載、複写すること...
Need help?
Do you have a question about the APW-896N/IP-420 and is the answer not in the manual?
Questions and answers