
Related Manuals for RCA RTD258


Summary of Contents for RCA RTD258
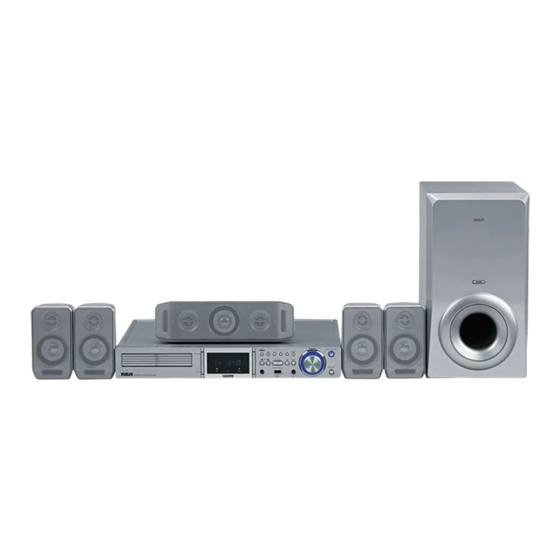
- Page 1 RTD258 Home Theater User’s Guide Système de cinéma maison Guide de l’utilisateur Teatro en Casa Guía del Usuario...
-
Page 2: Fcc Information
FCC Information This device complies with Part 15 of the FCC Rules. Operation is subject to the following two : (1) This device may not cause harmful interference, and (2) this device must accept any interference received, including interference that may cause undesired operation. -
Page 3: Table Of Contents
Connections and Setup Things to consider before you connect ...2 Accessories provided ...2 Front panel controls...3 Connecting to audiovisual equipment ...4 Connecting the speakers ...5 Positioning speakers ...6 Front speaker placement...6 Preferred surround placement ...7 Front Surround Mode Speaker Placement ...8 Setting up the speakers...8 Mounting the Speakers...8 Adjusting the angle of the speakers...9... -
Page 4: Connections And Setup
Connections and Setup Things to consider before you connect • Ensure that the mains supply in your house complies with that indicated on the identification sticker located on the back of your unit. • Install your unit horizontally, away from any source of heat (fireplace) or appliances creating strong magnetic or electric fields. -
Page 5: Front Panel Controls
Front panel controls DVD Home Theatre System RTD258 ON/STANDBY - Switches the unit on and off. SUBWOOFER - Toggles between different subwoofer output levels (soft/balance/strong/powerful). VOLUME - Adjusts the volume. DISC SKIP – Goes to the next slot in the disc tray. -
Page 6: Explanation Of Jacks And Cables
Connections and Setup VIDEO VID EO S-VIDEO S-V IDE O COM PONENT VI DEO COMPONENT VIDEO (REGULAR AND PROG SCAN) REGULAR A N D PROG S CAN Video cables Composite video cable (included) The basic Video jack (usually color-coded yellow) is also referred to as composite video. -
Page 7: Connecting The Speakers
Illustrations contained in this document are for representation only. Connections and Setup Connecting the speakers Six speakers are provided with the unit (2 front, 1 center, 2 rear, 1 subwoofer). To achieve good surround effects, all six speakers need to be connected to the receiver. -
Page 8: Positioning Speakers
Connections and Setup Courtesy Dolby Laboratories Magnetic shielding Speakers placed less than two feet from the TV set must be magnetically shielded in order to prevent picture distortion. Front, Center and Rear speakers provided with this unit are magnetically shielded to protect your TV set. Note: Place the subwoofer a feet or more away from TV when using the Front Surround sound Effect. -
Page 9: Preferred Surround Placement
Courtesy Dolby Laboratories Courtesy Dolby Laboratories Courtesy Dolby Laboratories Illustrations contained in this document are for representation only. Connections and Setup Preferred surround placement Location If possible, place surround speakers to either side of the listening area, not behind it. Height If space permits, install surround speakers 2-3 feet above viewers. -
Page 10: Front Surround Mode Speaker Placement
Connections and Setup Front Surround Mode Speaker Placement Configuration 1 Configuration 2 If placing the rear speakers (surround spekaers) at the back is not a good choice for you, you can use the Front Surround sound Effect(FSsE). Follow the following instruction for setting the speakers and the setup menu of the Player. -
Page 11: Adjusting The Angle Of The Speakers
Adjusting the Angle of the Speakers To achieve the best Front Surround sound Effect (FSsE), adjust the mounted front left and the rear left speakers to the left for an angle of 25 o - 45 o from the center. Adjust the mounted front right and rear right speakers to the right in the same way. -
Page 12: Disconnecting The Speakers
Connections and Setup Disconnecting the Speakers 1. To unlock the speakers, press and hold the hinge spring as illustrated below. 2. Slide out the rear speaker from the hinge. 3. Press and hold the two hinge springs. 4. Slide out the hinge from the front speaker. Illustrations contained in this document are for representation only. -
Page 13: Setting Up The Setup Menu
Connections and Setup 2. Setting the Setup Menu To optimize the front surround sound effect, you can control different levels of surround sound according to your room size. See page 25 section “Front Surround” for setting the setup menu of the Player. -
Page 14: The Remote Control
The Remote Control The remote control Navigating through menus Use the direction buttons to navigate through the menus. Press the OK button on the remote control to confirm your selection. Illustrations contained in this document are for representation only. Remote control functions in DVD/CD mode ON•OFF - Switches the unit on and off. -
Page 15: Remote Control Functions In Tuner Mode
Remote control functions in Tuner mode TUNER - Selects the TUNER and switch between FM/AM. VOL+/- - Adjusts the sound volume. MUTE - Mutes and Resotres the sound. TUNER +/- - Tunes down and up the radio frequencies. MEMORY - Stores a station. CH+/- - Selects programmed stations. -
Page 16: Playing Discs - Basic Functions
Playing Discs - Basic Functions Compatible discs • DVD • DVD-R,DVD-RW, DVD+R, DVD+RW • CD • CD-R, CD-RW Compatible formats • DVD, VCD (Video Compact Disc), SVCD (Super Video Compact Disc), JPEG • CD, mp3, WMA See page 30 and 31 for more information about discs and compatible formats. Regional coding Your DVD player has been designed to process regional management information stored on DVD discs. -
Page 17: Types Of Menus
Types of Menus • Disc menu – The appearance and contents of this menu varies according to the type of disc you have inserted. It is separate from the Setup menu. • Info menu – The player’s Info menu appears at the bottom of the screen while the disc is playing. Press the INFO button on the remote to toggle the Info menu on or off. -
Page 18: Accelerated Play
Playing Discs - Basic Functions Accelerated play While the disc is playing, press the REVERSE or FORWARD button one or more times to vary the speed and direction of the accelerated play. Press PLAY to resume normal playback. Note: REV or FWD function is not available for WMA disc. Pause While the disc is playing, press PAUSE once for freeze frame. -
Page 19: The Info Menu
The Info Menu Using the Info menu Press the INFO button on the remote while a disc is playing to display the Info menu. To show title, audio, subtitle, angle, bitrate and time display information. DVD Info Display VCD Info Display Chapter (DVD)/track (audio CD and VCD) To directly access a chapter (DVD) or a track (audio CD and VCD), press the CH+/- buttons, or press the numeric buttons then press OK. -
Page 20: Search Menu
The Info Menu time and disc time and press OK. Note: This function may not be available on all discs. DVD: - To access chapter elapsed time and chapter total time, press the INFO button while playing a chapter. VCD: - To access disc elapsed time and disc total time, press the INFO button while playing a VCD disc. -
Page 21: Play Mode
Play mode 1. While the disc is playing, press the repeat button repeatedly. 2. • DVD play modes: repeat chapter, repeat title, repeat A-B and repeat off (normal). Notes: Repeat mode is only available with discs that display elapsed time and remaining time. To repeat a sequence between points A and B, choose the A-B repeat option, and then follow the instructions for entering the two points. -
Page 22: Sleep
The Info Menu Sleep Press the SLEEP button on the remote control to select among Off, 30 mins, 60 mins, 90 mins and 120 mins. PBC (Playback Control – VCD) When playing a VCD, PBC gives you access to scenes and information that can be selected through a menu. -
Page 23: Mp3/Wma Files And Jpeg Files
Playing mp3/WMA Files or displaying JPEG Files Mp3/WMA is an audio file format which compresses recorded music. The main advantage of the Mp3/WMA format is that CD-quality music tracks can be stored on a personal computer in user friendly compressed files. JPEG files are image files. -
Page 24: Radio En
Radio The player has a built-in tuner that allows for FM radio function. The AM loop antenna allows for AM radio function. Manual Tuning 1. Connect the FM aerial and the AM loop antenna at the back of the unit. Rotate the AM loop for better reception. -
Page 25: Usb Device
This player allows you to connect your own USB storage devices such as mp3 players and USB flash memory. Connect the USB device first then you can start playback. Connecting/Disconnecting USB device to the Main Unit Insert the USB port of the USB device you want to connect into the USB socket of the player. The USB light indicator on the front panel lights. -
Page 26: The Setup Menu
The Setup Menu There are five options in the main setup menu: Language, Video, Audio, Rating and Misc. Press the SETUP button to bring up the main menu. Press the up/down button to select menu and press the right arrow button to move to the option’s choices on the right.. Language up/down arrow buttons and press right arrow button and press OK. -
Page 27: Video
Video This option lets you select the video output of your appliance - Component: if your TV is connected to the component video socket of the player. - P-scan: if your TV is connected to the components socket of the player. - HDMI: if your TV is connected to the HDMI socket of the player. -
Page 28: Audio
The Setup Menu 1. Highlight a distance option using the up/down arrow buttons. • Subwoofer (Sub Dist.) • Rear (SR Dist.) • Rear (SL Dist.) • Front (FR Dist.) • Center (Cen Dist.) • Front (FL Dist.) 2. Press the left/right arrow buttons to adjust the distance. Note: The receiver speaker distance default settings are as follows: Subwoofer (Sub Dist.): 0ft;... -
Page 29: Selecting Rating Limit
Rating Explanations 1 KID SAF – Kid safe; viewing safe even for kids. 2 G – General Audience; recommended as acceptable for viewers of all ages. 3 PG – Parental Guidance suggested. 4 PG13 – Material is unsuitable for children under age 13. 5 PGR –... -
Page 30: Additional Information
Additional Information Troubleshooting The unit does not switch on. • Make sure it is plugged in. • Press the ON/OFF button on the remote control or the ON/STANDBY button on the front of the unit. The device switches off spontaneously. •... -
Page 31: Precautions
Precautions • If your unit has been stored in a cool place for any length of time, during a journey for example, wait for about 2 hours before using it. • The openings located on the top and bottom are for ventilation and must not be obstructed. •... -
Page 32: Disc Formats You Can Play
Additional Information Disc Formats you can play In order to ensure playback, discs must conform with DVD, CD, VCD or SVCD standards. This unit may not play some recordings or files due to differences in recording formats, software used & Disc types. DVD-Video Digital video discs - 12 cm, single or double sided, single or dual layer. -
Page 33: Wma Files
JPEG files CD-R and CD-RW with JPEG files. Certain JPEG files, including progressive JPEG files, cannot be read by this player. The total number of files and folders on the disc should be less than 650. Make sure that files have the “.jpg” extension. Files without the “.jpg” extension will not be able to be read by the player - even though the files are shown as JPEG images on your computer. -
Page 34: Limited Warranty
Additional Information Limited Warranty What your warranty covers: • Defects in materials or workmanship. For how long after your purchase: • One year from date of purchase - Unit exchange, which includes parts and labor. • The warranty for rental units begins with the first rental or 45 days from date of shipment to the rental firm, whichever comes first. - Page 35 Product Registration: • Please complete the online Product Registration on RCA.com/productregistration or complete and mail the Product Registration Card packed with your product. This will make it easier to contact you should it ever be necessary. The return of the card is not required for warranty coverage.
- Page 36 Visit the RCA website at www.rca.com Visitez le site Internet de RCA à l’adresse www.rca.com Visite el sitio web de RCA en www.rca.com Please do not send any products to the Indianapolis address listed in this manual or on the carton. This will only add delays in service for your product.
Need help?
Do you have a question about the RTD258 and is the answer not in the manual?
Questions and answers