Table of Contents
Advertisement
Advertisement
Table of Contents

Related Manuals for RCA RTD130


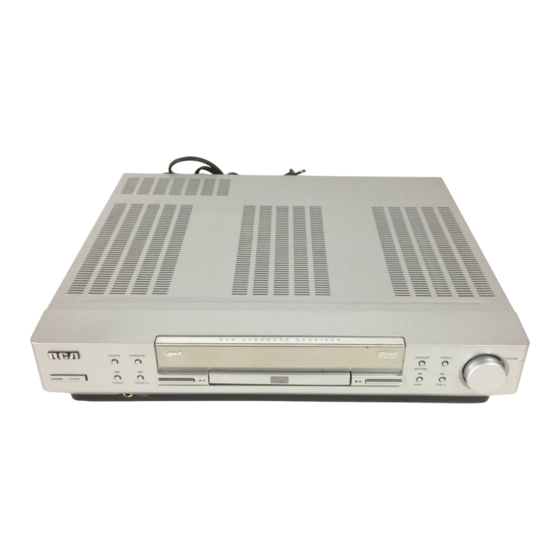
Summary of Contents for RCA RTD130
- Page 2 This device complies with Part 15 of the FCC Rules. Safety For Your Operation is subject to the following two condi- The AC power plug is polarized tions: (1) This device may not cause harmful (one blade is wider than the interference, and (2) this device must accept any other) and only fits into AC...
- Page 3 Speaker ..... TV Codes ......Front Speaker Placement ..... Satellite Receivers ....Preferred Surround Placement ..Audio (RCA only) ....Advanced Surround Setting ..Laser disc Players ....Test Tone / Channel Balance ..Connecting for Power ....Lanquaqe Codes ....
-
Page 5: Inserting Batteries Into Remote Control
Inserting Batteries into Remote Control Insert two AA(R6) batteries according to the + and - signs on the battery compartment. To use the remote control, _oint it directly at your receiver. Set up and Maintenance of the Receiver IMPORTANT NOTE •... - Page 7 optical-or coaxial cable isneeded f oreach SAT receiver, DVD player o rCDplayer. When optical o rcoaxial cable is nd FM used, the analog audio cables are still needed if recording through a tape or VCR is desired. This receiver provides one optical and one coaxial digital input for the connection...
-
Page 8: Connecting The Subwoofer
Toease speaker connections, thespeaker cords a ndtheter- minals a recolor-coded. • Red/Black (Front S peakers), • Blue/Black (Center Speaker) • Grey/Black (Rear S peakers). • Brown/Black (Subwoofer) Connect thespeaker wire(red/black wire)to theback of L, Rfrontspeakers (red / black terminals) and to the corre- sponding color terminals on the rear of the receiver. -
Page 9: Positioning Your Speaker
Positioning your speaker _1_ Left, Right (Front Speakers) They carry primarily music and sound effects Center In surround mode, the center speaker carries much of the dialogue as well as music and effects. It should be set between the left and right speakers. Surround (Rear Speakers) Their overall sound balance should be as close as possible... - Page 10 Advanced Setting Alternative Surround Placement Rear wall If rear wall mounting is the only choice, aim the speakers at each other (A), towards the front (B) or even towards sidewalls (C, D). Experiment with placement until surround sounds seem to envelop you, rather than coming from behind you.
-
Page 11: Test Tone / Channel Balance
Test Tone / Channel balance Channel balance Your receiver is equipped with a test signal generator balancing the channels. As the signal "travels" from chan- nel to channel, adjust the level controls until each channel plays at the same loudness level. (details see operation test/setup) Courtesy Dotby Laboratories... - Page 12 7. _S._I]IaEI_.IE • To adjust BASS or TREBLE, pressrelevant button and turn the volume knob to adjust level. • Press and hold for Random function in CD/MP3playback. 8. TI_E- / F/ISI"REVERSE • In tuner mode, pressto tune down on the radio frequency or pressand hold to to searchdown.
- Page 13 pressing any button. If it works, the red LED will light. 1. ONIOFF TOturn on or off the receiver and other auxiliary components (see page 14 "Using the Remote to Control Additional Components"). 2. Source Buttons TO turn on and select various audio/video sources, 3.
- Page 14 CHAP • Chapter location at which DVD is currently at AUTO • Auto programming in tuner mode is activated PROG. • Program mode is activated TUNED • Tuner station detected • Tuner stereo signal detected REPEAT I REPEAT 1 I REPEAT •...
-
Page 15: Switching On/Off
Switching on/off To switch on the receiver, press POWER button on the receiver once to enter standby mode. Press SOURCE or POWER button on the receiver or one of the source buttons on the remote control to power on the receive£ •... - Page 16 3.Press andholdthecorresponding Source B utton (like VCR1, SAT/CABLE, TV) on the remote while entering code from the code list using the Number Buttons. 4. Release the component button, then press ON,OFF to see if the component will turn off. 5. If this does not work, repeat steps 3 and 4 by trying use the next code (if available) listed for the brand of your component...
-
Page 17: Sound Enhancement Systems
Sound Enhancement Systems This receiver is equipped with several built-in sound enhancement systems. Dolby Pro Logic II and Dolby 3 Stereo The Pro Logic H mode uses the built-in circuit to steer the Left, Center, Right and Surround left and right channel audio signals and uses all five speakers to play both stereo and Dolby Pro Logic program... -
Page 18: Input Signal Setting
Input Signal Setting The receiver defaults to the most convenient settings your easiest use (see table). By default, SAT (satellite) is set to analogue input. If you wish to change the input formats, follow the steps below: 1. Press SOURCE on the main unit until SAT appears on the display or press the SAT source buttons on the remote control. -
Page 19: Fine Setting Of The Speakers
Fine Setting of the Speakers If you use all the speakers provided, all the basic settings have been set. However, to make the surround sound more effective suit the acoustic conditions in your listening room, you need to delay the signal from some of the speakers. Such channel delay compensates for center or surround... -
Page 20: Speaker Icons
Speaker Icons The receiver shows you the speakers' settings on the display with the following icons: Displaying Program Formats When a digital source is playing, the receiver will automati- cally switch to the proper surround mode and indicates on the speaker icons on the right-hand side of the display. -
Page 21: Basicplayback Features
BasicPlayback Features 1. Press SOURCE on the main unit until "DVD/CD" appears on the display or DVO source key on the remote to select DVD/CD input source. 2. Open disc tray for loading discs with label side facing up. Press again to close it. 3. -
Page 22: On-Screen Banner Display
On-screen banner display You can access the on-screen banner display during play- back to select many playback features. Each feature is illus- trated with an icon. However, each banner display feature is available only if the disc was created with that particular feature. -
Page 23: Selecting A Chapter
Selecting a title 1. Refer to previous page "General use" to open the title menu. 2. Enter title number using the number keys on the remote control. Add 0 in front of single*digit title number (e.g. 9 = 09). Selecting a chapter 1. -
Page 24: Using Bookmarks
Using bookmarks The bookmark feature allows you to mark a point on the disc that you can go to quickly. You can store up to 9 bookmarks. Addingbookmarks 1. Refer to Page 20 "General use" to open the bookmark menu. 2. -
Page 25: Program Playback
Repeat (During Playback Only) 1. During playback, press the RPTIPGM button on the main unit or SHIFT and 7/REPEAT repeatedly on the remote control to select among the repeat modes - Repeat Disc > Repeat Title > Repeat Chapter > Repeat Off >... -
Page 26: Cancel Program
3.Use the LEFT and RIGHT arrows to select Title or Chapter, then the UP and DOWN arrows to select the number. 4. Use the LEFT and DOWN arrows to highlight "Insert" and then press OK. 5. Use the arrow buttons to highlight "Play"... -
Page 27: Setup Menu
Set up menu General use 1. Press MENU in stop mode to display the set up menu on screen. The menu shows current settings. 2. Use arrow buttons to highlight options and press OK to open selected menu. 3. Press LEFT arrow to go back to the previous menu or press GO BACK,DISC to exit the setup menu completely. -
Page 28: Menu Language
4.Enter l anguage c ode intoboxes a ndthenselect O Kto return to main menu. P ress OKbuttonontheremote. Menu language This step will define the language of menus and other short messages shown on screen, 1. Refer to page 25 "General use"... - Page 29 Rating (Parental control) This step will disable the playing of some DVDs (especially U.S. type) which are not suitable for some audience, e.g. children. Such kind of DVDs is encoded with a specific rat- ing level. If the rating level of the disc is higher than the preset level (to be set in this step), the playing will be pro- hibited...
- Page 30 4.Use thenumber b uttons to enternewpassword and thenpress O K. 5.Repeat theabove step to confirm password and return to password menu. Use the LEFT arrow to return to the main menu. Clearpassword 1. Refer to page 25 "General use" to open the password menu.
- Page 31 TV aspect This step selects the TV aspect, wide-screen (16:9) or con- ventional (4:3). 1. Refer to page 25 "General use" to open the TV aspect menu. 2. Use the UP or DOWN arrows to select TV aspect and then press OK to return to main menu. If you have a wide-screen (16:9) TV, choose "16:9 Widescreen ".
-
Page 32: Loading And Playing An Audio Cd
Loading and playing an audio CD 1. Press STOP/EJECT button on the front panel to open the disc tray. Place disc on the disc tray with the label side facing up. Press STOP/EJECT again to close disc tray. The disc will be read to detect whether an audio CD or MP3 CD has been... -
Page 33: Quick Scan
4. Press SKIP REVERSE on the main unit or CH- on the remote to return to the previous track, Press SKIP FOR- WARD on the main unit or CH + on the remote to go to next track, 5. Press STOPIEJECT on the main unit or STOP on the remote control to end playback. -
Page 34: Selecting A Track
Selecting a track 1. Refer to "Genera/use" to open the track menu, 2, Enter track number, Add 0 in front of single-digit track number (e.g, 9 = 09), IntroScan (0nly for audio CDs) IntroScan plays the first few seconds of each track. 1, Refer to "General use"... - Page 35 Bookmarks (Audio CDs Only) The bookmark feature allows you to select certain points on the disc where you want to jump to quickly. 9 bookmarks can be selected. AddingBookmarks (AudioCOsOnly) 1. Refer to "General use" on page 32 to open the bookmark menu.
- Page 36 4. Repeat steps 2 and 3 to add additional tracks to the pro- gram. 5. Move to highlight "Play" (start program playback) or "Done" (return to normal playback with program saved) and then press OK to confirm program playback. DeleteProgram 1.
- Page 37 Filemode 1. Use the UP or DOWN arrow buttons on the remote to select the file you wish to begin playing. 2. Press PLAY on the main unit or on the remote control to start playback. If you are currently playing, then press OK button...
-
Page 38: Delete All
5,Press STOP or RPT / PGM on the main unit or STOP or SHIFT 9/PROGRAM to end program playback. 6. To play program again, press and hold RPT I PGM on the main unit or SHIFT 91PROGRAM while in stop mode to reactivate program playback. -
Page 39: Operating The Radio
Operating the Radio The receiver has a built-in tuner that allows for AM/FM radio function, Manual tuning 1. Connect the FM and AM antenna accordingly (see "Connecting the Antenna" on page 5 section for details) 2. Press POWER on the main unit. 3. - Page 40 3.Press MENU on the remote control. "PROG" will appear on the display 4. While the word "PROG " is still flashing, input your desired preset number (1-30) using the numeric keys on the remote control to store the radio station. Retrievingpresetstations 1.
- Page 42 Equipment Specifications RTDVDI: AMPLIFIER SECTION: All S channels: RTDVDI: each 32W at 6 ohm. 010% THD @1 kHz Subwoofer channel: 40w at 6£2 Muting Attenuation: 65dB Frequency Response: 40Hz to 20kHz +/-3dB Signal to Noise Ratio: 65dB (Bypass mode) VIDEO SECTION: Input ( Sensitivity/Impedance ):lVp-p/75ohm Output...
- Page 43 Disconnect theaudiosystem fromthepower source b efore performing a nymaintenance. Cleaning Clean the exterior of the system using a soft dust cloth. The player CAUTION! This system operates with a laser. It must be opened by only a qualified technician. • Never move the player during playback.
- Page 44 2131 2026 2027 2002,2026 2003, 2004, 2006, 2007, 2008, 2111, 2112, 2021 2013 2009, 2010 2014 2011 2013 2012, 2025 2014 2013, 2014, 2016, 2016, 2017, 2018,2019 2021, 2022, 2114 2020, 2110 2062 2027,2061 2013, 2014, 2016, 2016, 2017, 2018,2019,2027 2009 2061 2013, 2014, 2023, 2061...
- Page 45 2002, 2011, 2013, 2014, 2021, 2023, 2026, 2104, 2131 2029, 2065, 2113 20!3 2053 2055, 2056, 2107 2029, 2055, 2056, 2065, 2066, 2067, 2069, 2070, 2071, 2072, 2073, 2074, 2106, 2113, 2123 2075,2131 2021,2131 2002,2013,2028 2002, 2013, 2016, 2026, 2053, 2061 2009, 2010, 2011, 2016, 2018, 2058, 2064, 2076,2078,2079,2111,2123 2014...
- Page 46 1008 1176 1002 1004 1006,1008, 1038,1046 1189 1004 1038 1038 1174 1002 1004 1006,1008, 1019,1062,1068,1069, 1074 1075,1076, 1077,1088,1116,1161, 1183 1184 1033 1038,1189 1173 1003 1178 1054 lOO4 1008,1054 1004 1005,1006, 1008,1012,1013,1016, 1038 1046,1076, 1082,1083,1105,1170, 1171 1117 1004 1006 1049 107%1072, 1089,1105,1109,1117, 1118 1160,1162...
- Page 47 For audio track and subtitle selection, see p.25,26. Abkhazian 6566 Kashmiri Afar 6566 Kazakh Afrikaans 6570 Kanyarwanda Albanian 8381 Kirghiz Amehanie 6577 Kirundi Arabic 6582 Korean Armenian 7289 Kurdish Assamese 6583 Laothian Aymara 6588 Latin Azerbaijani 6590 Latvian, Leltish Bashkir 6665 Lingala Basque...
- Page 48 Limitation of Warranty: • THE WARRANTY STATED ABOVE IS THE ONLY WAR- RANTY APPLICABLE TO THIS PRODUCT. ALL OTHER WARRANTIES, EXPRESS OR IMPLIED (INCLUDING IMPLIED WARRANTIES OF MERCHANTABILITY OR FIT- NESS FOR A PARTICULAR PURPOSE) ARE HEREBY DIS- CLAIMED. NO VERBAL OR WRITTEN INFORMATION GIVEN BY THOMSON MULTIMEDIA INC., ITS AGENTS...
-
Page 49: What Your Warranty Covers
• Take your unit to any Authorized RCA Audio Service Center. To identify your nearest Authorized RCA Audio Service Center, ask your dealer, look in the Yellow Pages, or call 1-800-336-1900.
Need help?
Do you have a question about the RTD130 and is the answer not in the manual?
Questions and answers