Advertisement
OVERVIEW
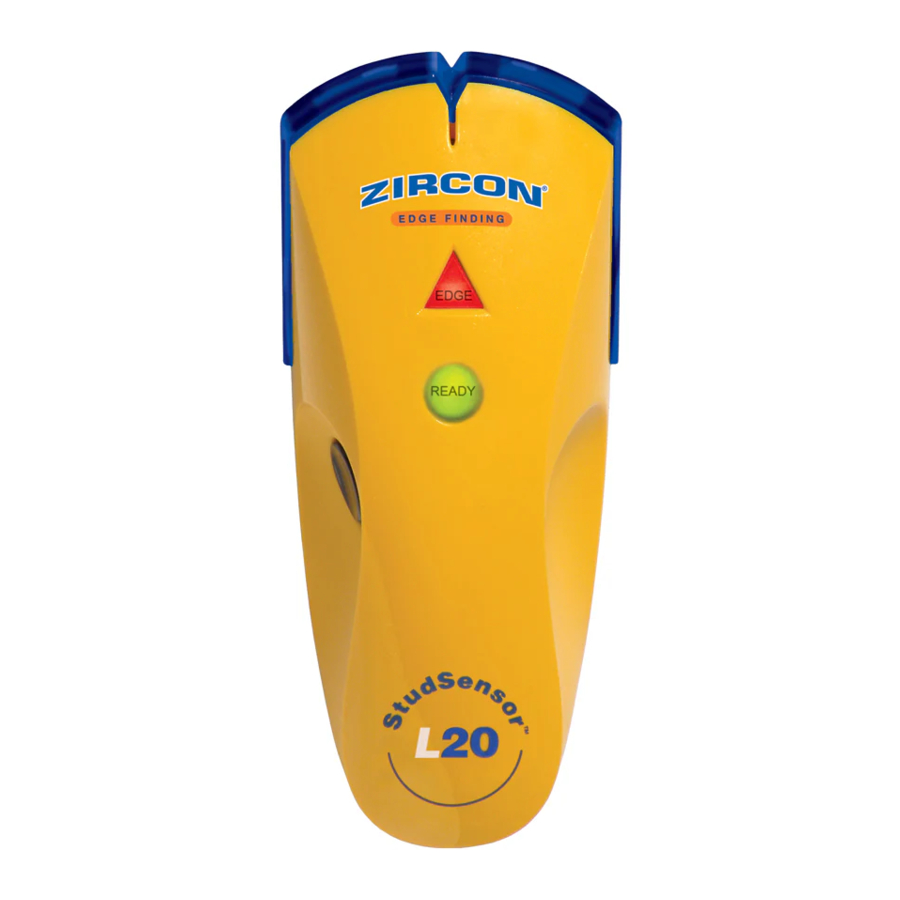
The Zircon StudSensor™ L20 stud finder finds the edges of wood and metal studs up to 19 mm deep in walls. It features a sleek, high-impact case, with a patented pinch grip design, and a SpotLite® Pointer.

INSTALLING THE BATTERY

Do not attempt to unscrew the back of the tool. Push in the battery door tab at the bottom of the tool and open the door. Insert a new 9V battery, matching the positive (+) and negative (-) terminals to the icons printed on the back. Snap the battery into place and replace the door. Zircon stud finders and detectors, particularly those with LCD screens, require and consume a great deal of current from batteries.
For optimal performance, brand-new, recently purchased alkaline batteries are strongly recommended for use in these tools.
If you are experiencing any trouble with your tool, please replace the battery in your tool with a brand-new one, contact your Zircon dealer or e-mail at techsupport@zircon.com.
OPERATING TIPS
- Tool Position: For proper use, always place scanner flat against the surface before turning on power.
- Power: Press and hold in the Power button continuously while in use.
- Operation: Move the unit slowly, while keeping it flat against the wall. Do not rock, tilt, or lift it.
If you're receiving erratic scanning results, it may be a result of humidity, moisture within the wall cavity or drywall, or recently applied paint or wallpaper that hasn't fully dried. While the moisture may not always be visible, it will interfere with the tool's sensors. Please allow a few days for the wall to dry out.
WORKING WITH DIFFERENT MATERIALS
Freshly painted walls: May take one week or longer to dry after application.
Wallpaper: The StudSensor™ L20 functions normally on walls covered with wallpaper or fabric, unless the materials are metallic foil, contain metallic fibers, or are still wet after application.
Lath & plaster: Due to irregularities in plaster thickness, this tool is not recommended for use on lath & plaster.
The StudSensor™ L20 cannot scan for wood studs and joists through ceramic tile or carpeting and pad.
Note: Sensing depth and accuracy can vary due to moisture, content of materials, wall texture, and paint.

Do not rely exclusively on the detector to locate items behind the scanned surface. Use other information sources to help locate items before penetrating the surface. Such additional sources include construction plans, visible points of entry of pipes and wiring into walls, such as in a basement, and in standard 40 and 60 cm stud spacing practices.
TURNING ON/CALIBRATING THE TOOL AND FINDING A STUD
- Place unit flat on wall. Press and hold the Power button. During calibration, SpotLite® arrow and red EDGE light will flash, unit will beep, and green READY light will stay illuminated. Do not move the unit until calibration is complete.
- If you calibrate over a stud, the unit will beep repeatedly. Move the unit 7–8 cm right or left, release the Power button, and start over.
- After calibration is complete, continue to hold the Power button and slowly slide the unit across the surface.

- When the top red EDGE light is lit, the beep sounds, and the SpotLite® Pointer arrow shines, you have located the edge of the stud. Mark this spot.

- Continue scanning beyond the marked spot until the red EDGE light turns off. Slide unit in reverse direction to locate other edge of stud. Mark this second spot. The middle of the stud is centred between the two marks.


OPERATING CAUTIONS
Depending on the proximity of electrical wiring or pipes to the wall surface, the StudSensor™ L20 may detect them in the same manner as studs. Caution should always be used when nailing, sawing, or drilling into walls, floors, and ceilings that may contain these items.
DO NOT ASSUME THERE ARE NO LIVE ELECTRICAL WIRES IN THE WALL. DO NOT TAKE ACTIONS THAT COULD BE DANGEROUS IF THE WALL CONTAINS A LIVE ELECTRICAL WIRE.
ALWAYS TURN OFF THE ELECTRICAL POWER, GAS, AND WATER SUPPLIES BEFORE PENETRATING A SURFACE. FAILURE TO FOLLOW THESE INSTRUCTIONS MAY RESULT IN ELECTRIC SHOCK, FIRE, AND/OR SERIOUS INJURY OR PROPERTY DAMAGE.
Always turn off the power when working near electrical wires.
HELPFUL HINTS
(See also OPERATING TIPS)
| Situation | Probable Causes | Solutions |
No indications |
|
|
Unit beeps repeatedly |
|
|
Detects other objects besides studsFinds more targets than there should be |
|
|
SpotLite, StudSensor, and Zircon are trademarks or registered trademarks of Zircon Corporation.
Visit www.ZirconEurope.com for the most current instructions.
www.ZirconEurope.com
E-mail: info@zircon.com
 ZirconCorporation
 ZirconTV
 ZirconTools | ZirconToolPro
 ZirconTools
© 2015 Zircon Corporation • P/N 67569 Rev A 10/15

Documents / Resources
References

Download manual
Here you can download full pdf version of manual, it may contain additional safety instructions, warranty information, FCC rules, etc.
Advertisement


Need help?
Do you have a question about the StudSensor L20 and is the answer not in the manual?
Questions and answers