Table of Contents
Advertisement
Quick Links
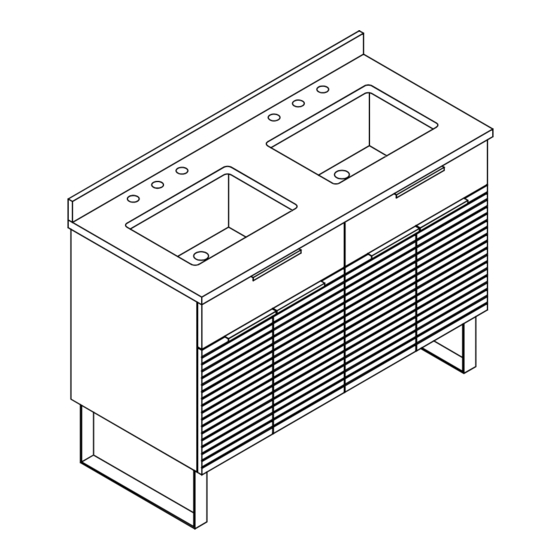
Model# HDVB4801
ASSEMBLY INSTRUCTIONS
HDVB4801 48 IN. VANITY
Questions, problems, missing parts? Before returning to the store,
call Home Decorators Collection Customer Service
8 a.m. - 7 p.m., EST, Monday - Friday, 9 a.m. - 6 p.m., EST, Saturday
1-800-986-3460
HOMEDEPOT.COM/HOMEDEPOT.CA/HOMEDECORATORS
THANK YOU
We appreciate the trust and confidence you have placed in Home Decorators Collection through the purchase of this vanity. We strive to continually
create quality products designed to enhance your home. Visit us online to see our full line of products available for your home improvement needs.
Thank you for choosing Home Decorators Collection!
Advertisement
Table of Contents

Related Manuals for Home Decorators Collection HDVB4801


Summary of Contents for Home Decorators Collection HDVB4801
- Page 1 THANK YOU We appreciate the trust and confidence you have placed in Home Decorators Collection through the purchase of this vanity. We strive to continually create quality products designed to enhance your home. Visit us online to see our full line of products available for your home improvement needs.
-
Page 2: Table Of Contents
Table of Contents Table of Contents ............2 Installation guidelines ..............4 Safety information ............2 Package Contents ..............5 Warranty ................ 3 Assembly ..............6 Maintenance .............. 18 Limited Lifetime Warranty ............3 Care and cleaning ............18 What is Covered ...............3 What is Not Covered ..............3 Troubleshooting ............ -
Page 3: Warranty
Home Decorators Collection products are manufactured with superior quality standards and workmanship and are backed by our limited lifetime warranty. Home Decorators Collection products are warranted to the original consumer purchaser to be free of defects in materials or workmanship. We will replace FREE OF CHARGE any product or parts that proves defective. -
Page 4: Pre-Assembly
Pre-assembly PLANNING ASSEMBLY Check the vanity for damage before installation. If any part of the vanity is missing or damaged, contact the Customer Service Team at 1-800-986-3460. Ensure that the vanity location is accessible to water supply and drain lines. It is suggested that you rough-in the water lines and drain before installing the vanity. -
Page 5: Package Contents
Pre-assembly (continued) PACKAGE CONTENTS Part Description Quantity Countertop Vanity Backsplash Support bar Wall Anchor Screw Bolt Spring washer Washer Screw Allen key HOMEDEPOT.COM/HOMEDEPOT.CA/HOMEDECORATORS Please contact 1-800-986-3460 for further assistance. -
Page 6: Assembly
Assembly (Option#1) Installing the legs Unpaking the countertop □ Unpack the countertop (A) from its vanity (B) □ Using Allen key (L), install the legs (D) to the vanity (B) and place it on a throw rug or other protective with the spring washers (I), washers (J) and bolts (H). - Page 7 Assembly (Option#1) (continued) Attaching the countertop Installing the legs □ Apply lines of silicone onto the top of the vanity (B). □ Secure the legs (D) with the screws (K) using screw □ Place the countertop (A) on top of the vanity (B). driver.
- Page 8 Assembly (Option#1) (continued) Completing the assembly Attaching the backsplash □ Wipe off the area on the top of the countertop (A) □ Wipe away any seeping silicone from underneath where the backsplash (C) will sit using a clean rag. the backsplash (C) with a clean rag. □...
- Page 9 Assembly (Option#1) (continued) Drying □ Allow the vanity to dry for 24 hours before use. 24H! HOMEDEPOT.COM/HOMEDEPOT.CA/HOMEDECORATORS Please contact 1-800-986-3460 for further assistance.
- Page 10 Assembly (Option#2) Unpaking the countertop Installing support bars □ Unpack the countertop (A) from its vanity (B) □ Measure the height (d) at where the vanity will be and place it on a throw rug or other protective located, as illustrated. □...
- Page 11 Assembly (Option#2) (continued) Installing support bars Installing support bars □ Using a stud finder or equivalent tool, locate at □ Keep the support bars in the position, then drill pilot least 1 wall stud and mark its positions on the wall holes on the wall through the support bar at the for each support bar (E).
- Page 12 Assembly (Option#2) (continued) Installing support bars Installing support bars □ Except for the holes that are over the stud, drill in □ Replace and secure the support bars (E) with the exisiting holes on the wall using ø5/16” (8mm) screws (G). drill bit and insert the wall anchors (F) into the holes using a rubber mallet until the wall anchors are flush with the wall.
- Page 13 Assembly (Option#2) (continued) Hang on the vanity Securing the vanity □ Gently hang the vanity (B) on the support bars (E). □ Mark the positions of the holes through the vanity (B) onto the wall. HOMEDEPOT.COM/HOMEDEPOT.CA/HOMEDECORATORS Please contact 1-800-986-3460 for further assistance.
- Page 14 Assembly (Option#2) (continued) Securing the vanity Securing the vanity □ Gently unhang the vanity (B) from the support bars □ Drill pilot holes on the wall at the marked positions (E). using ø5/16” (8mm) drill bit and insert the wall anchors (E) into the holes using a rubber mallet until the wall anchors (E) are flush with the wall.
- Page 15 Assembly (Option#2) (continued) Attaching the countertop Securing the vanity □ Replace and secure the vanity (B) with screws (G). □ Apply lines of silicone onto the top of the vanity (B). □ Place the countertop (A) on top of the vanity (B). CAUTION: Wear a pair of rubber gloves to protect your hands.
- Page 16 Assembly (Option#2) (continued) Completing the assembly Attaching the backsplash □ Wipe off the area on the top of the countertop (A) □ Wipe away any seeping silicone from underneath the where the backsplash (C) will sit using a clean rag. backsplash (C) with a clean rag.
- Page 17 Assembly (Option#2) (continued) Drying □ Allow the vanity to dry for 24 hours before use. 24H! HOMEDEPOT.COM/HOMEDEPOT.CA/HOMEDECORATORS Please contact 1-800-986-3460 for further assistance.
-
Page 18: Maintenance
Maintenance □ Stone countertops (Granite, Marble, etc.) are surprisingly resilient to stains and scratches. However, as a preventative measure, any spills on the stone surfaces should be wiped up within a reasonable amount of time. Do not let liquid sit on the stone overnight. Stones are most prone to staining by oil and acid, so be sure to blot these spills up as soon as they happen. - Page 19 Questions, problems, missing parts? Before returning to the store, call Home Decorators Collection Customer Service. 8 a.m. - 7 p.m., EST, Monday - Friday, 9a.m. - 6 p.m., EST, Saturday 1-800-986-3460 HOMEDEPOT.COM/HOMEDEPOT.CA/HOMEDECORATORS Retain this manual for future use.
Need help?
Do you have a question about the HDVB4801 and is the answer not in the manual?
Questions and answers