Table of Contents
Advertisement
Quick Links
Advertisement
Table of Contents

Related Manuals for Diamond FRU-511/N


Summary of Contents for Diamond FRU-511/N
- Page 1 09/2014 Mod: FRU-511/N Production code: A1 RRUA-105E JR 09DI 51...
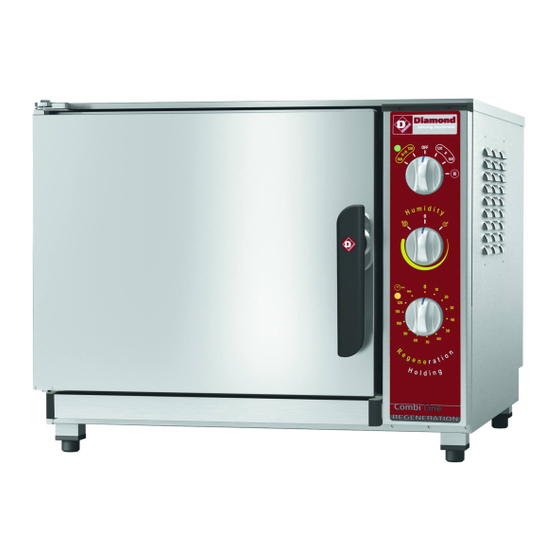
- Page 2 REGENERATION OVENS INSTRUCTIONS FOR THE INSTALLATION, USE AND MAINTENANCE CONVECTION C O NVEC TION+HUM IDIFICATION 305/ 10 5 /11 0 /11 5 ANALO GIC...
- Page 3 5 x 2/3 GN / 5-10-15 x 1/1 GN ANALOGIC WARNING ! Before making any type of connection of this equipment (electrical or hydraulic), carefully read the instructions in this manual. The installation must be carried out only by qualified technical personnel.
-
Page 4: Use And Maintenance
5 x 2/3 GN / 5-10-15 x 1/1 GN ANALOGIC INDEX 0.0A Dimensions 5x2/3 GN 0.0B Dimensions 5x1/1 GN 0.0C Dimensions 10x1/1 GN 0.0D Dimensions 15x1/1 GN 0.0E Dimensions 5x2/3 GN + stand 0.0F Dimensions 5x1/1 GN + stand 0.0G Dimensions 10x1/1 GN + stand INSTALLATION Declaration of Conformity... - Page 5 5 x 2/3 GN / 5-10-15 x 1/1 GN ANALOGIC A- Electrical connection B- Water inlet Ø 3/4” C- Water drainage Ø 40 mm 5 x 2/3 GN 0.1A Dimensions mod. 5 x 2/3 GN Model Dimensions Capacity Trays distance 5 x 2/3 GN 5 x 2/3 GN cm 71 x 65 x h 58...
- Page 6 5 x 2/3 GN / 5-10-15 x 1/1 GN ANALOGIC A- Electrical connection B- Water inlet Ø 3/4” C- Water drainage Ø 40 mm 5 x 1/1 GN 0.1B Dimensions mod. 5 x 1/1 GN Model Dimensions Capacity Trays distance 5 x 1/1 GN 5 x 1/1 GN cm 71 x 83 x h 58...
- Page 7 5 x 2/3 GN / 5-10-15 x 1/1 GN ANALOGIC A- Electrical connection B- Water inlet Ø 3/4” C- Water drainage Ø 40 mm 10 x 1/1 GN 0.1C Dimensions mod. 10 x 1/1 GN Model Dimensions Capacity Trays distance 10 x 1/1 GN 10 x 1/1 GN cm 71 x 83 x h 91...
- Page 8 5 x 2/3 GN / 5-10-15 x 1/1 GN ANALOGIC A- Electrical connection B- Water inlet Ø 3/4” C- Water drainage Ø 40 mm 15 x 1/1 GN 0.1D Dimensions mod. 15 x 1/1 GN Model Dimensions Capacity Trays distance 15 x 1/1 GN 15 x 1/1 GN cm 75 x 85 x h 156...
- Page 9 5 x 2/3 GN / 5-10-15 x 1/1 GN ANALOGIC 5 x 2/3 GN + SG-53R 0.1E Dimensions mod. 5 x 2/3 GN + stand Model Dimensions Capacity Trays distance 5 x 2/3 GN 5 x 2/3 GN cm 71 x 65 x h 130 67 mm Electric 5 x 1/2 GN...
- Page 10 5 x 2/3 GN / 5-10-15 x 1/1 GN ANALOGIC 5 x 1/1 GN + SG-51R 0.1F Dimensions mod. 5 x 1/1 GN + stand Model Dimensions Capacity Trays distance 5 x 1/1 GN 5 x 1/1 GN cm 71 x 83 x h 130 67 mm Electric 15 x 1/2 GN...
- Page 11 5 x 2/3 GN / 5-10-15 x 1/1 GN ANALOGIC 10 x 1/1 GN + SG-51R 0.1G Dimensions mod. 10 x 1/1 GN + stand Model Dimensions Capacity Trays distance 10 x 1/1 GN 10 x 1/1 GN cm 71 x 83 x h 163 67 mm Electric 20 x 1/2 GN...
-
Page 12: Installation
5 x 2/3 GN / 5-10-15 x 1/1 GN ANALOGIC INSTALLATION 1.0 DECLARATION OF CONFORMITY The Manufacturer declares that the appliances conform to the EEC norms. They must be installed in accordance with current standards, especially regarding aeration of the prem- ises and the exhaust gas evacuation system. -
Page 13: Installing The Appliance
5 x 2/3 GN / 5-10-15 x 1/1 GN ANALOGIC 2.0 INSTALLING THE APPLIANCE Read this handbook through carefully as it provides important information to guarantee a safe installation, use and maintenance. The appliance must be installed only and exclusively by qualified personnel following the instructions given herein and in compliance with current laws in force. -
Page 14: Electrical Connection
5 x 2/3 GN / 5-10-15 x 1/1 GN ANALOGIC 2.2 ELECTRICAL CONNECTION When the appliance is delivered it is set to work at the voltage given on the rating plate affixed on the right side of the appliance. The terminal board used for connecting can be accessed from the right of the appliance, removing the side panel. - Page 15 5 x 2/3 GN / 5-10-15 x 1/1 GN ANALOGIC 2.3 HYDRAULIC CONNECTION – WATER INLET The ovens have a water inlet coupling at the back. Always install an on-off valve between the appliance and the water mains, making sure it is easy to operate. We also suggest installing a cartridge filter on the water inlet pipe.
-
Page 16: Plumbing - Water Drainage
5 x 2/3 GN / 5-10-15 x 1/1 GN ANALOGIC 2.4 PLUMBING – WATER DRAINAGE Drainage for the water is at the back of the oven and must be connected directly to the end of the stainless steel drainpipe. The drain must have no trap and be made in rigid pipes that can withstand a temperature of 110°C. -
Page 17: Control And Safety Devices
5 x 2/3 GN / 5-10-15 x 1/1 GN ANALOGIC 3.0 CONTROL AND SAFETY DEVICES The ovens are equipped with a set of control and safety devices for the electric and hydraulic circuits. 3.0A 2A fuse: it is in the auxiliary circuit to protect against short circuiting of the electrical system and is inside its own support on the contactor’s fixing bracket. - Page 18 5 x 2/3 GN / 5-10-15 x 1/1 GN ANALOGIC 4.1 PROGRAMMING AND OPERATION MOD. CONVECTION Convection forced hot air cycle Select the cooking chamber temperature by turn- ing the thermostat knob (A), and the desired time by turning the timer-knob (C). 4.1A COMPONENTS DESCRIPTION PANNEL CONVECTION Cooking chamber thermostat Timer...
- Page 19 5 x 2/3 GN / 5-10-15 x 1/1 GN ANALOGIC 4.2 PROGRAMMING AND OPERATION MOD. CONVECTION + HUMIDIFICATION (R) Regeneration without humidification Two fixed temperatures selectable: 120°C or 160°C (R) Regeneration with humidification Two fixed temperatures selectable: 120°C or 160°C (R+H) Regeneration without humidification with maintenance phase Two fixed temperatures selectable: 120°C or 160°C...
-
Page 20: Starting The Oven
5 x 2/3 GN / 5-10-15 x 1/1 GN ANALOGIC 4.4 STARTING THE OVEN Ensure that water supply are turned on and that the electricity supply is switched on. Select the cooking time with the timer (C) that goes up to a maximum of 120 minutes; for longer cooking times, select the (∞) nonstop position. -
Page 21: Maintenance
5 x 2/3 GN / 5-10-15 x 1/1 GN ANALOGIC 9.0 MAINTENANCE It is compulsory to turn the main switch off and close the water on-off valve, both installed upstream from the oven before servicing it. The oven should be cleaned at the end of each working day, using specific products only. All stainless steel parts should be: 1- cleaned with clear, soapy water;...
Need help?
Do you have a question about the FRU-511/N and is the answer not in the manual?
Questions and answers