Table of Contents
Advertisement
Quick Links
Advertisement
Table of Contents

Subscribe to Our Youtube Channel
Related Manuals for IKEA MUTEBO


Summary of Contents for IKEA MUTEBO
- Page 1 MUTEBO...
- Page 2 ENGLISH Please refer to the last page of this manual for the full list of IKEA appointed After Sales Service Provider and relative national phone numbers.
- Page 3 ENGLISH...
-
Page 4: Table Of Contents
Energy efficiency Before first use Menu structure Daily use Environmental concerns Clock functions IKEA guarantee Using the accessories Additional functions Subject to change without notice. Safety information Before the installation and use of the appliance, carefully read the supplied instructions. The manufacturer is not responsible if an incorrect installation and use causes injuries and damage. - Page 5 ENGLISH WARNING: The appliance and its accessible parts become • hot during use. Keep children and pets away from the appliance when in use and when cooling down. If the appliance has a child safety device, it should be • activated.
-
Page 6: Safety Instructions
ENGLISH Safety instructions Installation Ventilation opening 560x20 mm Warning! Only a qualified person minimum size. Open‐ must install this appliance. ing placed on the bot‐ tom rear side • Remove all the packaging. • Do not install or use a damaged Mounting screws 4x25 mm appliance. - Page 7 ENGLISH • The electrical installation must have an – be careful when you remove or install isolation device which lets you disconnect the accessories. the appliance from the mains at all poles. • Discoloration of the enamel or stainless The isolation device must have a contact steel has no effect on the performance of opening width of minimum 3 mm.
-
Page 8: Installation
ENGLISH • If you use an oven spray, obey the safety • Use original spare parts only. instructions on the packaging. Disposal Internal lighting Warning! Risk of injury or Warning! Risk of electric shock. suffocation. • Disconnect the appliance from the mains •... -
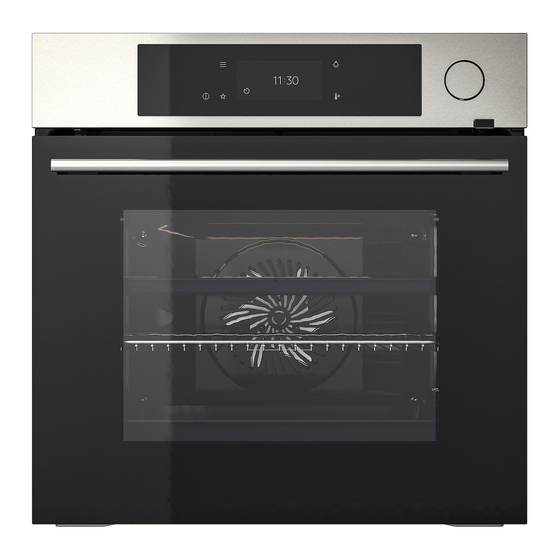
Page 9: Product Description
ENGLISH Product description General overview Control panel Display Water drawer Socket for the food sensor Heating element Lamp Descaling pipe outlet Shelf support, removable Shelf positions Accessories Wire shelf For cookware, cake tins, roasts. Baking tray For cakes and biscuits. Grill- / Roasting pan To bake and roast or as a pan to collect fat. -
Page 10: Control Panel
ENGLISH Food sensor To measure the temperature inside food. Telescopic runners For inserting and removing trays and wireshelf more easily. Steam set One unperforated and one perforated food container. The steam set drains the condensing water away from the food during steam cooking. Use it to prepare vegetables, fish, chicken breast. - Page 11 ENGLISH Favourites Lists the favourite settings. Display Shows the current settings of the appliance. Lamp switch To turn the lamp on and off. Fast Heat Up To turn on and off the function: Fast Heat Up. Press Move Press and hold Touch the surface with finger‐...
-
Page 12: Before First Use
ENGLISH Before first use Warning! Refer to Safety chapters. Initial Cleaning Step 1 Step 2 Step 3 Clean the appliance and the Remove all accessories and Place the accessories and the accessories only with a mi‐ removable shelf supports removable shelf supports in crofibre cloth, warm water from the appliance. -
Page 13: Daily Use
ENGLISH Put the test paper Shake the test paper After 1 min, check Set the water hardness into water for about to remove the excess water hardness with level: Menu / Settings / 1 sec. Do not put the of water. the table below. - Page 14 ENGLISH - press to turn off the heating function. Step 6 Turn off the oven. How to set: Easysteam - Steam heating function Step 1 Turn on the oven. Select the symbol of the heating function and press it to enter the submenu. Step 2 Press .
- Page 15 ENGLISH Step 7 Fill the water drawer with cold water to the maximum level (around 950 ml) until the signal sounds or the display shows the message. The water supply is suffi‐ cient for approximately 50 min. Do not fill the water drawer over its maximum capacity.
- Page 16 ENGLISH Heating functions STANDARD Heating function Application To grill thin pieces of food and to toast bread. Grill To roast large meat joints or poultry with bones on one shelf position. To make gratins and to brown. Turbo Grilling To bake on up to three shelf positions at the same time and to dry food.
- Page 17 ENGLISH Heating function Application To preheat plates for serving. Plate Warming To defrost food (vegetables and fruit). The defrosting time depends on the amount and size of the frozen food. Defrost For dishes such as lasagna or potato gratin. To make gratins and to brown.
-
Page 18: Clock Functions
ENGLISH Heating function Application For steaming vegetables, side dishes, fish Full Steam The function is suitable for cooking delicate dishes like custards, flans, terrines and fish. Humidity High The function is suitable for meat, poultry, oven dishes and casseroles. Thanks to the combination of steam and heat, meat gets a tender and juicy texture along with a crusty surface. - Page 19 ENGLISH How to set the clock Step 2 Press: Time of day. Step 3 Set the time. Press: How to set cooking time Step 1 Choose the heating function and set the temperature. Step 2 Press: Step 3 Set the time. Press: How to choose end option Step 1 Choose the heating function and set the temperature.
-
Page 20: Using The Accessories
ENGLISH How to change timer settings Step 1 Press: Step 2 Set the timer value. Step 3 Press: You can change the set time during cooking at any time. Using the accessories devices. The high rim around the shelf Warning! Refer to Safety prevents cookware from slipping of the chapters. - Page 21 ENGLISH Food Sensor Food Sensor - measures the temperature inside the food. You can use it with every heating function. There are two temperatures to be set: The oven temperature: minimum 120 °C. The core temperature. For the best cooking results: Ingredients should be at Do not use it for liquid During cooking it must remain in...
-
Page 22: Additional Functions
ENGLISH Step 5 - press to set the core temperature of the sensor. Step 6 - press to set the preferred option: • Sound alarm - when food reaches the core temperature, the signal sounds. • Sound alarm and stop cooking - when food reaches the core temperature, the signal sounds and the oven stops. - Page 23 ENGLISH Automatic switch-off The Automatic switch-off does not work with the functions: Light, Food sensor, End time, For safety reasons the appliance turns off Slow Cooking. after some time, if a heating function works and you do not change any settings. Cooling fan When the appliance operates, the cooling fan turns on automatically to keep the...
-
Page 24: Hints And Tips
ENGLISH Hints and tips Cooking recommendations The temperature and cooking times in the tables are guidelines only. They depend on the recipes and the quality and quantity of the ingredients used. Your appliance may bake or roast differently to the appliance you had before. The hints be‐ low show recommended settings for temperature, cooking time and shelf position for spe‐... - Page 25 ENGLISH Moist Fan Baking - recommended accessories Use the dark and non-reflective tins and containers. They have better heat absorption than the light colour and reflective dishes. Ramekins Pizza pan Baking dish Flan base tin Ceramic Dark, non-reflective Dark, non-reflective Dark, non-reflective 8 cm diameter, 28 cm diameter...
- Page 26 ENGLISH °C Small cakes, 20 per tray, Conventional Cooking 20 - 30 preheat the empty oven Multilevel baking - biscuits °C Short bread True Fan Cooking 25 - 45 2 / 4 Small cakes, 20 per tray, True Fan Cooking 25 - 35 1 / 4 preheat the empty oven...
-
Page 27: Care And Cleaning
ENGLISH Container (Gastronorm) Broccoli, pre‐ 1 x 2/3 perfo‐ max. 10 - 11 Put the baking heat the emp‐ rated tray on the first ty oven shelf position. Peas, frozen 2 x 2/3 perfo‐ 2 x 1.5 2 and 4 Until the Put the baking rated... - Page 28 ENGLISH Step 1 Turn off the oven and wait until it is cold. Step 2 Carefully pull the shelf sup‐ ports up and out of the front catch. Step 3 Pull the front end of the shelf support away from the side wall.
- Page 29 ENGLISH Cleaning Reminder When the reminder appears, cleaning is recommended. Use the function: Steam Cleaning Plus. How to use: Descaling Before you start: Turn off the oven and wait Remove all accessories. Make sure that the water draw‐ until it is cold. er is empty.
- Page 30 ENGLISH Type Description Soft reminder Recommends you to descale the oven. Hard reminder Obligates you to descale the oven. If you do not descale the oven when the hard reminder is on, the steam functions are disabled. How to use: Rinsing Before you start: Turn off the oven and wait until it is cold.
- Page 31 ENGLISH Step 1 Place the deep pan on the first shelf position. Step 2 Select: Menu / Cleaning / Tank emptying. Duration: 6 min Step 3 Turn on the function and follow the instruction on the display. Step 4 When the function ends, remove the deep pan. When this function works, the lamp is off.
- Page 32 ENGLISH Step 7 Clean the glass panel with water and soap. Dry the glass panel carefully. Do not clean the glass panels in the dishwasher. Step 8 After cleaning, do the above steps in the opposite se‐ quence. Step 9 Install the smaller panel first, then the larger and the door.
-
Page 33: Troubleshooting
ENGLISH Step 3 Remove and clean the metal Step 5 Install the metal frame and the frame and the seal. seal. Tighten the screws. Step 4 Replace the lamp with a suita‐ Step 6 Install the left shelf support. ble 300 °C heat-resistant lamp. Troubleshooting Warning! Refer to Safety chapters. -
Page 34: Technical Data
ENGLISH Code and description Remedy F111 - Food sensor is not correctly inserted Fully plug Food sensor into the socket. into the socket. F240, F439 - the touch fields on the display Clean the surface of the display. Make sure do not work properly. -
Page 35: Energy Efficiency
ENGLISH Energy efficiency Product Information Sheet according to UK Ecodesign and Energy Labelling Regulations Supplier's name IKEA Model identification MUTEBO 505.570.39 Energy Efficiency Index 61.9 Energy efficiency class Energy consumption with a standard load, convention‐ 1.09 kWh/cycle al mode Energy consumption with a standard load, fan-forced 0.52 kWh/cycle... -
Page 36: Menu Structure
ENGLISH Keep food warm Moist Fan Baking Choose the lowest possible temperature Function designed to save energy during setting to use residual heat and keep a meal cooking. warm. The residual heat indicator or When you use this function the lamp temperature appears on the display. -
Page 37: Environmental Concerns
ENGLISH Submenu Application Child Lock Prevents accidental activation of the appliance. When the option is on, the text Child Lock appears in the display when you turn on the appliance. To enable the appliance use, choose the code let‐ ters in the alphabetical order. Access to the timer, the remote op‐ eration and the lamp is available with the option on. -
Page 38: Ikea Guarantee
IKEA. The original sales receipt is required including but not limited to damage as proof of purchase. If service work is... - Page 39 The IKEA guarantee gives you specific legal Please refer to the last page of this manual rights, which covers or exceed local for the full list of IKEA appointed contacts demands. However these conditions do not and relative national phone numbers.
- Page 40 9 till 21. Weekdays +381 11 7 555 444 (ако позивате изван Србије) Цена позива у националном Понедељак – субота: 09 – 20 Србија 011 7 555 444 саобраћају Недеља: 09 – 18 (ако позивате из Србије) Eesti, Latvija, Україна www.ikea.com...
- Page 44 21552 © Inter IKEA Systems B.V. 2023 AA-2350641-2...
Need help?
Do you have a question about the MUTEBO and is the answer not in the manual?
Questions and answers