Emerson Rosemount 644 Quick Start Manual
Temperature transmitter
Hide thumbs
Also See for Rosemount 644:
- Reference manual (182 pages) ,
- Quick start manual (48 pages) ,
- Service manual (37 pages)

Related Manuals for Emerson Rosemount 644


Summary of Contents for Emerson Rosemount 644
- Page 1 Quick Start Guide 00825-0200-4728, Rev LC April 2023 Rosemount 644 Temperature ™ Transmitter with 4–20 mA HART Protocol (Revision ® 5 and 7)
-
Page 2: Table Of Contents
Quick Start Guide April 2023 Contents About this guide........................... 3 System readiness......................... 5 Transmitter installation....................... 6 Safety instrumented systems....................24 Product certifications........................ 25 Declaration of Conformity......................44 China RoHS..........................48 Rosemount 644... -
Page 3: About This Guide
This guide provides basic guidelines for installing the Rosemount 644 Temperature Transmitter. It does not provide instructions for detailed configuration, diagnostics, maintenance, service, troubleshooting, or installation. Refer to the Rosemount 644 Reference Manual for more instruction. The manual and this guide are also available electronically on Emerson.com/Rosemount. - Page 4 Entries marked "M20" are M20 x 1.5 thread form. When installing in a hazardous location, use only appropriately listed or Ex certified plugs, glands, or adapters in cable/conduit entries. Rosemount 644...
-
Page 5: System Readiness
HART devices. To access new functionality, download the new Device Driver. Emerson recommends downloading new Device Driver files to ensure full functionality. HART Revision 5 and 7 Selectable, Dual Sensor support, Safety Certified, Advanced Diagnostics (if ordered), Enhanced Accuracy and Stability (if ordered). -
Page 6: Transmitter Installation
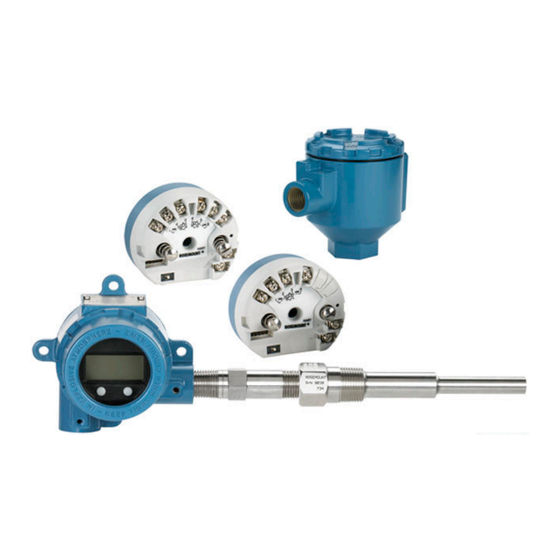
9. Connect the shielded power cable leads to the transmitter power terminals. Avoid contact with sensor leads and sensor connections. 10. Connect and tighten the cable gland. 11. Install and tighten the connection head cover. Rosemount 644... - Page 7 April 2023 Quick Start Guide A. Connection head cover B. Connection head C. Thermowell D. Transmitter mounting screws E. Integral mount sensor with flying leads F. Extension 3.1.2 Head mount transmitter with threaded sensor installation (two or three conduit entries) WARNING Enclosure Enclosure covers must be fully engaged to meet explosion-proof requirements.
- Page 8 Attach the sensor and power leads to the transmitter. Avoid contact with other terminals. 13. Install and tighten the universal head cover. A. Threaded thermowell B. Threaded style sensor C. Universal head (transmitter inside) D. Standard extension E. Conduit entry Rosemount 644...
- Page 9 April 2023 Quick Start Guide 3.1.3 Field mount transmitter with threaded sensor installation WARNING Enclosure Enclosure covers must be fully engaged to meet explosion-proof requirements. Procedure 1. Attach the thermowell to the pipe or process container wall. Install and tighten thermowells before applying process pressure.
- Page 10 E. Conduit entry 3.2 Wire and apply power 3.2.1 Wire the sensor to the transmitter Figure 3-1: Rosemount 644 Head Mount - Single and Dual Input Wiring Diagrams • The transmitter must be configured for at least a three-wire RTD in order to recognize an RTD with a compensation loop.
- Page 11 April 2023 Quick Start Guide 2. Connect the positive power lead to the “+” terminal. Connect the negative power lead to the “–” terminal. If a transient protector is being used, the power leads will now be connected to the top of the transient protector unit. See the transient label for indication of “+”...
- Page 12 2. Ensure the sensor shield is electrically isolated from surrounding fixtures that may be grounded. 3. Ground signal wiring shield at the power supply end. A. Sensor wires B. Transmitter C. Shield ground point D. 4-20 mA loop Rosemount 644...
- Page 13 April 2023 Quick Start Guide Ground the transmitter: option 2 Procedure 1. Connect signal wiring shield to the sensor wiring shield. 2. Ensure the two shields are tied together and electrically isolated from the transmitter housing. 3. Ground shield at the power supply end only. 4.
- Page 14 3. Do not connect the signal wiring shield to the sensor wiring shield. 4. Ground the signal wiring shield at the power supply end. A. Sensor wires B. Transmitter C. Shield ground point D. 4-20 mA loop Rosemount 644...
- Page 15 April 2023 Quick Start Guide Grounded thermocouple inputs Ground the transmitter: option 4 Procedure 1. Ground sensor wiring shield at the sensor. 2. Ensure the sensor wiring and signal wiring shields are electrically isolated from the transmitter housing. 3. Do not connect the signal wiring shield to the sensor wiring shield.
- Page 16 Enclosure covers must be fully engaged to meet explosion- proof requirements. 3.4 Verify configuration Upon receiving your transmitter, verify its configuration using any HART -compliant configuration tool. See the Rosemount 644 ® Reference Manual for configuration instructions using AMS Device Manager. The transmitter communicates using the Field Communicator (communication requires a loop resistance between 250 and 1100 ohms).
- Page 17 April 2023 Quick Start Guide 3.4.1 Verify configuration with a Field Communicator To verify configuration, you must install a Rosemount 644 DD (Device Descriptor) on the Field Communicator. Fast Key sequences for the latest DD are shown in Table 3-1. For Fast Key sequences using legacy DD's, contact your local Emerson representative.
- Page 18 Date 2, 2, 7, 1, 2 2, 2, 7, 1, 3 Display setup 2, 1, 4 2, 1, 4 Descriptor 2, 2, 7, 1, 4 2, 2, 7, 1, 5 Device information 1, 8, 1 1, 8, 1 Rosemount 644...
- Page 19 April 2023 Quick Start Guide Table 3-1: Device Revision 8 and 9 (HART 5 and 7), DD Revision 1 ® (continued) Fast Key Sequence Function HART 5 HART 7 Differential temperature setup 2, 2, 3, 1 2, 2, 3, 1 Drift alert 2, 2, 4, 2 2, 2, 4, 2 Filter 50/60 Hz...
- Page 20 The optional LOI can be used for commissioning the device. The LOI is a two-button design. To activate the LOI, push any button. LOI button functionality is shown on the bottom corners of the display. See Table 3-2 Figure 3-6 for button operation and menu information. Rosemount 644...
- Page 21 April 2023 Quick Start Guide Figure 3-5: Local Operator Interface Table 3-2: LOI Button Operation Button Left SCROLL Right ENTER Figure 3-6: LOI Menu Quick Start Guide...
- Page 22 3. In the test loop, verify the transmitter’s actual mA output and the HART mA reading are the same value. If the readings do not match, either the transmitter requires an output trim or the meter is malfunctioning. Rosemount 644...
- Page 23 April 2023 Quick Start Guide After completing the test, the display returns to the loop test screen and allows the user to choose another output value. 4. To end the loop test, select End and Enter. 3.5.2 Perform a loop test using Device Manager Procedure 1.
-
Page 24: Safety Instrumented Systems
Quick Start Guide April 2023 4 Safety instrumented systems For Safety Certified installations, refer to the Rosemount Reference Manual. The manual is available electronically Emerson.com/Rosemount or by contacting an Emerson representative. Rosemount 644... -
Page 25: Product Certifications
European Directive Information A copy of the EU Declaration of Conformity can be found at the end of the Quick Start Guide. The most recent revision of the EU Declaration of Conformity can be found at Emerson.com/Rosemount. 5.2 Ordinary Location Certification... - Page 26 3. An enclosure option must be selected to maintain a Type 4X rating. 4. The Rosemount 644 Transmitter optional housings may contain aluminum and is considered a potential risk of ignition by impact or friction. Care must be taken during installation and use to prevent impact and friction.
- Page 27 April 2023 Quick Start Guide 60529-05, CAN/CSA C22.2 No. 60079-0:11, CAN/CSA C22.2 No. 60079-11:14, CAN/CSA Std. No. 61010-1-12 CL I/II/III, DIV 1, GP B, C, D, E, F, G Markings: See I6 description for Intrinsic Safety and Division 2 markings. 5.6 Europe 5.6.1 ...
- Page 28 ≤ +40 °C); T5(–60 °C ≤ T ≤ +85 °C) Special Conditions for Safe Use (X): 1. The Rosemount 644 Temperature Transmitter must be installed in a suitably certified enclosure such that it is afforded a degree of protection of at least IP54 in accordance with IEC 60529 and EN 60079-15.
- Page 29 April 2023 Quick Start Guide 2. When fitted with the Transient Protector Assembly, the equipment is not capable of withstanding the 500 V test as defined in Clause 6.5 of EN 60079-15: 2010. This must be taken into account during installation. 5.6.5 ...
- Page 30 500 V test as defined in Clause 6.3.13 of IEC 60079-11:2011. This must be taken into account during installation. 5.7.3 N7 IECEx Type n – with enclosure IECEx BAS 07.0055 Certificate: Rosemount 644...
- Page 31 +40 °C); T5(–60 °C ≤ T ≤ +85 °C) Special Conditions for Safe Use (X): 1. The Rosemount 644 Temperature Transmitter must be installed in a suitably certified enclosure such that it is afforded a degree of protection of at least IP54 in accordance with IEC 60529 and IEC 60079-15.
- Page 32 -60 °C to +70 °C -60 °C to +80 °C -60 °C to +80 °C T5…T1 -60 °C to +80 °C -60 °C to +80 °C T130 °C Sensor Connection is where the sensor threads into the transmitter or junction box housing Rosemount 644...
- Page 33 April 2023 Quick Start Guide 5.8.2 I2 Brazil Intrinsic Safety [Fieldbus]: UL-BR 15.0264X [HART ]: UL-BR 14.0670X Certificate: ® ABNT NBR IEC 60079-0:2013, ABNT NBR IEC Standards: 60079-11:2013 [Fieldbus]: Ex ia IIC T* Ga (–60 °C ≤ T ≤ +** °C) [HART]: Markings: Ex ia IIC T* Ga (–60 °C ≤...
- Page 34 5.9.2 I3 China Intrinsic Safety GYJ21.1119X Certificate: GB3836.1-2010, GB3836.4-2010, GB3836.20-2010 Standards: Ex ia IIC T4 T6 Ga Markings: 产品安全使用特殊条件 防爆合格证号后缀“X”代表产品安全使用有特定条件: 1. 温度变送器须安装于外壳防护等级不低于国家标准 GB/T4208-2017 规定的 IP20 的壳体中,方可用于爆炸性危险场所,金属壳体须 符合国家标准 GB3836.1-2010 第 8 条的规定,非金属壳体须符合 GB3836.1-2010 第 7.4 条的规定。 2. 非金属外壳表面电阻必须小于 1GΩ,轻金属或者锆外壳在安装时必 须防止冲击和摩擦。 Rosemount 644...
- Page 35 April 2023 Quick Start Guide 3. 当 Transmitter Type 为 F、D 时,产品外壳含有轻金属,用于 0 区 时需注意防止由于冲击或摩擦产生的点燃危险。 4. 产品选用瞬态保护端子板(选项代码为 T1)时,此设备不能承受 GB3836.4-2010 标准中第 6.3.12 条规定的 500V 交流有效值试验电 压的介电强度试验。 产品使用注意事项 1. 产品环境温度为: 当 Options 不选择 Enhanced Performance 时 输出代码 最大输出功率(W) 温度 环境温度 组别 0.67 –60 °C ≤ T ≤...
- Page 36 5.79 5.196 23.4 18.596 48.06 注:本案电气参数符合 GB3836.19-2010 对 FISCO 现场仪表的参数 要求。 3. 该产品必须与已通过防爆认证的关联设备配套共同组成本安防爆系 统方可使用于爆炸性气体环境。其系统接线必须同时遵守本产品和 所配关联设备的使用说明书要求,接线端子不得接错。 4. 用户不得自行更换该产品的零部件,应会同产品制造商共同解决运 行中出现的故障,以杜绝损坏现象的发生。 5. 产品的安装、使用和维护应同时遵守产品使用说明书、 GB3836.13-2013“爆炸性环境 第 13 部分:设备的修理、检修、修 复和改造”、GB/T3836.15-2017“爆炸性环境 第 15 部分:电气装置 的设计,选型和安装”、GB/T3836.16-2017“爆炸性环境 第 16 部 分:电气装置的检查和维护”、GB/T3836.18-2017“爆炸性环境 第 18 部分:本质安全电气系统”和 GB50257-2014“电气装置安装工程 爆炸和火灾危险环境电力装置施工及验收规范”的有关规定。 Rosemount 644...
- Page 37 April 2023 Quick Start Guide 5.9.3 N3 China Type n GYJ20.1544 Certificate: GB3836.1-2010, GB3836.8-2014 Standards: Ex nA IIC T5/T6 Gc Markings: 产品安全使用特殊条件 1. 产品温度组别和使用环境温度范围之间的关系为: 当 Options 不选择 Enhanced Performance 时: 温度组别 环境温度 –40 °C ≤ T ≤ +70 °C 当 Options 选择 Enhanced Performance 时: 温度组别...
- Page 38 Special Conditions for Safe Use (X): Refer to certificate for details regarding process and ambient temperature limits as well as Special Conditions for Safe Use. See EM for Flameproof Specific Conditions of Use and see IM for Intrinsic Safety Specific Conditions of Use. Rosemount 644...
- Page 39 April 2023 Quick Start Guide 5.11 Japan 5.11.1 E4 Japan Flameproof Certificate: CML 21JPN1842X Ex db IIC T6…T1 Gb; T6(-60 °C ≤ T ≤ +70 °C); T5…T1(-60 Markings: °C ≤ T ≤ +80 °C) Special Conditions for Safe Use: 1. Flameproof joints are not intended for repair. 2.
- Page 40 Combination of E5 and I5 Combination of E7, I7, N7, and NK Combination of K6, E1, and I1 Combination of K5 and K6 Combination of I5 and I6 Combination of E5, I5, K6, E1, and I1 Combination of EP and IP Rosemount 644...
- Page 41 April 2023 Quick Start Guide 5.14 Additional certifications 5.14.1 SBS American Bureau of Shipping (ABS) Type Approval Certificate: 21-2157984-PDA 5.14.2 SBV Bureau Veritas (BV) Type Approval Certificate: 26325 BV Bureau Veritas Rules for the Classification of Steel Requirements: Ships Class notations: AUT-UMS, AUT-CCS, AUT-PORT and Application: AUT-IMS 5.14.3 ...
- Page 42 230 °F (110 °C) Table 5-4: Service Temperature Limits Transmitter Service temperature [°C] with LCD Dust display cover T4...T1 T130 °C No extension 149 °F (65 °C) 167 °F (75 °C) 203 °F (95 °C) 203 °F (95 °C) Rosemount 644...
- Page 43 April 2023 Quick Start Guide Table 5-5: Entity Parameters Fieldbus/PROFIBUS HART HART (Enhanced) ® ® [FISCO] 30 [17.5] (mA) 300 [380] 150 for T ≤ 80 °C 170 for T ≤ 70 °C 190 for T ≤ 60 °C 1.3 at T4 (–50 °C ≤ T .67 at T6(–60 °C ≤...
-
Page 44: Declaration Of Conformity
Quick Start Guide April 2023 6 Declaration of Conformity Rosemount 644... - Page 45 April 2023 Quick Start Guide Quick Start Guide...
- Page 46 Quick Start Guide April 2023 Rosemount 644...
- Page 47 April 2023 Quick Start Guide Quick Start Guide...
-
Page 48: China Rohs
Quick Start Guide April 2023 7 China RoHS Rosemount 644... - Page 49 April 2023 Quick Start Guide Quick Start Guide...
- Page 50 Quick Start Guide April 2023 Rosemount 644...
- Page 51 April 2023 Quick Start Guide Quick Start Guide...
- Page 52 2023 Emerson. All rights reserved. Emerson Terms and Conditions of Sale are available upon request. The Emerson logo is a trademark and service mark of Emerson Electric Co. Rosemount is a mark of one of the Emerson family of companies. All other marks are the property of their respective owners.
Need help?
Do you have a question about the Rosemount 644 and is the answer not in the manual?
Questions and answers