Advertisement
Quick Links
EN Installation / User Instructions / Warranty
FR Instructions de montage / Mode d'emploi / Garantie
ES Instrucciones de montaje / Manejo / Garantía
AXOR 300 Ceiling
Showerarm SoftCube
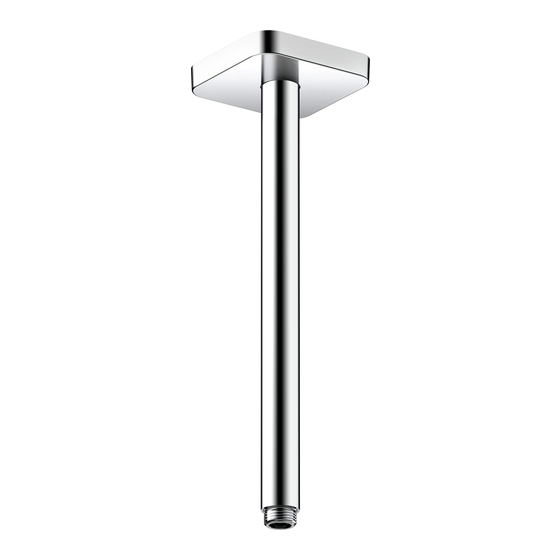
26966XX1
AXOR 300 Ceiling
Showerarm Square
26438XX1
AXOR 100 Ceiling
Showerarm SoftCube
26965XX1
I N S T A L L A T I O N
AXOR 300 Ceiling
Showerarm
26433XX1
AXOR 100 Ceiling
Showerarm Square
26437XX1
AXOR 100 Ceiling
Showerarm
26432XX1
Advertisement

Related Manuals for Axor 300 26966 1 Series


Summary of Contents for Axor 300 26966 1 Series
- Page 1 AXOR 300 Ceiling AXOR 300 Ceiling AXOR 300 Ceiling Showerarm Showerarm SoftCube Showerarm Square 26433XX1 26966XX1 26438XX1 AXOR 100 Ceiling AXOR 100 Ceiling Showerarm Square Showerarm SoftCube 26437XX1 26965XX1 EN Installation / User Instructions / Warranty AXOR 100 Ceiling FR Instructions de montage / Mode d'emploi / Garantie Showerarm 26432XX1 ES Instrucciones de montaje / Manejo / Garantía...
-
Page 2: Installation Considerations
E N G L I S H F R A N A I S I NSTALL ATI O N CO N SI D E R ATI ON S À PR EN D RE EN CO N SIDÉR ATIO N POUR L’... -
Page 3: Consideraciones Para La Instalación
E S P A Ñ O L CONSIDERACIONES PARA LA INSTALACIÓN TO OLS R EQU IRED / OUTILS REQ UIS / HER RA M IEN TAS ÚTIL ES ⁄ Para obtener mejores resultados, la instalación debe estar a cargo de un plomero profesional matriculado. - Page 4 AXOR 100 Ceiling Showerarm AXOR 100 Ceiling Showerarm Square / SoftCube 26432XX1 26437XX1 / 26965XX1 Ø 3⅝" 3 ⅝ " G ½ ½ AXOR 300 Ceiling Showerarm AXOR 300 Ceiling Showerarm Square / SoftCube 26433XX1 26438XX1 / 26966XX1 Ø 3⅝"...
- Page 5 I N S T A L L A T I O N / I N S T A L L A T I O N / I N S T A L A C I Ó N This shower arm requires a properly anchored NPT ½...
- Page 6 Mark the mounting nipple at a point ¼" (6 mm) outside the surface of the finished ceiling. ¼"(6 mm) Faites une marque sur le raccord de montage à ¼ po (6 mm) à l’extérieur de la surface du plafond fini. Marque el niple de montaje a un ¼"...
- Page 7 Install the mounting nipple using a ⅜" Allen wrench. Installez le raccord de montage à l’aide d’une clé hexagonale de ⅜ po. ⅜" Instale temporalmente el niple de montaje usando una llave Allen de ⅜”. The mounting nipple should extend ¼" (6 mm) outside the surface of the finished ceiling.
- Page 8 Install the showerarm adaptor nipple. Tighten using an 8 mm Allen wrench. Installez l’embout de l’adaptateur du bras de douche. Serrez à l’aide d’une clé hexagonale de 8 mm. Instale el niple del adaptador del brazo de ducha. Ajuste usando una llave Allen de 8 mm. The adaptor nipple should extend 2⅜"...
- Page 9 Detach the decorative rosette from the anchor plate. Thread the adaptor plate onto the showerarm adap- tor nipple. Détachez la rosace décorative de la plaque d’ancrage. Vissez la plaque adaptatrice sur l’embout de l’adaptateur du bras de douche. Desacople la roseta decorativa de la placa de anclaje.
- Page 10 Set and drill holes using a ¼” (6mm) drill bit. WARNING: Do not drill into any water lines. Ø ¼" Réglez et percez les trous à l’aide d’une mèche de 6 mm ¼ po (6 mm). AVERTISSEMENT : Ne percez pas dans une conduite d’eau.
- Page 11 Screw the anchor plate back onto the showerarm adaptor nipple. Revissez la plaque d’ancrage sur l’embout de l’adaptateur du bras de douche. Enrosque la placa de anclaje nuevamente en el niple del adaptador del brazo de ducha. Install the mounting screws and washers. Installez les vis de montage et les rondelles.
- Page 12 Thread the locking nut onto the showerarm adaptor nipple using a 27 mm wrench. Thread the showerarm onto the showerarm adaptor nipple until hand tight. Vissez l’écrou de blocage sur l’embout de l’adaptateur du bras de douche à l’aide d’une clé de 27 mm.
- Page 13 Lubricate the anchor plate o-ring. Push the rosette onto the anchor plate until secure. Lubrifiez le joint torique de la plaque d’ancrage. Poussez la rosace sur la plaque d’ancrage jusqu’à ce qu’elle soit bien fixée. Lubrique la junta tórica de la placa de anclaje. Empuje la roseta sobre la placa de anclaje hasta que quede firme.
- Page 14 R E P L A C E M E N T P A R T S / P I È C E S D É T A C H É E S / R E P U E S T O S AXOR 100 Ceiling Showerarm AXOR 100 Ceiling Showerarm SoftCube 26432XX1...
- Page 15 C L E A N I N G R E C O M M E N D AT I O N F O R H A N S G R O H E P R O D U C T S Modern bathroom faucets, kitchen faucets and shower products are made from different materials to comply with the needs of the market with regard to design and functionality.
- Page 16 IMPORTA N T ⁄ Les residus de produits pour le corps comme les savons liquides, shampooings, gels de douche, teintures pour cheveux, parfums, apres-rasage et vernis a ongles peuvent causer des deteriorations. Rincez le produit avec de l’eau propre après chaque utilisation. ⁄...
-
Page 17: What We Will Do
(a) one (1) year for hansgrohe products and (b) five (5) years for 1492 Bluegrass Lakes Parkway AXOR products, in each case from the date of purchase. The war- Alpharetta, GA 30004 ranty period for products in the Rubbed Bronze, Matte Black and Toll-free 800 -334- 0455 Matte White finishes are three (3) years from the date of purchase. - Page 18 OR OTHERWISE. HANSGROHE, INC. SHALL NOT BE LIABLE This warranty gives you specific legal rights, and you may also have FOR ANY DAMAGE TO THE PRODUCT RESULTING FROM other rights which vary from state to state. REASONABLE WEAR AND TEAR, OUTDOOR USE, MISUSE PRODUCT INSTRUCTIONS AND QUESTIONS (INCLUDING USE OF THE PRODUCT FOR AN UNINTENDED APPLICATION),...
- Page 20 AXOR ⁄ Hansgrohe, Inc. 1490 Bluegrass Lakes Parkway Alpharetta, GA 30004 Tel. 800-334-0455 Fax 770-889-1783 axor-design.com...
Need help?
Do you have a question about the 300 26966 1 Series and is the answer not in the manual?
Questions and answers