
Related Manuals for Axor Citterio 39447 1 Series


Summary of Contents for Axor Citterio 39447 1 Series
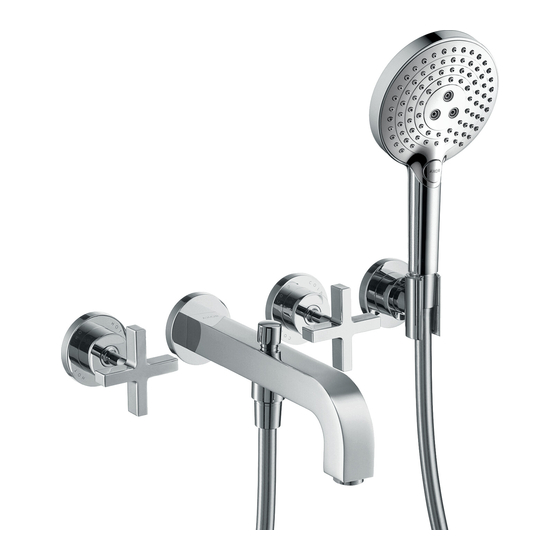
- Page 1 ® AXOR Citterio 39447XX1 EN Installation / User Instructions / Warranty FR Instructions de montage / Mode d'emploi / Garantie AXOR Citterio 39448XX1 ES Instrucciones de montaje / Manejo / Garantía I N S T A L L A T I O N...
-
Page 2: Safety Notes
E N G L I S H E N G L I S H SAFET Y NOTES INSTALLATION CONSIDERATIONS W A R N I N G : To avoid the risk of product ⁄ Read over these instructions thoroughly before beginning failure, propert y damage, and personal installation. -
Page 3: Consignes De Sécurité
F R A N A I S F R A N A I S CONSIGNES DE SÉCURITÉ À PRENDRE EN CONSIDÉRATION POUR L’INSTALL ATION AV E RTI SSEMEN T : Afin d’éviter les risques de défaillance du produit, de dommages ⁄... -
Page 4: Indicaciones De Seguridad
E S P A Ñ O L INDICACIONES DE SEGURIDAD CONSIDERACIONES PARA L A INSTAL ACIÓN ADVERTENCIA: Para evitar el riesgo de falla ⁄ Antes de comenzar la instalación, lea estas instrucciones del producto, daño a la propiedad y lesiones detenidamente. - Page 5 AXOR Citterio AXOR Citterio 39447XX1 39448XX1 5" (128 mm) 5" (128 mm) 4" (100 mm) 4" (100 mm) 4" (100 mm) 4" (100 mm) 4" (100 mm) 4" (100 mm) 2¾" 2⅛" (70 mm) (55 mm) Ø2⅜" Ø2⅜" Ø2⅜" Ø2⅜"...
- Page 6 INSTALLATION SUGGESTIONS / SUGGESTIONS D'INSTALLATION / SUGERENCIAS PARA LA INSTALACIÓN 8" (200 mm) 8" (200 mm) TOOLS REQUIRED / OUTILS REQUIS / HERRAMIENTAS ÚTILES 22 mm 17 mm 3 mm 5 mm 12 mm...
- Page 7 I N S T A L L A T I O N / I N S T A L L A T I O N / I N S T A L A C I Ó N TURN THE WATER OFF AT THE MAIN. Remove the covers.
- Page 8 394 48XX1 ONLY: 39448XX1 Remove the cartridges. 394 48XX1 SEU LE ME NT : Retirez les cartouches. 17 mm 394 48XX1 SOL A ME NTE : 17 mm Retire los cartuchos. Install the new cartridges. 39448XX1 96350001 cold froid frío 96351001 Installez les nouvelles cartouches.
- Page 9 AL L MO D ELS: Remove the plug from the spout port using a 17 mm wrench. Measure the distance between the rough and the end of the plaster shield Record this measurement (“X”). TOUS LES MODÈLES: Retirez le bouchon du port de bec à l'aide d'une clé de 17 mm 17 mm.
- Page 10 Install the connecting thread using a 12 mm Allen wrench. The connecting thread should extend 1⅜" (36 mm) outside the surface of the finished wall. Installez le raccord fileté à l'aide d'une clé hexagonale de 12 mm. 12 mm Le raccord fileté devrait étendre 1⅜ po (36 mm) hors de la surface du mur fini.
- Page 11 Cut the extension spindle so that it extends ½" (12 mm) outside the surface of the finished wall. Install the handles. Coupez la tige d’extension de façon à ce qu’une partie de ½ po (12 mm) soit à l’extérieur de la surface du mur ½...
- Page 12 If it is not satisfactory, remove the handle. Si l’alignement n’est pas satisfaisant, retirez la poignée. Si la alineación no es satisfactoria, retire la manija. Remove the extension spindle from the handle. Rotate it slightly and reinstall it. Retirez le tige d’extension, tournez-la légèrement, puis réinstallez-la.
- Page 13 If this does not correct the problem, remove the handle. Loosen the handle screw three complete turns. Raise the cross. Rotate and reinstall it. Tighten the screw. Si ceci ne corrige pas le problème, enlevez la poignée. Desserrez la vis de poignée trois virages complets. Elevez la croix.
- Page 14 Install the handle. Installez le poignée. Instale la manija. Remove the handle. Retirez la poignée. Retire la manija.
- Page 15 Install the escutcheons and the handles. Lightly lubricate the o-ring on the connecting thread using white plumber’s grease. Install the spout escutcheon. Install the spout. Tighten the screw using a 3 mm Allen wrench. Installez les écussons et las poignées. Lubrifiez légèrement le joint torique sur le raccord fileté.
- Page 16 Drill the holes using a ¼" (6 mm) bit. Percez les trous à l’aide d’une mèche de ¼ po (6 mm). Ø 6mm Perfore los orificios con una broca de ¼" (6 mm). Install the anchors. Seal the wall around the anchors using waterproof sealant.
- Page 17 Install a hose washer in the shorter of the two hose nuts. Connect this end to the handshower outlet. Install the filter washer in the longer of the two hose nuts. Connect this end to the handshower. Do not use pliers to tighten the hose nuts as they will damage the finish.
- Page 18 Flush the faucet for at least two minutes. Rincez le robinet pendant au moins deux minutes. Purgue el grifo durante al menos dos minutos. > 2 min Reinstall the aerator. Réinstallez l’aérateur Reinstale el aireador. 22 mm (1.5 ft-lb / 2 Nm)
- Page 19 AXOR Citterio 39447XX1 97716XX0 97705XX0 98134000 97228000 (16x2,5) 39525XX0 96754000 96466XX0 97738XX0 96756XX0 97704XX0 96392000 26052XX1 94077000 96755XX0 13956XX0 92856XX0 39295XX0 98058000 92672000 28272XX0 98058000 95413000 (25 mm) 96259000 (25 mm) XX = COLORS / COULEURS / ACABADOS 00 = chrome...
- Page 20 AXOR Citterio 39448XX1 96350001 97716XX0 97705XX0 98134000 (16x2,5) 97228000 96351001 39525XX0 96754XX0 96466XX0 97738XX0 96756XX0 96392000 94077000 26052XX1 96755XX0 13956XX0 39296XX0 92856XX0 28272XX0 92672000 98058000 95413000 (25 mm) 96259000 (25 mm) XX = COLORS / COULEURS / ACABADOS 00 = chrome...
- Page 21 USER INSTRUCTIONS / INSTRUCTIONS DE SERVICE / MANEJO 39447XX1 fermé ouvert cerrado abierto cold froid chaud frío caliente...
- Page 22 USER INSTRUCTIONS / INSTRUCTIONS DE SERVICE / MANEJO 39448XX1 fermé ouvert cerrado abierto cold froid chaud frío caliente...
-
Page 23: M A I N T E N A N C E / E N T R E T I E N / M A N T E N I M I E N T O
M A I N T E N A N C E / E N T R E T I E N / M A N T E N I M I E N T O JUST CLEAN: simply rub over the spray nozzles to remove Q U I C K lime scale. - Page 24 > 1 min.
- Page 25 C L E A N I N G R E C O M M E N D AT I O N F O R H A N S G R O H E P R O D U C T S Modern bathroom faucets, kitchen faucets and shower products are made from different materials to comply with the needs of the market with regard to design and functionality.
- Page 26 IMP ORTA NT ⁄ Les residus de produits pour le corps comme les savons liquides, shampooings, gels de douche, teintures pour cheveux, parfums, apres-rasage et vernis a ongles peuvent causer des deteriorations. Rincez le produit avec de l’eau propre après chaque utilisation.
- Page 27 Hansgrohe, Inc. company philosophy. We offer consumers a limited warranty on our hansgrohe and AXOR branded products. (ii) any hansgrohe or AXOR product sold for display purposes or (iii) ® ® hansgrohe or AXOR products purchased from unauthorized sellers.
- Page 28 800 -334- 0455. State of New Jersey. This warranty gives you specific legal rights, and you may also have other rights which vary from state to state. AXOR ⁄ Hansgrohe, Inc. 1490 Bluegrass Lakes Parkway Alpharetta, GA 30004 Tel. 800-334-0455 Fax 770-889-1783 axor-design.com...
Need help?
Do you have a question about the Citterio 39447 1 Series and is the answer not in the manual?
Questions and answers