Polycom VVX 250 Quick Start Manual
Hide thumbs
Also See for VVX 250:
- User manual (17 pages) ,
- Long format manual (15 pages) ,
- Manual (12 pages)
Table of Contents
Advertisement
Quick Links
Advertisement
Table of Contents

Related Manuals for Polycom VVX 250


Summary of Contents for Polycom VVX 250
- Page 1 Quick Start Guide Intermedia Unite Polycom VVX...
- Page 2 Welcome to Intermedia Unite...
-
Page 3: What's In The Box
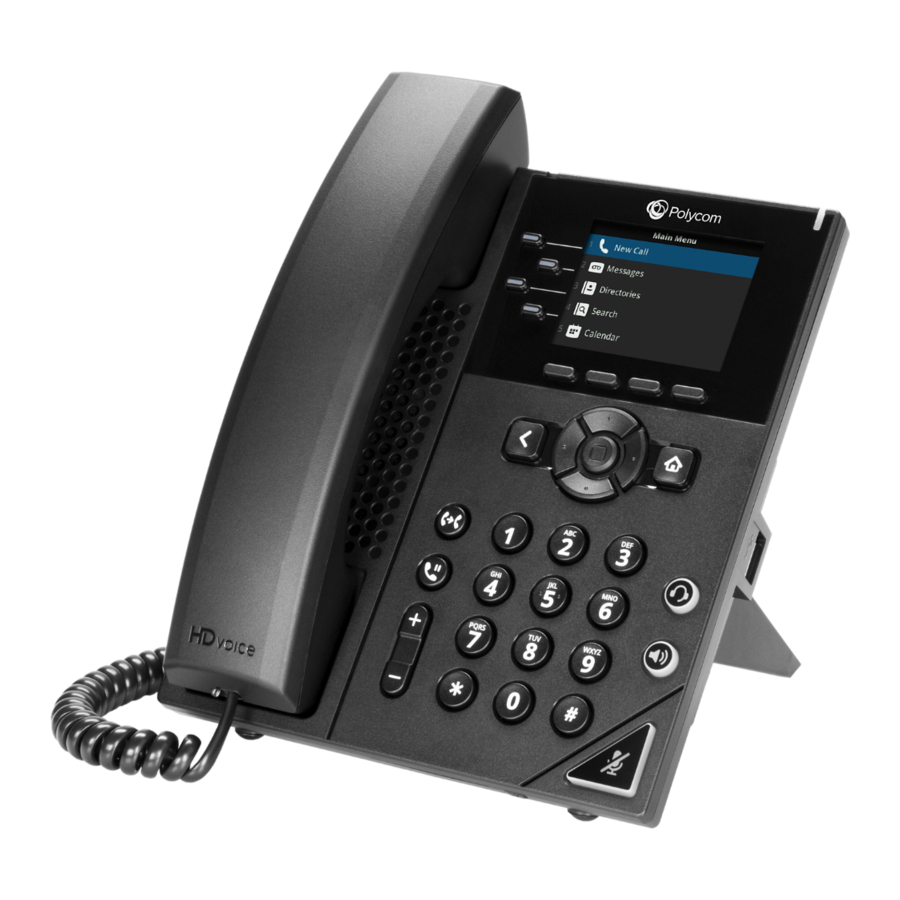
What’s in the box? T42G Polycom VVX 250 A. Phone E. Stand B. Ethernet Cable F. Power Adapter C. Handset Cable D. Handset... -
Page 4: Guided Setup
Guided Setup Attach Stand Attach the stand as shown below. Connect Handset and Optional Headset Note: Your phone supports wired headsets, including electronic hookswitch (EHS) headsets. For connection directions, refer to your headset documentation. EHS port RJ-9 port Note: Your phone supports USB and wired headsets, including Electronic Hookswitch (EHS) headsets. -
Page 5: Connect Cables
Connect Cables Please follow the diagram to install your phone. Once plugged in, the The voicemail box will be functional with a default greeting. Optional: Ethernet connection to computer AC power connection (optional accessory) Use if Power over Ethernet (POE) is unavailable. Note: Only use the power supply designed for your phone to avoid damaging the phone. - Page 6 (secures the phone at high angles) Soft keys Speaker Navigation keys / Select key ‹ Back key Home key USB port (on side; VVX 250 only) Transfer key Headset key Hold key Speakerphone key PQRS WXYZ Volume keys Mute key...
- Page 7 Voicemail Box Setup RECORDING YOUR PERSONAL VOICEMAIL GREETING 1. Press the "Home" button. 2. Press option 2 for "Messages". 3. Press option 1 for "Message Center". and press the "Connect" soft key. 4. Enter the PIN provided to you by your Administrator, followed by the # key.
-
Page 8: Commonly Used Features
Commonly Used Features PLACING OUTGOING CALLS When the phone is not in use: Pick up the handset or press the “Speakerphone” button. Dial an extension or telephone number. When you are already on a call: Press the “Hold” soft key. Press the “New Call”... -
Page 9: Rejecting An Incoming Call
REJECTING AN INCOMING CALL Press the “Reject” soft key to immediately send the caller to voicemail. Note: Caller will continue to hear ringing after pressing "Reject" if you have multiple devices assigned to your User. IGNORING AN INCOMING CALL Press the "More" soft key followed by the "Ignore" soft key to send the caller to voicemail. -
Page 10: Transferring Calls
TRANSFERRING CALLS Blind Transfers: While on a call, press the “Transfer” soft key. Dial the desired phone number or extension number. Press the “Transfer” soft key again. The call is automatically transferred. Attended (Consultative or Warm) Transfers: While on a call, press the “Transfer” soft key. Dial the desired phone number or extension number. -
Page 11: Volume Adjustment
CALL WAITING (CONTINUED) To Ignore the Second Call: Press the down arrow button to access the second call. Press the "More" soft key and press the "Ignore" soft key to send the caller to voicemail. Note: The caller will continue to hear ringing for the specified amount of time, defined in the phone’s “No Answer Forwarding”... -
Page 12: Forwarding Calls
FORWARDING CALLS Press the “Forward” soft key OR Press the “Home” button and press the option corresponding to "Forward". If “Always Forward” is currently disabled, “Always (Disabled)” will be displayed. Press 1 for “Always.” Enter / verify the contact number where calls will be forwarded. Press the “Enable”... - Page 13 We are here to help. www.intermedia.net/knowledgebase/voice voicesupport@intermedia.net 1.877.880.0055 POLYCOMVVX250-QS-001 ©2017 Intermedia.net, Inc.
Need help?
Do you have a question about the VVX 250 and is the answer not in the manual?
Questions and answers