Table of Contents
Troubleshooting

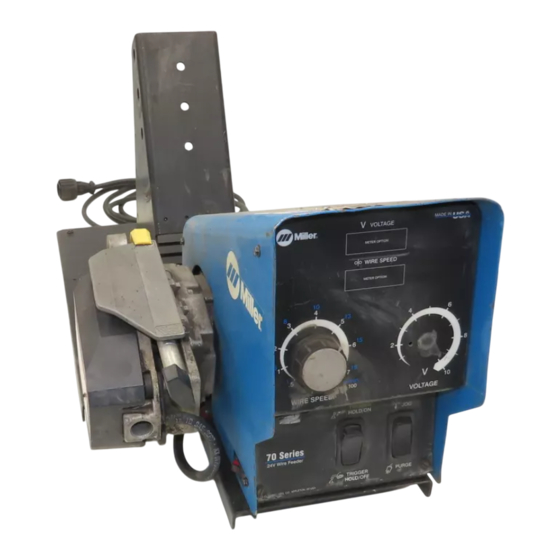
Related Manuals for Miller S-75S


Summary of Contents for Miller S-75S
- Page 1 OM-223 605E 2006−07 Processes MIG (GMAW) Welding Flux Cored (FCAW) Welding (Gas- And Self-Shielded) Description Wire Feeder S-75S, S-75SA, S-75SC S-75D, S-75DA, S-75DC File: MIG (GMAW) Visit our website at www.MillerWelds.com...
- Page 2 We know you don’t have time to do it any other way. That’s why when Niels Miller first started building arc welders in 1929, he made sure his products offered long-lasting value and superior quality.
-
Page 3: Table Of Contents
TABLE OF CONTENTS SECTION 1 − SAFETY PRECAUTIONS - READ BEFORE USING ........1-1. - Page 4 Via Privata Iseo 6/E 20098 San Giuliano Milanese, Italy Phone: 39(02)98290-1 Fax: 39(02)98290203 European Contact Signature: S-75S, S-75SA, S-75SC, S-75D, Declares that the product: S-75DA, S-75DC conforms to the following Directives and Standards: Directives Low Voltage Directive: 73/23/EEC Electromagnetic Compatibility (EMC) Directive: 89/336/EEC...
-
Page 5: Section 1 − Safety Precautions - Read Before Using
SECTION 1 − SAFETY PRECAUTIONS - READ BEFORE USING som _3/05 Y Warning: Protect yourself and others from injury — read and follow these precautions. 1-1. Symbol Usage Means Warning! Watch Out! There are possible hazards with this procedure! The possible hazards are shown in the adjoining symbols. - Page 6 ARC RAYS can burn eyes and skin. BUILDUP OF GAS can injure or kill. D Shut off shielding gas supply when not in use. Arc rays from the welding process produce intense visible and invisible (ultraviolet and infrared) rays D Always ventilate confined spaces or use that can burn eyes and skin.
-
Page 7: Additional Symbols For Installation, Operation, And Maintenance
D Read Owner’s Manual before using or servic- support unit. ing unit. D If using lift forks to move unit, be sure forks are D Use only genuine Miller/Hobart replacement long enough to extend beyond opposite side of parts. unit. -
Page 8: Principal Safety Standards
1-5. Principal Safety Standards Safety in Welding, Cutting, and Allied Processes, ANSI Standard Z49.1, Boulevard, Rexdale, Ontario, Canada (phone: from Global Engineering Documents (phone: 1-877-413-5184, website: 800−463−6727 or in Toronto 416−747−4044, website: www.csa−in- www.global.ihs.com). ternational.org). Practice For Occupational And Educational Eye And Face Protection, Recommended Safe Practices for the Preparation for Welding and Cut- ANSI Standard Z87.1, from American National Standards Institute, 11 ting of Containers and Piping, American Welding Society Standard... -
Page 9: Section 2 − Consignes De Sécurité − Lire Avant Utilisation
SECTION 2 − CONSIGNES DE SÉCURITÉ − LIRE AVANT UTILISATION som _3/05 Y Avertissement : se protéger et protéger les autres contre le risque de blessure — lire et respecter ces consignes. 2-1. Symboles utilisés Symbole graphique d’avertissement ! Attention ! Cette pro- cédure comporte des risques possibles ! Les dangers éven- tuels sont représentés par les symboles graphiques joints. - Page 10 LES RAYONS D’ARC peuvent entraî- ACCUMULATIONS ner des brûlures aux yeux et à la peau. risquent de provoquer des blessures ou même la mort. Le rayonnement de l’arc du procédé de soudage génère des rayons visibles et invisibles intenses D Fermer l’alimentation du gaz protecteur en cas (ultraviolets et infrarouges) susceptibles de provo- de non-utilisation.
-
Page 11: Dangers Supplémentaires En Relation Avec L'installation, Le Fonctionnement Et La Maintenance
D Utiliser un équipement de levage de capacité D Utiliser uniquement des pièces de rechange suffisante pour lever l’appareil. Miller/Hobart. D En utilisant des fourches de levage pour déplacer l’unité, s’assu- rer que les fourches sont suffisamment longues pour dépasser du côté... -
Page 12: Principales Normes De Sécurité
2-5. Principales normes de sécurité Safety in Welding, Cutting, and Allied Processes, ANSI Standard Z49.1, Boulevard, Rexdale, Ontario, Canada M9W 1R3 (téléphone : de Global Engineering Documents (téléphone : 1-877-413-5184, site In- 800-463-6727 ou à Toronto 416-747-4044, site Internet ternet : www.global.ihs.com). www.csa-international.org). -
Page 13: Section 3 − Definitions
SECTION 3 − DEFINITIONS 3-1. Warning Label Definitions A. Warning! Watch Out! There are possible hazards as shown by the symbols. B. Drive rolls can injure fingers. C. Welding wire and drive parts are at welding voltage during operation − keep hands and metal objects clear. -
Page 14: Weee Label
3-2. WEEE Label Do not discard this product with general waste. Reuse or recycle Waste Electrical and Electronic Equipment (WEEE) by disposing at a designated collec- tion facility. Contact your local recycling office or your local distributor for further information. 3-3. -
Page 15: Section 4 − Introduction
SECTION 4 − INTRODUCTION 4-1. Specifications Welding Wire Type of Input Welding Power Overall Maximum Wire Feed Circuit Diameter Weight Power Source Type Rating Dimensions Spool Weight Speed Range Rating Range 24 Volts ac Constant 100 Volts, IP 21 Length: 27 in 60 lb Standard .023 to 5/64 in... -
Page 16: Equipment Connection Diagrams
5-2. Equipment Connection Diagrams Welding Power Source Contactor Control/Power Cord Weld Cable Weld Cable Workpiece Welding Gun Wire Feeder Gas Hose Gas Cylinder and Regulator (Customer Supplied) Shielding gas pressure not to exceed 100 PSI (689 kPa). 804 656-A OM-223 605 Page 12... -
Page 17: Rear Panel Connections And Rotating Drive Assembly
5-3. Rear Panel Connections And Rotating Drive Assembly 350 Amps and above weld connection point A Up to 350 Amps weld connection point B Connection Connection Point A Point B Tools Needed: 9/16 in Ref. 804 183-B / 804 184-B 14-Pin Control Cable - 10 ft (3.0 m) from connection point A and use it at con- Note two weld cable connections: Up... -
Page 18: 14-Pin Plug Plg12 Information
5-4. 14-Pin Plug PLG12 Information Pin* Pin Information 24 volts ac with respect to socket G. Contact closure to A completes 24 volts ac contactor control circuit. Circuit common for 24 volts ac circuit. +10 volts dc input from power source to wire feeder with respect to socket D. Remote control circuit common. -
Page 19: Installing Pd Continuous Wire Guides
5-8. Installing PD Continuous Wire Guides PD Continuous Wire Guides: Should be used with .068/.072 in (1.8 mm) and smaller diameter wire for opti- mal performance. Should be used with PD drive rolls and cannot be used with non-PD (old-style) drive rolls. -
Page 20: Installing Non-Pd (Old Style) Wire Guides
5-9. Installing Non-PD (Old Style) Wire Guides Installing wire guides with non- PD (old-style) drive rolls Non-PD (old-style) wire guides and drive rolls should be used with 5/64 in (2.0 mm) and larger diameter wire. Pressure Door Assembly PD Inlet Guide Intermediate Guide Set Screw Guide Holder... -
Page 21: Installing Welding Gun
5-10. Installing Welding Gun Power Clamp Knob Gun Locking Tab Power Pin Groove Gun Connection End Installing gun with Accu-Mate connection Loosen power clamp knob to allow power pin of gun to clear the gun locking tab. When installing gun, the liner should extend into the PD continu- ous guide (or exit guide if used) as far as possible without interfering... -
Page 22: Installing Welding Wire And Adjusting Pressure Drive Setting
5-11. Installing Welding Wire And Adjusting Pressure Drive Setting Install wire spool. Adjust tension nut so wire is taut when wire feed stops. Thread wire. Adjust tension. Drive Rolls Pressure door as- sembly not shown. Back Of Gun End Of Liner Ref. -
Page 23: Setting Internal Dip Switches
5-12. Setting Internal DIP Switches Remove wrapper. DIP Switch S1 On Motor Board PC1 S1-1 Run-In enable or disable. S1-2 Automatic Run-In versus Manual Adjustment Run-in Install wrapper when finished. Factory Set Default Set- tings For DIP Switch S1 In the DIP switch S1 illustrations, the elevated slider on each switch is shown in white. -
Page 24: Equipment Dip Switch Settings (For Models With Meters Only)
5-13. Equipment DIP Switch Settings (For Models With Meters Only) Remove wrapper. DIP Switch S2 On Digital Meter Board PC60 Install wrapper when finished. Digital Meter DIP Switch Setting Inches/Minute Meters/Minute PC60 Tools Needed: 1/4 in Ref. 802 946 OM-223 605 Page 20... -
Page 25: Section 6 − Operation
SECTION 6 − OPERATION 6-1. Power Switch Power Switch 804 182-B 6-2. Jog/Purge And Trigger Hold Jog/Purge Push Button Pressing the Jog/Purge switch al- lows the operator to jog wire without energizing the weld power or gas valve circuit. • Jog speed can be adjusted with the Wire Speed control when the unit is jogging wire. -
Page 26: Voltage Control And Digital Meters (For Models With Meters Only)
6-3. Voltage Control And Digital Meters (For Models With Meters Only) Voltmeter The voltmeter displays actual or preset voltage from the welding power source through the 14−pin control cable. Voltmeter will not display actu- al or preset voltage if voltage feedback is not provided through the 14-pin control cable. -
Page 27: Section 7 − Maintenance And Troubleshooting
SECTION 7 − MAINTENANCE AND TROUBLESHOOTING 7-1. Routine Maintenance Y Disconnect power before maintaining. n = Check ~ = Clean l = Replace Reference Every Section 5-2, Months l Unreadable Labels ~ Weld Terminals nl Weld Cable nl Motor Brush Section 5-2, n 14-Pin Cord n Gas Hose and Fittings... -
Page 28: Diagnostics
7-3. Diagnostics Wrapper Motor Control Board PC1 LED3 Front panel is shown removed for purpose of illustration only. In actual use, front panel would be in place. Display On LED3 Sequence On Meter Motor Control Board PC1 Indicated Error (If Equipped) HELP 11 1 Blink Communication Error... -
Page 29: Troubleshooting
7-4. Troubleshooting Y Disconnect power before troubleshooting Trouble Remedy Wire feeds, shielding gas flows, but Check cable connections. Check cables for continuity, and repair or replace cables if necessary electrode wire is not energized. (see Section 5-3). Wire feeder is on, display does not light Check and reset circuit breaker at welding power source. -
Page 30: Section 8 − Electrical Diagram
SECTION 8 − ELECTRICAL DIAGRAM 202 246-C Figure 8-1. Circuit Diagram OM-223 605 Page 26... - Page 31 Notes OM-223 605 Page 27...
-
Page 32: Section 9 − Parts List
SECTION 9 − PARTS LIST Hardware is common and not available unless listed. Fig 9-3, 9-4 Fig 9-2 804 185-C Figure 9-1. Main Assembly OM-223 605 Page 28... - Page 33 Item Item Part Part Description Description Quantity Quantity Figure 9-1. Main Assembly ....159 647 Insulator, Motor Clamp ......... . .
- Page 34 Item Diagram Part Model marking Description S-75S S-75D Figure 9-2. Control Box (Figure 9-1 Item 21) ....200 555 Wrapper, Feeder .........
- Page 35 Diagram Part Model marking Description S-75S S-75D Figure 9-2. Control Box (Figure 9-1 Item 21) ....213 134 Knob, Encoder 1.670 Dia X .250 Id Push On W/Spring .
- Page 36 Hardware is common and not available unless listed. See Table 9-1 For Drive Roll & Wire Guide Kits 804 186-B Figure 9-3. Drive Assembly, Wire Item Diagram Part marking Description Quantity Figure 9-3. Drive Assembly, Wire (Figure 9-1 Item 4) .
- Page 37 Diagram Part Model marking Description S-75S S-75D Figure 9-4. Drive Assembly With Motor (Figure 9-1 Item 4) ....219 103 Screw, 010−32x .75 Flathd−Soc Stl Pln (Low Speed) .
- Page 38 OM-223 605 Page 34...
- Page 39 Effective January 1, 2006 (Equipment with a serial number preface of “LG” or newer) This limited warranty supersedes all previous Miller warranties and is exclusive with no other Warranty Questions? guarantees or warranties expressed or implied. LIMITED WARRANTY − Subject to the terms and conditions...
-
Page 40: Options And Accessories
Contact the Delivering Carrier to: File a claim for loss or damage during shipment. For assistance in filing or settling claims, contact your distributor and/or equipment manufacturer’s Transportation Department. © PRINTED IN USA 2006 Miller Electric Mfg. Co. 2006−01...
Need help?
Do you have a question about the S-75S and is the answer not in the manual?
Questions and answers