
Related Manuals for Zionair SB22AB


Summary of Contents for Zionair SB22AB
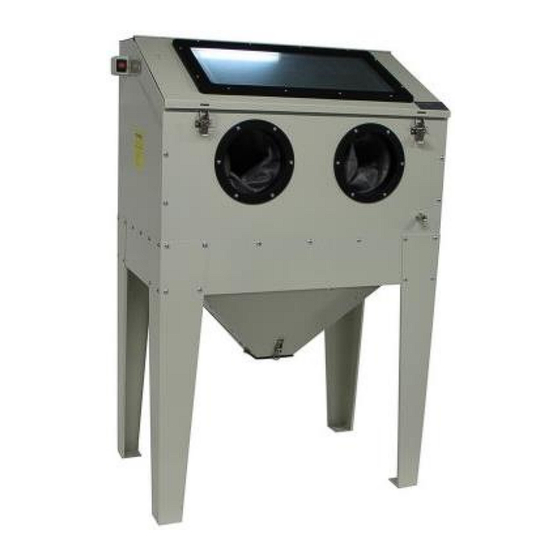
- Page 1 Zandstraalcabine 220L Sandblasting cabinet 220L SB22AB Montage- en gebruiksinstructies Assembly and user instructions...
-
Page 2: Table Of Contents
Inhoudsopgave Algemene informatie ............................2 Veiligheidsvoorschriften ..........................2 Algemene veiligheidsvoorschriften ........................2 Specifieke veiligheidsvoorschriften voor zandstraalcabines ................3 Assemblage ..............................4 Uitpakken ................................4 Assemblage ................................. 5 Bediening ................................ 8 Voorbereiding ..............................8 Bediening ................................8 Onderhoud ..............................8 Controle voorafgaand aan ieder gebruik ......................8 Mogelijke problemen en oorzaken ........................ -
Page 3: Algemene Informatie
Omdat er in het oog van de kwaliteit constant verbeteringen aan de apparatuur worden doorgevoerd, behoudt Zionair zich het recht voor om specificaties van de in de handleiding beschreven apparatuur te wijzigen. -
Page 4: Specifieke Veiligheidsvoorschriften Voor Zandstraalcabines
Specifieke veiligheidsvoorschriften voor zandstraalcabines 1. Voorkom te allen tijde het inademen van vrijkomend stof, draag te allen tijde adembescherming wanneer men de ruimte waar de zandstraalcabine staat betreedt i.v.m. fijnstof dat vrijkomt tijdens het stralen en in de lucht blijft hangen. Het inademen van fijnstof veroorzaakt ernstige longproblemen. -
Page 5: Assemblage
3. Assemblage Uitpakken Verwijder het karton en controleer de zandstraalcabine op schade, missende onderdelen etc.. In geval van schade of defecten doortransport onmiddellijk contact opnemen met uw Zionair- verkooppunt. -
Page 6: Assemblage
Assemblage 1. Plak δ3 afdicht tape (NN, fig.1.1) op de gebogen rand van de voorste plaat (K, fig.1.1) en achterste plaat (J, fig.1.1) van de trechter zoals in fig 1.1. 2. Gebruik M4x10mm bouten (CC, fig.1.2) om de klem (Z, fig.1.2) op de voorste plaat (K, fig.1.2), te bevestigen. - Page 7 9. Monteer het rechter zijpaneel (I, fig.3.8) tegen de trechter met 2 M6x12mm bouten (AA, fig.3.8), draai deze nog niet volledig aan. 10. Plak nu δ3 afdicht tape (NN, fig.3.10) op de achterkant van de cabine (E, I & J, fig.3.10). Fig.3 11.
- Page 8 16. Monteer de flens (KK, fig.5.16) met de M4x16mm bouten (BB, fig.5.16), Ø4 ringen (GG, fig.5.16) en M4 moeren (FF, fig.5.16). Monteer de inlaat (X, fig.5.16)tegen de achterwand van de cabine met 4 M6x12mm bouten (AA, fig.5.16) en M6 moeren (EE, fig.5.16). Monteer de klemmen (M, fig.5.16) op de cabine met M4x10mm bouten (CC, fig.5.16), Ø4 ringen (GG, fig.5.16) en M4 moeren (FF, fig.5.16).
-
Page 9: Bediening
4. Bediening Voorbereiding 1. Alvorens men kan gaan stralen dient het werkstuk vrij te zijn van olie, water en vocht, wees er zeker van dat het werkstuk droog en schoon is. 2. Stel de werkdruk van de perslucht in tussen 4en 8,6 bar, 8,6 bar is de maximale werkdruk, denk eraan dat straalgrit sneller afbreekt onder een hoge werkdruk. -
Page 10: Mogelijke Problemen En Oorzaken
Deze kan men gemakkelijk vervangen door een nieuwe. Wanneer het glas zelf beschadigd is, vervang dit dan door veiligheidsglas van dezelfde dikte en afmetingen, dit kunt U ook krijgen bij Uw Zionair-leverancier. Schoonmaken van de afzuiging Kijk de afzuiging na iedere 5 uur gebruik na, verwijder stof met behulp van perslucht of stofzuiger en verwijder opgehoopt vuil om een goede afzuigende werking te garanderen. -
Page 11: Garantie
7. Garantie 1. De garantie treed in werking op de datum vermeld op de aankoopnota en heeft een geldigheid van 12 maanden. 2. De garantie is niet overdraagbaar zonder een schriftelijke verklaring van toestemming van Uw leverancier. 3. Zonder aankoopnota kan geen aanspraak op garantie worden gemaakt. 4. -
Page 12: General
2006/42/EC. Every sandblasting cabinet is supplied with a manual including a declaration of conformity. These must be stored and kept up to date properly. Because of quality reasons constant improvements are going to be made on the equipment, Zionair reserves the right to alter specifications of the equipment described in this manual. -
Page 13: Specific Safety Regulations For Sandblasting Cabinets
Specific safety regulations for sandblasting cabinets 1. Prevent breathing in dust at all times, wear respiratory protection at all times when one enters the room where the sandblasting cabinet stands with regard to particulate matter that is released during the blasting and remains in the air. Breathing in particulate matter causes serious lung problems. -
Page 14: Assembly
3. Assembly Unpacking Remove the carton and check the sandblasting cabinet for damage, defect parts etc.. In case of damage through transport or defect parts, immediately contact your Zionair-retailer. -
Page 15: Assembly
Assembly 1. Stick δ3 sealing tape (NN, fig.1.1) onto the bended edge of the front plate (K, fig.1.1) and back plate (J, fig.1.1) of the funnel as shown in fig 1.1. 2. Use M4x10mm bolts (CC, fig.1.2) to mount the clamp (Z, fig.1.2) to the front funnel plate (K, fig.1.2), firmly tighten. - Page 16 9. Mount the right side panel (I, fig.3.8) against the funnel with 2 M6x12mm bolts (AA, fig.3.8), do not fully tighten yet. 10. Now place δ3 sealing tape (NN, fig.3.10) on the backside of the cabinet (E, I & J, fig.3.10). Fig.3 11.
- Page 17 fig.5.16) to the cabinet with M4x10mm bolts (CC, fig.5.16), Ø4 rings (GG, fig.5.16) and M4 nuts (FF, fig.5.16). Fig.5 17. Stick δ3 sealing tape (NN, fig.6.17) onto the edge of the back wall (C, fig.6.17) and top of the side walls (E & I, fig.6.17) just over the ridge.
-
Page 18: Operation
4. Operation Preparation 1. Before you can start sandblasting make sure the workpiece is free of oil, water and moisture, make sure the workpiece is dry and clean. 2. Set the work pressure of the compressed air between 4 and 8.6 bar, 8.6 bar is the maximum work pressure, grit breaks down faster with a higher work pressure. -
Page 19: Cleaning The Dust Extractor
This can easily be replaced by new foil. When the glass itself is damaged, replace it by safety glass with the same thickness and measurements, you can get this at your Zionair retailer. Cleaning the dust extractor (not included) Check the dust extractor after every 5 hours, remove dust by means of compressed air or vacuum cleaner and removed clogged debris to ensure a proper functioning of the extractor. -
Page 20: Warranty
7. Warranty 1. The warranty enters into force on the date that is mentioned on the receipt and has a validity of twelve months. 2. The warranty is not transferable without written permission of your distributor. 3. Warranty cannot be claimed without a receipt. 4. -
Page 21: Onderhoud/Keuring Legenda, Maintenance/Examination Legenda, Wartung / Inspektion-Legende
Onderhoud/keuring legenda, Maintenance/Examination Legenda, Wartung / Inspektion-Legende Naam gebruiker/Name of user/Name des Datum van ingebruikname/Date of Nutzers: commissioning/Datum der Inbetriebname: Adresgegevens/Address data/Anschriftdaten: Controle – Inspection – Kontrolle Datum/Date/Datum In orde/Okay/In Niet in orde, Handtekening/Signature/Unterschrift Ordnung ontmanteling/Not okay, decommissioning/ Nicht in Ordnung, Außer Betrieb gestellt... -
Page 22: Eg-Verklaring Van Overeenstemming - Declaration Of Conformity - Eg- Konformitätserklärung
Tipo Descrizione Marca Tipo Descripción Marca SB22AB Zandstraalkast, Sandblasting Zionair cabinet, Sandstrahlcabine Waarop deze verklaring betrekking heeft, in overeenstemming zijn met de volgende normen: To which this declaration relates is in conformity with the following document: Auf welches sich diese Erklärung bezieht, den folgenden Normen entspricht: Auquel se réfère cette déclaration est conforme à...
Need help?
Do you have a question about the SB22AB and is the answer not in the manual?
Questions and answers