Table of Contents
Advertisement
Quick Links
Advertisement
Table of Contents

Related Manuals for Sangean DPR-69+


Summary of Contents for Sangean DPR-69+
- Page 1 DPR-69+...
-
Page 2: Table Of Contents
Contents Controls ................. 2-3 Stereo / Mono setting - FM ..........17 Battery operation ..............4-5 Scan sensitivity setting - FM ..........18 Using the AC adaptor .............. 6 Software version ..............19 Lock switch ................6 System reset ................19 Operating your radio - DAB ............ -
Page 3: Controls
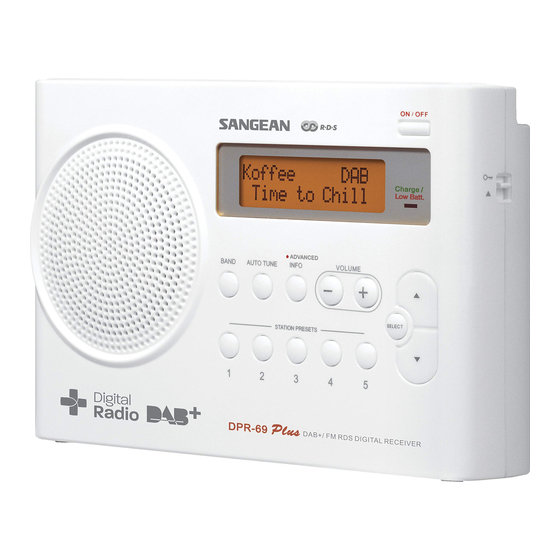
Controls (Front) 1. Speaker 5. Volume Down button 9. Charge / Battery Low indicator 10. Tuning Up / Down buttons 2. Band button 6. Volume Up button 11. Select button 3. Auto Tune button 7. On / Off button 4. Info button 8. - Page 4 Controls (Back) 15. Headphone socket 13.Battery compartment 16. DC jack socket 14.Telescopic aerial...
-
Page 5: Battery Operation
Battery operation using alkaline batteries 1. Remove the battery cover on the back of the unit by sliding the cover in the direction of the arrow. 2. Slide the switch inside the battery compartment to the Alkaline position. 3. Insert four LR6 (AA size) alkaline batteries into the spaces in the compartment. - Page 6 Battery operation using rechargeable batteries 1. Remove the battery cover on the back of the unit by sliding the cover in the direction of the arrow. 2. Slide the switch inside the battery compartment to the NiMH position. 3. Insert four Rechargeable LR6 (AA size) batteries into the spaces in the compartment.
-
Page 7: Using The Ac Adaptor
Using the AC adaptor Your radio is supplied with a Mains Adaptor. 1. Place your radio on a flat surface. 2. Insert the adaptor plug into the DC socket located on the left hand side of your radio. 3. Plug the adaptor into a standard 13 amp mains socket outlet. Whenever the adaptor is used with the radio, it will take power from the mains rather than from the batteries. -
Page 8: Operating Your Radio - Dab
Operating your radio - DAB 1. Carefully extend the telescopic aerial. 2. Press the On/Off button to switch on your radio. The display will show “Welcome to Digital Radio” for a few seconds. 3. If this is the first time the radio is used to scan of the Band III DAB channels will be carried out. -
Page 9: Selecting A Station - Dab
Selecting a station - DAB 1. The top line of the display shows the name of the station currently selected. 2. Press the Tuning Up/Down buttons to scroll through the list of available stations. 3. Press and release the Select button to select the station. The display may show “Now tuning...”... -
Page 10: Display Modes - Dab
Display modes - DAB Your radio has seven display modes:- 1. Press the Info button to cycle through the various modes. Scrolling text Displays scrolling text messages such as artist/track name, phone in number etc. Program Type Displays the type of station being listened to e.g. -
Page 11: Finding New Stations - Dab
Finding new stations - DAB As time passes new stations may become available. To find new stations proceed as follows:- 1. With the radio switched on and in DAB mode, press and release the Auto Tune button. The display will show "Scanning..." and your clock radio will perform a scan of the Band III DAB channels. -
Page 12: Manual Tuning - Dab
Manual Tuning - DAB Manual tuning allows you to tune directly to the various DAB Band III channels. Note that DAB stations are located in the range of 5A-13F. 1. Press and hold the Select button until the display shows “Manual tune”. -
Page 13: Dynamic Range Control - Dab
Dynamic Range Control settings - DAB Dynamic Range Control (also known as DRC) can make quieter sounds easier to hear when your radio is used in a noisy environment. 1. Press the On/Off button to switch on your radio. 2. Press and hold in the Info button. The display will show “Station list.”... -
Page 14: Operating Your Radio - Fm
Operating your radio - FM 1. Carefully extend the telescopic aerial. 2. Press the On/Off button to switch on your radio. The display will show “Welcome to Digital Radio” for a few seconds. 3. Press the Band button to select the FM band. 4. -
Page 15: Manual Tuning - Fm
Manual tuning - FM 1. Press the On/Off button to switch on your radio. 2. Press the Band button to select the FM band. Fully extend the Telescopic aerial. 3. Press and release the Select button until the display shows “Manual tune <... -
Page 16: Display Modes - Fm
Display modes - FM In FM mode the bottom line of the display can be set any of four display options. 1. Press the Info button to cycle through the various options. a. Radio text Displays scrolling text messages such as artist/track name, phone in number etc. -
Page 17: Presetting Stations - Dab And Fm
Presetting stations - DAB and FM There are 5 memory presets for each of the two wavebands. 1. Press the On/Off button to switch on your radio. 2. Tune to the required station as previously described. 3. Press and hold the required Preset button until the display shows, for example, “Preset 1 stored”. -
Page 18: Stereo / Mono Setting - Fm
Stereo / Mono setting - FM Your radio will play stereo broadcasts in stereo (via headphones) so long as the received signal is of adequate strength. However, as a stereo signal becomes weaker the audio signal will become poorer. It may be preferable to force the radio to play the station in mono in order to reduce the level of audio noise. -
Page 19: Scan Sensitivity Setting - Fm
Scan sensitivity setting - FM Your radio will normally scan for FM broadcasts which are strong enough to give good reception. However, you may wish the Auto-scan function to also be able to find weaker signals, possibly from more distant radio transmitters. Your radio includes a local / distant option for the Auto-scan function. -
Page 20: Software Version
Software version The software display cannot be altered and is just for your reference. Ensure your radio is switched on and in DAB mode. 1. To view the software version on the display press and hold the Info button for 2 seconds. 2. -
Page 21: Headphone Socket
Headphone socket A 3.5mm Headphone Socket located on the left hand side of your radio is provided for use with either headphones or an earpiece. Inserting a plug automatically mutes the internal loudspeaker. IMPORTANT: Excessive sound pressure from earphones and headphones can cause hearing loss. -
Page 22: Battery Information
A Few Words about Batteries... Rechargeable batteries Your radio has been designed to use a choice of power sources. Your radio uses a range of methods to ensure correct and safe charging You may plug it into the mains using the supplied high-efficiency of Rechargeable Nickel-Metal-Hydride batteries. - Page 23 If you use the radio powered from the batteries, the battery light will be To avoid danger and risk of injury, please follow these off until the batteries are exhausted. The battery light will then show guide lines red for a short while before the radio switches itself off. It does this in Improper use of batteries may result in leakage of fluid, overheating order that the batteries are not excessively discharged.
-
Page 24: General
General Your radio should not be exposed to dripping or splashing and that Do not allow this radio to be exposed to water, steam or sand. Do not no objects filled with liquids, such as vases, shall be placed on leave your radio where excessive heat could cause damage such as in a the radio. - Page 25 If at any time in the future you should need to dispose of this product please note that: Waste electrical products should not be disposed of with household waste. Please recycle where facilities exist. Check with your Local Authority or retailer for recycling advice.
Need help?
Do you have a question about the DPR-69+ and is the answer not in the manual?
Questions and answers