Miele F 9052 i Operating And Installation Instructions
Hide thumbs
Also See for F 9052 i:
- Operating and installation instruction (52 pages) ,
- Operating and installation instructions (52 pages)
Table of Contents

Related Manuals for Miele F 9052 i


Summary of Contents for Miele F 9052 i
- Page 1 Operating and installation instructions Freezer F 9052 i F 9252 i To avoid the risk of accidents or damage to the appliance, it is essential to read these instructions before it is installed and used for the first time. M.-Nr. 07 021370...
-
Page 2: Table Of Contents
Contents Guide to the appliance ..........4 Caring for the environment . - Page 3 Contents Cool pack............24 Defrosting the appliance .
-
Page 4: Guide To The Appliance
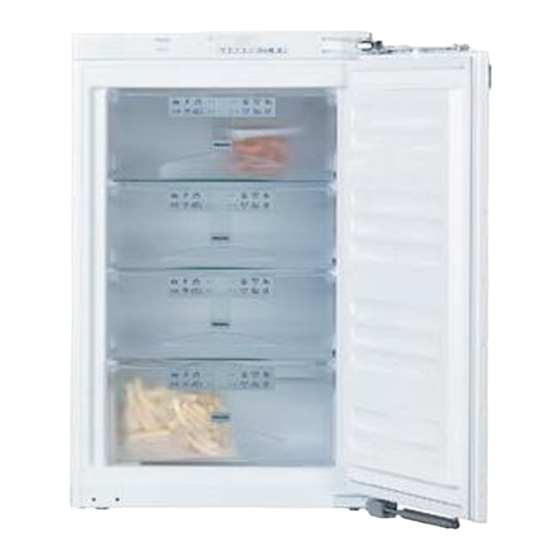
Guide to the appliance a Safety lock indicator light d Temperature selector buttons (+ for warmer; – for colder) b On/Off button e Super freeze button and indicator c Temperature display light f Alarm off button a Freezer drawers with freezer calendar... -
Page 5: Caring For The Environment
Caring for the environment Disposal of the packing Disposal of your old appliance material Please ensure that the appliance presents no danger to children while The transport and protective packing being stored for disposal. has been selected from materials which are environmentally friendly for It should be unplugged or disposal, and can normally be... -
Page 6: Warning And Safety Instructions
Warning and Safety instructions Correct application This appliance complies with all This appliance is intended for relevant legal safety requirements. domestic use only, to store deep Improper use of the appliance can, frozen food, freeze fresh food, and to however, present a risk of both make ice. - Page 7 - contact the Service Department for of or inadequacy of an effective advice. earthing system (e.g. electric shock). If the connection cable is faulty it must only be replaced by a Miele approved service technician to protect the user from danger.
- Page 8 Warning and Safety instructions Safe operation of the appliance is In countries where there are areas only assured if it has been installed which may be subject to infestation and connected in accordance with by cockroaches or other vermin, pay these operating and installation particular attention to keeping the instructions.
- Page 9 Warning and Safety instructions Do not store cans or bottles Do not use any oils or grease on containing carbonated drinks or the door seal, as these will cause liquids which could freeze in the freezer the seal to deteriorate and become section.
- Page 10 Warning and Safety instructions Disposal of your old freezer Before disposing of an old appliance, first make the door latch or lock unusable. This way you will prevent children from accidentally locking themselves in and endangering their lives. Disconnect it from the mains, cut off the cable directly behind the appliance, and render any plug unusable.
-
Page 11: How To Save Energy
How to save energy Normal energy Increased energy consumption consumption Installation site In a ventilated room. In an enclosed, unventilated room. Protected from direct sunlight. In direct sunlight. Not situated near to a heat source Situated near to a heat source (radiator, oven). - Page 12 How to save energy Normal energy Increased energy consumption consumption Defrosting Defrost the freezer compartment A layer of ice hinders the cold when a layer of ice 0.5 cm thick from reaching the frozen food, and has built up. causes an increase in energy consumption.
-
Page 13: Switching On And Off
Switching on and off Before using for the first time The cooling system is switched off. (If this does not happen, the safety lock is ^ Clean the inside of the appliance and still activated). the accessories with warm water and a little washing-up liquid, and then Safety lock dry with a soft cloth. -
Page 14: Switching Off For Longer Periods Of Time
Switching on and off ^ Press the On/Off button to come out of setting mode. The electronics will then switch over to normal operation after a couple of minutes. Switching off for longer periods of time If the appliance is not going to be used for a longer period of time, e.g. -
Page 15: The Correct Temperature
The correct temperature Setting the temperature It is very important to set the correct temperature for storing food in the Use the two buttons underneath the appliance. Micro-organisms will cause temperature display to set the food which is not stored at the correct temperature for the freezer. -
Page 16: Temperature Range
The correct temperature If you have adjusted the temperature, This loss of coldness is no cause for wait for approx. 6 hours if the concern in the following circumstances: appliance is not very full and for – when the door has been left open for approx. - Page 17 The correct temperature ^ Press one of the temperature selector buttons repeatedly until appears in the display. ^ Press the Super freeze button again. lights up in the display. ^ You can now adjust the level of brightness by pressing the temperature selector buttons.
-
Page 18: Alarm
Alarm Activating the alarm system Your appliance has been fitted with a warning system which ensures that the The alarm system is always active. It temperature in the freezer cannot rise does not have to be switched on unnoticed and to avoid energy being manually. -
Page 19: Super Freeze
Super freeze Super freeze Switching off Super freeze Switch the Super freeze function on The Super freeze function will switch off before putting fresh food into the automatically after a minimum of 30 freezer. hours and a maximum of 65 hours. The indicator light will go out and the This helps food to freeze quickly and appliance will run at normal power... -
Page 20: Freezing And Storing Food
Freezing and storing food Maximum freezing capacity Storing frozen food To ensure that fresh food placed in the When buying frozen food to store in freezer freezes through to the core as your freezer, check quickly as possible, the maximum –... -
Page 21: Home Freezing
Freezing and storing food Home freezing – Do not season fresh foods or blanched vegetables before Only freeze fresh food which is in a freezing. Only season cooked food good condition. lightly before freezing, but care should be taken as the taste of some Hints on home freezing spices alters when frozen. -
Page 22: Before Placing Food In The Freezer Compartment
Freezing and storing food ^ Make a note of the contents and the Freezing large items date of freezing on the packaging. If you wish to freeze large items such as a turkey or game, the glass cold Before placing food in the freezer plates between the drawers can be compartment removed. -
Page 23: Defrosting
Freezing and storing food Defrosting Ice cubes Frozen food can be defrosted in different ways: – in a microwave oven, – in an oven using the "Fan" or "Defrost" setting, ^ Fill the ice tray three quarters full with – at room temperature, water, and place it on the bottom of –... -
Page 24: Freezer Tray
Freezing and storing food Freezer tray Cool pack The freezer tray is useful for freezing The cool pack prevents the small items such as berries and temperature in the freezer rising too vegetables. They can be frozen quickly in the event of a power cut. individually and therefore maintain their Place the cool pack in the upper shape when defrosted. -
Page 25: Defrosting The Appliance
Defrosting the appliance In normal use, ice and frost will form in To defrost the freezer. If allowed to accumulate, Carry out the defrosting procedure this will impair the efficiency of the freezer and increase the consumption as quickly as possible if food has of electricity. - Page 26 Defrosting the appliance After defrosting ^ Clean the appliance, and then dry it thoroughly. ^ Close the appliance door, insert the plug in the socket and switch the appliance back on. ^ Switch on the Super freeze function so that the appliance can cool down quickly.
-
Page 27: Cleaning And Care
Cleaning and care ^ After cleaning, wipe the interior and Never use cleaning agents accessories with a damp cloth, and containing abrasive substances dry with a soft cloth. Leave the door such as sand, soda, acids, chlorides open to air the appliance for a short or chemical solvents. -
Page 28: Problem Solving Guide
^ Check to see whether a thick layer of tripped. If it has, contact the Miele ice has built up in the freezer. If it Service Department. has, then the freezer will need... - Page 29 Problem solving guide . . ? . . . the compressor runs . . . a bar is lit up or flashing in the continuously. temperature display. To save energy, the compressor runs at Check the temperature display about 6 a lower speed, but for longer, when less hours after switching on the appliance.
- Page 30 The safety lock has been activated. If you still cannot remedy the fault having followed these suggestions, please contact the Miele Service Department. To prevent unnecessary loss of temperature it is advisable not to open the door while waiting for the...
-
Page 31: Noises
Noises Normal noises What causes them Humming noise made by the motor (compressor). This noise can Brrrrr... get louder for brief periods when the motor is switching on. Blubb, blubb..A gurgling noise can be heard when coolant is circulating through the pipes. -
Page 32: After Sales Service
In the event of a fault which you cannot correct yourself, or if the appliance is under guarantee, please contact: – Your Miele Dealer – The Miele Service Department (see back cover for address). When contacting your Dealer or the Service Department, please quote the model and serial number of your appliance. -
Page 33: Electrical Connection
Electrical connection Electrical connection U.K. Non-rewireable plugs (BS 1363) All electrical work should be carried out The fuse cover must be re-fitted when by a suitably qualified and competent changing the fuse, and if the fuse cover person in strict accordance with current is lost, the plug must not be used until a local and national safety regulations suitable replacement is obtained. -
Page 34: Installation
Installation Ventilation This appliance must be built in, Air at the back of the appliance gets otherwise it could tip up. warm. The appliance housing unit must be constructed to allow sufficient space Location for ventilation. The appliance should be installed in a A ventilation gap of at least 38 mm dry, well-ventilated room. -
Page 35: Before Installation
They are no longer required because the furniture door is now fitted to the appliance door. All the necessary parts are supplied or can be ordered from the Miele Spare Parts Department. Stainless steel front ^ On no account should the spacers... -
Page 36: Building-In Dimensions
Building-in dimensions Niche height [mm] F 9052 i 714 - 730 F 9252 i 874 - 890... -
Page 37: Changing The Door Hinging
Changing the door hinging Before building the appliance in, you If you have put locking pins into the will need to decide on which side the hinges to stop the door opening too far: door is to be hinged. If left hand door hinging is required, follow the instructions below. - Page 38 Changing the door hinging To secure the soft-close mechanism Do not separate the soft-close ^ Place the door with the outer side mechanism from the ball joint. This downwards on a stable surface. would damage the mechanism. ^ Stand the appliance door up, and slacken the hinges at the front (the hinges remain open).
- Page 39 Changing the door hinging ^ Fit the appliance door onto the previously fitted screws a, and then tighten the screws. ^ Refit the covers b. ^ Replace the locking pins into the top of the hinges to prevent the door opening too far.
-
Page 40: Building In The Appliance
Building in the appliance Preparing the appliance All building-in instructions given are for a right-hand hinged appliance. If you have converted the appliance to left-hand hinging, you will need to adapt these instructions accordingly. Building into a peninsular run When built into a peninsular run, the rear of the building-in niche must be fitted with a kitchen furniture panel. - Page 41 Building in the appliance ^ Push the hinged side of the Building in the appliance appliance to the furniture wall. ^ Push the appliance into its housing ^ Align the appliance by altering the unit. When doing this, make sure that the adjustable feet using the spanner supplied f.
-
Page 42: Fitting A Furniture Door
Building in the appliance ^ Undo nuts b, and remove fixing – screw two long 4 x 19 mm chip board screws b loosely into the bracket c, together with the fitting middle of the long slot on the plastic aids. - Page 43 Building in the appliance ^ Whilst counterholding adjusting bolts b with a screwdriver, tighten nuts a at the top of the appliance door. ^ Hang the furniture door onto adjusting bolts a. ^ Loosely attach the nuts b on the adjusting bolts.
- Page 44 Building in the appliance (On large or divided doors, attach a second pair of fixing brackets a in the handle region of the door. Use the pre-drilled holes in the appliance door). ^ Securing the appliance door to the furniture door: –...
-
Page 45: Adjusting The Door Hinges
Adjusting the door hinges The door hinges are set ex-works to – If you would like the appliance door enable the door to be opened wide. to be cushioned so that it opens more softly, the spring tension on the However, if the opening angle of the appliance door can be adjusted. - Page 48 Alteration rights reserved / 5106 M.-Nr. 07 021370 / 00 en - GB F 9052 i F 9252 i...
Need help?
Do you have a question about the F 9052 i and is the answer not in the manual?
Questions and answers