Chapters
Table of Contents

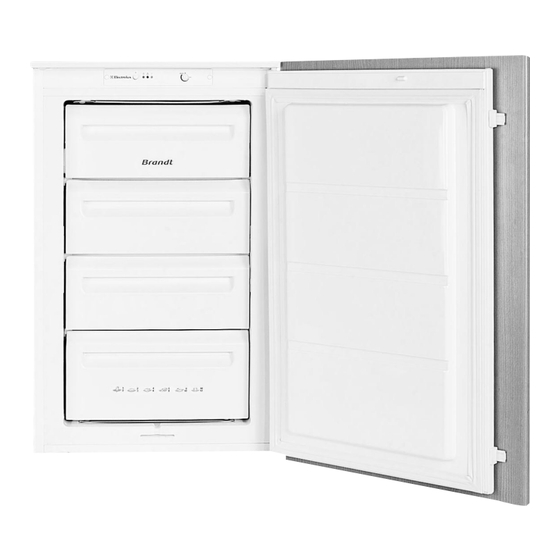
Related Manuals for Brandt FB 1000 E


Summary of Contents for Brandt FB 1000 E
- Page 1 FB 1000 E CONGELATEUR FREEZER DIEPVRIEZER GEFRIERSCHRANK CONGELADOR MODE D’EMPLOI INSTRUCTIONS FOR USE GEBRUIKSAANWIJZING BEDIENUNGSANLEITUNG LIBRO DE ISTRUCCIONES INSTRUÇÕES DE USO 2222740-33...
- Page 2 à vos exigences en termes de performance et de respect de l’environnement. Sous un design très actuel, les réfrigérateurs Brandt présentent de très nombreuses innovations pertinentes. Performants, ils assurent une fraîcheur optimale à vos aliments grâce à un espace de conservation organisé.
-
Page 3: Table Of Contents
SOMMAIRE Avertissement et conseils importants A l’attention de l’installateur A l’attention de l’utilisateur Caracteristique Techniques Description de l’appareil Installation Utilisation Emplacement Nettoyage Branchement électrique Tableau de commande Réversibilité de la porte Mise en service Instructions pour l’encastrement Réglage de la température Congélation rapide Voyant d’alarme Calendrier de congélation... -
Page 4: Avertissement Et Conseils Importants
AVERTISSEMENTS ET CONSEILS IMPORTANTS Il est très important que cette notice d’utilisation soit gardée avec l’appareil pour toute future consultation. Si cet appareil devait être vendu ou transféré à une autre personne, assurez-vous que la notice d’utilisation suive l’appareil, de façon à ce que le nouvel utilisateur puisse être informé du fonctionnement de celui-ci et des avertissements relatifs. -
Page 5: Description De L'appareil
sécurité, la ventilation doit être prévue comme indiqué dans le paragraphe correspondant. Attention: veillez à ne pas obstruer les ouvertures de ventilation. A cause du système de transport, I’huile contenue dans le compresseur pourrait s’écouler dans le circuit réfrigérant. Attendez 2 heures au moins avant de brancher l’appareil pour permettre à... -
Page 6: Utilisation
UTILISATION Cet appareil est repéré par le symbole ce qui signifie qu'il est apte à la congélation de denrées fraîches, au stockage de produits surgelés et à la fabrication de cubes de glace. Nettoyage L'appareil étant convenablement installé, nous vous conseillons de le nettoyer soigneusement avec de l'eau tiède savonneuse, pour enlever l'odeur caractéristique de “neuf”. -
Page 7: Congélation Rapide
Congélation rapide Pour la congélation rapide («SUPER»), réglage pendant les vingt-quatre heures qui suivent l'introduction du lot de denrées, puis repassez I'interrupteur doit être enfoncé jusqu'à ce que le au régime de conservation. voyant jaune s'allùme. Placez les aliments à congeler dans les deux La fonction de congélation rapide peut être ôtée on compartiments supérieurs de l'appareil de façon à... -
Page 8: Décongélation
Pour l'extraction des tiroirs, procédez de la façon suivante: extrayez le tiroir jusqu'au point de butée puis tournez-le vers le haut (voir fig.). PR001c Décongélation Avant leur utilisation, les aliments congelés ou surgelés doivent être laissés décongeler dans le réfrigérateur (viande, volaille, poissons, etc.) ou à température ambiante (pour les autres aliments), selon le temps dont on dispose pour cette opération. -
Page 9: Conseils
CONSEILS Conseils pour la congélation Conseils pour la surgélation Les produits destinés à la congélation doivent être Repérez la date de fabrication des produits frais et d'excellente qualité. Chaque paquet doit être surgelés et respectez la durée de conservation proportionné à l'importance de la consommation indiquée par le fabricant. -
Page 10: Entretien
ENTRETIEN Nettoyage périodique Débranchez l’appareil avant toute opération. N'utilisez jamais des objets métalliques pour nettoyer l'appareil; vous risquez de l'endommager. Attention Nettoyez périodiquement l'intérieur de votre appareil Cet appareil contient des hydrocarbures avec de l'eau tiède et du bicarbonate de soude. dans son circuit réfrigérant;... -
Page 11: Service Après-Vente Et Pièces De Rechange
SERVICE APRES-VENTE ET PIECES DE RECHANGE Si l'appareil marche mal, il faut contrôler: Dérangement Remède L’appareil ne fonctionne pas. - L’appareil n’est pas mis en service; mettre l’appareil en service. - La fiche n’est pas branchée ou ne donne pas de contact; brancher la fiche secteur. -
Page 12: Caracteristique Techniques
CARACTERISTIQUES TECHNIQUES Les données techniques figurent sur la plaque signalétique situeé sur le côté gauche à l’intérieur de l’appareil. INSTALLATION Si cet appareil, muni de fermeture magnétique, Important doit être employé pour en remplacer un autre L’appareil doit pouvoir être débranché du avec une fermeture à... -
Page 13: Instructions Pour L'encastrement
Instructions pour I'encastrement Dimensions de la niche Hauteur 880 mm Profondeur 550 mm Largeur 560 mm D132 2. Appliquez le joint à pression, entre l'appareil et le meuble (Fig.). PR 32 Il est également nécessaire que la niche soit équipée d’un conduit d’areation ayant les mesures suivantes: Profondeur 50 mm... - Page 14 PR266 PR167 5. Séparez les pièces A, B, C, D comme l’indique de 8. Ouvrez la porte de l’appareil et celle du meuble à la figure. 90° environ. Introduisez l’équerre (B) dans la glissière (A). Tenir ensemble la porte de l’appareil et celle du meuble et marquer la position des trous comme l’indique la figure.
- Page 15 CONTENTS Instructions for the User Instructions for the Installer Important Safety Instructions Technical specifications Description of the Appliance Installation Positioning Electrical connection Cleaning the interior Door reversal Control panel Instructions for totally built-in appliances Starting up Temperature regulation Quick freezing Warning light Freezing calendar Cold accumulator...
-
Page 16: Important Safety Instructions
IMPORTANT SAFETY INSTRUCTIONS It is most important that this instruction book should be retained with the appliance for future reference. Should the appliance be sold or transferred to another owner, or should you move house and leave the appliance, always ensure that the book is supplied with the appliance in order that the new owner can be acquainted with the functioning of the appliance and the relevant warnings. -
Page 17: Description Of The Appliance
During normal operation, the condenser and Environment Protection compressor at the back of the appliance heat up considerably. For safety reasons, minimum This appliance does not contain gasses which ventilation must be as shown in the relevant could damage the ozone layer, in either its paragraph. -
Page 18: Use
The freezer is marked with the symbol, which means that the compartment is suitable for freezing fresie food and long-term storage of frozen food. Cleaning the interior Before using the appliance for the first time, wash the interior and all internal accessories with lukewarm water and some neutral soap so as to remove the typical smell of a brand-new product, then dry thoroughly. -
Page 19: Quick Freezing
Quick freezing Activate fast freeze by depressing the fast freeze switch . The pilot lamp will then light up. The to be found on the bottom left-hand side. SUPER function can be ended by pressing the button You should never freeze all at once a greater quantity again. -
Page 20: Tips
TIPS Tips for freezing fresh foods Tips for storage of commercially frozen food To help you get the best out of the freezing process, here are a few hints: To get the best out of your freezer, in the case of Freeze only good-quality, fresh and well-cleaned storage of commercially frozen food you should foods. -
Page 21: Periodic Cleaning
To carry out complete defrosting proceed as follows: 1. Remove any stored food, wrap it in several layers of newspaper and put it in a cool place. 2. Turn the thermostat control to the «O» setting. 3. Leave the door open. 4. -
Page 22: Technical Specifications
TECHNICAL SPECIFICATIONS The technical data is indicated in the rating plate on the left side inside the appliance. INSTALLATION lf this appliance featuring magnetic door seals is This appliance complies with the following to replace an older appliance having a spring lock E.E.C. -
Page 23: Instructions For Totally Built-In Appliances
Instructions for totally built-in appliances Dimensions of the recess Height of housing mm 880 Depth of housing mm 550 Width of housing mm 560 D022 3. Slide the appliance into the recess, pushing it against the wall on the handle side. PR 32 1. - Page 24 PR266 PR167 6. Separate parts A, B, C, D as shown in the figure. 9. Open the appliance door and the furniture door at 90°. Insert the small square (B) into guide (A). Put together the appliance door and the furniture door and mark the holes as indicated in the figure.
- Page 25 INHOUD Waarschuwingen en belangrijke adviezen Technische gegevens Beschrijving van het apparaat Installatie Het gebruik Plaats van opstelling Reiniging van de binnenkant Elektrische aansluiting Bedieningspaneel Wijzigen van de deurdraairichting In bedrijf stellen Aanwijzingen voor de geïntegreerde inbouw Instellen van de temperatuur Snelvriezen Controlelampje “te warm”...
-
Page 26: Waarschuwingen En Belangrijke Adviezen
WAARSCHUWINGEN EN BELANGRIJKE ADVIEZEN Het is uiterst belangrijk dat de bij het apparaat behorende gebruiksaanwijzing bewaard blijft. Zou het apparaat door u aan iemand anders gegeven of verkocht worden, of zou het apparaat in het huis van waaruit u verhuist achterblijven, dan dient de nieuwe gebruik(st)er over de gebruiksaanwijzing en de daarin opgenomen waarschuwingen te kunnen beschikken. -
Page 27: Beschrijving Van Het Apparaat
wordt alleen verwijderd bij het ontdooien van het Afhankelijk van de wijze van transport kan apparaat. olie vanuit de compressor in het koelcircuit gevloeid zijn. Wacht, na het Geen voorwerpen of methodes gebruiken om het plaatsen van het apparaat, ten minste een half uur ontdooiproces te versnellen die niet door de alvorens de stekker in het stopcontact te steken. -
Page 28: Het Gebruik
HET GEBRUIK Dit apparaat is voorzien van het 4-sterren symbool dat wil zeggen dat het bedoeld is voor zowel het bewaren van diepvriesartikelen als voor het zelf invriezen van verse levensmiddelen. Voor het veilig bewaren van diepvriesartikelen dient de inwendige temperatuur niet warmer dan -18°C te zijn. Reiniging van de binnenkant Voor u de kast in gebruik neemt, dient u de binnenkant met lauw water en een neutraal... -
Page 29: Snelvriezen
“1” = warmste instelling “6” = koudste instelling Bij het instellen van de juiste stand dient u er rekening mee te houden dat de temperatuur in het het niet nodig om de diepvriezer naar de invries-stand apparaat afhankelijk is van: om te schakelen. -
Page 30: Ontdooien Van Diepvriesproducten
Ontdooien van diepvriesproducten IJslaatjes Met uitzondering van consumptieijs worden Met het apparaat zijn ijslaatjes meegeleverd. diepvriesartikelen voor verdere behandeling of het De ijslaatjes zijn bedoeld voor het maken van nuttigen ontdooid. ijsblokjes. Vul ze met drinkwater. Maak de onderkant Het ontdooien kan zowel in de koelkast als op het goed droog, anders vriezen de laatjes vast aan aanrecht gebeuren. -
Page 31: Onderhoud
ONDERHOUD Periodieke reiniging Neem voor iedere handeling altijd eerst de stekker uit het stopcontact. Nooit metalen voorwerpen gebruiken om het apparaat Belangrijk schoon te maken; dit zou het apparaat kunnen Dit apparaat bevat koolwaterstoffen in het beschadigen. koelcircuit; onderhoud en bijvulling dient Naar behoefte kunt u de buitenkant van de kast daarom uitsluitend door door de fabrikant lappen met lauwwarm water en een neutraal... -
Page 32: Servicedienst En Onderdelen
SERVICEDIENST EN ONDERDELEN Indien het apparaat niet goed funktioneert, kontroleer Kunt u de storing niet zelf lokaliseren en verhelpen, dan: raadpleeg dan de service-afdeling. of de stekker goed in het zit; Geef daarbij altijd het model en het typenummer of de elektriciteit soms uitgevallen is; van de kast op. -
Page 33: Wijzigen Van De Deurdraairichting
Wijzigen van de deurdraairichting Aanwijzingen voor de geïntegreerde inbouw Als transportbeveiliging zijn aan beide scharnierkanten scharnierpennen aangebracht. Nismaten Nishoogte 880 mm Nisdiepte 550 mm Nisbreedte 560 mm D163 Afhankelijk van de gewenste deurdraairichting moet aan een kant, zowel onder als boven, een scharnierpen verwijderd worden. - Page 34 PR266 D132 3. Breng, onder lichte druk, de voegafdichting tussen 6. Onderdelen A, B, C, D scheiden zoals u in de apparaat en niswand aan (zie afbeelding). tekening ziet. D727 PR166 4. Open de deur en druk het apparaat tegen de 7.
- Page 35 PR167 9. De deur van het apparaat en die van de kast met een hoek van ongeveer 90° openen. IJzer (B) in geleider (A) aanbrengen. De deuren samen vasthouden en de gaten aangeven zoals in de tekening. De ijzers weghalen en gaten van Ø 2 mm boren op een afstand van 8 mm van de buitenrand van de deur.
- Page 36 INHALT Warnungen und wichtige Hinwese Für den Benutzer Für den Installateur Gerätebeschreibung Technische Angabe Gebrauch Installation Reinigung der Innenteile Aufstellung Bedienungsblende Elektrischer Anschluß Inbetriebnahme Türanschlagwechsel Temperatureinstellung Montageanleitung für den integrierten Einbau Schnellgefriervorgang Alarmlampe Gefrierkalender Kälteakku Einfrieren der frischen Lebensmitteln Aufbewahrung der Tiefkühlkost Auftauen Eiswürfelbereitung Tips...
-
Page 37: Warnungen Und Wichtige Hinwese
WARNUNGEN UND WICHTIGE HINWEISE Es ist sehr wichtig, daß diese Bedienungsanleitung mit dem betreffenden Gerät aufbewahrt wird. Sollte dieses Gerät verkauft bzw. einer anderen Person gegeben werden, so ist es nötig, die Anleitung beizufügen, damit der neue Kunde über den Betrieb des Gerätes bzw. die entsprechenden Warnungen informiert werden kann. -
Page 38: Gerätebeschreibung
In allen Kühl- und Gefriergeräten bedecken sich im Laufe der Zeit alle kälteführenden Teile mit einer Umweltnormen Reif bzw. Eisschicht. Diese Schicht wird je nach Dieses Gerät enthält im Kühlkreislauf und in der Modell automatisch oder mit der Hand abgetaut. Isolierung kein ozonschädigendes Gas. -
Page 39: Gebrauch
GEBRAUCH Dieses Gerät ist mit dem «Viersterne» Symbol versehen, was bedeutet, daß darin sowohl frische Lebensmittel eingefroren als auch Tiefkühlkost langfristig gelagert werden können. Reinigung der Innenteile Bevor Sie das Gerät in Betrieb nehmen, beseitigen Sie den typischen «Neugeruch» am besten durch Auswaschen der Innenteile mit lauwarmem Wasser und einem neutralen Reinigungsmittel. -
Page 40: Schnellgefriervorgang
Schnellgefriervorgang Aufbewahrung der Tiefkühlkost Schalter drücken, um auf Position SUPER zu Nach einem längeren Stillstand des Gerätes muß stellen. Die Kontrollampe leuchtet auf. dieses vor der Einlagerung der Lebensmittel, durch Zum Ausschalten den Schnellgefriervorgang die Taste Einstellung des Schalters auf Schnellgefriervorgang erneut drücken. -
Page 41: Tips
TIPS Tips für das Einfrieren Tips für Tiefkühlkost Für einen vorteilhaften Gefriervorgang, geben wir Zur optimalen Verwendung des Gerätes müssen Sie folgende wichtige Ratschläge: noch folgendes beachten: nur erstklassige, frische und gut gesäuberte vergewissern Sie sich, Qualitätsware einfrieren; teilen Sie die daß... -
Page 42: Regelmäßige Reinigung
2. Das herausgenommene Gefriergut mehrfach in Zeitungspapier einwickeln und sehr kühl aufbewahren. 3. Tür offen lassen, und zum Auffangen des Abtauwassers den Plastikschaber als Verlängerung der Tauwasserführung in den vorgesehenen Sitz einstecken und eine Schale unterstellen (siehe Abb.). 4. Nach erfolgtem Abtauen den Innenraum gut trocknen. -
Page 43: Kundendienst Und Ersatzteile
KUNDENDIENST UND ERSATZTEILE Falls das Gerät Störungen aufweisen sollte, Sollten Sie nach o.e. Prüfungen zu keinem Resultat überprüfen Sie zuerst folgendes: kommen, so wenden Sie sich bitte an unseren nächsten Kundendienst. Steckt der Netzstecker in der Steckdose? Um ein rasches Beheben des Schadens zu Befindet sich der Hauptschalter der elektrischen ermöglichen, ist es beim Anruf an den Anlage in der richtigen Stellung? -
Page 44: Türanschlagwechsel
Türanschlagwechsel Montageanleitung für den integrierten Einbau Zur Transportsicherung wurde die Gerätetür an Nischenmaße beiden Auschlagseiten mit Scharnierstiften befestigt. Je nach Türanschlag, Scharnierstift auf einer Seite Höhe 880 mm oben und unten entfernen. Tiefe 550 mm Breite 560 mm D163 PR 32 Achtung! Bei einer niedrigen Raumtemperatur (z.B. - Page 45 D022 3. Gerät in die Nische schieben bis die Anschlagleiste (A) am Möbel anliegt. PR266 6. Die Teile A, B, C, D abnehmen, wie in der Abb. gezeigt wird. D727 4. Tür öffnen und Gerät gegenüber der Bandseite an die Möbelseitenwand rücken. Gerät mit den 4 beiliegenden Schrauben befestigen.
- Page 46 PR167 9. Gerätetür und Möbeltür auf ca. 90°öffnen. Den Winkel (B) in der Schiene (A) einsetzen. Gerätetür und Möbeltür zusammenhalten und die Bohrlöcher anzeichnen (siehe Abb.). Winkel abnehmen und die Bohrlöcher mit Ø 2mm und einem Abstand von 8 mm von der Türaußenkante ausführen. Den Winkel wieder auf der Schiene anbringen und mit den mitgelieferten Schrauben befestigen.
- Page 47 INDICE Advertencias y consejos importantes Descripción del aparato Caracteristicas tecnicas Instalación Limpieza de las partes internas Colocación Cuadro de mandos Conexión eléctrica Puesta en marcha Reversibilidad de la puerta Regulación de la temperatura Instrucciones para el empotramiento integral Congelación rápida Piloto de alarma Calendario de productos congelados Masa eutéctica...
-
Page 48: Advertencias Y Consejos Importantes
ADVERTENCIAS Y CONSEJOS IMPORTANTES Es muy importante conservar este libro de instrucciones junto al aparato por si fuera necesario consultarlo. Si el aparato se vendiese o transfiriese a otra persona, acuérdese de entregarlo junto con él para que el nuevo propietario conozca el funcionamiento de la máquina y sus advertencias. Estas advertencias han sido redactadas para su seguridad y para la seguridad de los demás. -
Page 49: Descripción Del Aparato
El aparato se calienta considerablemente en la proximidad del condensador y del compresor, por Protección del ambiente lo tanto hay que verificar que el aire pueda circular Este aparato no contiene en el circuito libremente alrededor del mismo. Una ventilación refrigerante y en el aislamiento, gases insuficiente puede causar un mal funcionamiento y refrigerantes nocivos para el ozono. -
Page 50: Uso
El congelador está marcado con el simbolo , que indica que es acto para la congelación de los alimentos frescos y para la conservación de alimentos congelados a largo plazo. Limpieza de las partes internas Antes del empleo limpiar todas las partes internas con agua tibia y jabón neutro, a fin de eliminar el característico olor de nuevo y secarlas luego cuidadosamente. -
Page 51: Congelación Rápida
Congelación rápida Pulse el interruptor . El piloto se encendará Los alimentos para congelar se colocan (posición SUPER). en los dos compartimientos superiores. La función SUPER se puede cancelar en cualquier En el primero compartimiento los productos se momento pulsando de nuevo el interruptor . -
Page 52: Cubitos De Hielo
La carne, el pescado y la fruta se descongelan en el Cubitos de hielo compartimiento refrigerador; los pequeños pedazos de carne o de volatería podrán cocerse aún sin El aparato está dotado de una o más cubeteras de descongelarlos, pero en este caso el tiempo de plástico para la producción de cubitos de hielo, cocción será... -
Page 53: Mantenimiento
MANTENIMIENTO Limpieza periódica Desenchufar el aparato antes de efectuar cualquier operación. No utilizar nunca objectos metálicos para limpiar el Atención aparato porque podría ser dañado. Este aparato contiene hidrocarburos en el Limpiar el interior con agua templada y bicarbonato y circuito refrigerante;... -
Page 54: No Funciona
SI ALGO NO FUNCIONA Si el aparato presentase anomalías será oportuno Después de hacer las verificaciones anteriores, si la controlar: anomalía persiste, llame al Centro de Asistencia Técnica más cercano. Que esté bien enchufado y que el interruptor de la instalación eléctrica esté... -
Page 55: Reversibilidad De La Puerta
Instrucciones para el Este aparato es conforme a las siguientes Directivas Comunitarias: empotramiento integral - 73/23 CEE 19/02/73 (Baja tensión) y modificaciones sucesivas; Dimensiones del hueco de instalación - 87/308 CEE 2/6/87 (Supresión de interferencias Altura hueco 880 mm radio) y modificaciones sucesivas; Produndidad hueco 550 mm - 89/336 CEE 03/05/89 (Compatibilidad... - Page 56 PR266 D132 3. Colocar a presión el cubre-juntas. 6. Separar las piezas A, B, C, D según se indica en la figura. D727 PR166 4. Adosar el aparato al lado opuesto a la bisagra de la puerta. Fijar el aparato con los 4 tornillos en 7.
- Page 57 PR167 9. Abrir la puerta del aparato y la del mueble a 90° aprox. Introducir la escuadrita (B) en la guía (A). Mantener unidas la puerta del aparato y la del mueble y marcar los agujeros según se indica en la figura.
- Page 58 SUMÁRIO Avertências e conselhos Características Técnicas importantes Instalação Colocação Descrição do aparelho Ligação eléctrica Utilização Porta reversível Instruções para encastrar Limpeza das partes internas Painel de comandos Arranque Regulação da temperatura Botão de congelação rápida Controlos luminoso vermelho de alarme Calendário de congelamento Massa eutéctica Congelação dos alimentos...
-
Page 59: Importantes
AVISOS E CONSELHOS IMPORTANTES É muito importante que este manual de instruções acompanhe o aparelho para garantir uma futura utilização correcta. Se o aparelho for vendido ou emprestado a terceiros, o manual de instruções deve, como acima citado, acompanhá-lo, de maneira que o utilizador possa ser informado sobre o seu funcionamento, os avisos e conselhos. -
Page 60: Descrição Do Aparelho
Desligue sempre a tomada de corrente antes de proceder à limpeza ou qualquer operação de manutenção do aparelho. Ao transportar o aparelho na horizontal, pode acontecer que o óleo contido no compressor escorra para o circuito refrigerante. É portanto aconselhável esperar pelo menos duas horas antes de ligar o aparelho à... -
Page 61: Utilização
UTILIZAÇÃO Este aparelho está classificado com símbolo o que significa que está apto à congelação de produtos frescos ou ao armazenamento de produtos congelados e à produção de cubos de gelo. Limpeza das partes internas Estando o aparelho convenientemente instalado, antes de o utilizar, aconselhamos a sua limpeza cuidadosa com água tépida e sabão neutro para retirar o cheiro característico do "novo". -
Page 62: Botão De Congelação Rápida
Botão de congelação rápida Congelação dos alimentos A função de congelação rápida é activada, Para uma boa conservação dos produtos premindase a tecla . O controlo luminoso précongelados e congelados a temperatura interior acende-se (SUPER). Quando está em fase de deve estar inferior ou igual a -18°C. -
Page 63: Conservação Dos Produtos Précongelados
Conservação dos produtos précongelados A primeira vez que estiver a funcionar ou depois de uma paragem prolongada o aparelho tem que ser posto em fase de congelação rápida pelo menos duas horas antes de introduzir os produtos pré- congelados. A seguir passe à fase de conservação. Tudo isto não é... -
Page 64: Conselhos
CONSELHOS Conselhos para a congelação Conselhos para a conservação dos produtos précongelados Tenha a noção da capacidade de congelação, que corresponde ao peso dos alimentos Os nossos conselhos: congeláveis de uma só vez. Veja a data de fabricação dos produtos Para uma melhor congelação aconselhamos a précongelados e respeite a duração de consultar um manual sobre a congelação, que se... -
Page 65: Manutenção
MANUTENÇÃO A regular manutenção do aparelho assegura o seu Limpe com uma esponja e seque cuidadosamente regular funcionamento e a sua duração. as paredes. Volte a por o botão do termostato na posição desejada ou volte a ligar o aparelho. Antes de qualquer intervenção no aparelho, aconselhamos que se desligue a tomada de Não utilize nunca facas ou objectos... -
Page 66: Anomalias De Funcionamento
ASSISTÊNCIA TÉCNICA E PEÇAS DE SUBSTITUIÇÃO Para uma intervenção solícita é importante, no Caso o aparelho apresentar anomalias de funcionamento, controle: momento da chamada, indicar as referências completas do aparelho, ou seja modelo e número se a ficha está bem inserida na tomada de corrente e de série, que figuram no cartão da garantia ou na se o interruptor da instalação eléctrica está... -
Page 67: Porta Reversível
Instruções para encastrar Este aparelho está conforme às seguintes Directrizes Comunitárias: Dimensões do nicho - 73/23 CEE 19/02/73 (Baixa Tensão) e sucessivas modificações; Altura 880 mm 87/308 CEE 2/6/87 (Supressão de Interferências Profundidade 550 mm de Rádio) e sucessivas modificações; Largura 560 mm - 89/336 CEE 03/05/89 (Compatibilidade... - Page 68 PR266 D132 3. Coloque a junta de pressão entre o aparelho e o 6. Separe as peças A, B, C, D, como indicado na móvel. figura. D727 PR166 4. Abra a porta e apoie o aparelho contra o móvel de 7.
- Page 69 PR167 9. Abra a porta do aparelho e a do móvel a 90° aprox. Insira a esquadria (B) na guia (A). Mantenha juntas a porta do aparelho e a do móvel e marque os furos como indicado na figura. Retire as esquadrias e realize uns furos de ø...
- Page 71 Brandt Group Suisse SA Service Après Vente Route de Soleure 12 2072 St Blaise (NE) Tél: 032-756-49-89 Fax: 032-756-49-99 Numéro vert: 0800 81 12 34 E-mail: serviceCH@elcobrandt.com...
- Page 72 BP 9526 - 95069 Cergy Pontoise Cedex - France Tél: +33 (0) 825 06 16 01 Brandt Appliances - 7 rue Henri Becquerel 92854 Rueil-Malmaison cedex - France S.A.S. au capital de 10 000 000 Euros - RCS Nanterre B 440 302 347...
Need help?
Do you have a question about the FB 1000 E and is the answer not in the manual?
Questions and answers