KitchenAid 5K45 Manual
Hide thumbs
Also See for 5K45:
- Use and care manual (293 pages) ,
- Owner's manual (193 pages) ,
- Manual (68 pages)

Related Manuals for KitchenAid 5K45


Summary of Contents for KitchenAid 5K45
- Page 1 Stand Mixer 5K45, 5KSM45, 5KSM175, 5KSM125 W11658773A.indb 1 W11658773A.indb 1 4/13/2023 4:56:07 PM 4/13/2023 4:56:07 PM...
-
Page 2: Parts And Features
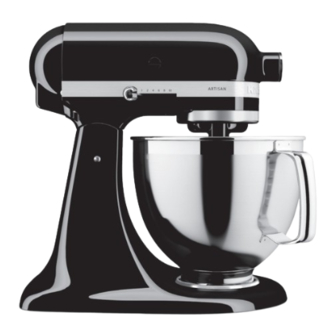
PARTS AND FEATURES Speed Control Lever Bowl** Motor Head Pouring Shield* Attachment Hub 3 L Stainless Steel Bowl Attachment Knob Dough Hook Locking Lever (not shown) Wire Whip Beater Shaft Flex Edge Beater* Beater Height Adjustment Screw Flat Beater (not shown) Bowl Clamping Plate *Included with select models only. -
Page 3: Product Safety
Return appliance to the nearest Authorised Service Facility for examination, repair, or electrical or mechanical adjustment. 9. The use of attachments/accessories not recommended or sold by KitchenAid may cause fire, electrical shock, or injury to persons. W11658773A.indb 3 W11658773A.indb 3... - Page 4 SAVE THESE INSTRUCTIONS For complete details on product information, instructions and videos, including Guaantee information, visit www.KitchenAid.co.uk or www.KitchenAid.eu. This may save you the cost of a service call. To receive a free printed copy of the information online, call 00 800 381 040 26.
-
Page 5: Electrical Requirements
PRODUCT SAFETY ELECTRICAL REQUIREMENTS Power: 300 W For 5KSM125 and 5KSM175 275 W For 5K45SS and 5KSM45 Voltage: 220-240 VAC Frequency: 50-60 Hz NOTE: If the plug does not fit in the Electrical Shock Hazard outlet, contact a qualified electrician. Do not modify the plug in any way. - Page 6 PRODUCT SAFETY DISPOSAL OF PACKING MATERIAL The packing material is recyclable and is marked with the recycle symbol . The various parts of the packing must therefore be disposed of responsibly and in full compliance with local authority regulations governing waste disposal. ELECTRICAL EQUIPMENT WASTE DISPOSAL Recycling the product - This appliance is marked in compliance...
-
Page 7: Speed Control Guide
SPEED CONTROL GUIDE All speeds have the Soft Start feature, which automatically starts the Stand Mixer at a lower speed to help avoid ingredient splash-out and “flour puff” at start-up, then quickly increases to the selected speed for optimal performance. SPEED ACTION ACCESSORY... -
Page 8: Product Assembly
PRODUCT ASSEMBLY ATTACHING/REMOVING THE BOWL To attach Bowl: Turn Speed Control Hold the Locking Lever in the unlock Lever to off (O). Unplug Stand Mixer. position and tilt Motor Head back. To remove Bowl: Repeat steps 1 and 2. Place Bowl on Bowl Clamping Plate. Turn Bowl gently in clockwise direction. -
Page 9: Attaching/Removing The Flat Beater, Flex Edge Beater*, Wire Whip, Or Dough Hook
PRODUCT ASSEMBLY ATTACHING/REMOVING THE FLAT BEATER, FLEX EDGE BEATER*, WIRE WHIP, OR DOUGH HOOK To attach accessory: Turn Speed Control Lever to off (O). Unplug Stand Mixer. Slip accessory onto Beater Shaft and press upward as far as possible. Then, Hold the Locking Lever in the unlock turn accessory to the clockwise, hooking position and tilt Motor Head back. -
Page 10: Beater To Bowl Clearance
PRODUCT ASSEMBLY BEATER TO BOWL CLEARANCE Your Stand Mixer is adjusted at the factory so the Flat Beater just clears the bottom of the bowl. If, for any reason, the Flat Beater hits the bottom of the bowl or is too far away from the bowl, you can correct clearance easily. -
Page 11: Using The Pouring Shield
PRODUCT ASSEMBLY To remove Pouring Shield*: Turn Speed Lift the front of the Pouring Shield* clear Control Lever to off (0). Unplug Stand of the bowl rim and pull forward. Remove Mixer. attachment and bowl. USING THE POURING SHIELD* Use the Pouring Shield* to avoid having ingredients splashing out of the bowl when mixing, as well as to easily pour ingredients in the bowl while mixing. -
Page 12: Operating The Speed Control
PRODUCT ASSEMBLY OPERATING THE SPEED CONTROL NOTE: The Stand Mixer may warm up during use. Under heavy loads with extended mixing time, the top of the unit may become hot. This is normal. Electrical Shock Hazard Plug Stand Mixer into proper electrical Plug into an earthed outlet. -
Page 13: Product Usage
PRODUCT USAGE OPTIONAL ATTACHMENTS KitchenAid offers a wide range of optional attachments such as food grinders or pasta makers. They may be attached to the Stand Mixer attachment power shaft, as shown here. Loosen attachment knob by turning it To attach: Turn Speed Control Lever to off (0). - Page 14 PRODUCT USAGE To remove: Turn Speed Control Lever Plug into proper electrical outlet. to off (0). Unplug Stand Mixer. Loosen Attachment Knob by turning it Replace Attachment Hub cover. Tighten counterclockwise. Rotate attachment slightly attachment knob by turning it clockwise. back and forth while pulling out.
-
Page 15: Care And Cleaning
CARE AND CLEANING IMPORTANT: Allow the appliance to cool completely before putting on or taking off parts, and before cleaning the appliance. Electrical Shock Hazard Always be sure to unplug Stand Mixer Plug into an earthed outlet. before cleaning. Wipe Stand Mixer with a soft, damp cloth. -
Page 16: Troubleshooting
If the Stand Mixer still does not start, allow it to cool for 30 minutes before turning it back on. See the “Terms of KitchenAid Guarantee (“Guarantee”)” If the problem cannot be section. Do not return the Stand Mixer to the retailer;... -
Page 17: Product Registration
Warranty may replace it with an equivalent Product or with a Product of greater value than the original Product. f) Consumers seeking to file a claim under the Warranty are required to contact the KitchenAid service centers in the relevant... - Page 18 חלקי המכשיר והתכונות שלו **קערה ידית לשינוי מהירות *מגן מזיגה ראש המנוע קערה מנירוסטה בנפח של 3 ליטר נקודת חיבור לאביזרים וו לישה כפתור לחיבור אביזרים )ידית נעילה (לא מוצגת מקצף *אביזר ערבול עם קצה גמיש ציר המערבל וו גיטרה בורג...
- Page 19 אין להפעיל את המכשיר אם נגרם נזק לכבל החשמל או לתקע או לאחר תקלה, נפילה או כל נזק אחר. במקרים כאלה, צריך לקחת אותו לבדיקה, תיקון או כוונון חשמלי או מכני במרכז השירות .המורשה הקרוב או שהחברה אינה משווקת אותם עלולKitchenAid השימוש באביזרים שאינם מומלצים על-ידי .לגרום לדליקה, להתחשמלות או לפציעות W11658773A.indb 19 W11658773A.indb 19...
- Page 20 ;- פינות בישול ללקוחות בבתי מלון, באכסניות ובסוגים אחרים של סביבות מגורים .- פינות בישול בצימרים חשוב לשמור את ההוראות למידע מלא על פרטי המוצר, הוראות וסרטונים, כולל מידע לגבי אחריות, עבור אל www.KitchenAid.eu .*מצורפת רק לחלק מהדגמים. אפשר גם לרכושאותו בנפרד כאביזר אופציונלי W11658773A.indb 20 W11658773A.indb 20...
- Page 21 שימוש בטיחותי במוצר דרישות חשמל :עוצמת מנוע KSM - וKSM 3 עבור דגמיW KSM - וK SS עבור דגמיW AC מתח חשמלי: 022-042וולט תדר: 06-05 הרץ הערה: אם התקע לא מתאים לשקע, צריך לפנות .לחשמלאי מוסמך .אין לשנות את התקע בשום צורה .אין...
- Page 22 שימוש בטיחותי במוצר השלכה של חומרי האריזה . לכן יש להשליך את כל חומרי האריזה באופן חומרי האריזה ניתנים למיחזור ומסומנים בסמל המיחזור .אחראי, בהתאם לתקנות של הרשות המקומית הרלוונטית לגבי השלכת פסולת השלכה של ציוד חשמלי מחזור המוצר המוצר עומד בדרישות שמפורטות בהנחיה שמופיע...
- Page 23 הוראות לשליטה במהירות לא משנה באיזו מהירות בוחרים, המיקסר יתחיל לעבוד במהירות נמוכה יותר כדי למנוע התזה של הרכיבים או היווצרות של "עננת" קמח ברגע ההפעלה. כדי להבטיח רמה מיטבית של ביצועים, המהירות .תעלה בהדרכה עד למהירות שנבחרה תיאור אביזר הפעולה...
- Page 24 הרכבת המוצר חיבור/הסרה של הקערה לחיבור קערה: מסובבים את ידית שינוי המהירות וכופפוunlock החזיקו את ידית הנעילה במצב .). מנתקים את המיקסר מהחשמלO( למצב כבוי .את ראש המנוע אחורה . -כדי להסיר את הקערה: חוזרים על שלבים ו מציבים את הקערה על המשטח המייצב. מסובבים .מסובבים...
- Page 25 הרכבת המוצר ,*חיבור/הסרה של וו הגיטרה, אביזר הערבול עם הקצה הגמיש המקצף או וו הלישה לחיבור אביזר: מסובבים את ידית שינוי המהירות .). מנתקים את המיקסר מהחשמלO( למצב כבוי מחליקים את האביזר על ציר המערבל ודוחפים ,אותו כמה שאפשר כלפי מעלה. לאחר מכן ...
- Page 26 הרכבת המוצר המרווח בין הוו לקערה ,המיקסר מכוונן במפעל כך שוו הגיטרה כמעט נוגע בתחתית הקערה. אם מכל סיבה שהיא .הוו נוגע בתחתית הקערה או שהוא רחוק ממנה מדי, אפשר לשנות את המרווח ידנית בקלות מרימים את ראש המנוע. מסובבים את הבורג בעדינות...
- Page 27 הרכבת המוצר *מרימים את החלק הקדמי של מגן המזיגה כדי להסיר את מגן המזיגה*: מסובבים את ומנתקים אותו משולי הקערה, ואז מושכים הידית לשינוי המהירות למצב כבוי ( ). מנתקים אותו קדימה. מסירים את האביזר המחובר .את המיקסר מהחשמל .ואת הקערה *שימוש...
- Page 28 הרכבת המוצר הפעלה של מחוון המהירות ,הערה: המיקסר עשוי להתחמם בזמן השימוש. אם תכניסו אליו כמויות גדולות ותפעילו אותו לזמן ממושך .ייתכן שהחלק העליון שלו יהיה חם מדי למגע. זו תופעה רגילה לחלוטין מחברים את המיקסר לשקע תקין. חשוב להעביר את...
- Page 29 שימוש במוצר אביזרים אופציונליים מגוון רחב של אביזרים אופציונליים, כמו מטחנות או מכונות פסטה. אפשר לחבר אותםKitchenAid-יש ל .לציר להנעת אביזרים של המיקסר, כפי שמוצג בהמשך מסובבים את הכפתור לחיבור אביזרים נגד כיוון לחיבור: מסובבים את ידית שינוי המהירות למצב...
- Page 30 שימוש במוצר להסרה: מסובבים את ידית שינוי המהירות למצב .מחברים את המיקסר לשקע תקין .כבוי ( ). מנתקים את המיקסר מהחשמל .מחזירים את הכיסוי למקומו על נקודת החיבור סובב את הכפתור לחיבור אביזרים נגד כיוון השעון מסובבים את הכפתור לחיבור אביזרים בכיוון כדי...
- Page 31 תחזוקה וניקוי ,חשוב: יש לחכות שהמכשיר יתקרר לחלוטין לפני שמרכיבים בו חלקים או מנתקים ממנו חלקים .ולפני שמנקים אותו .יש לנתק את המיקסר מהחשמל לפני שמנקים אותו מנגבים את המיקסר במטלית לחה. אין להשתמש בחומרי ניקוי רגילים/מסחריים. חשוב לנגב את ציר המערבל...
- Page 32 מחדש. אם המיקסר השולחני עדיין לא פועל, יש להניח לו להתקרר .במשך 3 דקות ורק אז להפעיל אותו מחדש .")" ("אחריותKitchenAid אפשר לעיין בסעיף "תנאי האחריות של אין להחזיר את המיקסר לחנות שבה הוא נקנה – החנויות לא מספקות :אם לא ניתן לפתור את הבעיה...
- Page 33 ) אם צרכן מקבל שירות למוצר במסגרת האחריות, תקופת האחריות שניתנה עליו לא מתארכת, ואחרי השירות לא מתחילה תקופת אחריותd .חדשה. תקופת האחריות על חלקי חילוף שמגיעים עם המוצר מסתיימת כשמסתיימת תקופת האחריות שניתנה למוצר כולו אם יש להם שאלות או שהם רוצים לקבל מידע על המוצר גם אחרי שהאחריותKitchenAid לקוחות הקצה מוזמנים לפנות למרכזי השירות של www.kitchenaid.eu :מסתיימת...
- Page 34 NOTES W11658773A.indb 34 W11658773A.indb 34 4/13/2023 4:56:13 PM 4/13/2023 4:56:13 PM...
- Page 35 NOTES W11658773A.indb 35 W11658773A.indb 35 4/13/2023 4:56:13 PM 4/13/2023 4:56:13 PM...
- Page 36 NOTES W11658773A.indb 36 W11658773A.indb 36 4/13/2023 4:56:13 PM 4/13/2023 4:56:13 PM...
- Page 37 NOTES W11658773A.indb 37 W11658773A.indb 37 4/13/2023 4:56:13 PM 4/13/2023 4:56:13 PM...
- Page 38 NOTES W11658773A.indb 38 W11658773A.indb 38 4/13/2023 4:56:13 PM 4/13/2023 4:56:13 PM...
- Page 39 NOTES W11658773A.indb 39 W11658773A.indb 39 4/13/2023 4:56:13 PM 4/13/2023 4:56:13 PM...
- Page 40 ©2023 All rights reserved. KITCHENAID and the design of the stand mixer are trademarks in the U.S. and elsewhere. .©3 כל הזכויות שמורות . והעיצוב של המיקסר הם סימנים מסחריים רשומים בארה"ב. ובמדינות אחרותKITCHENAID W11658773A 04/23 W11658773A.indb 40 W11658773A.indb 40...
Need help?
Do you have a question about the 5K45 and is the answer not in the manual?
Questions and answers