
Related Manuals for VADDIO IntelliSHOT-M


Summary of Contents for VADDIO IntelliSHOT-M
- Page 1 Complete Manual for the IntelliSHOT-M Auto-Tracking Camera Document 411-0065-30 Rev A November 2022...
-
Page 2: Table Of Contents
About Inverted Installation Status Lights Initial Device Set-Up Browser Support Initial Device Set-Up Using the Vaddio Device Controller Initial Device Set-Up Using the Vaddio Deployment Tool Manual Access and Initial Device Set-Up Getting the Camera's IP Address If the Camera Is At 169.254.1.1... - Page 3 Complete Manual for the IntelliSHOT-M Auto-Tracking Camera Renaming Presets Speed Adjustments Setting the Direction for Camera Movements Adjusting Color, Lighting, and Image Quality Settings Lighting and Image Quality Quick Reference Color Adjustment Quick Reference Saving Color and Lighting Settings Adjusting the Focus...
- Page 4 Complete Manual for the IntelliSHOT-M Auto-Tracking Camera autoframer responsiveness autoframer initial-persistence autoframer persistence autoframer max-speed autoframer noise-threshold autoframer tri-sync-motion autoframer history autoframer forced-wait-time Camera and Video Management Commands camera home camera pan camera tilt camera zoom camera ptz-position camera preset...
-
Page 5: Overview
Telnet API reference Troubleshooting For your convenience, the information you need to install this product is also available in the smaller, stand-alone Installation Guide for the IntelliSHOT-M Auto-Tracking Camera. Features Ideal for small to medium conference rooms Certified for Microsoft Teams Auto-framing available 30x zoom, horizontal field of view of 70.2°... -
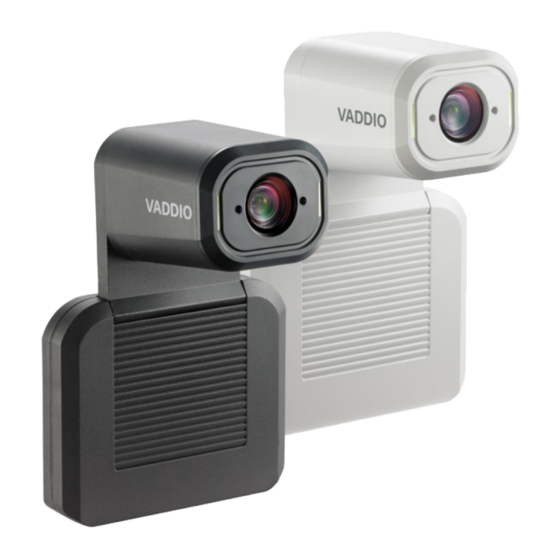
Page 6: A Quick Look At The Camera
Pivoting head – Manually tilt the head as needed. Note By default, the status lights on Vaddio cameras are active during normal operation; however, they can be configured to remain off even when the camera is sending video. -
Page 7: Connector Panel
Complete Manual for the IntelliSHOT-M Auto-Tracking Camera Connector Panel The connectors are on the underside of the camera. PoE+ – RJ-45 connector for power, network access, and camera control. Connect to a PoE+ network switch or to the Power and Data Out port of the mid-span PoE+ power injector. -
Page 8: Installation
Do not allow it to come into contact with any liquid. Do not install or operate this product if it has been dropped, damaged, or exposed to liquids. If any of these things happen, return it to Vaddio for safety and functional testing. Before You Install the Camera... -
Page 9: Cabling Notes
Complete Manual for the IntelliSHOT-M Auto-Tracking Camera Cabling Notes Use Cat-5e or better cable. Use shielded cabling if the cables will be coiled, run tightly with other cables, or routed near sources of electromagnetic interference such as power lines or fluorescent light fixtures. -
Page 10: Installing The Wall Mount
Complete Manual for the IntelliSHOT-M Auto-Tracking Camera Installing the Wall Mount The camera is shipped with a wall mount, which can be inverted. You can install the camera wall mount to a display mount or directly to drywall. If you mount it to drywall, use wall anchors. -
Page 11: Status Lights
Do not remove power or reset the camera while the status lights are yellow, showing a firmware update in progress. Interrupting a firmware update can make the camera unusable. Note By default, the status lights on Vaddio cameras are active during normal operation; however, they can be configured to remain off even when the camera is sending video. -
Page 12: Initial Device Set-Up
Note Be sure you have the current version of the Vaddio Deployment Tool. If it notifies you that an update is available, install the update. This ensures that you have access to the full capabilities of the tool. Old... - Page 13 Complete Manual for the IntelliSHOT-M Auto-Tracking Camera To complete the initial device set-up with the Vaddio Deployment Tool: 1. Power up the camera and other devices if you have not done so already. 2. On the Find Devices page, select Scan. If the scan does not locate the devices you need to set up, your computer may be on a different subnet.
-
Page 14: Manual Access And Initial Device Set-Up
Manual Access and Initial Device Set-Up If you do not use a Vaddio Device Controller or the Vaddio Deployment Tool, you will need to complete the initial device set-up manually, by browsing to the device's web interface using its IP address. -
Page 15: Initial Access To The Web Interface
Complete Manual for the IntelliSHOT-M Auto-Tracking Camera Initial Access to the Web Interface HTTP access is disabled initially. Enter the camera's IP address in your browser's address bar using https:// as a prefix. (Example: https://10.30.200.125) When you access the web interface... -
Page 16: System Administration And Communication
Note Vaddio products are designed with very similar web interfaces. Some of the screen shots in this manual may be from other cameras. Some may show settings that are not present or not enabled in your camera. -
Page 17: Configuring The Device With A Static Ip Address
Complete Manual for the IntelliSHOT-M Auto-Tracking Camera Configuring the Device with a Static IP Address ETWORKING PAGE Caution Consult your IT department before changing any network setting. Errors in network configuration can make the camera inaccessible from the network. By default, the camera is set to DHCP, and will receive an IP address automatically if your network assigns IP addresses. -
Page 18: Changing The Camera's Hostname
Complete Manual for the IntelliSHOT-M Auto-Tracking Camera Changing the Camera's Hostname ETWORKING PAGE If your network supports hostname resolution, you can browse to the camera using its hostname. Giving it a simple, easy-to-remember hostname means you don't need to know its IP address. Work with your IT department to ensure that the new hostname conforms to the organization's naming conventions. -
Page 19: Configuring Camera Behavior
Status light behavior Note Vaddio products are designed with very similar web interfaces. Some of the screen shots in this manual may be from other cameras. Some may show settings that are not present or not enabled in your camera. -
Page 20: Configuring Usb Streaming Settings
Complete Manual for the IntelliSHOT-M Auto-Tracking Camera Configuring USB Streaming Settings TREAMING PAGE These settings affect how the camera works with soft conferencing applications. They are available in both Low Latency mode and High Quality mode. They do not change when you change modes. -
Page 21: Configuring Status Light Behavior
Complete Manual for the IntelliSHOT-M Auto-Tracking Camera Configuring Status Light Behavior YSTEM PAGE ENERAL TAB You can set the camera’s status light behavior and color scheme to fit your environment. By default, the status lights are on if the camera is on. -
Page 22: Configuring Video Behavior
Complete Manual for the IntelliSHOT-M Auto-Tracking Camera Configuring Video Behavior YSTEM PAGE ENERAL TAB Get the best video performance by adjusting for your environment. These settings are available in both Low Latency mode and High Quality mode. They revert to their factory default values when you change modes, so you will need to configure them again afterward. -
Page 23: Configuring Camera Performance
Auto-framing is only available in High Quality mode. Note Vaddio products are designed with very similar web interfaces. Some of the screen shots in this manual may be from other cameras. Some may show settings that are not present or not enabled in your camera. -
Page 24: Setting The Home Position And Other Preset Shots
Complete Manual for the IntelliSHOT-M Auto-Tracking Camera Setting the Home Position and Other Preset Shots AMERA PAGE If a camera shot will be used repeatedly, you can save the shot and color settings together as a preset. Home and presets 1 through 8 are available from the remote; all stored presets are available from the web interface. -
Page 25: Speed Adjustments
Complete Manual for the IntelliSHOT-M Auto-Tracking Camera Speed Adjustments AMERA PAGE Low Latency mode and High Quality mode offer different speed adjustments. When you change modes, the speed adjustments are lost. In Low Latency mode, you can set the camera’s zoom speed. -
Page 26: Adjusting Color, Lighting, And Image Quality Settings
No two rooms are exactly alike – but a lot of rooms are a lot alike. The technical folks at Vaddio (Scott, to be specific) have already set up adjustments for common lighting scenarios (CCU scenes) –... -
Page 27: Lighting And Image Quality Quick Reference
Complete Manual for the IntelliSHOT-M Auto-Tracking Camera Lighting and Image Quality Quick Reference Here are some tips for using the CCU settings for lighting and image quality. What do you need to correct? Make this adjustment: The image is too dark... -
Page 28: Color Adjustment Quick Reference
Complete Manual for the IntelliSHOT-M Auto-Tracking Camera Color Adjustment Quick Reference Here are some tips for using the color-related CCU settings. What do you need to correct? Make this adjustment: Colors look less vivid than they should Increase Chroma Colors look too vivid Decrease Chroma Colors look wrong;... -
Page 29: Adjusting The Focus
Complete Manual for the IntelliSHOT-M Auto-Tracking Camera Adjusting the Focus AMERA PAGE Open the Focus control to select Auto-focus, or set manual focus with the + (near) and – (far) buttons. The + and – buttons only work when Auto Focus is not selected. -
Page 30: Fine-Tuning Auto-Framing Behavior
How It Works: Auto-Framing Vaddio‘s Auto-framing is based on motion detection. It won't mistake pictures for people, it still works if you turn away from the camera, and you don't have to wear a special device. But with no special device to follow, Auto-framing does not necessarily keep the shot on its original subject. -
Page 31: Basic Auto-Framing Adjustments
Complete Manual for the IntelliSHOT-M Auto-Tracking Camera Basic Auto-framing Adjustments FRAMING PAGE When making adjustments, compare the Visualizer's image to the video output. Optical Zoom – Sets the area in which motion can be tracked. Adjust this first. Auto-framing Presets – Factory configurations. "Conservative" settings are less sensitive and track at lower speeds than "responsive"... -
Page 32: Masking Unwanted Motion
Complete Manual for the IntelliSHOT-M Auto-Tracking Camera Persistence – How long the camera remembers motion and stays on its source after other trackable motion starts. Typically 25% to 100% for conferencing, below 15% for lecture capture. Shot Margin – Controls how tight or wide the shot will be around the people in the camera's field of view. -
Page 33: Advanced Auto-Framing Adjustments
Complete Manual for the IntelliSHOT-M Auto-Tracking Camera Advanced Auto-framing Adjustments FRAMING PAGE Max Electronic Zoom – Sets the default size of the frame relative to the area defined by Optical Zoom. Default value is 3x for all Auto-framing presets. Initial Persistence – How the camera remembers motion when it starts; similar to Persistence. Typically 25% to 100% for conferencing, 0 for lecture capture or presenter framing. -
Page 34: Auto-Framing Adjustment Quick Reference
Complete Manual for the IntelliSHOT-M Auto-Tracking Camera Auto-framing Adjustment Quick Reference Set Optical Zoom and select the Auto-framing preset that is most similar to the room's requirements. Then adjust Auto-framing to meet the unique demands of your space. These tables may help. -
Page 35: System Maintenance
Installing firmware updates Getting help Note Vaddio products are designed with very similar web interfaces. Some of the screen shots in this manual may be from other cameras. Some may show settings that are not present or not enabled in your camera. -
Page 36: Installing A Firmware Update
Complete Manual for the IntelliSHOT-M Auto-Tracking Camera Installing a Firmware Update YSTEM PAGE IRMWARE TAB Caution Be sure the camera stays connected to power and to the network during the update. Interrupting the update could make it unusable. 1. Read the release notes and download the firmware update file from the product's web page at www.legrandav.com. -
Page 37: Contacting Vaddio Technical Support And Viewing Diagnostic Logs
You’ll find information for contacting Vaddio Technical Support on the Help screen. Note The Help page links to our standard privacy notice. This product does not record or save video files, or store any identifying information except what you enter on the Room Labels page. -
Page 38: Operating The Camera
Camera In the default Low Latency mode: In Low Latency mode, the IntelliSHOT-M is a fixed camera that provides zoom control, color and lighting adjustments, and focus control. You can store zoom presets and save color and lighting settings as custom scenes. -
Page 39: About The Web Interface
By default, the operator's page of the web interface is not available. The administrator must set a password for the user account or enable guest access; this provides access to the operator's page only. The web interface is available on the Vaddio Device Controller touch panel (if your installation uses one) or from a web browser. -
Page 40: Muting Video
Complete Manual for the IntelliSHOT-M Auto-Tracking Camera Muting Video Use the video mute button to temporarily stop sending video from the camera without placing it in standby. Managing the Camera Ready State Use the Standby button to switch between low-power (standby) and ready states. -
Page 41: Command Reference For Third-Party Control
Complete Manual for the IntelliSHOT-M Auto-Tracking Camera Command Reference for Third-Party Control The Vaddio Command Line Interface SHell (CLISH) allows an external device such as an AMX or Crestron presentation system to control the camera. These commands are sometimes called Telnet commands. -
Page 42: Auto-Framing Commands
Complete Manual for the IntelliSHOT-M Auto-Tracking Camera Auto-Framing Commands Commands to manage and adjust Auto-framing fall roughly into three categories. Status commands: autoframer enabled autoframer paused Shot definition commands: autoframer default-wide camera optical-zoom autoframer buffer-zone autoframer shot-margin autoframer max-electronic-zoom Auto-framing behavior adjustment commands:... -
Page 43: Autoframer Paused
Complete Manual for the IntelliSHOT-M Auto-Tracking Camera autoframer paused Pause or resume Auto-framing. Auto-framing pauses automatically when the camera receives a pan, tilt, zoom, or preset recall command from any source. Synopsis autoframer paused { get | off | on | toggle } Options Returns the pause state for Auto-framing. -
Page 44: Camera Optical-Zoom
Complete Manual for the IntelliSHOT-M Auto-Tracking Camera camera optical-zoom Adjusts the area in which Auto-framing can occur. Synopsis camera optical-zoom { in [<speed>] | out [<speed>] | stop | get ] } Options Zooms the camera in. Zooms the camera out. -
Page 45: Autoframer Max-Electronic-Zoom
Complete Manual for the IntelliSHOT-M Auto-Tracking Camera autoframer max-electronic-zoom Get or set the value for the Auto-framing maximum electronic zoom. This limits how far the camera zooms in for Auto-framing. Synopsis autoframer max-electronic-zoom { get | set <value> } Options Returns the current value for the maximum electronic zoom. -
Page 46: Autoframer Sensitivity
Complete Manual for the IntelliSHOT-M Auto-Tracking Camera autoframer sensitivity Get or set Auto-framing sensitivity. Synopsis autoframer sensitivity { get | set <value> } Options Returns the current value for sensitivity. set <value> Sets Auto-framing sensitivity. >autoframer sensitivity set 95 Examples >... - Page 47 Complete Manual for the IntelliSHOT-M Auto-Tracking Camera autoframer initial-persistence Get or set the initial persistence value. Synopsis autoframer initial-persistence { get | set <value> } Options Returns the current value for initial persistence. set <value> Sets initial persistence. >autoframer initial-persistence set 15 Examples >...
- Page 48 Complete Manual for the IntelliSHOT-M Auto-Tracking Camera autoframer max-speed Get or set the value for the Auto-framing maximum ePTZ speed. This limits pan, tilt, and zoom movements during Auto-framing. Synopsis autoframer max-speed { get | set <value> } Options Returns the current value for the maximum speed.
- Page 49 Complete Manual for the IntelliSHOT-M Auto-Tracking Camera autoframer tri-sync-motion Enable or disable Tri-Sync Motion. This allows the camera to pan, tilt, and zoom smoothly. When Tri- Sync Motion is off, the camera snaps to the new position. Synopsis autoframer tri-sync-motion { get | off | on | toggle } Options Returns the current state for Tri-Sync Motion.
- Page 50 Complete Manual for the IntelliSHOT-M Auto-Tracking Camera autoframer forced-wait-time Get or set the value for the Auto-framing forced wait time. This sets a minimum time to hold the shot before responding to new motion. Increasing persistence and reducing responsiveness may produce more satisfactory results.
- Page 51 Complete Manual for the IntelliSHOT-M Auto-Tracking Camera Camera and Video Management Commands The following camera and video management commands are available: camera home camera pan camera tilt camera zoom camera ptz-position camera focus camera preset camera ccu get camera ccu set...
- Page 52 Complete Manual for the IntelliSHOT-M Auto-Tracking Camera camera pan Moves the shot horizontally. The amount of pan available depends on the zoom level. (See How It Works: Digital Pan/Tilt/Zoom.) Auto-framing pauses when the camera receives this command. Synopsis camera pan { { left [<speed>] [no_wait] } | { right [<speed>] [no_wait] } | stop | get | { set <position>...
- Page 53 Complete Manual for the IntelliSHOT-M Auto-Tracking Camera camera tilt Moves the shot vertically. The amount of tilt available depends on the zoom level. (See How It Works: Digital Pan/Tilt/Zoom.) Auto-framing pauses when the camera receives this command. Synopsis camera tilt { { up [<speed>] [no_wait] } | {down [<speed>] [no_wait] } | stop | get | { set <position>...
- Page 54 Complete Manual for the IntelliSHOT-M Auto-Tracking Camera camera zoom Moves the camera in toward the subject or out away from the subject. (See How It Works: Digital Pan/Tilt/Zoom.) Auto-framing pauses when the camera receives this command. Synopsis camera zoom { in [<speed>] | out [<speed>] | stop | get | set <position> [<speed>] [no_...
- Page 55 Complete Manual for the IntelliSHOT-M Auto-Tracking Camera camera ptz-position Specifies a shot by zoom and pan/tilt coordinates. The amount of pan and tilt available depend on the zoom level. (See How It Works: Digital Pan/Tilt/Zoom.) Pan, tilt, and zoom may be specified in any order.
- Page 56 Complete Manual for the IntelliSHOT-M Auto-Tracking Camera camera preset Moves the camera to the specified preset, or stores the current camera position and type of motion to use, optionally including color and lighting information. Synopsis camera preset { recall <1 - 16> | store <1 - 16> [tri-sync <1 - 24>] [save-ccu] } Options recall <1 - 16>]...
- Page 57 Complete Manual for the IntelliSHOT-M Auto-Tracking Camera camera focus Changes the camera focus. Synopsis camera focus { near [<speed>] | far [<speed> | stop | mode {get | auto | manual} } Options near Brings the focus nearer to the camera; manual mode only.
- Page 58 Complete Manual for the IntelliSHOT-M Auto-Tracking Camera camera ccu get Returns CCU (lighting and color) information. Entering the command without specifying a parameter returns all current CCU settings. Synopsis camera ccu get <param> auto_white_balance Options Current auto white balance setting (on or off).
- Page 59 Complete Manual for the IntelliSHOT-M Auto-Tracking Camera camera ccu set Sets the specified CCU (lighting) information. Synopsis camera ccu set <param> <value> auto_white_balance Options Sets auto white balance on or off. red_gain Sets the red gain value (integer). blue_gain Sets the blue gain value (integer).
- Page 60 Complete Manual for the IntelliSHOT-M Auto-Tracking Camera video mute Gets or sets the camera's video mute status. When video is muted, the camera sends blue or black video with an on-screen message stating that video mute is on. This can be desirable when preparing the room, or when privacy is needed.
- Page 61 Complete Manual for the IntelliSHOT-M Auto-Tracking Camera Maintenance and Troubleshooting Commands The following commands are available for maintenance and troubleshooting: version network ping system reboot system factory-reset network settings get Returns the camera's current network settings and MAC address. The default hostname includes the model name of the camera;...
- Page 62 Complete Manual for the IntelliSHOT-M Auto-Tracking Camera network ping Sends an ICMP ECHO_REQUEST to the specified hostname or IP address. Synopsis network ping [count <count>] [size <size>] <string> Options <count> The number of ECHO_REQUEST packets to send. Default is five packets.
- Page 63 Complete Manual for the IntelliSHOT-M Auto-Tracking Camera system factory-reset Gets or sets the factory reset status. When the factory reset status is on, the system will resets to factory defaults on the next reboot. Synopsis system factory-reset { get | on | off} Options Returns the camera's current factory reset status.
- Page 64 Complete Manual for the IntelliSHOT-M Auto-Tracking Camera Information and Session Management Commands The following commands are available for CLISH help and session management: history help exit history Returns the most recently issued commands from the current Telnet session. Since many of the programs read user input a line at a time, the command history is used to keep track of these lines and recall historic information.
- Page 65 (The author would like to confess having made a certain number of almost-good cables. It happens.) Use this table to determine whether it's time to call Vaddio Technical Support. Power and Control What is it doing?
- Page 66 Do not remove power or reset the camera while the status lights are yellow, showing a firmware update in progress. Interrupting a firmware update can make the camera unusable. Note By default, the status lights on Vaddio cameras are active during normal operation; however, they can be configured to remain off even when the camera is sending video.
- Page 67 Complete Manual for the IntelliSHOT-M Auto-Tracking Camera Restoring Default Camera Settings This returns the camera to its original state. If you export the camera's configuration before restoring factory defaults, you will be able to restore the room label, time zone information, and home information by importing the configuration afterward.
- Page 68 Tilt your head to one side and diagonal FOV will make sense. framing Keeping the camera on a subject by using an algorithm to determine where the subject is. Vaddio's ePTZ cameras do this using motion recognition, not facial identification. gamma...
- Page 69 Complete Manual for the IntelliSHOT-M Auto-Tracking Camera gateway Network information automatically assigned in a DHCP network. If installing equipment on a non-DHCP network, get this information from the network administrator. home The button (web interface or remote) that restarts Autoframing.
- Page 70 1. The image size. For Vaddio cameras, resolution is expressed in terms of digital TV standards, with 1080p being the default in most cases. Resolution and frame rate are set together on Vaddio cameras. 2. The thing that usually flies out the window by January 10th.
- Page 71 Complete Manual for the IntelliSHOT-M Auto-Tracking Camera Photo Credits This guide may include some of these photos. European Space Agency (ESA) astronaut Samantha Cristoforetti, a Flight Engineer with Expedition 42, photographs the Earth through a window in the Cupola on the International Space Station By NASA - https://blogs.nasa.gov/ISS_Science_Blog/2015/03/06/women-in-space-part-two-whats-...
- Page 72 CCU scenes 20, 24, 53 custom 20, 24, 53 Index recalling 53 CCU settings 20, 22-24, 52, 54-55 adjusting 23-24 in the web interface 22 admin password 11-12 storing with a preset 20, 52 changing 12 ceiling-mounted cameras 6 initial 11 cheat sheet 23-24, 30 AEC 5 Auto-framing 30...
- Page 73 Complete Manual for the IntelliSHOT-M Auto-Tracking Camera firmware update 32 static, configuring 13 firmware version 57 iris settings 23, 54-55 focus 25, 53 Forced Wait Time (Auto-framing setting) 29, labels, room 14 functional check 5 LED control 55 light, status indicator 7, 17, 55, 62...
- Page 74 Complete Manual for the IntelliSHOT-M Auto-Tracking Camera Security 12 Streaming 16 pan 21, 36, 48, 51 saving a configuration 31 direction 21 saving color (CCU) settings 24 speed 48 scenes, CCU 20 pan/tilt 52 naming 20 storing as a preset 52...
- Page 75 Complete Manual for the IntelliSHOT-M Auto-Tracking Camera typographical conventions in command zoom 36, 40-41, 50-52 reference 37 electronic (Auto-framing setting) 41 temperature, operating and storage 63 in stored presets 52 third-party control 37 optical (Auto-framing setting) 40 tilt 36, 49, 51...
- Page 76 Fax +1.763.971.4464 · Email av.vaddio.techsupport@legrand.com Vaddio is a registered trademark of Legrand AV Inc. Microsoft and Microsoft Teams are trademarks of the Microsoft group of companies. All other brand names or marks are used for identification purposes and are trademarks of their respective owners. All patents are protected under existing designations.
Need help?
Do you have a question about the IntelliSHOT-M and is the answer not in the manual?
Questions and answers