VADDIO HuddleSHOT Installation Manual
All-in-one conferencing cameras
Hide thumbs
Also See for HuddleSHOT:
- Complete manual (82 pages) ,
- Quick manual (4 pages) ,
- Complete manual (69 pages)

Related Manuals for VADDIO HuddleSHOT


Summary of Contents for VADDIO HuddleSHOT
- Page 1 Installation Guide for the HuddleSHOT and HuddleSHOT FC All-in-One Conferencing Cameras Document 411-0037-31 Rev D March 2021...
-
Page 2: Table Of Contents
Connections – Using the Camera with a Room Audio System Connections – Using the Camera as a Sound Bar Mounting the HuddleSHOT Camera Installing the HuddleSHOT Wall Mount Installing the HuddleSHOT Camera on the Wall Mount Optional Adjustable HuddleSHOT Mount Tabletop Use Wall Mounting... -
Page 3: Overview
Instructions for installing the camera mount Camera power-on Complete product information is available in the Complete Manual for the HuddleSHOT All-in-One Conferencing Camera. If you are responsible for configuring the equipment after installing it, please use the Complete Manual. It includes all the information in this guide, plus information on configuring, operating, and troubleshooting the camera. -
Page 4: A Quick Look At The Camera
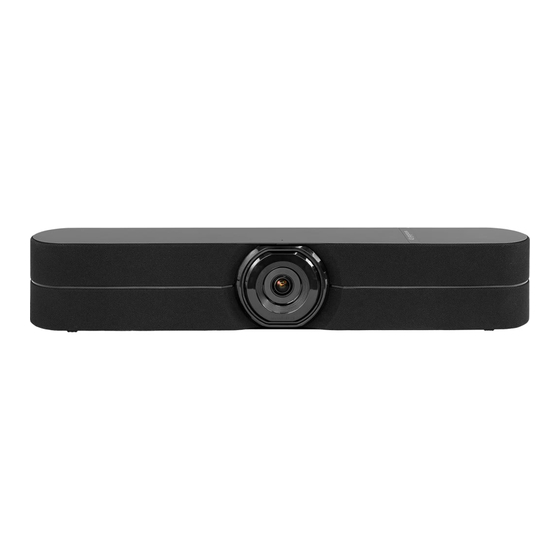
This section covers the physical features of the cameras. They are in the same locations in both cameras. Front of the Camera Camera and zoom lens – HuddleSHOT and HuddleSHOT FC cameras offers 1x, 1.5x, and 2x zoom levels. Left and right speakers – Far-end audio, or content audio when using EasyMic Adapter Mode. -
Page 5: Back Of The Camera
USB 3.0 – USB type C connector. Connect to a computer for use with soft conferencing applications. Provides uncompressed USB 3.0 stream. EasyMic – RJ-45 connector. Optional connection for a TableMIC or other microphone with Vaddio EasyMic connectivity. Multifunction button – Momentary pushbutton; used to return from standby, display IP address, pair with... -
Page 6: Connections
Do not allow it to come into contact with any liquid. Do not install or operate this product if it has been dropped, damaged, or exposed to liquids. If any of these things happen, return it to Vaddio for safety and functional testing. Before You Install the Camera Keep these things in mind when deciding where to place the camera. -
Page 7: Basic Connections For Conferencing
This diagram shows a basic conferencing configuration. A laptop provides USB connectivity and the HDMI output to the display. Adding an optional TableMIC microphone allows more flexibility in the room layout. This system provides acoustic echo cancellation, with or without the TableMIC microphone. HuddleSHOT camera shown. The HuddleSHOT FC camera connects the same way. -
Page 8: Connections - Using The Camera With A Room Audio System
This diagram shows a setup for a room with an audio system. The camera's built-in microphones are used and far-end audio is routed to the room's speakers, using the EasyMic adapter. HuddleSHOT camera shown. The HuddleSHOT FC camera connects the same way. Connections – Using the Camera as a Sound Bar This diagram shows the camera used as a sound bar for the display. -
Page 9: Mounting The Huddleshot Camera
Installation Guide for the HuddleSHOT All-in-One Conferencing Camera Mounting the HuddleSHOT Camera For information about mounting the HuddleSHOT FC camera, refer to the documentation for the product in which it is housed. This section covers: Installing the wall mount for the HuddleSHOT camera... -
Page 10: Optional Adjustable Huddleshot Mount
Optional Adjustable HuddleSHOT Mount For additional flexibility in installation, a tilting wall mount (part number 535-2100-207) is available for the HuddleSHOT camera. It can be mounted above or below a display, or placed on the conference room table. Tabletop Use Use the adjustable mount on as a tabletop mount for a simple, quick installation. -
Page 11: Powering Up The Camera
The camera will need to be configured for your network before it can be used. This will require knowing the camera's IP address. To get this information, the remote will need to be paired with the camera. Refer to the Complete Manual for the HuddleSHOT All-in-One Conferencing Camera for these tasks. -
Page 12: Photo Credits
Installation Guide for the HuddleSHOT All-in-One Conferencing Camera Photo Credits This guide may include some or all of these photos. European Space Agency (ESA) astronaut Samantha Cristoforetti, a Flight Engineer with Expedition 42, photographs the Earth through a window in the Cupola on the International Space Station By NASA - https://blogs.nasa.gov/ISS_Science_Blog/2015/03/06/women-in-space-part-two-whats-... -
Page 13: Index
EasyMIC port 3 shelf-mounted cameras 7 factory defaults, restoring 9 shelf, camera mount 7 site requirements 4 status light 9 HuddleSHOT EasyMIC adapter 6 meanings of colors 9 indicator light 9 TableMIC microphone 5 meaning of colors 9 installation 7... - Page 14 +1.763.971.4464 · Email av.vaddio.support@legrand.com Vaddio is a registered trademark of Legrand AV Inc. All other brand names or marks are used for identification purposes and are trademarks of their respective owners. All patents are protected under existing designations. Other patents pending.
Need help?
Do you have a question about the HuddleSHOT and is the answer not in the manual?
Questions and answers