Projectiondesign F1+ SXGA+ User Manual
Projectiondesign f1+ sxga+: user guide
Hide thumbs
Also See for F1+ SXGA+:
- Reference manual (5 pages) ,
- Protocol manual (34 pages) ,
- Reference manual (1 page)
Advertisement
Quick Links
user guide • benutzer handbuch •
SXGA+ (1 400 x 1 050)
2 500 ANSI lumen
High Resolution
High Brightness
guide d'utilisateur • guía del usario • manuale d'uso • bruksanvisning
DLP
TM
Technology
3.4 kg / 7.5 lbs
Single Chip
Compact Low Weight
Awarded
28 dB(A)
Magnesium Design
Low Noise
Advertisement

Related Manuals for Projectiondesign F1+ SXGA+


Summary of Contents for Projectiondesign F1+ SXGA+
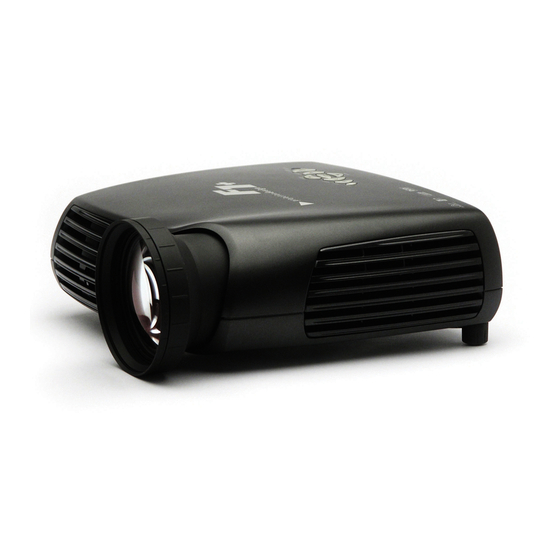
- Page 1 user guide • benutzer handbuch • SXGA+ (1 400 x 1 050) 2 500 ANSI lumen Technology High Resolution High Brightness Single Chip guide d’utilisateur • guía del usario • manuale d’uso • bruksanvisning 3.4 kg / 7.5 lbs Awarded 28 dB(A) Compact Low Weight Magnesium Design...
- Page 2 QUICK START SCHNELL START Set up Computer Set up DVD/VideoSet up Computer MISE en ROUTE ARRANQUE RÁPIDO PARTENZA RAPIDA KORT INNFØRING...
- Page 3 Set up computer Einrichten des computers Image adjustments Bildeinstellungen Ceiling mount Deckenmontage Ceiling mount cover Deckenmontage - Abdeckung Using the projector Benutzung des projektors Menu system Das Menüsystem Mouse control Maussteuerung RS 232 and LAN control RS 232- und LAN-Steuerung Trouble shooting Problemlösung...
- Page 4 INTRODUCTION EINLEITUNG This digital projector is designed with the latest Mit seiner modernsten Spitzentechnologie für state-of-the-art technologies in illumination, Beleuchtung, Bild, Optik, Elektronik, thermisches imaging, optics, electronics, thermal and und industrielles Design eignet sich dieser industrial design in order to serve traditional as Digitalprojektor sowohl für traditionelle, als auch...
- Page 5 Do not spill any liquids in die Belüftungsschlitze oder Öffnungen der Anlage gelangen. Keine Flüssigkeiten über den on the projector or into the vents or openings of the unit. Projektor oder in die Belüftungsschlitze oder Öffnungen des Geräts gießen.
- Page 6 Belüftungsschlitzen tritt heiße Luft aus. Legen Sie heat nearer than 50cm / 20" to the exhaust vent. keine hitzeempfindlichen Gegenstände näher als 50 cm / 20" an die Belüftungsschlitze. The projector is designed for indoor use only. Projektor ausschließlich Never operate the unit outdoors.
- Page 7 As a general precaution, secure good ventilation Als allgemeine Vorsichtsmaßnahme sollte der Raum während dem Betrieb des Projektors gut in the room when operating the projector. If lamp rupture occurs, evacuate the room and secure belüftet sein. Sollte die Lampe zerbrechen, ist der Saal zu räumen und eine gute Belüftung...
- Page 8 SUPPLIED MATERIAL MITGELIEFERTE TEILE Projector with lens cap Projektor mit Linsen-Abdeckung Remote control with batteries Fernbedienung mit Batterien Cover Abdeckung User guide Bedienungsanweisung VGA cable VGA-Kabel DVI-D cable DVI-D-Kabel A/V cable A/V-Kabel MATÉRIEL FOURNI MATERIAL ENTREGADO Projecteur avec cache de l'objectif Proyector con tapa de lente Télécommande avec piles...
- Page 9 Remove the lens cap from the Entfernen Sie die Linsenabdeckungen projection lens. If you switch the von den Projektionslinsen. Falls Sie projector on with the lens cap in den Projektor mit abgedeckten Linsen place, the lens cap may melt, einschalten, können die Abdeck-...
- Page 10 Höhenverstellbarer Fuß Foot release Fußfreigabe Security lock Sicherheitsschloss Ceiling mount Deckenbesfestigung NOTE: The projector is available with HINWEIS: Der Projektor kann mit a standard zoom lens or an optional standardgemäßen Zoom-Linsen oder wide lens. The lenses are factory einer Option erhältlichen...
- Page 11 Sie fest (1 Sekunde lang), um das Gerät auszuschalten. AUTO AUTO Adjusting the projector to display a correct Einstellung des Projektors, damit das Bild image, including position, width, height, richtig angezeigt wird, darunter auch die contrast, brightness and overall stability.
- Page 12 STATUS STATUS PERMANENT GREEN LIGHT GRÜNES DAUERLICHT The projector is turned on and in normal Der Projektor ist eingeschaltet und operation. befindet sich im normalen Betrieb. PERMANENT YELLOW LIGHT GELBES DAUERLICHT The unit is in standby mode; no Das Gerät befindet sich im Standby; es...
- Page 13 REMOTE CONTROL FERNBEDIENUNG The remote control allows flexible Die Fernbedienung ermöglicht einen access to the projector settings, either flexiblen Zugriff auf die Einstellungen des through direct keys, or through the Projektors, sowohl über Direkttasten als menu system. The remote control can auch über das Menüsystem.
- Page 14 When cable connected Wenn die Verbindung zwischen dem PC between PC and projector, the trackball und dem Projektor mit einem USB- is used to move the mouse pointer Kabel hergestellt wird, dient der when not in the menu. Use the trackball...
- Page 15 REMOTE CONTROL FERNBEDIENUNG LASER LASER Activates the built-in laser pointer. Aktiviert den integrierten Laserpointer. CAUTION! Do not point laser beam at VORSICHT! Den Laserstrahl nicht auf people. Do not stare into laser beam. Menschen richten. Nicht Laserstrahl schauen. ARROW KEYS PFEILTASTEN Use the four arrow keys as alternatives vier...
- Page 16 G RS 232 control in-out: Allows for wired G RS 232-Steuerung (Eingang - Ausgang): remote control and monitoring of many Ermöglicht die Steuerung und Überprüfung projector functions used in installation zahlreicher in einer Installationsumgebung environments. The secondary output verwendeten Projektorfunktionen mittels connector allows for daisy-chaining, Kabelfernbedienung.
- Page 17 CONNECTOR PANEL DER ANSCHLUSSBEREICH PANNEAU DE CONNECTEURS PANEL DE CONEXIONES PANNELLO DEI CONNETTORI KONTAKTPANEL...
- Page 18 SET UP VIDEO VIDEOEINSTELLUNGEN Before setting-up, switch off all equipment. Bevor die Geräte aufgestellt werden, müssen sie ausgeschaltet sein. Three video sources may be connected, using können drei the YPbPr (component), S-VIDEO (super angeschlossen werden, wozu die Anschlüsse video) and VIDEO (composite video) inputs. YPbPr (Komponente), S-VIDEO (Supervideo) und VIDEO (kombiniertes Video) zur Verfügung stehen.
- Page 19 Before setting-up, switch off all equipment. Bevor die Geräte aufgestellt werden, müssen sie ausgeschaltet sein. The projector may be connected to up to three Der Projektor kann an bis zu drei Rechner computer sources simultaneously, using the gleichzeitig angeschlossen werden, wozu die VGA and DVI inputs.
- Page 20 IMAGE ADJUSTMENTS BILDEINSTELLUNGEN Turn the FOCUS (A) and ZOOM (B) rings on the Drehen sie die Ringe FOCUS (A) und ZOOM (B) projection lens to get a correctly sized and an der Projektionslinse, um das Bild auf die focused image. If the desired image size is not richtige Größe und Schärfe einzustellen.
- Page 21 CEILING MOUNT DECKENMONTAGE The projector can be ceiling mounted using an Projektor kann approved UL tested/ listed ceiling mount entsprechend getesteten fixture, with capacity of minimum 12 kg/ 26 zugelassenen Deckenbefestigung mit einer lbs. Tragefähigkeit von mindestens 12 kg (26 lbs.) an der Decke befestigt werden.
- Page 22 DECKENMONTAGE - ABDECKUNG Die Nebenkabelabdeckung kann auf dem The auxiliary cable cover can be mounted Projektor angebracht werden, um die on the projector to conceal the interface Schnittstellen- Stromkabel cables and power cord when the unit is verdecken, wenn das Gerät an der Decke ceiling mounted.
- Page 23 The ist. Die STATUS-Anzeige wechselt von grün auf gelb blinkend und anschließend auf gelb. Der projector will be switched back on if at least Projektor wird wieder angeschaltet, sobald one source is (re)activated. The power-down function can be disabled in the menu.
- Page 24 Ermöglicht eine zusätzliche Steuerung projected image. des projizierten Bildes. advanced fein-sync Advanced picture controls Erweiterte Bildsteuerungen set up einstell General projector controls Allgemeine Projektorsteuerungen utilities werkzeuge System controls and information Systemsteuerungen und Informationen control Steuerung RS232 and LAN configurations RS232- und LAN-Konfiguration SYSTÈME DE MENUS...
- Page 25 MENU SYSTEM DAS MENÜSYSTEM PICTURE SUB MENU DAS UNTERMENÜ BILD brightness helligkeit Adjusts the image brightness. A higher Stellt die Helligkeit des Bildes ein. Eine setting will increase the brightness, a höhere Einstellung erhöht die Helligkeit, lower setting will decrease eine niedrigere Einstellung verringert die brightness of the image.
- Page 26 MENU SYSTEM DAS MENÜSYSTEM DYNAMIC SUB MENU DAS UNTERMENÜ DYNAMISCH white boost Weiß-Boost Increases the white level of the image for Erhöht den Weißabgleich des Bildes, enhanced contrast um einen verbesserten Kontrast zu erzielen gamma gamma The source image is adapted to Das Bild der Quelle wird für die characteristics typical...
- Page 27 MENU ADJUSTMENT DAS MENÜSYSTEM ADVANCED SUB MENU DAS UNTERMENÜ FEIN-SYNC. h position h position Shifts the image sideways. Verschiebt das Bild seitlich. v position v position Shifts the image up and down. Verschiebt das Bild nach oben bzw. unten. phase phase Adjust for stable image.
- Page 28 Wandposition entstehen. DPMS DPMS Activate/deactivate DPMS (Display Aktiviert/deaktiviert die Funktion DPMS Power Management Signalling). When (Display Power Management Signalling / DPMS is on, the projector will switch off Signalausgabe für Strom- following powering sparmodus der Anzeige). Ist DPMS disconnection of the signal source.
- Page 29 Hintergrundmodus transparent or opaque. transparent oder undurchsichtig. reset fabr. einstellungen Resets the projector to its basic Stellt die ursprünglichen Einstellungen settings. All parameters available in the des Projektors wieder her. Alle in den various menus are reset to their factory verschiedenen Menüs...
- Page 30 Modus Selects between RS232, RIMI (internal) Wählt zwischen Steuermodi and LAN control modes. The projector RS232, RIMI (intern) und LAN. Der can be controlled by only one of the Projektor kann nur über jeweils einen modes at a time. Modus gesteuert werden.
- Page 31 2nd edition or newer). ein Betriebssystem verfügt, das USB unterstützt (Windows™ 98 2. Edition oder neuer). As long as the menu system on the projector Solange das Menüsystem auf dem Projektor is not activated, the tracker ball on the remote...
- Page 32 ABFRAGEN. Für die ABFRAGEN benötigt der interpreting incoming packets. SET-operations Host eine Routine für den Empfang und die are used to force the projector into different Interpretation der eingehenden Pakete. Die modes, like setting brightness and contrast , EINSTELLUNGS-Operationen switching between sources, etc.
- Page 33 Sources scan ist ausgeschaltet: the SET UP sub menu. If setting is OFF, the Überprüfen Sie im Untermenü der projector will not search for the next active EINSTELLUNGEN die Option SOURCES source, but will remain with the current SCAN. Ist die Einstellung OFF, sucht der source selected.
- Page 34 Verfall der Garantie führt. Wartungs- und qualified personnel only. Reparatur-arbeiten sind ausschließlich von Fachpersonal durchzuführen. The projector is using a lamp that has a limited Dieser Projektor verwendet eine Lampe mit life time. Please refer to the LAMP CHANGE begrenzter Lebensdauer. Weitere Details finden section below for further details.
- Page 35 Lampe immer mit einer Lampe des gleichen Typs und der gleichen Spezifikationen ersetzen. Always disconnect the power cord Vor dem Öffnen der Lampen- and wait until the projector has abdeckung Gerät cooled down (60 minutes) before ausstecken und den Projektor 60 opening the lamp cover (B).
- Page 36 LAMP CHANGE AUSWECHSELN DER LAMPE Replace with a new lamp in reverse In umgekehrter Reihenfolge eine order. neue Lampe einlegen. Replace the lamp house (E) and Das Lampengehäuse (E) wieder tighten the screws (C). einlegen und die Schrauben (C) festziehen. Fold the handle (D) in place.
- Page 37 Stromkabel korrekt properly connected. angeschlossen ist. Please check that the projector as well as the Bitte kontrollieren Sie, ob der Projektor sowie video and computer sources are all switched alle...
- Page 38 TECHNICAL DATA TECNISCHE DATEN Throw ratios SX+, zoom and fixed lenses Offset (8%) Image height 0.60 1.98 7.50 24.75 0.54 1.78 6.75 22.28 0.48 1.58 6.00 19.80 0.42 1.39 5.25 17.33 0.36 1.19 4.50 14.85 0.30 0.99 3.75 12.38 0.24 0.79 3.00 9.90...
- Page 39 TECHNICAL DATA TECNISCHE DATEN Resolution Auflösung Display technology Anzeige Technologie Display device Anzeige Device Computer Compatibility Datenkompatibilität Video Compatibility Videokompatibilität Aspect Ratio Bildformat Bandwidth Bandbreite Brightness Helligkeit Contrast Kontrast Zoom lens Zoom-Linsen Wide lens (option) Weitwinkellinsen Lamp Lampe Lamp Life Lebensdauer der Lampe Noise level Lärmbelastung...
- Page 40 TECHNICAL DATA TECNISCHE DATEN Inputs Eingänge Outputs Ausgänge Power Netzspannung Conformance Zulassungen Temperature operating Betriebstemperatur Temperature storage Lagertemperatur Humidity operating Betriebsfeuchtigkeit Humidity storage Lagerfeuchtigkeit Specifications subject change Die Spezifikationen und Funktionen des without prior notice. All values may vary Produktes können sich ohne vorherige up to +/- 20%.
- Page 41 TECHNICAL DATA TECNISCHE DATEN S-Video Computer DVI PHONO/RCA FEMALE 4 PIN MINI DIN DVI-D FEMALE STEM GREEN: G/Y TMDS Data 2- SHIELD: GND TMDS Data 2+ TMDS Data 2/4 Shield Luma Not used Chroma Not used DDC Clock DDC Data B/Pb Composite Video TMDS Data 1-...
- Page 42 DECLARATIONS This equipment has been tested and found to comply with the limits for a Class A digital device, pursuant to part 15 of the FCC Rules. These limits are designed to provide reasonable protection against harmful interference when the equipment is operated in a commercial environment. This equipment generates, uses, and can radiate radio frequency energy and, if not installed and used in accordance with the instruction manual, may cause harmful interference to radio communications.
- Page 43 DECLARATION OF CONFORMITY Declaration of Conformity Manufacturer: projectiondesign as, Habornveien 53, N-1630 Gamle Fredrikstad, NORWAY We declare under our responsibility that the F1 SX+ digital projector is in conformity with the following standard(s) and/or other normative document(s): Electrical safety: EN60950:2000...
- Page 44 • benutzer handbuch • guide d’utilisateur • guía del usario • manuale d’uso • bruksanvisning projectiondesign as Habornveien 53, N-1630 Gamle Fredrikstad, Norway www.projectiondesign.com • Tel: +47 69 30 45 50 601-0048-00...
Need help?
Do you have a question about the F1+ SXGA+ and is the answer not in the manual?
Questions and answers