Advertisement
Quick Links
Advertisement

Related Manuals for GAMDIAS ARGUS M3


Summary of Contents for GAMDIAS ARGUS M3
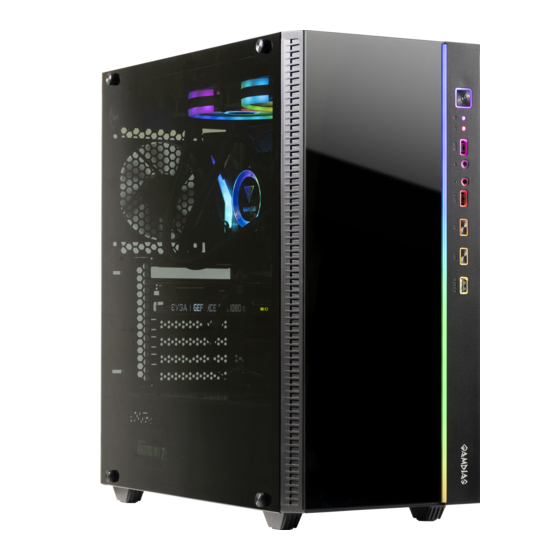
- Page 1 QUICK INSTALLATION GUIDE ARGUS M I D - T O W E R C A S E...
-
Page 2: Table Of Contents
TABLE OF CONTENTS 1 Specifications 2 Exploded View & Parts 3 Accessory 4 Side Panel Removal 5 Motherboard Installation 6 PSU Installation 7 3.5" & 2.5" HDD Installation 8 Air Cooling Compatibility 9 Radiator Compatibility 10 I/O Ports 11 I/O Connectors... -
Page 3: 1 Specifications
SPECIFICATIONS SERIES LED Strips Series Product Name ARGUS M3 Case Type MID Tower Dimension (L x W x H) 454 x 212 x 495 mm 17.9 x 8.3 x 19.1 inch Chassis Dimension (L x W x H) 410 x 205 x 475 mm 16.1 x 8.1 x 18.7 inch... -
Page 4: 2 Exploded View & Parts
EXPLODED VIEW PARTS PARTS PARTS Chassis Body Tempered Glass Front Panel Screw IO Port Tempered Glass Side Panel LED Strips Right Side Panel HDD Tray Top Dust Filters Rubber Foot ACCESSORY Parts Name Used for Figure Stand-off 4.75 x 6.5 x 10mm Motherboard Screw #6 x 6 mm Screw #6 x 5 mm... -
Page 5: 4 Side Panel Removal
SIDE PANEL REMOVAL English Português Remove the side panel Remova o painel lateral Español Русский Retire el panel lateral Снимите боковую панель Deutsch Türk dili Seitenblende entfernen Yan paneli çıkarın Polski 日本語 サイドパネルを取り外します Usuń panel boczny Français 한국어 Retirez le panneau latéral 사이드... -
Page 6: 5 Motherboard Installation
MOTHERBOARD INSTALLATION English Português Lay down the chassis Deite o chassi Install the motherboard in proper location Instale a placa-mãe no local correto e and secure it with screws prenda-a com parafusos Español Русский Tumbe el chasis Снимите подставку Instale la placa base en la posición adecuada Установите... -
Page 7: 6 Psu Installation
PSU INSTALLATION English Português Place the PSU in proper location Coloque a PSU no local adequado Español Русский Coloque la PSU en la posición adecuada Поместите блок питания в нужное место Deutsch Türk dili Netzteil an der richtigen Stelle platzieren PSU’yu uygun konuma yerleştirin Polski 日本語... - Page 8 3.5" 2.5" HDD INSTALLATION 3.5" HDD 2.5" SSD English Português A. 3.5" HDD A. HDD 3.5" Align the HDD into the mounting holes and screw in. Alinhe o HDD nos orifícios de montagem e aperte-o. B. 2.5" SSD B. HDD 2.5" Align the SSD into the mounting holes and screw in.
- Page 9 AIR COOLING COMPATIBILITY English Svensk 日本語 上部 120 mm x 3 または140 mm x2 3 x 120mm or 2 x 140mm Ovansida 3 x 120mm eller 2 x 140mm 前部 120 mm x 3 または140 mm x2 Front 3 x 120mm or 2 x 140mm Framsida 3 x 120mm eller 2 x 140mm 後部...
-
Page 10: Radiator Compatibility
RADIATOR COMPATIBILITY English Svensk 日本語 上部 360 mm または 280 mm 360 mm or 280 mm Ovansida 360 mm eller 280 mm Front 360 mm or 280 mm Framsida 360 mm eller 280 mm 前部 360 mm または 280 mm Rear 120 mm Baksida 120 mm 後部 120 mm Español Italiano 한국어... - Page 11 I/O PORTS Power Button USB 2.0 USB 2.0 IO LED Control LED Control Headphone USB 3.0 IO LED Off : Press and Hold the IO LED Control button for 3 Seconds. Sync With Motherboard : Press and Hold the LED Control button for 3 Seconds.
-
Page 12: O Connectors
I/O CONNECTORS RGB sync USB 3.0 POWER POWER POWER via MB HD AUDIO LED+ LED- English Português See your motherboard's manual for front panel header Veja o manual da sua placa-mãe para localizar locations and pin-outs. os locais e os compartimentos do painel frontal. Español Русский...
Need help?
Do you have a question about the ARGUS M3 and is the answer not in the manual?
Questions and answers