Advertisement
Available languages
Available languages
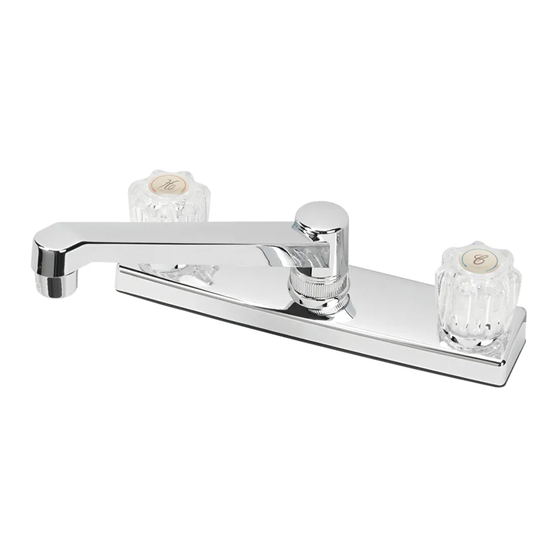
KITCHEN FAUCET
PROJECT SOURCE and logo design
are trademarks or registered trademarks
of LF, LLC. All rights reserved.
ATTACH YOUR RECEIPT HERE
Serial Number ________________________________________
Purchase Date ________________________________________
Questions, problems, missing parts? Before returning to the store,
call our customer service department at 1-866-389-8827, 8 a.m. - 8 p.m.,
EST, Monday - Sunday. You could also contact us at partsplus@lowes.
com or visit www.lowespartsplus.com.
SM21009
HARDWARE CONTENTS
PACKAGE CONTENTS
(not shown actual size)
A
Faucet body
Qty. 1
Due to constant design and quality improvements, the product may look slightly different from the
picture.
SAFETY INFORMATION
Please read and understand this entire manual before attempting to assemble,
operate or install the product.
CAUTION
• If you solder the joints during installation of the faucet, the seats, cartridges,
and washers must be removed before using a flame or the warranty will be
voided on these parts.
• Cover the sink drain to avoid losing parts.
WARNING
• Protect your eyes with safety glasses when cutting or soldering water supply
lines.
• When making water line connections, HAND TIGHTEN. DO NOT
OVERTIGHTEN. Do not use PTFE pipe tape, plumber's putty, pipe dope
or any other type of sealing compound on water inlet or threads. Additional
compound is unnecessary. A watertight seal between the thread inlet and
supply tube is achieved by compression.
1
ITEM # 0694851
PREPARATION
2-HANDLE
Before beginning assembly of product, make sure all parts are present. Compare
parts with package contents list and hardware contents list. If any part is missing
or damaged, do not attempt to assemble the product. Contact customer service
for replacement parts.
MODEL 10-K824-HWC
Estimated Assembly Time: 30 minutes
Español p. 2
Tools Required for Assembly (not included): Adjustable Wrench, Slip Joint Pliers,
Pipe Wrench, Phillips Screwdriver, Silicone and Supply Lines.
Installation may vary depending on how the previous faucet was installed.
Supplies necessary for the installation of the faucet are not all included; however,
they are available wherever plumbing supplies are sold.
Prior to beginning installation, turn off the hot and cold-water lines, then turn on
the old faucet to release built-up pressure. When installing the new faucet, hand
NSF/ANSI 61
NSF/ANSI 372
tighten the connector nuts. DO NOT OVERTIGHTEN. Connections that are too
tight will reduce the integrity of the system.
INSTALLATION INSTRUCTIONS
1.
Shut off the water at the supply valves
under the sink or at the main water
supply. Disconnect the supply lines.
Remove the existing faucet from the
sink.
Clean and dry the surface area where
the new faucet will be mounted.
2.
Apply a thin bead of silicone sealant
to the underside of the gasket on the
bottom of the faucet body (A).
Carefully slide the shanks (2.1) on the
faucet body (A) through the mounting
1/7/21
holes in the sink.
From underneath the sink, thread the
mounting nuts (AA) onto the shanks
(2.1) on the faucet body (A). Check
the position of the faucet and hand
tighten until the faucet body (A) is
AA
securely mounted. NOTE: It is helpful
to have a second person hold the
faucet in place while tightening the
mounting nuts (AA).
Mounting nut
Qty. 2
3.
Attach one end of each of the water
supply lines onto the shanks (3.1) on
the faucet body (A), with hot water on
the left and cold water on the right.
Use 1/2 in. IPS faucet connections
(3.2) or supply line coupling nuts
(3.3) with 3/8 in. OD ball-nose risers
(3.4). NOTE: Do not reuse existing
supply lines. When installing new
water supply lines, please refer to the
supply line manufacturer's installation
instructions. Tighten the supply line
connections using an adjustable or
basin wrench. Do not overtighten.
Attach each of the remaining ends
of the water supply lines (3.5) to the
hot and cold shut-off valves (3.6)
and tighten with a wrench. Do not
overtighten.
INSTALLATION INSTRUCTIONS (continued)
4.
REPLACEMENT PARTS
For replacement parts, call our customer service department at 1-866-389-8827,
8 a.m. - 8 p.m., EST, Monday - Sunday. You could also contact us at
partsplus@lowes.com or visit www.lowespartsplus.com
1
2
A
2.1
AA
LIMITED LIFETIME WARRANTY
3
The distributor warrants to the original purchaser of this product to be free from defects in material and
workmanship under normal use in residential applications. At its option, the Company will provide repair parts or
replace defective product when the product is used in accordance with the manufacturer's specifications.
3.1
The distributor provides a limited 5-year warranty on the finish of this product to the original purchaser. At its
option, the distributor will provide repair parts or replace defective product when the product is used in accordance
with the manufacturer's specifications. Use of mild abrasive, abrasive or chemical cleaners may damage the
3.4
3.2
finish of the product. We recommend cleaning your faucet with a soft cloth, moistened with water. Damage
resulting from the use of abrasive or chemical cleaners SHALL VOID THIS WARRANTY.
This warranty is not applicable to any products or parts of products where damage is caused by use of
3.3
non-genuine parts; is due to installation error, product misuse, negligence or faulty maintenance; or where the
product is not installed according to local building codes.
This warranty excludes labor charges or damage incurred during installation, repair or replacement, and any
3.5
indirect, incidental or consequential damages, losses, injury or costs of any nature. This warranty is in lieu of and
excludes all other warranties, conditions and guarantees, whether expressed or implied, including without
restriction those of merchantability or fitness of use.
Liability under this warranty will not exceed the purchase price for the product claimed to be defective by the original
consumer purchaser. Some states or provinces do not allow the exclusion or limitation of consequential damages
so the above limitations or exclusions may not apply. This warranty gives you specific legal rights and you may
also have other rights which vary from state to state, or province to province.
3.6
Inquiries regarding warranty claims can be directed to 1-866-389-8827, 8 a.m. - 8 p.m., EST, Monday -
Sunday.
2
After installation is complete, remove
4
the aerator (4.1) from the spout (4.2)
of the faucet body (A). Turn on the
water and allow both the hot and cold
water to run for at least one minute.
This flushes away any debris that
could cause damage to the internal
parts. While the water is running,
check for leaks. If a leak occurs, gently
tighten the nut on the connection
that is leaking. Turn off the water and
screw the aerator (4.1) back onto the
spout (4.2) of the faucet body (A).
PART
DESCRIPTION
PART #
Cold water index
1
RP 89999
1
button
Hot water index
2
RP 89998
button
Acrylic handle
3
RP 90000
and screw
4
Aerator assembly RP 90003CH
5
Cartridge
RP 90001
5
Cartridge seat
6
RP 90002
assembly
7
Mounting nut
RP 01525
3
4.2
A
4.1
4
2
3
6
7
Printed in Taiwan
Advertisement
Table of Contents

Subscribe to Our Youtube Channel
Related Manuals for Project Source 10-K824-HWC


Summary of Contents for Project Source 10-K824-HWC
- Page 1 Español p. 2 This flushes away any debris that Tools Required for Assembly (not included): Adjustable Wrench, Slip Joint Pliers, PROJECT SOURCE and logo design could cause damage to the internal are trademarks or registered trademarks Pipe Wrench, Phillips Screwdriver, Silicone and Supply Lines.
- Page 2 Abra el suministro de agua y deje Tiempo estimado de ensamblaje: 30 minutos correr el agua fría y caliente durante PROJECT SOURCE y el diseño del Herramientas necesarias para el ensamblaje (no se incluyen): llave inglesa al menos un minuto para eliminar...
Need help?
Do you have a question about the 10-K824-HWC and is the answer not in the manual?
Questions and answers
It doesn't show it in the manual
The Project Source 10-K824-HWC manual appears to be missing full installation diagrams or images, complete step-by-step instructions for all stages of installation, warnings or cautions in English, and a full parts list with labeled diagrams.
This answer is automatically generated
About a month or so ago I bought a kitchen faucet and it is a project source brand and I got it fully installed and then I took off the aerator and I dropped it and now I need to know how the aerator parts fit back together so I can put it back on the faucet, everything came apart and I have a bunch of pieces and I don't know how to re- assemble it
To reassemble the aerator for the Project Source kitchen faucet (model 10-K824-HWC):
1. Align the aerator (part RP 90003CH) with the spout of the faucet body.
2. Securely screw the aerator back onto the spout.
3. Ensure it is tightly fastened to prevent leaks.
4. Turn on the water and check for proper flow and any leaks.
If issues persist, ensure the aerator components are clean and correctly positioned before reattaching.
This answer is automatically generated