Table of Contents
Advertisement
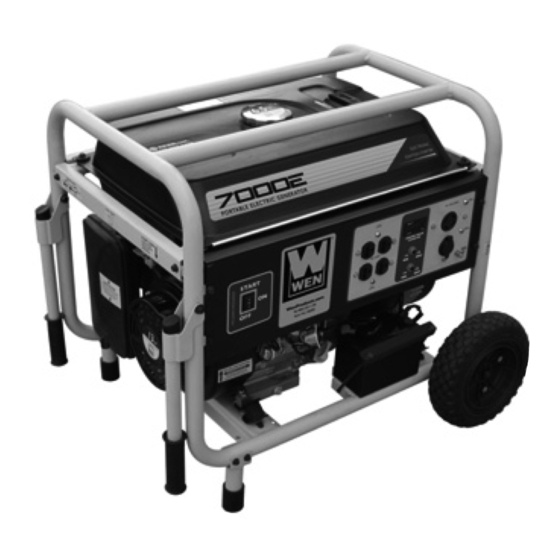
MODEL 7000E
390 cc Generator
Item # 56682
Owner's Manual
Manual del Propietario
Questions? Problems?
Please call our customer help line:
(800) 232-1195
M-F 8-5 CST
FEATURES
x 7000 Surge Watt Output
x 5500 Rated Watt Output
x Powerful Enough to Run Essential Appliances During Power Outages
x 120 and 240 Volt AC Outputs
x Low Oil Automatic Shutoff
x Circuit Breaker for Overload Protection
x 6.5 Gallon Fuel Tank Capacity
x Digital Engine Hour Counter
x Electric Starter
x Cigarette Lighter Style 12V DC Outlet
x Spark Arrester
x Meets EPA Emission Standards
Advertisement
Table of Contents


Need help?
Do you have a question about the Power 7000E and is the answer not in the manual?
Questions and answers