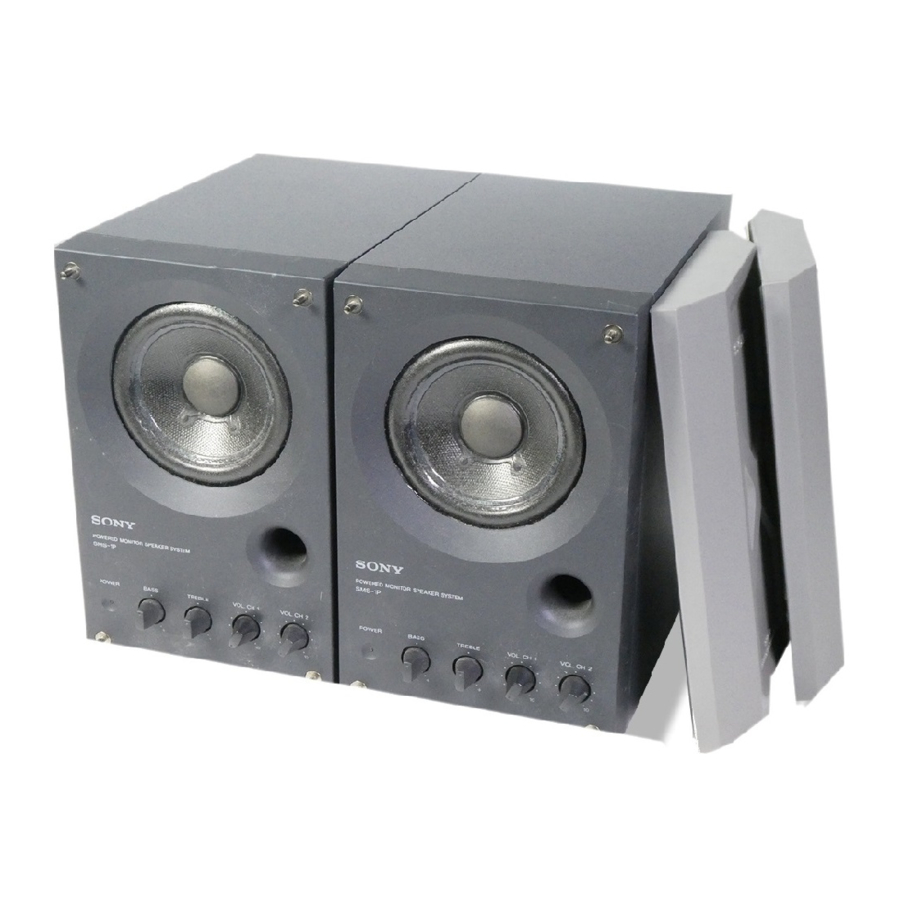
Sony SMS-1P - Powered Monitor Speaker System Manual
- Operating instructions (2 pages)
Advertisement
Features
- Professional quality inputs with high handling capacity (Balanced terminal +22 dB, Standard and Pin terminals +8 dB).
- Allows mixing of two different input sources.
- Magnetically shielded design allows placement near display monitors, TVs, etc.
- Full range speaker and wood cabinet designed for high fidelity.
- Beautiful front panel finished in synthetic marble.
This speaker was designed as a reference for use in recording studios to provide an accurate reproduction of the mix balance. In order to convey the full realistic expression and power of the artist while maintaining a supreme musical charm, we've carefully considered each of the individual parts as well as every inch of the circuit board.
We are confident you'll enjoy this unique speaker both in and out of the studio.
Cautions regarding usage
- Be sure to turn the volume to "0" when switching the power of the input source on and off.
- Remove the protective cover after you have connected the speaker and placed it in its final position.
![]()
- When listening at large volumes, we reccomend keeping the sound at a level where it does not distort.
- Do not take apart or modify the enclosure, it may damage the speaker.
- When moving the speaker, be sure to attach the supplied protective cover.

Precautions
On safety
- Do not attempt to open the enclosure or modify the speaker unit.
- Before operating the speaker, be sure that the operating voltage of your speaker is identical with that of your local power supply.
- Unplug the speaker from the wall outlet if it is not to be used for an extended period of time. To disconnect the cord, pull the cord by grasping the plug. Never pull the cord itself.
- Should any liquid or solid object fall into the speaker, unplug the speaker and have the speaker checked by qualified personnel before operating it any further.
- AC power cord must be changed only at the qualified service shop.
When turning on or off other equipment
Lower the volume of the speaker to minimum.
In case color irreg ularity is observed on the nearby TV screen
With the magnetically shielded type of the speaker system, the speakers can be installed near a TV set. However, color irregularity may still be observed on the TV screen depending on the type of your TV set.
If color irreg ularity is observed...
Turn off the TV set once, then turn it on after 15 to 30 minutes.
If color irreg ularity is observed again...
Place the speakers further apart from the TV set.
If it still persists...
Check that there is no other source of magnetism* near the TV set. Any other source of magnetism can cause color irregularity due to an interaction with the speaker.
* Examples of sources of magnetism: Rack, magnets attached to secure the doors of the TV stand, health tools, magnets used with a toy, etc.
On installation
- Do not install the speaker near heat sources such as radiators or air ducts, or in a place subject to direct sunlight, excessive dust, mechanical vibration or shock.
- Good ventilation is essential to prevent internal heat buildup in the speaker. Place the speaker in a location with adequate air circulation. Do not place the speaker on a soft surface or too close to a wall as this may obstruct the ventilation hole on the back.
On cleaning the cabinet
Clean the cabinet with a soft cloth lightly moistened with water. Do not use any type of abrasive pad, scouring powder or solvent such as alcohol or benzine.
If you have any questions or problems concerning your speaker that is not covered in this manual, please consult your nearest Sony dealer.
Device Connections and Placement
Placement
- The speaker can be placed vertically or horizontally.
- Two of these speakers placed sideways will fit into an EIA 3U size rack.
- When installing the speaker(s) on a stand or rack, use the nuts located in the bottom of the speaker. (Compatible with pitch 60 mm or M5 screws.)
Connections

Be sure to set the POWER switch on the back panel to OFF before making any connections.
Notes
- We reccomend not connecting more than one sound source to each channel.
- Use a commercially available adapter plug if you wish to reverse the HOT and COLD polarity of the balanced terminal.
- Pass high impedance sources (like electric guitars) and low impedance sources (like microphones) through a mixer before connecting to the speaker.
Names and Functions of Parts
Front

- POWER indicator
Lights when the POWER switch is set to the ON position. - BASS knob
Turn to the right to increase the level of the bass. Turn to the left to decrease the level of the bass.
(Increasing the level of the bass when listening at high volumes may cause the sound to distort.) - TREBLE knob
Turn to the right to increase the level of the treble. Turn to the left to decrease the level of the treble. - VOL. (volume) CH 1 and CH 2 knobs
Turning the VOL. CH 1 or VOL. CH 2 knob to the right increases the volume of the source connected to the respective input.
If nothing is connected to one of the input terminals, set the respective knob to the "0" position.
These knobs can also be used to adjust the mix balance of sound sources connected to CH 1 and CH 2.
Rear

- POWER switch
Turns the power to the speaker ON/ OFF.
(Before turning the power ON, be sure the VOL. CH 1 and VOL. CH 2 knobs are set to the "0" position.) - AC socket
Connect to a wall outlet (120 V in U.S.A. or Canada, 220-230 V in Europe) using the supplied power cord. - CH 2 IN Balanced terminal
Balanced input terminal for channel 2.
Connect to the output terminal of a professional mixing console (etc.). - CH 2 IN Standard terminal
Standard input terminal for channel 2.
Connect to the output terminal of an electronic instrument (etc.). - CH 1 IN Standard terminal
Standard input terminal for channel 1.
Connect to the output terminal of an electronic instrument (etc.). - CH 1 IN Pin plug terminal
Pin plug input terminal for channel 1.
Connect to the output terminal of an audio component (etc.).
Specifications
AUDIO POWER SPECIFICATIONS POWER OUTPUT AND TOTAL HARMONIC DISTORTION:
With 4 ohm load driven, from 40 Hz - 20 kHz; rated 14 watts minimum RMS power, with more than 0.9% total harmonic distortion from 250 m W to rated output.
Speaker
Speaker system
Full range bass reflex
Speaker unit
10 cm (315⁄16 inches) dia. cone type
Nominal Impedance
4 ohms
Power handling capacity
Nominal 25 W
Maximum
50 W
Sensitivity
88 dB/ W/ m
Frequency range
80 Hz - 16 kHz (– 10 dB)
Enclosure volume
Approx. 3.2 liters
Amplifier
Output
15 W
Inputs
CHANNEL 1
Pin jack x 1
Standard jack x 1
CHANNEL 2
Balanced terminal x 1
Standard jack x 1
Input level
Balanced terminal: + 4 dB
Standard jack: – 10 dB
Pin jack: – 10 dB
Input impedance
Balanced terminal: 600 ohms
Standard jack: 10 kilohms
Pin jack: 10 kilohms
Tone controls
BASS 100 Hz: ±6 dB
TREBLE 10 kHz: ±6 dB
General
Dimensions
Approx. 132 × 210 × 230 mm (w/ h/ d)
(53⁄16 × 81⁄4 × 91⁄16 inches)
excluding projecting parts and controls
Mass
Approx. 3.3 kg (7 lb 4 oz)
Supplied accessories
Power cord (1)
Protector (1)
Design and specifications are subject to change without notice.
Characteristic data

Output sound pressure, Frequency characteristics / adjustable range of tone controls
- Output sound pressure level (dB)
- Frequency (Hz)
Input: Pin Jack (– 30 dB)
Volume: VOL. CH 1 max
Anechoic room: 1 meter
Sony Corporation © 1996 Printed in China

Documents / ResourcesDownload manual
Here you can download full pdf version of manual, it may contain additional safety instructions, warranty information, FCC rules, etc.
Download Sony SMS-1P - Powered Monitor Speaker System Manual
Advertisement


Need help?
Do you have a question about the SMS-1P and is the answer not in the manual?
Questions and answers