
Related Manuals for Keba CDF3000


Summary of Contents for Keba CDF3000
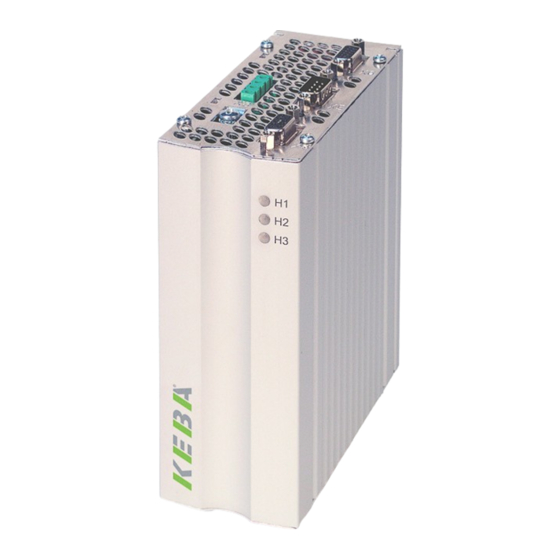
- Page 1 CDF3000 Operation Manual Positioning controller Rated current 8 A Power supply 24 ... 48 V DC...
- Page 2 We should nevertheless point out that this document cannot always be updated simultaneously with the ongoing technical development of our products. Information and specifications may be subject to change at any time. Please obtain information about the latest version at www.keba.com...
- Page 3 (ID. no.: 1040.20B.4-00 • 08/2013) rated motor current. The CDF3000 drive controllers are compliant with the current standards. The I T integrator acts as a thermal memory for the system. The thermal memory is retained while the motor is shut down and if the device is switched See chapter “01.8.2 Standards applied”...
- Page 4 From July 2021 the Ecodesign Regulation also applies to speed controllers 01.7 Rating plate (EU)2019/1781 (efficiency class IE2). The KEBA drive controllers described here do not fall under this regulation because at least one of the following points applies if used as intended:...
- Page 5 Commissioning (i.e. starting intended operation) is only permitted on strict compliance with the EMC directive (2014/30/EU). The CDF3000 conforms to the EMC Directive 2014/30/EU. On this topic, also see chapter “01.9 CE declaration”. 01.12 Note related to chapter 3.3 Connecting the...
- Page 6 Supplements to the operation manual 1040.00B.4-00 CDF3000 Supplements to the operation manual 1040.00B.4-00 CDF3000 Operation Manual CDF3000 ID no.: 1040.20B.5-00 Date: 02/2022 01.13 Note related to chapter 3.10 Safe Torque Off (STO) The information in chapter 3.10 Safe Torque Off (STO) is no longer valid.
- Page 7 Type: CDB32.004,C2.3 LTi DRiVES In : 230 V AC D- 35633 Lahnau 50/60 Hz 1,7 kVA Out : 3x0-230V 4 A 0,75 kW SN.: 092600179 Serial number Calender week Year Operating Instructions CDF3000...
- Page 8 Pictograms Attention! Operating errors may cause damage to or malfunction of the drive. Danger, high voltage! Improper behaviour may cause fatal accident. Danger from rotating parts! The drive may automat- ically start. Note: Useful information Operating Instructions CDF3000...
-
Page 9: Table Of Contents
Specification of interface X6 ......3-10 3.5.2 Connection of 2nd encoder to X6 .......3-12 3.5.3 Motor temperature monitoring ......3-12 3.5.4 Project planning notes on encoder connection ...3-13 Serial interface (SIO) ..........3-14 -interface X5 ..........3-16 open Multi-axis operation ..........3-17 Braking resistor (RB) ..........3-18 Operating Instructions CDF3000... - Page 10 Saving the settings ..........4-15 Test run ..............4-16 KP300 .......4-20 Operation with K Operation with D .......4-21 RIVE ANAGER Troubleshooting LEDs ................5-1 Error messages ............5-2 User errors in K operation ......5-4 User errors in S operation ......5-4 MART Operating Instructions CDF3000...
- Page 11 Reset ................5-5 Appendix Technical data ............A-2 Ambient conditions ..........A-4 UL-Approbation ............. A-5 Index Operating Instructions CDF3000...
- Page 12 Operating Instructions CDF3000...
-
Page 13: Safety
− Areas in which motors are assembled, repaired and operated. Motors with permanent magnets are sources of special dangers. If there is a necessity to access such areas a Note: decision from a physician is required. Operating Instructions CDF3000... - Page 14 Danger from rotating parts! The drive may auto- Danger to life or severe physical matically start. injury. In particular, on the usage of the "automatic restart" (Autostart) function it is to be ensured that a hazard is not produced. Operating Instructions CDF3000...
-
Page 15: Intended Use
2006/42/EC (Machine Directive); compliance with EN 60204 is mandatory. Commissioning (i. e. starting intended operation) is only permitted when strictly complying with EMC-directive (2004/108/EEC). The series CDF3000 complies with the EMC directive 2004/108/EEC The harmonized standards EN 61800-3 and EN 61800-5-1 are applied for the drive controllers. - Page 16 1 Safety Operating Instructions CDF3000...
-
Page 17: Mechanical Installation
• To attain the best result for effective EMC installation use a chro- mated or galvanized backing plate. If backing plates are varnished, remove the coating from the contact area. The devices themselves have an aluminium rear panel. Operating Instructions CDF3000... - Page 18 2 Mechanical installation Maximum pollution severity 2. • Further information on environmental conditions can be found in the appendix. Operating Instructions CDF3000...
-
Page 19: Wall Mounting
30 cm long. Continue with the electrical installation in section 3. Table 2.1 Device mounting ≥ 3 mm Fig. 2.1 Mounting clearances (see Table 2.2) Operating Instructions CDF3000... - Page 20 • Air must be able to flow through the device without restriction. • For mounting in switch cabinets with convection (= heat loss is dis- charged to the outside via the cabinet walls), always fit an internal air circulation fan. • The backing plate must be well earthed. Operating Instructions CDF3000...
-
Page 21: Installation
Hazard due to axis movement at the motor: ..3-24 3.10.7 Overview of "STO" connections for CDF .....3-25 3.10.8 Wiring and commissioning .........3-26 3.10.9 Function test STO ..........3-28 3.10.10 Safety-related approvals ........3-29 3.11 Control connections ..........3-30 3.11.1 Specification of control connections ....3-31 Operating Instructions CDF3000... - Page 22 3 Installation Attention: Installation must only be carried out by qualified electricians who have undergone instruction in the necessary accident prevention measures. Operating Instructions CDF3000...
-
Page 23: Connection Overview
Mains unit 24/48V DC/10 A* Brake- Power Part * with overload up to 20 A Fig. 3.1 Terminal plan CDF3000 (overview) *In generator operation the power supply unit must be protected against overvoltage (e.g. by protective diode) Legend Explanation continue... -
Page 24: Position Plan
3 Installation Legend Explanation continue Connection Protective earth (PE) Attention: Please observe chapter 3.3 "Connec- Page 3-5 tion of mains units". Table 3.1 Legend Terminal plan CDF3000 Position plan Fig. 3.2 Position plan CDF3000 Operating Instructions CDF3000... -
Page 25: Connection Of Mains Units
Power side 24/48 V DC: Each unit is to be protected sepa- Note: rately with a fuse of max. rating 16 A utilisation category gG! Provide power to the control and power sections using a ded- icated power supply unit for each! Operating Instructions CDF3000... - Page 26 • Due to the large dynamic range on the DC link, the power supply unit for the power section (supply of X1) is only to be used for the operation of the CDF3000 (no other load allowed). • Appropriate line protection must be provided in the DC mains sup- ply.
- Page 27 The brake chopper enable threshold and the selection of the braking resistor are based on the nominal supply voltage. In the CDF3000, please first set the parameter DCIN to the nominal value for the supply voltage connected such that U...
-
Page 28: Wire Cross-Section For X1 And X3
X3 CDF30.008 0.55 1.5 ... 2.5 Table 3.3 Cable cross-section X1 and X3 (the local regulations and conditions are to be observed) Lengths for stripping insulation 7 mm 10 mm Table 3.4 Lengths for stripping insulation Operating Instructions CDF3000... -
Page 29: Motor Connection
3 Installation Synchronous motors from LTi are optimally tuned for the positioning con- Motor connec- troller CDF3000. Prefabricated motor and encoder cables are also availa- tion ble. For further information on motors of series LSH and accessories please refer to the "Ordering Catalogue for Servo Motors, ID.-No. -
Page 30: Encoder Connection On Lti Motors
Compare the type plates on the components. Make absolutely sure to use the correct components! Earth the motor cable screen on the mounting plate as close as possible to the CDF3000. KRY2-CDF-KS xxx Do not separate the encoder cable, for... - Page 31 PTC- (KTY / Klixon) PTC- (KTY / Klixon) PTC+ (KTY / Klixon) PTC+ (KTY / Klixon) Cosine+ (S1) REF+ (R1) (Excitation+ [8 kHz, approx. 7 V AC]) n.c. CLK+ Table 3.6 Assignment of encoder interface X6 3-11 Operating Instructions CDF3000...
-
Page 32: Connection Of 2Nd Encoder To X6
"off"). Sensor TSS, no PTC Standard linear voltage Thermostatic used evaluation Technical data circuit breaker KTY84-130, PTC to Usable type – (tolerance band Klixon DIN44082 yellow) * Parameter 330-MOPTC = Table 3.7 Motor temperature monitoring specification 3-12 Operating Instructions CDF3000... -
Page 33: Project Planning Notes On Encoder Connection
A speed < n cannot be measured. In this range the actual Note: speed of 0 min is set. In the range 0 < n < n the ampli- fication of the encoder is reduced. 3-13 Operating Instructions CDF3000... -
Page 34: Serial Interface (Sio)
S Serial interface MART or a notebook with the PC-Tool D installed. This can RIVE ANAGER (SIO) be used to parameterize the CDF3000. Attention: The RS232 RS232 interface must only be used for service and RS232 commissioning. Using the interface for control... - Page 35 As a result the RS232, the notebook and the CDF3000 may be irreparably damaged! For this reason an opto-isolator is to be used in the interface cable (suppliers of opto-isolators are established IT accessory suppliers).
-
Page 36: Can Open -Interface X5
CAN_HIGH CAN-SYNC_HIGH This pin can optionally be switched by the micro controller as input or output. CAN_+24 V (24 V ±10%) Table 3.10 Pin assignment X5 The CAN-bus node address is set via coding switch S1. 3-16 Operating Instructions CDF3000... -
Page 37: Multi-Axis Operation
Mains unit 24/48V DC for power part Fig. 3.10 Network plan CDF3000 (example) The instructions in 3.3 "Connecting the power packs" in par- Note: ticular are also to be observed! Suitable measures are to be taken to protect the cable. -
Page 38: Braking Resistor (Rb)
• The design of the braking resistor must be clarified at the project planning stage. • The minimum permissible ohmic resistance of an externally installed braking resistor for the various positioning controllers can be found in appendix A2. For further information please consult your project engineer. 3-18 Operating Instructions CDF3000... - Page 39 (e.g. if there is a "short" in the chopper transistor), the braking resistor will not represent a fire risk and measures are to be taken to electrically isolate the resistor. 3-19 Operating Instructions CDF3000...
-
Page 40: Safe Torque Off (Sto)
With the danger analysis all prerequisites for establishing the required safety functions are fulfilled. The CDF3000 safety function "Safe Torque Off (STO)" has been approved by the accredited certification body "TÜV-Rheinland". Conform- ance to parts EN ISO 13849-1, EN 62061, EN 61800-5-1 and EN 61508 is ensured. - Page 41 A system that responds to the input signals from the process and/or a user and generates output signals which enable the EUC to work as desired. EUC equipment: Equipment, machine, apparatus or plant used for the manufacture, pro- duction and processing, transportation, medical or other activities. 3-21 Operating Instructions CDF3000...
-
Page 42: Description Of Function
The positioning controllers CDE3000 and CDB3000, SH support the 3.10.3 Description of "STO" (Safe Torque Off) safety function according to the requirements of function EN 61800-5-2, EN ISO 13849-1 "PL e" and EN 61508 / EN 62061 "SIL3". 3-22 Operating Instructions CDF3000... -
Page 43: Basic Information
• With the "STO" function no "shutdown of voltage in case of emer- gency" is possible without additional measures. There is no electrical isolation between the motor and servocontroller! This means there is a risk of electric shock or other electrical risk. 3-23 Operating Instructions CDF3000... -
Page 44: Hazard Due To Axis Movement At The Motor
The safety circuitry connected to the servocontroller should Note: be designed in such a way that in case of a loss of electrical supply the safe state of the machine can be reached or main- tained. 3-24 Operating Instructions CDF3000... -
Page 45: Overview Of "Sto" Connections For Cdf
3 Installation The servocontroller CDF3000 offers a separate input for the "STO" 3.10.7 Overview of request, a facility to deactivate the restart inhibit and a separate relay "STO" connec- contact for feedback. tions for CDF Des. Term. Specification floating Digital inputs... -
Page 46: Wiring And Commissioning
In combination with the controller enable "ENPO" the system uses two channels to prevent the motor creating a torque. The internal function of the unit and the connection for CDF3000 is shown in Fig. 3.12. 3-26... - Page 47 ENPO Channel 1 OSD02 (RSH) ISD00 (ISDSH) Channel 2 24 V + Fig. 3.12 Request "STO" on CDF3000 for shutting down in an emergency (emergency shutdown) Relay ENPO ISD00 (CDF,SH) Restart inhibit Controller state OSD02 / (CDF,SH) Power stage disabled via twochannels.
-
Page 48: Function Test Sto
In order to cancel the STO safety function and deactivate the restart inhibit, the ISDSH signal must be set to High before the ENPO signal, or simultaneously with it. 3-28 Operating Instructions CDF3000... -
Page 49: Safety-Related Approvals
SIL: 5.5 E-10 1/h 2.907 a Approval restart inhibit CDF Safety-related parameters Safety-related parameters in in accordance with EN 62061/ accordance with EN ISO 13849: EN 61508: SIL: HFT: Category: SIL: 7.5 E-11 1/h >10,000 a 3-29 Operating Instructions CDF3000... -
Page 50: Control Connections
• Always wire the control terminals with shielded cables. • Lay the control cables separately from the mains lead and motor cable. • The CDF3000 Application Manual presents more preset drive solutions. • A cable type with double copper braiding with 60 - 70% coverage must be used for all screened connections. -
Page 51: Specification Of Control Connections
ISA01+ ≈ • internal signal delay time 250µs ISA01- • Terminal scan cycle = 1 ms ISA00+ • Protection against inductive load ISA00- • High-side driver +24 V Table 3.13 Specification of control connections OSD03 OSD04 3-31 Operating Instructions CDF3000... - Page 52 • 24 V / 1 A AC, utilization category AC1, cos ϕ = 1 X2:20 • 30 V / 1 A DC, utilization category DC1, cos ϕ = 1 X2:19 • Operating delay approx. 10 ms Table 3.13 Specification of control connections 3-32 Operating Instructions CDF3000...
- Page 53 • strictly required for operation of the – CDF3000 • I = 0.9 A + currents on the outputs max_in OSD00, OSD03 and OSD04 • Reference point for control electronics Table 3.13 Specification of control connections 3-33 Operating Instructions CDF3000...
- Page 54 3 Installation 3-34 Operating Instructions CDF3000...
-
Page 55: Commissioning
Saving the settings ..........4-15 Test run ..............4-16 Operation with K KP300 .......4-20 Operation with D .......4-21 RIVE ANAGER Attention: Commissioning must only be carried out by qualified electri- cians who have undergone instruction in the necessary acci- dent prevention measures. Operating Instructions CDF3000... -
Page 56: Choosing The Commissioning
• Loading an existing data set. • Initial project planning and commissioning Initial commissioning Page 4-6 of the drive system. • Project planning and basic setting of the drive system have already been carried Test run Page 4-16 out. Operating Instructions CDF3000... -
Page 57: Serial Commissioning
CARD will be saved the Start/Enter key. start enter stop return = saving completed READY is displayed. CARD without errors With this process you have written your dataset to a S MART Operating Instructions CDF3000... - Page 58 Start/Enter key. start enter stop return = loading com- CARD READY is displayed. pleted without errors Repeat this loading process on all other drives. The dataset is automatically saved in the positioning control- Note: ler. Operating Instructions CDF3000...
-
Page 59: Serial Commissioning With Drive Manager
Please remember to save the Save the settings with the setting. button -> Repeat steps 4 ... 7 for all further drives. For further information concerning the D please refer to the RIVE ANAGER manual. RIVE ANAGER Operating Instructions CDF3000... -
Page 60: Initial Commissioning
Input ENPO = apply Low-Level to terminal X2/12 to avoid unintended starting of the motor (output stage locked, mains voltage for positioning controller switched on). Preparations: • Switching on the positioning controller CDF3000. A self-test is performed. • Start the D RIVE ANAGER Set up a connection to the device. - Page 61 4 Commissioning Opening the main window "Setting CDF3000": RIVE ANAGER Active device > Change settings Fig. 4.1 Main window for the different settings in the D RIVE ANAGER Continue with: Operating Instructions CDF3000...
-
Page 62: Pre-Set Solutions
Pre-set solutions modified this way are stored in the unit as user datasets. In this way, you can arrive more rapidly at your desired move- ment solution. Operating Instructions CDF3000... - Page 63 PCC_3 PLC - EasyDrive-Profile "PlcPos" Field bus options module (Profibus) PCB_3 PLC - EasyDrive-Profile "PlcPos" Table 4.1 Preset solutions for speed control with CDF3000 All pre-set solutions have an individual window for basic settings in D RIVE ANAGER Operating Instructions CDF3000...
- Page 64 4 Commissioning Select the pre-set solution matching your application. Fig. 4.3 Selecting the pre-set solution For more detailed information on pre-set solutions and termi- Note: nal assignment please refer to the application manual CDF3000. 4-10 Operating Instructions CDF3000...
-
Page 65: Setting The Motor And Encoder
The speed and positioning controllers have a high level of attenuation and therefore also suitable for the control of elas- tic mechanical components. For special settings in optimizing the speed and position circuitry you should use the application manual for the CDF3000. 4-11 Operating Instructions CDF3000... - Page 66 It is also possible to perform both functions with a single encoder. Fig. 4.5 Encoder configuration Every rotary encoder combination has a special setup screen. For more information on setting up the rotary encoders, refer to the CDF3000 Application Manual. 4-12 Operating Instructions CDF3000...
- Page 67 To check the encoder, rotate the motor shaft by hand. Checking the encoder Attention: Before the shaft is touched with the hands, the CDF3000 must be placed in the "Safe Standstill" state. The viewing is from the front onto the end of the shaft (flange). The "CDF3000 reference and actual values"...
-
Page 68: Making Basic Settings
Custom setup screens are provided for fine adjustment of each preset 4.3.3 Making basic solution. You can use them to adapt the drive to your application. For a settings detailed description of the individual functions, refer to the CDF3000 Application Manual. Fig. 4.6 Speed control Fig. -
Page 69: Saving The Settings
4.3.4 Saving the set- Saving the settings in the device tings All changes that are to be permanently stored in the device, must be saved via the mask CDF3000 Settings . RIVE ANAGER CDF3000 Settings Active device > Change set- tings These changes can also be saved in a file. -
Page 70: Test Run
Before starting the motor the motor brake (if present) must be checked for correct function. The optionally installed holding brake is only designed for a limited number of emergency brake operations. Use as work- ing brake is strictly prohibited. 4-16 Operating Instructions CDF3000... - Page 71 * After controller initialisation as a consequence of parameter change 3. Control with D RIVE ANAGER Select "speed control" and start the drive, e.g. with nominal value 100 min RIVE ANAGER Open-loop control Active device > Open-loop con- trol> Basic operating modes Fig. 4.8 Control 4-17 Operating Instructions CDF3000...
- Page 72 If the torque reference reaches its maximum, reduce the speed step. The time response (rise time, correction time) of the speed control loop is independent of the speed step. 4-18 Operating Instructions CDF3000...
- Page 73 If the step response of your drive does approximately correspond with the illustration, it is assured that the motor phases are correctly wired, the encoder is correctly connected and the CDF3000 is parameterized to the correct motor. If the step response deviates considerably from the illustration, it is to be assumed that •...
-
Page 74: Operation With Key Pad Kp300
57,5 KP300 and the posi- door, two holes for fastening tioning drive screws and a cut-out for the CDF3000 using the connector are required. cable CCD-SUB90X Please only use self-tapping screws for thermoplastics (e.g. EJOT PT screw, type K30 x 8 WN1412). -
Page 75: Operation With Drive Manager
RIVE ANAGER • The CDF3000 has been installed as instructed in chapter 3. Attention: Make sure that both the CDF3000 housing as well as the GND-connection (control voltage 0V) are connected to the protective conductor potential. Otherwise the serial interface of the CDF3000 may be destroyed by potential displacement (see chapter 3.3). - Page 76 As a result the RS232, the notebook and the CDF3000 may be irreparably damaged! For this reason an opto-isolator is to be used in the interface cable (suppliers of opto-isolators are established IT accessory suppliers).
- Page 77 Disconnect all devices Communication > Disconnect Save dataset of active device in Active device > Save settings of device file Dataset transfer from file to Active device > Load settings into active device device from 4-23 Operating Instructions CDF3000...
- Page 78 4 Commissioning 4-24 Operating Instructions CDF3000...
-
Page 79: Troubleshooting
In service/auto-tuning active ● ● ✳ ● Warning ✳ ❍ ● Error (flash code) ❍ ● ✳ LED off, LED on, LED flashing + 24 V on control terminal X2 Prerequisite: "Safe Standstill" and ENPO placed beside each other. Operating Instructions CDF3000... - Page 80 Excessive Ambient temperature too high: Improve ventilation in control cabinet. E-OTI temperature of Excessive load during driving/braking: Check dimensioning positioning controller 1) For further information please refer also to the CDE/CDB/CDF3000 application manual Table 5.1 Error messages Operating Instructions CDF3000...
- Page 81 If you need more detailed assistance and advice, you will find Note: all the services we offer in the "Support & Service" order catalogue. You can download the order catalogue from our website, www.lt-i.com, in the section of the same name. Operating Instructions CDF3000...
-
Page 82: User Errors In Key Pad Operation
Connection to S interrupted MART ERR97 data invalid (checksum) MART ERR98 Insufficient memory on S MART ERR99 Selected area not present on S , no parameters MART transferred from S MART Table 5.3 error: Reset with stop/return MART Operating Instructions CDF3000... -
Page 83: Reset
RIVE ANAGER Attention! This factory setting also resets the selected default Note: solution. Check the terminal assignment and the functionality of the positioning controller in these operating modes or load your user dataset. Operating Instructions CDF3000... - Page 84 5 Troubleshooting Operating Instructions CDF3000...
-
Page 85: A Appendix
Appendix Technical data ............A-2 Ambient conditions ..........A-3 UL-Approbation ............A-5 Operating Instructions CDF3000... - Page 86 The brake chopper enable threshold and the selection of the braking resistor are based on the nominal supply voltage. In the CDF3000, please first set the parameter DCIN to the nominal value for the supply voltage connected such that U...
- Page 87 24 V 2.7 Ω - 10 % 24 V to 32 V 3.3 Ω - 10 % 32 V to 40 V 3.9 Ω - 10 % 40 V to 48 V Table A.2 Minimum braking resistors allowed Operating Instructions CDF3000...
- Page 88 4) The absolute humidity is limited to max. 60 g/m . This means, at 70 °C for example, that the relative humidity may only be max. 40 %. 5) The devices are only designed for stationary use. Operating Instructions CDF3000...
- Page 89 The description of all measures to maintain UL approbation is to be found UL-Certification in the document „UL-Certification“ (ID No: 0927.01B.X.xx). Operating Instructions CDF3000...
- Page 90 Electrical isolation concept CDF3000 Fig.A.1 It is only allowed to lay signals and voltages to the CDF that meet the requirements for a protective extra-low voltage (PELV) or safety extra-low voltage (SELV) in the context of EN 61800-5-1. The related specifications and connection conditions for the sig- nals and voltages must comply with the descriptions in the opera- tion manual.
- Page 91 ENPO ............3-30 4-17 Power choke .............3-16 Error messages ...........5-2 Power stage enable ...........4-17 Project planning notes on the encoder connection ..............3-13 Factory setting ............5-5 Feather key ............4-16 Qualification, user ..........1-2 H1 flash code ............5-2 Holding brake plug-in connection ........3-10 Betriebsanleitung CDF3000...
- Page 92 Terminal X4 ............3-14 Test run ............4-2 4-17 Triggering condition .......... 4-18 UL-Approbation ...........A-5 User errors in SmartCard operation ..... 5-4 User errors KP200 ..........5-4 Voltage supply, specification ....3-26 3-33 Wire cross-section ..........3-8 Wiring and commissioning ........ 3-26 Betriebsanleitung CDF3000...
- Page 93 Notes on EN 61000-3-2 DE Notes on EN 61000-3-2 EN (load on the mains due to harmonics) (limits for harmonic current emissions) Our positioning drives and servo controllers are "professional Our frequency inverters and servocontrollers are "professional equipment" in the context of EN61000 such that with a nominal devices"...
- Page 94 Czech Republic • Turkey • USA Copyright © KEBA 2021 All rights reserved. All content of the documentation, in particular the text, photographs and graphics it contains are protected by copyright. The copyright lies, unless otherwise expressly stated, with KEBA Industrial Automation Germany GmbH.
Need help?
Do you have a question about the CDF3000 and is the answer not in the manual?
Questions and answers