GE PT7800 Owner's Manual
Double wall oven
Hide thumbs
Also See for PT7800:
- Owner's manual (76 pages) ,
- Owner's manual (64 pages) ,
- Owner's manual (72 pages)
Table of Contents
Advertisement
Available languages
Available languages
Quick Links
Oven Controls . . . . . . . . . . . . . . . . . . . . . . . . . 10
Oven Settings . . . . . . . . . . . . . . . . . . . . . . . . . 11
Oven Options . . . . . . . . . . . . . . . . . . . . . . . . . 12
Baking . . . . . . . . . . . . . . . . . . . . . . . . . . . . . . . 13
Warming and Proofing . . . . . . . . . . . . . . . . . 14
Microwaving . . . . . . . . . . . . . . . . . . . . . . . . . . 15
Cooking Modes . . . . . . . . . . . . . . . . . . . . . . . . 19
Sabbath Mode . . . . . . . . . . . . . . . . . . . . . . . . .20
Cooking Guide . . . . . . . . . . . . . . . . . . . . . . . . 21
Racks . . . . . . . . . . . . . . . . . . . . . . . . . . . . . . . . 23
Aluminum Foil and Oven Liners . . . . . . . . . .24
Cookware . . . . . . . . . . . . . . . . . . . . . . . . . . . . .24
CARE AND CLEANING
Oven . . . . . . . . . . . . . . . . . . . . . . . . . . . . . . . . . 25
Oven Racks . . . . . . . . . . . . . . . . . . . . . . . . . . . 27
Lower Oven Maintenance . . . . . . . . . . . . . . . 28
Write the model and serial
numbers here:
Model # ____________________
Serial # ____________________
You can find them on a label on
the side trim or on the front of the
(lower) oven behind the oven door.
GE is a trademark of the General Electric Company. Manufactured under trademark license.
. . . . . . . . . . 3
. . . . . . .29
. . . . . . . . . . . .34
. . . . . . . . . . . . . . . . . . . . 35
. . . . . . . . . . .36
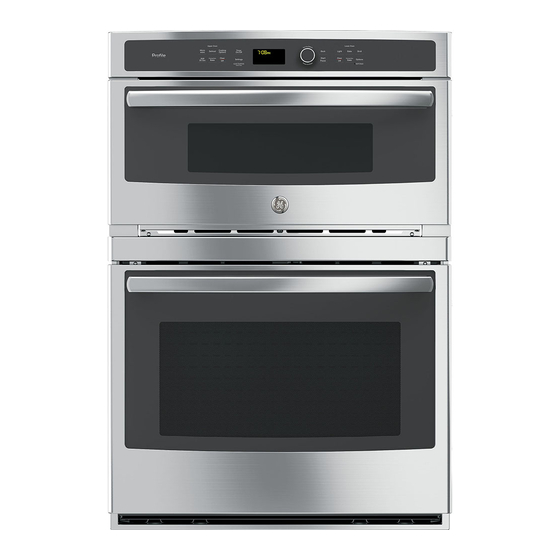
OWNER'S MANUAL
PT7800 - 30" Double Wall Oven
PK7800 - 27" Double Wall Oven
ESPAÑOL
Para consultar una version en
español de este manual de
instrucciones, visite nuestro sitio de
internet GEAppliances.com.
49-2001077 Rev. 0 02-22 GEA
Advertisement
Chapters
Table of Contents

Related Manuals for GE PT7800


Summary of Contents for GE PT7800
-
Page 1: Table Of Contents
You can find them on a label on the side trim or on the front of the (lower) oven behind the oven door. GE is a trademark of the General Electric Company. Manufactured under trademark license. 49-2001077 Rev. 0 02-22 GEA... - Page 2 THANK YOU FOR MAKING GE APPLIANCES A PART OF YOUR HOME. Whether you grew up with GE Appliances, or this is your first, we’re happy to have you in the family. We take pride in the craftsmanship, innovation and design that goes into every GE Appliances product, and we think you will too.
-
Page 3: Safety Information
IMPORTANT SAFETY INFORMATION READ ALL INSTRUCTIONS BEFORE USING THE APPLIANCE PRECAUTIONS TO AVOID POSSIBLE EXPOSURE TO EXCESSIVE MICROWAVE ENERGY (a) Do Not Attempt to operate this oven with the (c) Do Not Operate the oven if it is damaged. It is door open since open-door operation can result particularly important that the oven door close in harmful exposure to microwave energy. - Page 4 IMPORTANT SAFETY INFORMATION READ ALL INSTRUCTIONS BEFORE USING THE APPLIANCE WARNING GENERAL SAFETY INSTRUCTIONS (Cont.) bottles (especially carbonated beverages). Even if — Do not overcook food. Carefully attend appliance the container is open, pressure can build up. This when paper, plastic or other combustible can cause the container to burst, possibly resulting materials are placed inside the oven while in injury.
- Page 5 IMPORTANT SAFETY INFORMATION READ ALL INSTRUCTIONS BEFORE USING THE APPLIANCE WARNING FOODS SUPERHEATED WATER on the clear glass tray. Liquids, such as water, coffee or tea, are able to be overheated beyond the boiling point without microwave popcorn accessory or unless you use appearing to be boiling.
-
Page 6: Using The Oven
IMPORTANT SAFETY INFORMATION READ ALL INSTRUCTIONS BEFORE USING THE APPLIANCE WARNING MICROWAVE-SAFE COOKWARE Make sure to use suitable cookware during microwave cooking. Most glass casseroles, cooking dishes, measuring cups, custard cups, pottery or china dinnerware which does not have metallic trim or glaze with a the clear glass tray to cook your food. - Page 7 IMPORTANT SAFETY INFORMATION READ ALL INSTRUCTIONS BEFORE USING THE APPLIANCE WARNING in fire, electrical shock, serious injury or death. WARNING GENERAL SAFETY INSTRUCTIONS described in this Owner’s Manual. surface of the oven. These surfaces may be hot enough to burn even though they are dark in color. During and after use, do not touch, or let clothing grounded by a qualified installer in accordance with or other flammable materials contact any interior...
- Page 8 IMPORTANT SAFETY INFORMATION READ ALL INSTRUCTIONS BEFORE USING THE APPLIANCE IN THE EVENT OF A FIRE, TAKE THE FOLLOWING WARNING STEPS TO PREVENT INJURY AND FIRE SPREADING flaming pan. the oven off and wait for the fire to go out. Do not force the door open.
- Page 9 IMPORTANT SAFETY INFORMATION READ ALL INSTRUCTIONS BEFORE USING THE APPLIANCE FCC RADIO FREQUENCY INTERFERENCE This equipment generates and uses ISM frequency energy and if not installed and used properly, that is in strict accordance with the manufacturer's instructions, receiver. may cause interference to radio and television reception. It has been type tested and found to comply with limits which are designed to provide reasonable protection microwave oven and receiver are on different branch...
-
Page 10: Oven Controls
Oven Controls Upper Oven Lower Oven Controls Common Controls Controls Common Controls 9. Defrost: Press the Defrost pad to defrost, rotate selector dial to select the type of defrost and press to 1. Timer On/Off: Works as a countdown timer. Press select. -
Page 11: Oven Settings
Oven Settings Help Clock Settings Use this feature to find out more about your oven and Use this feature to set the time of day and to specify its features by pressing the Settings pad and selecting how the time of day will be displayed. You can select a help. -
Page 12: Oven Options
Oven Options Upper Oven Options Repeat Last Proof This feature can only be used for upper oven cooking Use this feature to proof bread. See Upper Oven modes. Use this time saving feature for cooking repetitive Warming and Proofing section for more detail. items like cookies or appetizers. -
Page 13: Baking
Baking Baking CAUTION Baking allows you to cook foods the same way as a When baking, remember that the conventional oven, using a heating element to raise oven, door and dishes will be very hot! the temperature of the air inside the oven. Any oven A fan gently circulates heated air throughout the oven, over and around the food. -
Page 14: Warming And Proofing
Warming and Proofing Warming The Warm feature will keep hot, cooked foods at serving To Crisp Stale Items: temperature. Always start with hot food. Use cookware on the glass tray. 1. Press the Cooking Options pad. 2. Turn the selector dial to Warm. Press the selector dial to enter. -
Page 15: Microwaving
Microwaving Using The Microwave Features Make sure the turntable and clear glass tray are in place. Place food or microwavable container directly on the clear glass tray to cook your food. The turntable must always be The clear glass tray should in place when using the oven. - Page 16 Microwaving (Cont.) Microwave Power Level(s) Here are some examples of uses for various power program. levels: 1. Press the selector dial to edit High 10 2. Rotate selector dial to change time and/or press Med-High 7: Gentle cooking of meat and poultry; baking selector dial to enter.
- Page 17 Microwaving (Cont.) Defrost By Weight Use Defrost By Weight to defrost for a selected length 4. Press the selector dial or Start/Pause pad to start of time. defrosting. 1. Press the Microwave pad and select defrost. Over. 2. Turn the selector dial to Defrost By Weight. Press the selector dial to enter.
- Page 18 Microwaving (Cont.) Microwave Sensor Cooking The sensor feature detects the increasing humidity released during cooking. The oven automatically adjusts the cooking time to various types and amounts of food. Covered on the same food portion— it may result in severely overcooked or burnt food.
-
Page 19: Cooking Modes
Cooking Modes Your new oven has a variety of cooking modes to help you get the best results. These modes are described below. Refer to the Cooking Guide section for recommendations for specific foods. Remember, your new oven may perform differently than the oven it is replacing. -
Page 20: Sabbath Mode
Sabbath Mode Your new oven conforms to Jewish Sabbath requirements with the Sabbath mode cooking feature. Below describes the detail of Sabbath mode feature. To Enter Sabbath Mode Timed Cook Feature In Sabbath Mode Press the lower oven Options pad and turn the selector The Sabbath mode is not capable of running a timed dial to Sabbath and press to select. - Page 21 Cooking Guide (27" Oven) RECOMMENDED RECOMMENDED FOOD TYPE MODE(S) RACK POSITION(S) ADDITIONAL SUGGESTIONS Baked Goods Layer cakes, sheet cakes, bundt cakes, muffins, quick Traditional Bake Use shiny cookware. breads on a Single Rack Chiffon cakes (angel food) Traditional Bake Use shiny cookware. Cookies, biscuits, scones on Traditional Bake Use shiny cookware.
-
Page 22: Cooking Guide
Cooking Guide (30" Oven) RECOMMENDED RECOMMENDED FOOD TYPE MODE(S) RACK POSITION(S) ADDITIONAL SUGGESTIONS Baked Goods Layer cakes, sheet cakes, bundt cakes, muffins, quick Traditional Bake Use shiny cookware. breads on a Single Rack Extension rack in higher position if used. Ensure Layer cakes* on Multiple Racks Traditional Bake 2 and 4... -
Page 23: Racks
Racks Your oven has six rack positions. Recommended rack positions for various types of foods are provided in the Cooking Guide. Adjusting rack position is one way to darker tops on cakes, muffins, or cookies, try moving The oven food one rack position higher. If you find foods are too has 6 rack brown on top try moving them down next time. -
Page 24: Aluminum Foil And Oven Liners
Racks (Cont.) Traditional Flat Racks The racks have stops so that when placed correctly on the supports they will stop before coming completely out and will not tilt. When placing and removing cookware, pull the rack out until it stops. To Remove a Rack Pull it toward you, tilt the front end up and pull it out. -
Page 25: Oven
Cleaning The Oven Be sure electrical power is off and all surfaces are cool before cleaning any part of the oven. Helpful Hints An occasional thorough wiping with a solution of When cleaning surfaces, make sure that they are at baking soda and water keeps the inside fresh. - Page 26 Cleaning The Oven (Cont.) How To Clean The Upper Oven Interior (Cont.) Cooking Trays And Baking Sheet Do not use metal scouring pads or abrasives, as they may damage the finish. A soap-filled scouring pad may To prevent breakage, allow the trays to cool completely be used to clean the trays.
-
Page 27: Oven Racks
Lower Oven Racks The racks that were provided with your oven (dark enameled racks, not shiny) may remain in the oven during the self-cleaning cycle without being damaged. To manually clean racks, use warm, soapy water. Make sure not to wash the rack slides on an extension rack. If racks become more difficult to remove from the oven, put some vegetable oil on a soft cloth or paper towel and rub onto the oven rack supports. -
Page 28: Lower Oven Maintenance
Lower Oven Maintenance Lower Oven Light Replacement SHOCK OR BURN HAZARD: Before replacing oven light bulb, disconnect the electrical power to the WARNING BURN HAZARD: The glass cover and bulb should be removed when cool. Touching hot glass with CAUTION bare hands or a damp cloth can cause burns. -
Page 29: Troubleshooting Tips
Troubleshooting tips ... Before you schedule service Save time and money! Review the charts on the following pages first and you may not need to schedule service. Problem Possible Cause What To Do Fan continues to run after The oven is cooling. The fan will automatically shut off when the internal parts of cooking stops the oven have cooled. - Page 30 Troubleshooting tips ... Before you schedule service Problem Possible Cause What To Do My new oven doesn't cook Your new oven has a different cooking like my old one. Is something system from your old oven and therefore temperatures carefully. If you still think your new oven wrong with the temperature may cook differently than your old oven.
- Page 31 Troubleshooting tips ... Before you schedule service Problem Possible Cause What To Do Oven not clean after a clean Oven controls improperly set. See the Cleaning the Oven section. cycle Oven was heavily soiled. Clean up heavy spillovers before starting the clean cycle. Heavily soiled ovens may need to self-clean again or for a longer period of time.
- Page 32 Notes 49-2001077 Rev. 0...
- Page 33 Notes 49-2001077 Rev. 0...
-
Page 34: Limited Warranty
GE Appliances with information on your appliance. If you do not want your appliance data to be sent to GE Appliances, please advise your technician not to submit the data to GE Appliances at the time of service. -
Page 35: Accessories
Accessories Looking For Something More? GE Appliances offers a variety of accessories to improve your cooking and maintenance experiences! To place an order visit us online at: www.GEApplianceParts.com (U.S.) or www.GEAppliances.ca (Canada) or call 800.626.2002 (U.S.) 800.661.1616 (Canada) The following products and more are available:... -
Page 36: Consumer Support
Have a question or need assistance with your appliance? Try the GE Appliances Website 24 hours a day, any day of the year! You can also shop for more great GE Appliances products and take advantage of all our on-line support services designed for your convenience. - Page 37 Los podrá encontrar en una etiqueta en el borde lateral o en el frente del horno detrás de la puerta del horno. GE es una marca registrada de General Electric Company. Fabricado bajo licencia de marca. 49-2001077 Rev. 0 02-22 GEA...
- Page 38 GRACIAS POR HACER QUE GE APPLIANCES SEA PARTE DE SU HOGAR. Ya sea que haya crecido usando GE Appliances, o que ésta es su primera vez, nos complace tenerlo en la familia. Sentimos orgullo por el nivel de arte, innovación y diseño de cada uno de los electrodomésticos de GE Appliances, y creemos que usted también.
- Page 39 INFORMACIÓN IMPORTANTE DE SEGURIDAD LEA TODAS LAS INSTRUCCIONES ANTES DE USAR PRECAUCIONES PARA EVITAR LA POSIBLE EXPOSICIÓN A ENERGÍA DE MICROONDAS EXCESIVA (a) No intente hacer funcionar el horno con la compuerta (c) No haga funcionar el horno si se encuentra dañado. abierta ya que ésto puede provocar exposición Es particularmente importante cerrar bien la compuerta peligrosa a la energía de microondas.
- Page 40 INFORMACIÓN IMPORTANTE DE SEGURIDAD LEA TODAS LAS INSTRUCCIONES ANTES DE USAR ADVERTENCIA INSTRUCCIONES GENERALES DE SEGURIDAD (Cont.) — Si los materiales que se encuentran dentro del horno prenden fuego, mantenga la compuerta del pueden tener la tendencia de hervir más rápidamente que microondas cerrada, apague el horno y corte el los alimentos que contienen menos humedad.
- Page 41 INFORMACIÓN IMPORTANTE DE SEGURIDAD LEA TODAS LAS INSTRUCCIONES ANTES DE USAR ADVERTENCIA ALIMENTOS AGUA SOBRECALENTADA y contenedores en la bandeja de vidrio transparente. de sobrecalentarse más allá del punto de ebullición se coloquen en un accesorio de palomitas de maíz para sin parecer que estén hirviendo.
- Page 42 INFORMACIÓN IMPORTANTE DE SEGURIDAD LEA TODAS LAS INSTRUCCIONES ANTES DE USAR ESTE ELECTRODOMÉSTICO ADVERTENCIA Recipientes de cocina seguros diseñados para microondas Asegúrese de utilizar recipientes de cocina adecuados durante la cocción a microondas. Se pueden utilizar la mayoría de las cacerolas, platos para cocinar, tazas de medir, tazas normales, cerámica o loza que no tengan bordes metálicos o vidriados con un recubrimiento metálico.
- Page 43 INFORMACIÓN IMPORTANTE DE SEGURIDAD LEA TODAS LAS INSTRUCCIONES ANTES DE USAR ADVERTENCIA producir incendios, descargas eléctricas, lesiones graves o la muerte. ADVERTENCIA INSTRUCCIONES GENERALES DE SEGURIDAD como se describe en el Manual del Propietario. del horno. Es posible que estas superficies estén demasiado calientes como para quemar, aunque su electrodoméstico y que esté...
- Page 44 INFORMACIÓN IMPORTANTE DE SEGURIDAD LEA TODAS LAS INSTRUCCIONES ANTES DE USAR EN CASO DE INCENDIO, SIGA LOS SIGUIENTES PASOS ADVERTENCIA PARA EVITAR LA PROPAGACIÓN DEL FUEGO olla que se esté incendiando. de limpieza automática, apague el horno y espere a que el fuego se extinga.
- Page 45 INFORMACIÓN IMPORTANTE DE SEGURIDAD LEA TODAS LAS INSTRUCCIONES ANTES DE USAR DECLARACIÓN DE LA FCC SOBRE INTERFERENCIA DE FRECUENCIAS RADIALES Este equipo genera y usa potencia de frecuencia ISM y si no es instalado y usado de forma adecuada, en cumplimiento estricto con las instrucciones del fabricante, se podrán ocasionar interferencias en la recepción de radio y televisión.
-
Page 46: Controles Del Horno
Controles del Horno Controles del Controles del Horno Superior Controles Comunes Horno Inferior Controles Comunes 9. Defrost (Descongelar): 1. Timer On/Off (Temporizador Encendido/ tipo de descongelación y presione el dial para hacer la selección. Apagado): Funciona como un temporizador con cuenta regresiva: Presione la tecla Timer On/Off (Temporizador Encendido/ Apagado), seleccione el tipo de temporizador (horas y minutos o minutos y segundos), use el dial de selección para configurar la hora, y presione... -
Page 47: Configuraciones Del Horno
Configuraciones del Horno Ayuda Clock Settings (Configuraciones del Reloj) Use esta función para saber más sobre su horno y sus Use esta función para configurar la hora del día y para especificar funciones, presionando la tecla Settings (Configuraciones) cómo ésta será exhibida. Puede seleccionar el reloj estándar de y seleccionando Help (Ayuda). -
Page 48: Opciones Del Horno
Opciones del Horno Opciones del Horno Superior Repeat Last (Repetir el Último Paso) Proof (Leudar) Esta función sólo puede ser usada con los modos de cocción Use esta función para leudar pan. Para más detalles, consulte del horno superior. Use esta función de ahorro de tiempo para aquellas cocciones que se repiten, tales como galletas o Warm (Calentar) aperitivos. -
Page 49: Horneado
Horneado Horneado PRECAUCIÓN ¡Cuando hornee, recuerde que el la misma forma que un horno convencional, utilizando un horno, compuerta y los platos estarán muy calientes! elemento de calentamiento para incrementar la temperatura del aire dentro del horno. Se puede ajustar cualquier temperatura de horno de 250 a 450°... -
Page 50: Calentar Y Leudar
Calentar y Leudar Calentamiento Para hacer que los alimentos secos estén crujientes: cocinados a una temperatura de servir. Empiece siempre con comida caliente. Utilice recipientes de cocina y utensilios que puedan soportar temperaturas de hasta 230° F. tiempo según sea necesario. 1. -
Page 51: Cocción Con Microondas
Cocción con Microondas Cómo Utilizar las Funciones de Microondas Asegúrese de que la base giratoria y la bandeja de vidrio transparente se encuentran colocadas. Coloque los alimentos o recipiente para microondas directamente en la bandeja de vidrio transparente para cocinar sus alimentos. base giratoria siempre bandeja de cristal debe estar colocada en su lugar... - Page 52 Cocción con Microondas (Cont.) Nivel(es) De Potencia Del Horno Microondas Aquí se presentan algunos ejemplos de utilizaciones para del programa de cocción. varios niveles de potencia: 1. Presione el dial de selección para editar. High (Alto) 10: Pescado, tocino, verduras, líquidos hirvientes. 2.
- Page 53 Cocción con Microondas (Cont.) Defrost By Weight (Descongelar por Peso) 4. Presione el dial de selección o la tecla Start/Pause (Iniciar/ descongelar durante un período de tiempo seleccionado. Pausar) para iniciar la descongelación. 1. Presione la tecla Microwave (Cocinar con Microondas) y 5.
- Page 54 Cocción con Microondas (Cont.) Cocción De Microondas Por Sensor durante la cocción. El horno ajusta el tiempo de cocción exterior de los recipientes automáticamente a los diferentes tipos y cantidades de comida. de cocina y el interior del horno se encuentren No utilice las funciones de sensor dos veces en sucesión en la secos antes de colocar misma porción de comida ya que puede tener como resultado...
-
Page 55: Modos De Cocción
Modos de Cocción Su nuevo horno posee una variedad de modos de cocción para que pueda obtener los mejores resultados. Estos modos se describen a continuación. Para acceder a recomendaciones para comidas específicas, consulte la sección de la Guía de Cocción. Recuerde que es posible que su nuevo horno funcione de manera diferente que aquel que está... -
Page 56: Modo Sabático
Modo Sabático Su nuevo horno cumple con los requisitos del Feriado Sabático Judío, contando con la función de cocción del modo Sabbath (Sabático). A continuación se describe en detalle la función del modo Sabbath (Sabático). NOTA: No presione ninguna otra tecla durante este momento, Para Ingresar a Sabbath Mode (Modo ya que de lo contrario el modo Sabbath (Sabático) será... -
Page 57: Guía De Cocción
Guía de Cocción (Horno de 27”) POSICIÓN(ES) MODO(S) DE ESTANTES TIPO DE COMIDA RECOMENDADO(S) RECOMENDADA SUGERENCIAS ADICIONALES Productos Horneados Tortas con capas, tortas rectangulares, roscas, panecillos, Horneado Tradicional Use utensilios brillantes. pan rápido en un Solo Estante Tortas de grasa (pastel de ángel) Horneado Tradicional Use utensilios brillantes. - Page 58 Guía de Cocción (Horno de 30”) MODO(S) POSICIÓN(ES) DE ESTANTES TIPO DE COMIDA RECOMENDADO(S) RECOMENDADA SUGERENCIAS ADICIONALES Productos Horneados Tortas con capas, tortas rectangulares, roscas, Horneado Tradicional Use utensilios brillantes. panecillos, pan rápido en un Solo Estante Estante extensible en la posición más alta, si se usa. Tortas con capas* en Horneado Tradicional 2 y 4...
-
Page 59: Estantes
Estantes El horno cuenta con seis posiciones de estantes. En la Guía de Cocción, se brindan recomendaciones de posiciones de los estantes para diferentes tipos de comidas. Se ajusta un estante en una dirección para afectar los resultados de cocción. Por ejemplo, si se prefieren partes superiores más El horno oscuras en tartas, panecillos o galletas, pruebe moviendo la tiene 6... -
Page 60: Papel De Aluminio Y Cobertores Del Horno
Estantes (Cont.) Estantes Planos Tradicionales correctamente sobre los soportes se detendrán antes de Estante plano salirse completamente y no se inclinarán. Al colocar y retirar utensilios de cocina, empuje la parrilla hasta que se detenga. Para Retirar un Estante Empuje el mismo hacia usted, incline el frente hacia arriba y Enlace de empuje hacia afuera. -
Page 61: Horno
Limpieza del Horno Asegúrese de que la corriente eléctrica esté apagada y que todas las superficies estén frías antes de limpiar cualquier parte del horno. Consejos Útiles Una limpieza minuciosa ocasional con un trapo empapado una solución de vinagre y agua. Enjuague con agua limpia y de bicarbonato sódico y agua mantendrá... - Page 62 Limpieza del Horno (Continúa) How To Clean The Upper Oven Interior (Cont.) Bandejas Para Cocinar Y Lámina De Hornear Para evitar que se rompan las bandejas, deje que se enfríen jabonosa tibia o en la máquina lavaplatos. Bandeja de vidrio transparente No utilice esponjillas metálicas para fregar o limpiadores para la función de microondas abrasivos, ya que pueden dañar el acabado.
-
Page 63: Estantes Del Horno
Estantes del Horno Inferior oscuros esmaltados, no brillantes) pueden permanecer en el horno durante el ciclo de limpieza automática, ya que este ciclo no los dañará. Para limpiar los estantes de forma manual, use agua caliente y jabón. Asegúrese de no lavar el espacio de deslizamiento de un estante extensible. -
Page 64: Mantenimiento Del Horno
Mantenimiento del Horno Inferior Reemplazo de la Lámpara del Horno Inferior PELIGRO DE DESCARGA O QUEMADURAS: Antes de reemplazar la lámpara de luz del horno, ADVERTENCIA desconecte la conexión eléctrica del horno del fusible principal o del panel del disyuntor. Si esto no se cumple, se podrá... -
Page 65: Consejos Para La Solución De Problemas
Consejos para la Solución de Problemas... Antes de solicitar el servicio técnico ¡Ahorre tiempo y dinero! Primero revise los cuadros que aparecen en las siguientes páginas y es posible que no necesite solicitar reparaciones. Problema Causa Posible Qué Hacer VE NTILADOR El ventilador continúa El horno se está... - Page 66 Consejos para la Solución de Problemas... Antes de solicitar el servicio técnico Problema Causa Posible Qué Hacer Mi horno nuevo no cocina como el Su horno nuevo cuenta con un sistema de En los primeros usos, use los tiempos y temperaturas de su receta anterior.
- Page 67 Consejos para la Solución de Problemas... Antes de solicitar el servicio técnico Problema Causa Posible Qué Hacer El horno no limpia luego de un ciclo Los controles del horno están configurados de de limpieza forma incorrecta. El horno estaba demasiado sucio. posible que, en hornos con mucha suciedad, sea necesario usar la limpieza automática nuevamente o usarla durante un período de tiempo más prolongado.
- Page 68 Notas 49-2001077 Rev. 0...
- Page 69 Notas 49-2001077 Rev. 0...
-
Page 70: Garantía Limitada
Para realizar el servicio técnico de su electrodoméstico, se podrá requerir el uso de datos del puerto de abordaje para su diagnóstico. Esto da al técnico del servicio de fábrica de GE Appliances la habilidad de diagnosticar de forma rápida cualquier problema con su electrodoméstico, y de ayudar a GE Appliances a mejorar sus productos al brindarle a GE Appliances la información sobre su... -
Page 71: Accesorios
Accesorios ¿Busca Algo Más? ¡Café ofrece una variedad de accesorios para mejorar sus experiencias de cocción y mantenimiento! Consulte la página de Apoyo al Consumidor para información sobre la página web. Estos y otros productos están disponibles: Accesorios Olla para Asar Pequeña (8 ¾ ” x 1 ¼” x 13 ½ “) Olla para Asar Grande* (12 ¾... -
Page 72: Soporte Para El Consumidor
En EE.UU.: GEAppliances.com/register Servicio Programado El servicio de reparación de expertos de GE Appliances está a sólo un paso de su puerta. Conéctese a través de Internet y programe su servicio a su conveniencia cualquier día del año. En EE.UU.: GEAppliances.com/service o comuníquese al 800.432.2737 durante el horario de atención comercial.
Need help?
Do you have a question about the PT7800 and is the answer not in the manual?
Questions and answers