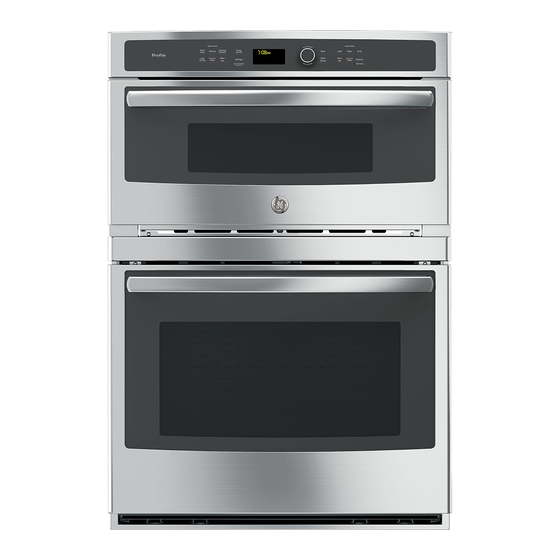
GE PT7800 Owner's Manual
Built-in combination convection-microwave/convection wall oven
Hide thumbs
Also See for PT7800:
- Owner's manual (76 pages) ,
- Owner's manual (36 pages) ,
- Owner's manual (72 pages)
Table of Contents
Advertisement
Available languages
Available languages
For a Spanish version of this
manual, visit our Website at
GEAppliances.com.
Para consultar una version
en español de este manual
de instrucciones, visite
nuestro sitio de internet
GEAppliances.com.
Printed in the United States
GEAppliances.com
. . . . . . . . . . . .2
. . . . . . . . . . . . . . . . . . . . . . . .9
Assistance / Accessories
Using The Oven
Oven Controls . . . . . . . . . . . . . . . . . . . . 11
Oven Settings . . . . . . . . . . . . . . . . . . . . 12
Oven Options . . . . . . . . . . . . . . . . . . . . 13
Baking . . . . . . . . . . . . . . . . . . . . . . . . . . . 14
Warming And Proofing . . . . . . . . . . . 15
Microwaving . . . . . . . . . . . . . . . . . . . . . 16
Lower Oven
Cooking Modes . . . . . . . . . . . . . . . . . . 20
Sabbath Mode . . . . . . . . . . . . . . . . . . . 21
Cooking Guide . . . . . . . . . . . . . . . . . . . 22
Racks . . . . . . . . . . . . . . . . . . . . . . . . . . . . 23
Aluminum Foil and Oven Liners . . . 24
Cookware . . . . . . . . . . . . . . . . . . . . . . . . 24
Care and Cleaning
Cleaning The Oven . . . . . . . . . . . . . . . 25
Lower Oven Racks . . . . . . . . . . . . . . . 27
Lower Oven Maintenance . . . . . . . . 28
Write the model and serial
numbers here:
Model # __________________
Serial # ___________________
You can find them on a label on the
side trim or on the front of the oven
behind the oven door.
Owner's Manual
PT7800 - 30" Double Wall Oven
. . . . 10
. . . . . . . . 29
Printed on
Recycled Paper
49-80738-1 06-14 GE
Advertisement
Chapters
Table of Contents
Troubleshooting

Related Manuals for GE PT7800


Summary of Contents for GE PT7800
-
Page 1: Table Of Contents
Owner’s Manual Warranty ......9 PT7800 - 30" Double Wall Oven Assistance / Accessories ..10 Using The Oven Oven Controls . -
Page 2: Safety Information
IMPORTANT SAFETY INFORMATION. READ ALL INSTRUCTIONS BEFORE USING. PRECAUTIONS TO AVOID POSSIBLE EXPOSURE TO EXCESSIVE MICROWAVE ENERGY (a) Do Not Attempt to operate this oven with (c) Do Not Operate the oven if it is damaged. It is the door open since open-door operation particularly important that the oven door close can result in harmful exposure to microwave properly and that there is no damage to the:... - Page 3 GENERAL SAFETY INSTRUCTIONS WARNING containers—for example, closed jars—are able to explode and should not be heated in utensils or food in the oven when not in use. — If materials inside the oven ignite, keep the injury. oven door closed, turn the oven off and shut off power at the fuse or circuit breaker panel.
- Page 4 IMPORTANT SAFETY INFORMATION. READ ALL INSTRUCTIONS BEFORE USING. WARNING from electronic products, including microwaves. consult their physicians if they have concerns. ARCING WARNING Clear/Off pad and correct the problem. (except for the pans provided with the oven). rimmed dishes, in the oven. antennas).
- Page 5 WARNING Oven-safe cookware for Baking, Warming & Proofing The oven and door will get very hot when baking, warming or proofing. Cookware will become hot. needed to handle the cookware. cause arcing in the oven. The turntable must always be in place when using the oven.
- Page 6 IMPORTANT SAFETY INFORMATION. READ ALL INSTRUCTIONS BEFORE USING. WARNING measuring cups, custard cups, pottery or china dinnerware which does not have metallic trim or glaze with on the clear glass tray to cook your food. can be used to cover dishes in order to retain plastic wrap so steam can escape.
- Page 7 WARNING electrical shock, serious injury or death. STATE OF CALIFORNIA PROPOSITION 65 WARNING publish a list of substances known to the state to cause cancer, birth defects or other reproductive harm, and requires businesses to warn customers of potential exposure to such substances. WARNING cause cancer, birth defects or other reproductive harm.
- Page 8 IMPORTANT SAFETY INFORMATION. READ ALL INSTRUCTIONS BEFORE USING. WARNING Failure to do so may result in fire or personal injury. an oven, including paper, plastic, pot holders, linens, wall coverings, curtains, drapes and gasoline they contact hot surfaces, causing severe burns. or other flammable vapors and liquids.
-
Page 9: Warranty
Thank You! ... for your purchase of a GE Brand appliance. Register Your Appliance: GE Electric Range Warranty GEAppliances.com ® technician. (800.432.2737). Please have serial number and model number available when calling for service. labor and in-home service to replace the defective part. - Page 10 GE Appliances, Appliance Park Louisville, KY 40225 must be exercised, since improper servicing may cause unsafe operation. Accessories Looking For Something More? GE offers a variety of accessories to improve your cooking and maintenance experiences! www.GEApplianceParts.com www.GEAppliances.ca or call 800.626.2002 800.661.1616...
-
Page 11: Oven Controls
Oven Controls Lower Oven Upper Oven Controls Controls Common Controls Common Controls Defrost: Press the Defrost pad to defrost, rotate selector dial to select the type of defrost and press to Timer On/Off: the Timer On/Off pad, select the timer type (hours and minutes or minutes and seconds), use the selector dial to set the time, and press the selector dial to start the timer more information. -
Page 12: Oven Settings
Oven Settings Help Clock Settings its features by pressing the Settings pad and selecting standard 12-hour clock (12 hr) or 24-hour military time feature you want to find out more about. display (24 hr). Prior to the first use of your oven, the clock must be set. -
Page 13: Oven Options
Oven Options Upper Oven Options Repeat Last Proof Warm selecting this feature, the last preset food will be Start/Pause pad or the selector dial to start cooking. detail. NOTE: Lower Oven Options Delay Start temperature, a random delay of approximately 30 seconds to 1 minute will occur before the oven will begin Back pad and then the Start/Pause... -
Page 14: Baking
Baking Baking conventional oven, using a heating element to raise The turntable must always be in Put food or oven-safe cookware on place when using the oven. the glass tray to bake. constantly moving, not permitting a layer of cooler air to develop around the food, some foods cook slightly faster than in regular oven cooking. -
Page 15: Warming And Proofing
Warming And Proofing Warming To Crisp Stale Items: 1. Press the Cooking Options pad. dial to enter. selector dial to enter. If the oven door is opened during warming, Pause will The turntable must always be in Put food on the glass tray to warm. Start/ place when using the oven. -
Page 16: Microwaving
Microwaving Using The Microwave Features Place food or microwavable container directly on the clear glass tray to cook your food. The turntable must always be in The clear glass tray should always place when using the oven. be in place when microwaving. MICROWAVE PRESET SELECTIONS: Beverage Melt... -
Page 17: Defrost By Time
Microwaving (Cont.) Microwave Power Level(s) program. High 10 1. Press the selector dial to edit Med-High 7: casseroles and reheating. selector dial to enter. Medium 5: less tender cuts of meat. counterclockwise to decrease the power level. Press the selector dial to enter. Low 2 or 3: Warm 1: Defrost By Food Type... -
Page 18: Defrosting Tips
Microwaving (Cont.) Defrost By Weight time. defrosting. 1. Press the Microwave pad and select defrost. selector dial to enter. Power level cannot be changed during this setting. Press the selector dial to enter. frozen food. 1. Press the Microwave Power level cannot be changed during this setting. defrost. - Page 19 Microwaving (Cont.) Microwave Sensor Cooking the cooking time to various types and amounts of food. Covered on the same food portion— it may result in severely overcooked or burnt food. If food is undercooked after cooking time. The proper containers and covers are essential for best sensor cooking.
-
Page 20: Cooking Modes
Cooking Modes than the oven it is replacing. Baking and Roasting Modes Broiling Modes baked goods such as cakes, cookies, and pastries always placing food closer to the broil element increases smoking, food placement. If no guidelines are provided, center food spattering, and the possibility of fats igniting. -
Page 21: Sabbath Mode
Sabbath Mode To Enter Sabbath Mode Timed Cook Feature In Sabbath Mode Press the lower oven Options pad and turn the selector cook feature on its own. If there is a desire to run a Settings upper oven features running will exit, and the lower oven Light To Change Temperature Bake... -
Page 22: Cooking Guide
Cooking Guide RECOMMENDED RECOMMENDED FOOD TYPE MODE(S) ADDITIONAL SUGGESTIONS Baked Goods cakes, muffins, quick breads on 2 and 4 equate airflow (see illustration below). 2 and 4 1, 3 and 5 Beef & Pork center food below the broil heating element. broil heating element. -
Page 23: Racks
Racks positions for various types of foods are provided in the darker tops on cakes, muffins, or cookies, try moving The oven food one rack position higher. If you find foods are too has 6 rack positions brown on top try moving them down next time. sufficient space for air to flow. -
Page 24: Aluminum Foil And Oven Liners
Racks (Cont.) Traditional Flat Racks Flat Rack the supports they will stop before coming completely out pull the rack out until it stops. To Remove a Rack Pull it toward you, tilt the front end up and pull it out. To Replace a Rack Locating Post... -
Page 25: Cleaning The Oven
Cleaning The Oven Helpful Hints room temperature and not in direct sunlight. we recommend against using cleaners with ammonia If stain on the door vent trim is persistent, use a mild or alcohol, as they can damage the appearance of abrasive cleaner and a sponge-scrubber for best results. - Page 26 Cleaning The Oven (Cont.) How To Clean The Upper Oven Interior (Cont.) Cooking Trays And Baking Sheet in the dishwasher. Clear glass tray for microwaving be used to clean the trays. Put food on the wire oven rack, and place them on the glass tray, when baking on two levels.
-
Page 27: Lower Oven Racks
Lower Oven Racks enameled racks, not shiny) may remain in the oven during the self-cleaning cycle without being damaged. sure not to wash the rack slides on an extension rack. If racks become more difficult to remove from the oven, put some vegetable oil on a soft cloth or paper towel and an extension rack slide. -
Page 28: Lower Oven Maintenance
Lower Oven Maintenance Lower Oven Light Replacement SHOCK OR BURN HAZARD: WARNING electric shock or burn. BURN HAZARD: CAUTION glass with bare hands or a damp cloth can cause burns. panel. bulb straight out until the two prongs have cleared the ceramic holder. -
Page 29: Troubleshooting Tips
Troubleshooting tips ... Before you call for service Save time and money! Review the charts on the following pages first and you may not need to call for service. Problem Possible Cause What To Do Fan continues to run after The oven is cooling. - Page 30 Troubleshooting tips ... Before you call for service Problem Possible Cause What To Do OTHER PROBLEMS The door and inside of The heat lamps produce intense heat the oven feels hot in a small space. when ready. Oven will not start A fuse in your home may be blown or the circuit breaker tripped.
- Page 31 Troubleshooting tips ... Before you call for service Problem Possible Cause What To Do My new oven doesn't Your new oven has a different cooking cook like my old one. system from your old oven and and temperatures carefully. If you still think your Is something wrong therefore may cook differently than your new oven is too hot or too cold, you can adjust the...
- Page 32 Troubleshooting tips ... Before you call for service Problem Possible Cause What To Do Oven light does not Light bulb is loose or defective. work Pad operating light is broken. Oven will not self- The temperature is too high to set a clean self-clean operation.
- Page 33 Garantía ......9 Horno de Pared Doble PT7800 de 30” Asistencia / Accesorios ..10 Uso del Horno Controles del Horno .
- Page 34 INFORMACIÓN IMPORTANTE DE SEGURIDAD LEA TODAS LAS INSTRUCCIONES ANTES DE USAR PRECAUCIONES PARA EVITAR LA POSIBLE EXPOSICIÓN A ENERGÍA DE MICROONDAS EXCESIVA (a) No intente hacer funcionar el horno con la (c) No haga funcionar el horno si se encuentra compuerta abierta ya que ésto puede provocar dañado.
- Page 35 INSTRUCCIONES GENERALES DE SEGURIDAD ADVERTENCIA suministro eléctrico a nivel del fusible o del panel contenedores sellados (por ejemplo, frascos sellados) son de interruptores de su hogar. Puede propagar el propensos a explotar y no deben calentarse en este horno. fuego si abre la compuerta del microondas. Tal uso del horno puede resultar en lesiones personales.
- Page 36 INFORMACIÓN IMPORTANTE DE SEGURIDAD LEA TODAS LAS INSTRUCCIONES ANTES DE USAR AVISO: MARCAPASOS ADVERTENCIA los pacientes que tengan marcapasos deberían protegidos contra la interferencia de productos consultar a sus médicos si tienen alguna duda. electrónicos, incluyendo los microondas. Sin embargo, ARQUEO VOLTAICO ADVERTENCIA Se pueden producir arqueos voltaicos al cocinar con microondas.
- Page 37 Utensilios de uso seguro en el horno para las funciones Baking (Hornear), ADVERTENCIA Warming (Calentar) y Proofing (Leudar) El horno y la puerta alcanzarán una temperatura muy alta al hornear, calentar o leudar. Los recipientes de cocina se tornarán muy calientes.
- Page 38 INFORMACIÓN IMPORTANTE DE SEGURIDAD LEA TODAS LAS INSTRUCCIONES ANTES DE USAR ADVERTENCIA Recipientes de cocina seguros diseñados para microondas Asegúrese de utilizar recipientes de cocina adecuados durante la cocción a microondas. Se pueden utilizar la mayoría para microondas. durante la cocción en microondas puede producir resultados insatisfactorios.
- Page 39 ADVERTENCIA descargas eléctricas, lesiones graves o la muerte. ADVERTENCIA DE LA PROPOSICIÓN 65 DEL ESTADO DE CALIFORNIA adviertan a sus clientes sobre la posible exposición a tales sustancias. ADVERTENCIA una ventana abierta o si se usa un ventilador o campana. INSTRUCCIONES GENERALES DE SEGURIDAD ADVERTENCIA Use este electrodoméstico sólo para su propósito...
- Page 40 INFORMACIÓN IMPORTANTE DE SEGURIDAD LEA TODAS LAS INSTRUCCIONES ANTES DE USAR MANTENGA LOS MATERIALES INFLAMABLES ALEJADOS DE LA COCINA ADVERTENCIA Si esto no se cumple, se podrán sufrir lesiones personales graves o incendios. No guarde ni use materiales inflamables en o cerca calientes, ocasionando quemaduras graves.
-
Page 41: Garantía
¡Gracias! ... por su compra de un electrodoméstico de la Marca GE Registre su Electrodoméstico: ¡Registre su electrodoméstico nuevo a través de Internet, según su conveniencia! www.geappliances.com/service_and_support/register/ garantía, en caso de surgir la necesidad. También puede enviar una carta en la tarjeta de inscripción pre-impresa que se incluye con el material embalado. - Page 42 Accesorios ¿Busca Algo Más? ¡GE ofrece una variedad de accesorios para mejorar sus experiencias de cocción y mantenimiento! Para realizar una orden, visítenos a través de Internet en: www.GEApplianceParts.com (EE.UU.) o en www.GEAppliances.ca o llame al 800.626.2002 (EE.UU.) 800.661.1616...
-
Page 43: Controles Del Horno
Controles del Horno Controles del Controles del Horno Inferior Horno Superior Controles Comunes Controles Comunes Defrost (Descongelar): Presione la tecla Defrost (Descongelar) para descongelar, gire el dial para seleccionar el tipo de descongelación Timer On/Off (Temporizador Encendido/ Apagado): y presione el dial para hacer la selección. El tipo de descongelación Funciona como un temporizador con cuenta regresiva: Presione la tecla Timer On/Off (Temporizador Encendido/ Apagado), seleccione el tipo de temporizador (horas y minutos o minutos y segundos), use el dial de... -
Page 44: Configuraciones Del Horno
Configuraciones del Horno Ayuda Clock Settings (Configuraciones del Reloj) Use esta función para configurar la hora del día y para especificar funciones, presionando la tecla Settings (Configuraciones) y seleccionando Help (Ayuda) 12 horas (12 hrs.) o el reloj militar de 24 horas (24 hrs.). El reloj Display Mode (Modo de Pantalla) NOTA: Es posible que su horno no cuente con todas las Use esta función para configurar el modo de pantalla Power... -
Page 45: Opciones Del Horno
Opciones del Horno Opciones del Horno Superior Repeat Last (Repetir el Último Paso) Proof (Leudar) Esta función sólo puede ser usada con los modos de cocción del horno superior. Use esta función de ahorro de tiempo para aquellas cocciones que se repiten, tales como galletas o Warm (Calentar) comida preconfigurada. -
Page 46: Horneado
Horneado Horneado la misma forma que un horno convencional, utilizando un elemento de calentamiento para incrementar la temperatura del aire dentro del horno. Se puede ajustar cualquier temperatura La base giratoria siempre debe Coloque la comida o el utensilio de de horno de 250 a 450°... -
Page 47: Calentar Y Leudar
Calentar y Leudar Calentamiento Para hacer que los alimentos secos estén crujientes: cocinados a una temperatura de servir. Empiece siempre con comida caliente. Utilice recipientes de cocina y utensilios que puedan soportar temperaturas de hasta 230° F. tiempo según sea necesario. Presione la tecla Cooking Options (Opciones de Cocción). -
Page 48: Cocción Con Microondas
Cocción con Microondas Cómo Utilizar las Funciones de Microondas Asegúrese de que la base giratoria y la bandeja de vidrio transparente se encuentran colocadas. Coloque los alimentos o recipiente para microondas directamente en la bandeja de vidrio transparente para cocinar sus alimentos. La base giratoria siempre debe La bandeja de cristal transparente estar colocada en su lugar... - Page 49 Cocción con Microondas (Continúa) Nivel(es) De Potencia Del Horno Microondas Aquí se presentan algunos ejemplos de utilizaciones para varios parte del programa de cocción. niveles de potencia: Presione el dial de selección para editar. High (Alto) 10: Pescado, tocino, verduras, líquidos hirvientes. Med (Medio) - High (Alto) 7: Cocción moderada de carne de el dial de selección para ingresar.
- Page 50 Cocción con Microondas (Continúa) Defrost By Weight (Descongelar por Peso) Presione el dial de selección o la tecla Start/Pause (Iniciar/ descongelar durante un período de tiempo seleccionado. Pausar) para iniciar la descongelación. Presione la tecla Microwave (Cocinar con Microondas) y El nivel de potencia no puede ser modificado durante esta por Peso).
- Page 51 Cocción con Microondas (Continúa) Cocción De Microondas Por Sensor humedad que se convierten en vapor pueden dar lecturas durante la cocción. El horno ajusta el tiempo de cocción incorrectas al sensor. No utilice las funciones de sensor dos veces en sucesión en la misma porción de comida ya que puede tener como resultado comida severamente sobrecocinada o quemada.
-
Page 52: Modos De Cocción
Modos de Cocción Su nuevo horno posee una variedad de modos de cocción para que pueda obtener los mejores resultados. Estos modos se describen a Modos de Horneado y Dorado Modo para Asar Seleccione un modo para hornear y dorar basado en el tipo y Siempre ase con la puerta cerrada. -
Page 53: Modo Sabático
Modo Sabático Para Ingresar a Sabbath Mode (Modo Sabático) NOTA: No presione ninguna otra tecla durante este momento, Presione la tecla Options (Opciones) del horno inferior y gire pantalla por omisión. Función de Cocción por Tiempo en el Modo Sabático para continuar. -
Page 54: Guía De Cocción
Guía de Cocción MODO(S) RECOMEN- POSICIÓN(ES) DE ESTANTES TIPO DE COMIDA DADO(S) RECOMENDADA SUGERENCIAS ADICIONALES Productos Horneados Tortas con capas, tortas rectan- gulares, roscas, panecillos, pan Use utensilios brillantes. 2 y 4 Asegúrese de que haya un flujo de aire adecuado (Vea la Estantes ilustración). -
Page 55: Estantes
Estantes de Cocción, se brindan recomendaciones de posiciones de los estantes para diferentes tipos de comidas. Se ajusta un estante en una dirección para afectar los resultados de El horno tiene 6 posiciones oscuras en tartas, panecillos o galletas, pruebe moviendo de estantes la próxima vez. -
Page 56: Papel De Aluminio Y Cobertores Del Horno
Estantes (Continúa) Estantes Planos Tradicionales Estante plano utensilios de cocina, empuje la parrilla hasta que se detenga. Para Retirar un Estante Empuje el mismo hacia usted, incline el frente hacia arriba y empuje hacia afuera. Enlace de Para Reemplazar un Estante ubicación Bloqueador Incline el frente del estante hacia arriba, cuelgue la parte... -
Page 57: Limpieza Del Horno
Limpieza del Horno Asegúrese de que la corriente eléctrica esté apagada y que todas las superficies estén frías antes de limpiar cualquier parte del horno. Consejos Útiles Una limpieza minuciosa ocasional con un trapo empapado una solución de vinagre y agua. Enjuague con agua limpia y seque con una tela seca. - Page 58 Limpieza del Horno (Continúa) How To Clean The Upper Oven Interior (Continúa) Bandejas Para Cocinar Y Lámina De Hornear Para evitar que se rompan las bandejas, deje que se enfríen Bandeja de vidrio transparente abrasivos, ya que pueden dañar el acabado. Se puede utilizar para la función de microondas una esponjilla cubierta de jabón para limpiar las bandejas.
-
Page 59: Estantes Del Horno Inferior
Estantes del Horno Inferior oscuros esmaltados, no brillantes) pueden permanecer en el Para limpiar los estantes de forma manual, use agua caliente y jabón. Asegúrese de no lavar el espacio de deslizamiento de un estante extensible. Si resulta difícil retirar los estantes del horno, coloque un poco de aceite vegetal en una tela seca o toalla de papel y frote sobre los soportes de los estantes del horno. -
Page 60: Mantenimiento Del Horno Inferior
Mantenimiento del Horno Inferior Reemplazo de la Lámpara del Horno Inferior PELIGRO DE DESCARGA O QUEMADURAS: ADVERTENCIA del horno, desconecte la conexión eléctrica del horno del fusible principal o del panel del RIESGO DE INCENDIO: PRECAUCIÓN estén frías. Tocar el vidrio caliente sin protección en las manos o con un trapo húmedo puede ocasionar quemaduras. -
Page 61: Consejos Para La Solución De Problemas
Consejos para la Solución de Problemas... Antes de solicitar el servicio técnico ¡Ahorre tiempo y dinero! Primero revise los cuadros que aparecen en las siguientes páginas y es posible que no necesite solicitar reparaciones. Problema Causa Posible Qué Hacer VENTILADOR El ventilador continúa El horno se está... - Page 62 Consejos para la Solución de Problemas... Antes de solicitar el servicio técnico Problema Causa Posible Qué Hacer OTROS PROBLEMAS La compuerta y el interior del Las lámparas térmicas producen calor intenso Esto es normal. Use guantes térmicos de cocina horno se sienten calientes en un espacio reducido.
- Page 63 Consejos para la Solución de Problemas... Antes de solicitar el servicio técnico Problema Causa Posible Qué Hacer Mi horno nuevo no Su horno nuevo cuenta con un sistema de cocción En los primeros usos, use los tiempos y cocina como el anterior. diferente con relación al anterior y, por lo tanto, es temperaturas de su receta con cuidado.
- Page 64 Consejos para la Solución de Problemas... Antes de solicitar el servicio técnico Problema Causa Posible Qué Hacer La luz del horno no funciona La lámpara está floja o presenta defectos. La luz de funcionamiento del interruptor está rota. El modo de limpieza La temperatura del horno es demasiado Espere a que el horno se enfríe y reinicie los controles.
Need help?
Do you have a question about the PT7800 and is the answer not in the manual?
Questions and answers