
Subscribe to Our Youtube Channel
Related Manuals for NESTOR MARTIN WOODBOX S13 WOODBOX S23


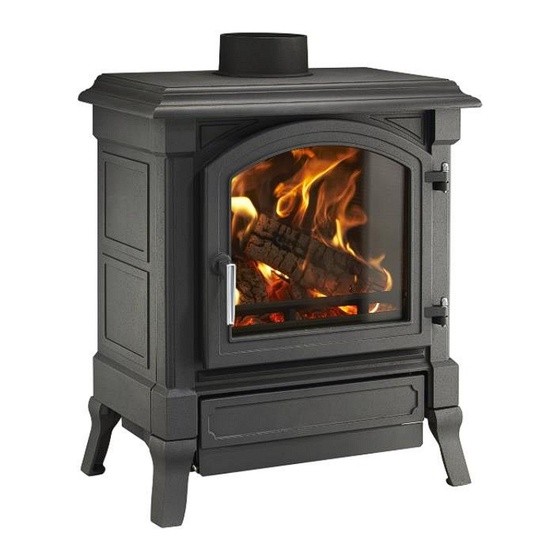
Summary of Contents for NESTOR MARTIN WOODBOX S13 WOODBOX S23
- Page 1 ® WOODBOX TECHNOLOGY S - H INSTALLATION, USE AND MAINTENANCE INSTRUCTIONS. INSTRUCCIONES PARA INSTALACIÓN, USO Y MANTENIMIENTO...
-
Page 3: About These Instructions
ABOUT THESE INSTRUCTIONS WARNINGS These instructions cover the Nestor Marntin range of Due to the high operating temperatures of this Harmony (H) and Stanford (S) Woodbox® stoves and appliance it should be located away from pedestrian the Catalytic Hybrid Woodbox variant. traffic and away from furniture and draperies.Mats and rugs put in front of the stove should be fire proof and It offers installation and operation information for the... -
Page 4: Installation
removed), and then for integrity of the stainless steel 1. INTRODUCTION liner. Look for obvious bulges in the lining which may IMPORTANT! All local regulations, including those indicate the need to replace that section (use a bright that refer to national or European regulations, must flashlight). - Page 5 the chimney, which are protected if possible Cowl against rust (enamelled steel, aluminized steel, Liner to top of stainless steel, …) termination and Choose the most vertical route possible. insulated Flue liner Do not connect several devices to the same Flue liner support collar chimney.
-
Page 6: The Woodbox® Combustion System
goes into the fireplace chimney. The liner of the fireplace chimney should extend at least to the point at which the chimney connector enters the chimney. Follow all the guidelines for installing a chimney connector into a freestanding masonry chimney, and pay special attention to these additional points: Double check the connector clearance from the ceiling: 18”... - Page 7 Balanced, equal distribution Vermiculite preheated air to baffle all regions of the firebox. Grate Log guard Combustion air is preheated, then delivered to the fire above the grate and down the glass The air can also enter the stove directly under the grate, for lighting or for use with Grate riddling arm coal.
- Page 8 By-pass Catalyst Fig. 8 By-pass close Fig. 9. By-pass open Fig. 10. Optional stove starter section with draught control 3.3. USING THE AIR CONTROL. Your stove will have one of these control panels, allowing you to adjust both: the volume, by rotating the round knob, and the direction from which air enters the stove, by moving the lever vertically up or down.
- Page 9 Low operation At low setting, the flap is barely open as to reduce the intake of air Normal operation At normal setting, the flap is about half-way open Lighting Generally, setting "3" or “6” is only used for lighting Rotation Stop Button Rotation Stop To enable the Air Volume Control knob to be rotated to the...
- Page 10 Smokeless Air Wash Lighting Wood Minimum Maximum (*) Coal 3.3.3. Examples of air settings (*) On certain models, press the rotation stop button inwards to enable the maximum burn rate to be achieved. Fig. 11. Lighting and reloading Fig. 12. Air wash. 3.3.4.
- Page 11 3.3.5. Remote Control (optional) This stove has the option of remote control. Fitting the remote control motor: At the rear of the appliance you will see the motor fitting bracket. This incorporates a magnet and the mechanism friction plate. The friction plate is hinged. To fit the motor, this friction plate needs to be detached from the magnet and swing to the left.
-
Page 12: Re-Loading The Stove
If your model has a blind grate, remove it, lift the grate from the bottom of the fire chamber. By-pass Under the grate is the blind grate. By-pass close Catalyst Fig. 18 Fig. 19 If you also have an optional draft control (fig. 10), fitted in the flue above the stove, place the valve Grate open. -
Page 13: Ash Removal
The Burn Rate Knob allows you to adjust the size of the the ash pan. Use gloves and hold the ash pan on both intake opening, and therefore the tempo of the fire. sides. Turning the knob to the left increases air intake, resulting in higher flames and a cleaner burn;... - Page 14 this heater. Keep all such liquids well away from the operator will soon become acquainted with the heater while it is in use. optimum settinng for the maximum heat production from their stove without the use of any surface or flue 3.9.
- Page 15 Safety distances S/H-13 models Safety distances S/H-23 models Safety distances S/H-33 models Safety distances S/H-43 models Fig. 22 Do not overload the stove. If any part of the stove or This will cause temperatures to rise dangerously, which chimney begins to glow or change color, it means that can cause nearby combustible materials to ignite.
-
Page 16: Cleaning And Maintenance
CAUTION: NEVER OPERATE YOUR STOVE WITH 5. CLEANING & MAINTENANCE BROKEN GLASS. WARNING: DO NOT CLEAN STOVE WHILE HOT. Replacement of the glass: Always keep the area around the unit clean and clear of furniture and other objects. Keep all furniture and 1. - Page 17 Brass fittings immediately. Remove all internal parts to expose any Any proprietary brass cleaner may be used to clean the remaining ash and cinders and remove, close all the brass on the stove, but care must be taken to ensure stove doors.
-
Page 18: Product Recycling
If extra cleaning is needed, follow the guidelines below: You may use compressed air under 2,5 bar (35 psi). Air only, no chemicals. You may soak the catalysts in a hot water mix (not boiling), 4 parts water, 1 part vinegar. Rinse with cold water until vinegar smell is mostly gone. -
Page 19: Instalación
La chimenea debe estar diseñada y fabricada para 1. INTRODUCCIÓN lograr la fluidez de evacuación (Tiro) suficiente que ¡IMPORTANTE! Todas las reglamentaciones locales, garantice la completa evacución de todos los gases que incluidas las que hagan referencia a normas se generan en la cámara de combustión de la estufa nacionales o europeas, ha de cumplirse cuando instale hacia el exterior de la vivienda. - Page 20 NUNCA CONECTE LA ESTUFA A UNA CHIMENEA QUE Las paredes internas debe de estar lisas y libres ESTÉ SIÉNDO UTILIZADA POR OTRO APARATO. de obstáculos. En las uniones de tubos con chimeneas de obra, evitar los estrangulamientos. Es importante que las uniones de los tubos estén selladas para evitar la entrada de aire a la chimenea.
- Page 21 En este tipo de instalación, la chimenea de chapa sube verticalmente desde la estufa y después gira 45º, Poste pared avanzando horizontalmente hasta conectar con la Conector de chimenea de obra (Fig. 4). El revestimiento de la chimenea chimenea de obra debe llegar, como mínimo, hasta dónde se conecta la chimenea de chapa.
- Page 22 Deflector de vermiculita Igual distribución aire precalentado Parrilla todas las partes de la cámara de combustión El aire se precalienta, después entra por la Morillo parte superior cámara de combustión y baja por el cristal, hasta la leña. El aire puede entrar directamente a la cámara de combustión por su Mando para agitar la parte inferior, a través de la parrilla,...
- Page 23 By-pass Catalizador Fig. 8 By-pass cerrado 9. By-pass abierto Fig. 10. Regulador de tiro opcional. 3.3. FUNCIONAMIENTO DEL CONTROL DE AIRE. Su estufa, en función del modelo que haya adquirido, dispondrá de uno de estos paneles de control, que le permitirán ajustar el volumen de aire, girando el botón de regulación, y la dirección por donde entrará...
- Page 24 Botón para el control de la combustión. Controla la cantidad de aire que entra en la estufa. Le permite controlar el tiempo del fuego. Cuándo gira el botón de regulación en sentido contrario al de las agujas del reloj, progresivamente se abrirá...
- Page 25 3.3.1. Tipos de combustión 3.3.2. Volumen entrada aire Posición Posición Posición Limpieza de para el para para Mínimo Máximo (*) cristal “encendido” “Madera” “Carbón” 3.3.3. Ejemplos de configuraciones del control de aire (*) En algunos modelos, para permitir la entrada de aire máxima, presione el botón bloqueo...
- Page 26 3.3.5. Mando a distancia (opcional) Esta estufa tiene la opción de mando a distancia. Para operar con el mando a distancia, siga las instrucciones del mismo. En la parte trasera de la estufa verá la pieza de fijación. Ésta incorpora un imán y un mecanismo de fricción. La placa de fricción es articulada.
- Page 27 “ON/HI” del mando a distancia (opcional). Protega sus manos para dicha manipulación. (Configuración fig. 11) También, si dispone de la regulación de tiro, Si su estufa dispone de sistema Catalytic Hybrid puede regular la combustión accionando el Woodbox, debe abrir el bypass situado en el mando.
- Page 28 puerta plenamente y ponga las brasas en la parte Para limpiar las cenizas del hogar puede utilizar el delantera, extendiéndolas uniformemente. Si hay gancho que se suministra con la estufa. Además, la troncos a medio quemar, posiciónelos en la parte estufa dispone de un agitador para permitir que la delantera de la estufa.
- Page 29 Ésta estufa ha sido fabricada y certificada para trabajar Temperatura de los gases de combustión únicamente con leña. No queme tableros de madera o El aspecto más importante del funcionamiento de una madera prensada ya que esto podría dañar seriamente estufa, es el mantener una temperatura alta durante la la estufa.
- Page 30 La estufa debe ser revisada antes de usarla, así como la Fuegos desatendidos chimenea limpiada como mínimo una vez al año. Muchos incendios han sucedido por tener una estufa Deberá hacer ésta operación más a menudo si la estufa encendida, desatendida durante un largo periodo de no se enciende habitualmente, la instalación es pobre tiempo.
-
Page 31: Limpieza Y Mantenimiento
Procedimiento a seguir en caso de incendio en una contacte con el distribuidor o el servicio técnico para chimenea que la sustituya. Evacue el edificio para asegurar la seguridad de Cristal las personas y animales. Tenga un plan de evacuación Su estufa dispone de un cristal cerámico de 4 mm de preparado con anterioridad. - Page 32 Para ajustar el mando de cierre de la puerta: en los mismos y de ésta manera la experiencia le 1. Afloje la tuerca de bloqueo. indicará con cuánta frecuencia deben limpiarse. 2. Ajuste el tornillo hacia dentro o hacia fuera según CUANDO LA TEMPORADA FINALIZA le convenga.
-
Page 33: Reciclaje Del Producto
Por ello, los catalizadores deben inspeccionarse 6 - RECICLAJE DEL PRODUCTO visualmente al menos tres veces durante la temporada Su aparato se entrega embalado con plástico y una caja de uso para determinar si se ha producido alguna de cartón sobre un palet de madera. Puede utilizar el degradación física u obstrucción. - Page 34 7. DIMENSIONS / AFMETINGEN / MEASURES / DIMENSIONI / DIMENSIONES Model B (int.)
- Page 35 8. DONNÉES TECH - TECHNISCHE GEGEVENS -DATI TECNICI - TECH SPEC. - DATOS TÉCNICOS Puissance nominale / Nominale kracht / Potenza nominalle / Nominal power / Potencia nominal (kW) Température des gaz moyenne / Gemiddelde temperatuur van de gassen / Temperatura media gas / Average smoke temperature / Temperatura media de los gases (°C) Émissions CO / CO uitstoten / Emissioni CO / CO emissions / Emisiones CO (13% O2 - 0,01...
- Page 36 8. DONNÉES TECH - TECHNISCHE GEGEVENS -DATI TECNICI - TECH SPEC. - DATOS TÉCNICOS S33 EUR S33 JP S43 EUR S43 JP H33 EUR H33 JP H43 EUR H43 JP Puissance nominale / Nominale kracht / Potenza 6,2 (*) 9,23 10,5 nominalle / Nominal power / Potencia nominal (kW) 8,0 (*)
- Page 37 PERMUTATION BUSELOT DESSUS/ARRIERE OMBOUWEN VOOR BOVENAFVOER/ACHTERAFVOER - COLLEGAMENTO RACCORDO FUMI - INTERCHANGING THE TOP/BACK FLUE OUTLETS - PERMUTACIÓN SALIDA DE HUMOS...
- Page 38 10. INSTALLATION SYSTÈME CATALYTIC HYBRID WOODBOX / INSTALLATIE CATALYTIC HYBRID WOODBOX SYSTEEM / INSTALAZIONE SISTEMA CATALYTIC HYBRID WOODBOX / CATALYTIC HYBRID WOODBOX SYSTEM INSTALLATION / INSTALACIÓN SISTEMA CATALYTIC HYBRID WOODBOX S/H-13 – 23 (Sortie verticale / Verticale rookafvoer / Scarico fumi vertical / Vertical outlet / Salida vertical) S/H-13 S/H-23...
- Page 39 S/H-13 S/H-23...
- Page 40 10. INSTALLATION SYSTÈME CATALYTIC HYBRID WOODBOX / INSTALLATIE CATALYTIC HYBRID WOODBOX SYSTEEM / INSTALAZIONE SISTEMA CATALYTIC HYBRID WOODBOX / CATALYTIC HYBRID WOODBOX SYSTEM INSTALLATION / INSTALACIÓN SISTEMA CATALYTIC HYBRID WOODBOX S/H-13 – 23 (Sortie horizontal / Horizontaal rookafvoer / Scarico fumi orizzontale / Rear outlet / Salida horizontal) S/H-23 S/H-13 S/H-33 CT...
- Page 41 S/H-43...
- Page 44 11. INSTALLATION DU KIT OPTIONNEL POUR BARDAGE FONTE S/H-33 CT - INSTALLATIE VAN OPTIONELE KIT VOOR GIETIJZEREN BEKLEDING S/H-33 CT– INSTALLATION OF OPTIONAL KIT FOR CAST IRON CLADDING S/H-33 CT - INSTALAZIONE KIT OPTIONAL PER RIVESTIMENTO IN GHISA S/H- 33 CT - INSTALACIÓN KIT OPCIONAL REVESTIMIENTO HIERRO FUNDIDO S/H-33 CT (993900403)
- Page 48 SOTO DE LA MARINA - CANTABRIA Apdo. de correos 208 SANTANDER C07100DC595_7 ED: 02/2023...
Need help?
Do you have a question about the WOODBOX S13 WOODBOX S23 and is the answer not in the manual?
Questions and answers