
Related Manuals for Insignia NS-RGFCGS2


Summary of Contents for Insignia NS-RGFCGS2
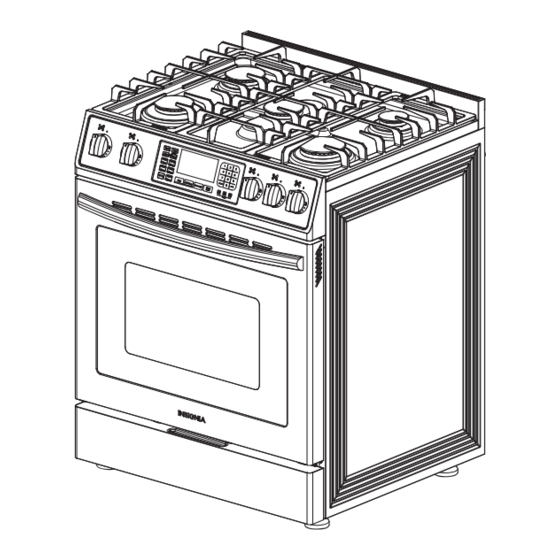
- Page 1 USER GUIDE 4.8 Cu. Ft. Gas Convection Range with Self Clean and Air Fry NS-RGFCGS2 Before using your new product, please read these instructions to prevent any damage.
-
Page 2: Table Of Contents
Contents Before you begin ..................3 IMPORTANT SAFETY INSTRUCTIONS . -
Page 3: Before You Begin
4.8 Cu. Ft. Gas Convection Range with Self Clean and Air Fry Manually lighting a burner ..................29 Selecting the flame size . - Page 4 Important note to the consumer • Keep your user manual for future reference. • As when using any appliance generating heat, there are certain safety precautions you should follow. • Be sure your range is installed and grounded properly by a qualified installer or service technician. •...
-
Page 5: Important Safety Instructions
4.8 Cu. Ft. Gas Convection Range with Self Clean and Air Fry IMPORTANT SAFETY INSTRUCTIONS WHAT TO DO IF YOU SMELL GAS WARNING If the information in this manual is not followed exactly, a fire or explosion may result causing property damages, personal injury or death. - Page 6 Never try to repair or replace this appliance on your own unless it is specifically recommended in this manual. This appliance should be serviced only by a qualified service technician. Know the location of the gas shut-off valve and how to shut it off if necessary. Properly remove or destroy the packaging materials after the appliance is unpacked.
- Page 7 4.8 Cu. Ft. Gas Convection Range with Self Clean and Air Fry DO NOT STORE OR USE combustible materials, gasoline, or other flammable vapors or liquids in the vicinity of this appliance. See WHAT TO DO IF YOU SMELL GAS on page 5. Do not pour water into the cooktop well while cleaning the cooktop.
-
Page 8: Electrical Warnings
IN THE COMMONWEALTH OF MASSACHUSETTS This product must be installed by a qualified plumber or gas fitter by the State of Massachusetts. When using ball-type gas shut-off valves, they shall be the T-handle type. Multiple flexible gas lines must not be connected in series. ELECTRICAL WARNINGS Comply with the following electrical instructions and requirements to avoid death, personal injury from electric shock, and/or property damage from fire:... -
Page 9: Installation Warnings
4.8 Cu. Ft. Gas Convection Range with Self Clean and Air Fry INSTALLATION WARNINGS Any adjustment and service should be performed only by qualified gas range installers or service technicians. Be sure your range is correctly installed and adjusted by a qualified service technician or installer for the type of gas (natural or LP) that is to be used. -
Page 10: Surface Burner Warnings
SURFACE BURNER WARNINGS Follow basic precautions when installing and using this range to reduce the risk of fire, electrical shock, injury, or death to persons, including: WARNING Use proper pan sizes. Avoid pans that are unstable or warped. Select cookware having flat bottoms large enough to cover the burner grates. -
Page 11: Oven Warnings
4.8 Cu. Ft. Gas Convection Range with Self Clean and Air Fry OVEN WARNINGS NEVER cover any holes or passages in the bottom oven cover. NEVER cover an entire oven rack with aluminum foil or like material. Covering bottom cover and/or racks blocks airflow through the oven and could cause carbon monoxide poisoning. -
Page 12: Features
Features Package contents • 4.8 Cu. Ft. Gas Convection Range with Self Clean and Air Fry • Anti-tip device (1) with ST5*40mm screws (4) • Oven handle (1) with Hex wrench (1) • Oven racks (2) • Air fryer basket (1) •... -
Page 13: Oven Control Panel
4.8 Cu. Ft. Gas Convection Range with Self Clean and Air Fry Oven control panel WARM Bake Broil High/Low ° Bake Roast ° Cook Delay Time Start Bake Broil Bake Roast Steam Clean Self Clean Air Fry Oven Keep AM / PM °F / °C Clean Warm... -
Page 14: Range Dimensions
TOUCHPAD DESCRIPTION... 14 Start Starts the oven cooking, cleaning, or timing functions. 15 Off / Clear Cancels all oven operations except the clock and timer. 16 Oven Light Turns the oven light on or off. 17 Timer On / Off Turns on the kitchen timer for the amount of time you want. - Page 15 4.8 Cu. Ft. Gas Convection Range with Self Clean and Air Fry Side 27 1/8 in. (68.9 cm) 23 3/4 in. (60.3 cm) www.insigniaproducts.com...
-
Page 16: Installing
Installing 4.8 Cu. Ft. Gas Convection Range with Self Clean and Air Fry Selecting a location ........17 Clearances and dimensions. -
Page 17: Selecting A Location
4.8 Cu. Ft. Gas Convection Range with Self Clean and Air Fry Selecting a location Clearances and dimensions BEFORE YOU BEGIN to install your range, refer to the following information, dimensions, and clearances. Don’t install your range where it may be subject to strong drafts. Provide adequate clearances between your range and adjacent combustible surfaces. -
Page 18: Locations For Gas Piping And Electrical Outlets
Locations for gas piping and electrical outlets BACK OF YOUR RANGE 4.5 in. (11.5 cm) 6.2 in. (15.7cm) Gas pipe connection Power cord and plug Gas requirements Your range is convertible for use with natural or propane (LP) gas. The factory default is natural gas. If you decide to use your range on LP gas, conversion must be made by a qualified LP installer before attempting to operate your range. -
Page 19: Installing Your Gas Range
4.8 Cu. Ft. Gas Convection Range with Self Clean and Air Fry • Ground Fault Circuit Interrupters (GFCIs) aren’t required or recommended for the gas range receptacles. • NEVER connect the ground wire to plastic plumbing lines, gas lines, or water pipes. Installing your gas range WARNING: We recommend that a professional installer install your range. -
Page 20: Optional: Converting To Lp Gas
6 When all connections have been made, make sure that all range controls are in the OFF positions, then turn on the main gas supply valve. 7 Use a liquid leak detector at all joints and connections to check for leaks. WARNING: Don’t use a flame to check for gas leaks. -
Page 21: Installing The Anti-Tip Device
4.8 Cu. Ft. Gas Convection Range with Self Clean and Air Fry Installing the anti-tip device WARNING: To reduce the risk of tipping, you must secure your range using the provided anti-tip device. • All ranges can tip, resulting in personal injury. •... -
Page 22: Leveling Your Range
Leveling your range Your range should be level. If your range isn’t level, the door may not close or seal correctly which can cause uneven heating and gas wastage problems. Notes: • To make it easier to adjust the feet, have someone push against the top of your range to tilt it slightly. •... -
Page 23: Assembling The Top Burners
4.8 Cu. Ft. Gas Convection Range with Self Clean and Air Fry 4 Position an oven rack in the center rack position. Check the level of your range with a carpenter level using the two positions. Oven racks 5 After your range is level, make sure that the rear leg is under the anti-tip device. See Installing the anti-tip device on page 21. -
Page 24: Installing The Burner Knobs
Installing the burner knobs Your range may have a “KD Knob + handle design” that you need to install. 1 Check all five knobs. 2 Push each knob in all the way to fully attach the shaft and make sure that each knob is easy to rotate. Installing the oven door handle You range may have a “KD handle”... -
Page 25: Installing The Plastic Pads
Installing the plastic pads To prevent your range from getting too close to the wall behind your range, install the included plastic pads. 1 Locate the plastic pad kit. It includes: Plastic pads (2) Screws (2) 2 Align the holes in the plastic pads with the holes on the top, back of your range, then secure the pads to your range with the provided screws. -
Page 26: Using
Using 4.8 Cu. Ft. Gas Convection Range with Self Clean and Air Fry Before you begin using your range......27 Tips for saving gas. -
Page 27: Before You Begin Using Your Range
4.8 Cu. Ft. Gas Convection Range with Self Clean and Air Fry Before you begin using your range WARNING: All electrical and gas equipment with moving parts can be dangerous. Make sure that you read and understand all safety information. See IMPORTANT SAFETY INSTRUCTIONS on page 5. Pay particular attention to SURFACE BURNER WARNINGS on page 10 and OVEN WARNINGS on page 11. -
Page 28: Using The Surface Burners
Using the surface burners WARNINGS: Before using the surface burners, make sure to follow all the safety warnings and precautions as listed. Failure to do so could result in product damage, personal injury, and/or death. When you want to move a pot or pan onto another burner, lift it up and place it on the other burner. Don’t slide a pot or pan from one burner to another. -
Page 29: Using The Correct Cookware
4.8 Cu. Ft. Gas Convection Range with Self Clean and Air Fry Using the correct cookware Using the correct cookware can prevent many problems, such as uneven cooking or extended cooking times. Using the correct pans reduces cooking times and cooks food more evenly. Look for the following pan characteristics: •... -
Page 30: Selecting The Flame Size
Selecting the flame size WARNING: Flames larger than the bottom of the cookware don’t result in faster heating, but could result in a fire hazard or personal injury. The flames on the burners should always stay under the cookware. The flames should never extend beyond the bottom surface or up the sides of the cookware. -
Page 31: Using The Oven Light
4.8 Cu. Ft. Gas Convection Range with Self Clean and Air Fry Using the oven light Press Oven Light to turn the light on or off. The oven light lets you check the cooking progress without opening the oven door. Oven light Positioning the oven racks You can remove and reposition the oven racks in any of the six rack positions. - Page 32 Removing an oven rack 1 Pull the rack straight out until it stops. 2 Lift up the front of the oven rack and pull to remove it from the oven. Replacing an oven rack 1 Place the back edge of the rack on the rack support. 2 Lift up the front of the rack and slide it into the oven.
-
Page 33: Tips For Baking
4.8 Cu. Ft. Gas Convection Range with Self Clean and Air Fry Baking layer cakes Note: Correct positioning of food items in the oven helps you achieve the best cooking results. • Centering the baking pans in the oven produces better cooking results. •... -
Page 34: Baking
Baking The Bake function lets you program the oven to bake to any temperature between 150° F (66° C) and 550° F (288° C). 1 Position the oven rack where you want it. 2 Press Bake. The display shows the default temperature 350° and the bake icon blinks. If the default temperature is the cooking temperature you want, skip to step 4. -
Page 35: Using Air Fry
4.8 Cu. Ft. Gas Convection Range with Self Clean and Air Fry Using Air Fry The Air Fry feature uses hot air for crispier and healthier frozen or fresh foods without any (or less than normal) oil compared to convection modes. The Air Fry feature works best for single rack baking with packaged and convenience foods. -
Page 36: Programming A Delayed Start Time
7 To change the programmed baking temperature, press Bake, enter the new baking temperature, then press Start. The oven completes cooking at the new temperature. 8 To change the cooking time, press Cook Time, enter the new cooking time, then press Start. The oven continues cooking for the remaining time you set. -
Page 37: Keeping Food Warm
4.8 Cu. Ft. Gas Convection Range with Self Clean and Air Fry Broiling guide This guide is for reference only. • This guide is based on meats at refrigerator temperature. • The size, weight, thickness, starting temperature, and your doneness preference affect broiling times. •... -
Page 38: Maintenance
Maintenance 4.8 Cu. Ft. Gas Convection Range with Self Clean and Air Fry Cleaning and maintaining ........39 Cleaning the control panel . -
Page 39: Cleaning And Maintaining
4.8 Cu. Ft. Gas Convection Range with Self Clean and Air Fry Cleaning and maintaining WARNINGS: • Always make sure that the controls are off and all surfaces are cool before removing or cleaning any of the range parts. This prevents you from getting burned. -
Page 40: Cleaning The Oven Door
4 To replace the rack, place the back edge of the rack on the rack support, then lift the front of the rack and slide it into the oven. If a rack becomes difficult to slide, rub the side rails with wax paper or a cloth containing a small amount of cooking oil. -
Page 41: Cleaning The Surface Burner Control Knobs
4.8 Cu. Ft. Gas Convection Range with Self Clean and Air Fry 3 Clean the outside door stainless steel surfaces by following the instructions in Cleaning stainless steel surfaces on page 39. 4 Clean the glass window with glass cleaner or warm, soapy water with a thorough rinse. Don’t let moisture get inside the door assembly. -
Page 42: Cleaning Surface Burner Grates And Assemblies
Cleaning surface burner grates and assemblies 1 Turn off all controls and make sure that all parts have cooled. 2 Lift up and remove the burner grates from the cooktop. Make note of the burner sizes and locations. 3 Lift up and remove the burner caps from the burner heads. 4 Lift up and remove the burner heads from the valve manifolds. - Page 43 4.8 Cu. Ft. Gas Convection Range with Self Clean and Air Fry 7 Set all burner heads on top of the manifold valves in the same locations you removed them from. The hole on the side of a burner head goes over the electrode. The burner heads are correctly installed when they are flat on the top of the manifold valves.
-
Page 44: Cleaning The Cooktop
9 Replace the burner grates on top of the range cooktop. 10 Push in and turn each surface burner control knob to the LITE position, let each burner light, then set each control knob back to a burner setting to make sure each burner operates correctly. Cleaning the cooktop The cooktop surface is a porcelain-enamel surface. -
Page 45: Removing And Replacing The Oven Door
4.8 Cu. Ft. Gas Convection Range with Self Clean and Air Fry Removing and replacing the oven door WARNINGS: • The oven door is heavy. Don’t lift the door by its handle. Be careful not to drop the door during removal. Incorrect handling could result in personal injury. - Page 46 3 Hold the door firmly on both sides. 4 Disconnect the hinges and remove the door gently with a 30° angle between the door and the oven. Place the door on a protected surface. www.insigniaproducts.com...
- Page 47 4.8 Cu. Ft. Gas Convection Range with Self Clean and Air Fry Replacing the door 1 Hold the door firmly in an almost half open position. Notch 2 Insert the hinge tongues into the slots making sure that the notches on both sides drop into place. 3 Open the door fully.
- Page 48 4 Fully close the levers on the left and right hinges, then close the door. www.insigniaproducts.com...
-
Page 49: Removing And Replacing The Storage Drawer
4.8 Cu. Ft. Gas Convection Range with Self Clean and Air Fry Removing and replacing the storage drawer The storage drawer is a good place to store cookware and bakeware. Don’t store plastics or flammable material in the drawer. Clean the storage drawer with a damp cloth or sponge. Never use harsh abrasives or scouring pads. 1 Slide the drawer open until it stops. -
Page 50: Steam Cleaning The Oven
8 After cleaning, leave the oven door ajar at a 15° angle to let the interior enamel surface dry thoroughly. Troubleshooting Cooktop If the solutions in this section don’t solve a problem, contact a qualified service technician or Insignia customer service. PROBLEM PROBABLE CAUSE... -
Page 51: Oven
Contact your installer to check the burner orifice burner flames size or LP gas conversion. Oven If the solutions in this section don’t solve a problem, contact a qualified service technician or Insignia customer service. PROBLEM PROBABLE CAUSE POSSIBLE SOLUTION... - Page 52 PROBLEM PROBABLE CAUSE POSSIBLE SOLUTION Food doesn’t broil correctly Oven controls aren’t set See Broiling on page 36. in the oven correctly. Oven door wasn’t closed Keep the oven door closed when broiling. during broiling. Oven temperature is too hot Oven thermostat needs See Adjusting the thermostat on page 34.
-
Page 53: Error Codes
4.8 Cu. Ft. Gas Convection Range with Self Clean and Air Fry Error codes ERROR CODE POSSIBLE CAUSE SOLUTION Oven temperature detection circuit Press Off/Clear, then restart the oven. If failure. the problem persists, disconnect all power to your range for at least 30 seconds, then After the oven starts to heat up, the reconnect the power. -
Page 54: Specifications
Specifications Dimensions (H × W × D) 38 1/8 to 39 1/8 × 2915/16 × 27 1/8 in. (96.8 to 99.4 × 75.9 × 68.9 cm) Gross Weight: 229.2 lbs. (104 kg) Weight Net Weight: 198.4 lbs. (90 kg) Power requirements 110 ~ 120V/60Hz Power cord length 5 ft. -
Page 55: One-Year Limited Warranty
During the Warranty Period, if the original manufacture of the material or workmanship of the Product is determined to be defective by an authorized Insignia repair center or store personnel, Insignia will (at its sole option): (1) repair the Product with new or rebuilt parts; or (2) replace the Product at no charge with new or rebuilt comparable products or parts. - Page 56 For product inquiries, please contact us with the information below: 1-877-467-4289 www.insigniaproducts.com INSIGNIA is a trademark of Best Buy and its affiliated companies. Distributed by Best Buy Purchasing, LLC 7601 Penn Ave South, Richfield, MN 55423 U.S.A. ©2022 Best Buy. All rights reserved.
Need help?
Do you have a question about the NS-RGFCGS2 and is the answer not in the manual?
Questions and answers
I am missing the burner caps and burner head pieces for the model NS-RGFCGS2. Do you have the actual part number for those?
The part number for the burner caps and burner head pieces for the Insignia model NS-RGFCGS2 is not provided in the given information.
This answer is automatically generated
Oven is not lighting. Can I light manually?