
Subscribe to Our Youtube Channel
Related Manuals for Insignia NS-RNG24SS9


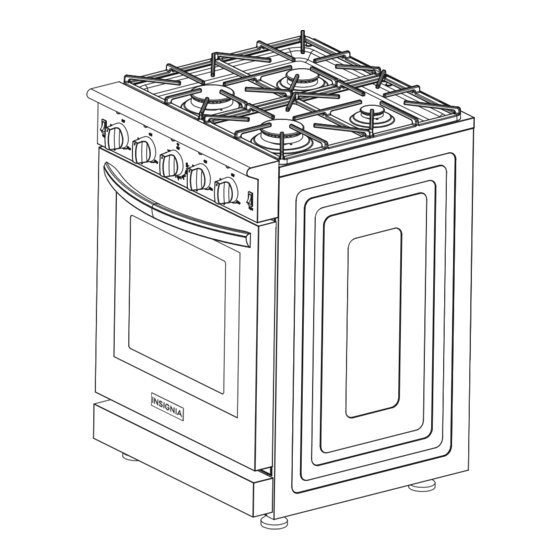
Summary of Contents for Insignia NS-RNG24SS9
- Page 1 USER GUIDE Final Trim Size: 8.268 x 11.22 in. (210 x 284 mm) 3.7 Cu. Ft. Free-Standing Gas Range for RVs NS-RNG24SS9 NS-RNG24SS9-C Before using your new product, please read these instructions to prevent any damage.
-
Page 2: Table Of Contents
Contents Introduction ..................3 IMPORTANT SAFETY INSTRUCTIONS . -
Page 3: Introduction
ONE-YEAR LIMITED WARRANTY ..............33 Introduction Congratulations on your purchase of a high-quality Insignia product. Your NS-RNG24SS9 represents the state of the art in RV range design and is designed for reliable and trouble-free performance. -
Page 4: General Safety Precautions
3.7 Cu. Ft. Free-Standing Gas Range for RVs WARNING Improper installation, adjustment, alteration, service or maintenance can cause injury or property damage. Refer to this manual. For assistance or additional information consult a qualified installer, service agency, manufacturer (dealer) or the gas supplier. -
Page 5: Installation Instructions
NS-RNG24SS9 A WARNING: SERIOUS HAZARDS ARE ASSOCIATED WITH REACHING INTO STORAGE CABINETS ABOVE THE RANGE WHEN THE TOP BURNERS AND/OR OVEN ARE IN OPERATION. Do not store items that are attractive to children above the range. Do not let clothing come into contact with top burners when range is in operation. -
Page 6: Features
3.7 Cu. Ft. Free-Standing Gas Range for RVs Features Note to reviewers: Please see the question in red in the Troubleshooting section. Package contents • 3.7 Cu. Ft. Free-Standing Gas Range for RV • Anti-tip device • Rubber pad kit •... -
Page 7: Range Dimensions
NS-RNG24SS9 Range dimensions Front 23.9" (60.7 cm) www.insigniaproducts.com... -
Page 8: Installing The Range
3.7 Cu. Ft. Free-Standing Gas Range for RVs Side 26.9" (68.3 cm) 24" (60.9 cm) .7" 21.7" (55.1 cm) (1.8 cm) 24.3" (61.7 cm) Installing the range IMPORTANT: We recommend that a professional installer install your range. If your range is not installed correctly, incorrect electrical grounding or gas leaks can cause a fire or explosion which can lead to injury or death. -
Page 9: Clearances And Dimensions
NS-RNG24SS9 Clearances and dimensions Use the dimensions shown below to install the range. The back and sides of the range below the cook top can be flush to combustible material. A minimum clearance of 5 in. (12.7 cm) horizontally and 18 in. (45.7 cm) vertically is required between the sides of the cooking surface and any combustible construction adjacent to the cooking surface. -
Page 10: Important Notes To The Installer
3.7 Cu. Ft. Free-Standing Gas Range for RVs Gas and electric location requirements 8.6" (21.8 cm) 2" (5.1 cm) Important notes to the installer: 1 Read this manual before installing the range. 2 Observe all governing codes and ordinances. 3 Make sure that you leave these instructions with the range. 4 Before installing the range in an area covered with linoleum or any synthetic floor covering, make sure that the floor covering can withstand temperatures at least 90°F (32°C) above room temperature without shrinking, warping, or discoloring. -
Page 11: Installing The Anti-Tip Device
NS-RNG24SS9 Installing the anti-tip device WARNING: • All ranges can tip and injure people. Install the anti-tip device that came with the range. • If you pull the range away from the wall for cleaning, service, or any other reason, make sure that the anti-tip device is correctly re-engaged when you push the range back against the wall. - Page 12 3.7 Cu. Ft. Free-Standing Gas Range for RVs 3 Align the rear feet with the notches on the rear brackets, then slide the range into place. Make sure that the rear feet are under the brackets. 4 Open the storage drawer, slide the notches on the front brackets over the front feet, then screw the brackets into the floor using two of the provided screws for each bracket.
- Page 13 NS-RNG24SS9 5 Close the drawer. www.insigniaproducts.com...
-
Page 14: Connecting To Gas
3.7 Cu. Ft. Free-Standing Gas Range for RVs Connecting to gas WARNING: If your range is not installed correctly, gas leaks can cause a fire or explosion which can lead to death or injury. We recommend that a professional installer connect the gas. CAUTION: Your range can use only LP gas. -
Page 15: Installing Rubber Pads To The Oven Back
NS-RNG24SS9 Installing rubber pads to the oven back To prevent the range from getting too close to the wall behind the range, install the included rubber pads. 1 Locate the rubber pad kit. It includes: Screws Rubber pads 2 Align the holes in the rubber pads with the holes on the top, back of the range, then secure the pads to the range with the provided screws. -
Page 16: Connecting To Power
3.7 Cu. Ft. Free-Standing Gas Range for RVs Connecting to power DANGER: Risk of electric shock, short circuit, or fire if the power cord is damaged. The power cord must not be clamped, bent, or trapped or come into contact with hot parts of the range. If the power cord is damaged, it must be replaced by a qualified electrician. -
Page 17: Testing Top Burners
NS-RNG24SS9 Testing top burners 1 Test the burner ignition. Push in on a burner knob, then turn it counter-clockwise to the flame symbol. The igniter/spark module produces a clicking sound. After the air has been purged from the supply lines, the burner should light within six seconds. -
Page 18: Using The Cook Top Burners
3.7 Cu. Ft. Free-Standing Gas Range for RVs Using the cook top burners WARNING: Overheated oil can catch on fire. When you are heating oil, do not leave it unattended. If oil overheats, it may catch on fire. If oil catches on fire, do not try to extinguish the fire with water. -
Page 19: Turning On A Burner
NS-RNG24SS9 The size of a pot or pan and the burner flame must match each other. Adjust the flame so that it does not extend beyond the bottom of the pot or pan, and center the pot or pan over the burner. -
Page 20: Tips For Roasting
3.7 Cu. Ft. Free-Standing Gas Range for RVs Tips for roasting • Seasoning with lemon juice and black pepper helps improve the cooking performance when roasting a whole chicken or turkey or any large piece of meat. • Meat with bones takes about 25 to 35 minutes longer to cook than a roast of the same size without bones. •... -
Page 21: Oven Control Knob
NS-RNG24SS9 Oven control knob Turning on the oven WARNING: Do not try to light the oven with a match or lighter. 1 Close the oven door. 2 While pressing in on the oven control knob, turn it counter-clockwise to the large flame symbol. Your range generates an ignition spark and ignites the gas. -
Page 22: Adjusting The Oven Rack
3.7 Cu. Ft. Free-Standing Gas Range for RVs Adjusting the oven rack The maximum load for an oven rack is Note: 22 lbs (10 kg). In the last review, we were told to change 8.8 lbs (4 kg) to 22 lbs (10 kg). The new source PDF shows 8.8 lbs (4 kg). Please verify which is correct. -
Page 23: Cleaning And Maintenance
NS-RNG24SS9 Cleaning and maintenance Removing the cook top grate • Use both hands, one on each side of the grate, or one hand in the middle of the grate to pull the grate straight up and off the cook top. -
Page 24: Removing The Storage Drawer
3.7 Cu. Ft. Free-Standing Gas Range for RVs Removing the storage drawer 1 At the same time, press down on the clip on the left side of the storage drawer and up on the clip on the right side of the storage drawer. - Page 25 NS-RNG24SS9 2 While holding the clips, pull the drawer until it separates from the groove on the guide rail, then remove the drawer. 3 To replace the drawer, align it with the rails, press down on the clip on the left side of the drawer and up on the right side of the drawer, then slide the drawer back into your range.
-
Page 26: Disassembling Range Parts
3.7 Cu. Ft. Free-Standing Gas Range for RVs Disassembling range parts CAUTION: To avoid potential damage or injury, these disassemble tasks should only be done by a qualified technician. Disassembling the cook top burners 1 Remove the grate. See Removing the cook top grate on page 24. 2 Use a Phillips screwdriver to remove the two screws on a burner cap, then remove the cap and outer burner head. -
Page 27: Accessing The Pilot Light And Oven Burner
NS-RNG24SS9 Accessing the pilot light and oven burner Note: The illustrations shown in this section are for reference only. The actual product may differ slightly. 1 Open the oven door. 2 Remove the racks from the oven. To remove a rack, pull the rack toward you until it reaches the stop position, then tilt the front edge of the rack up and pull the rack completely out. - Page 28 3.7 Cu. Ft. Free-Standing Gas Range for RVs 3 Use a Phillips screwdriver to remove the two screws on the panel on the bottom of the oven, then remove the panel. 4 Remove the two screws from the pilot lamp and the single screw on the tube burner, then lift the lamp and burner up and out of the oven.
-
Page 29: Removing And Reinstalling The Oven Door
NS-RNG24SS9 Removing and reinstalling the oven door To remove the oven door: 1 Open the oven door to a 90° angle, then fully open the levers on each side. 2 Gently close the door about halfway to disengage the hinges, then pull out the door and place it on a protected surface. -
Page 30: Troubleshooting
2 Carefully close the door. If the door does not easily close, do not force it. Make sure that the hinges are correctly installed. Troubleshooting Cook top If the solutions in this section do not solve a problem, contact a qualified service technician or Insignia customer service. PROBLEM PROBABLE CAUSE POSSIBLE SOLUTION... -
Page 31: Oven
When the flame is burning all the way around the burner, release the knob. Adjust the heat if needed. Oven If the solutions in this section do not solve a problem, contact a qualified service technician or Insignia customer service. PROBLEM PROBABLE CAUSE POSSIBLE SOLUTION... -
Page 32: Specifications
3.7 Cu. Ft. Free-Standing Gas Range for RVs PROBLEM PROBABLE CAUSE POSSIBLE SOLUTION Cracking or popping sound This is the sound of metal This sound is normal. heating up or cooling down Can I use the oven during a No, do not try to use the oven during a power power outage? outage. -
Page 33: One-Year Limited Warranty
During the Warranty Period, if the original manufacture of the material or workmanship of the Product is determined to be defective by an authorized Insignia repair center or store personnel, Insignia will (at its sole option): (1) repair the Product with new or rebuilt parts; or (2) replace the Product at no charge with new or rebuilt comparable products or parts. - Page 34 For product inquiries, please contact us with the information below: 1-877-467-4289 www.insigniaproducts.com INSIGNIA is a trademark of Best Buy and its affiliated companies. Distributed by Best Buy Purchasing, LLC 7601 Penn Ave South, Richfield, MN 55423 U.S.A. ©2019 Best Buy. All rights reserved.
Need help?
Do you have a question about the NS-RNG24SS9 and is the answer not in the manual?
Questions and answers
My flame is low. As I turn on more burners, the flame gets lower as if it is not getting the proper amount of gas. I have replaced the master propane regulator. Tanks are full. I have tried resetting the safety surge valves on the tanks. Is there a master valve, orifice for this stove ? It may have been like this since new but it seems to be getting worse.
The Insignia NS-RNG24SS9 stove has multiple gas valves listed, including 12000 BTU, 9000 BTU, 6000 BTU, and 3500 BTU gas valves. Additionally, there is an "Insignia Orifice Bracket" mentioned. However, there is no mention of a single master valve in the provided information.
This answer is automatically generated