Table of Contents
Advertisement
Quick Links
Advertisement
Table of Contents

Related Manuals for Maxwell HWVC3500 Series


Summary of Contents for Maxwell HWVC3500 Series
- Page 1 HORIZONTAL WINDLASS HWVC 3500 SERIES...
- Page 2 VETUS–MAXWELL APAC Ltd Copyright VETUS-Maxwell APAC Ltd. All rights reserved. VETUS-Maxwell APAC Ltd reserves the right to make engineering refinements on all products without notice. Always consult manual supplied with product as details may have been revised. Illustrations and specifications are not binding as to detail.
-
Page 3: Table Of Contents
Contents INTRODUCTION PRE-INSTALLATION NOTES PRODUCT VARIATIONS SPECIFICATIONS INSTALLATION SELECTION OF POSITION FOR THE WINDLASS PREPARATION OF MOUNTING AREA PREPARATION OF THE WINDLASS INSTALLING THE WINDLASS POWER CONNECTIONS TO DC MOTOR POWER CONNECTIONS TO HYDRAULIC MOTOR INSTALLATION OF CONTROLS NOTE TO BOAT BUILDER USING THE WINDLASS PERSONAL SAFETY WARNINGS LOWERING THE ANCHOR UNDER POWER... -
Page 4: Introduction
This can be guaranteed only when calibrated chain to a recognised international standard is used and the chain is correctly identified to Maxwell, or if a chain sample is provided to Maxwell to develop a custom chainwheel. ... -
Page 5: Product Variations
The main part number refers to the type of chainwheel and the suffix refers to size and type of chain. Please refer to your closest Maxwell Marine agent or distributor (Appendix D), who will select the correct replacement chainwheel for your chain. -
Page 6: Specifications
SPECIFICATIONS Electric DC Drive 12V Line speed at normal working load. 8.7m/min (29ft/min) Maximum pull capacity. 1590kg (3500lb) Current at normal working load. 110-160A Current at stall. 450A Motor power 1.2kW (1.6HP) Weight – Single drum / Single chainwheel 56.7kg (124.7lb) Weight –... -
Page 7: Installation
INSTALLATION SELECTION OF POSITION FOR THE WINDLASS Position of the windlass should be selected together with positions of the hawse pipe. Allow the chain a straight run from the bow roller to the chainwheel with no more than a 2° deviation from horizontal (Picture 2.1). -
Page 8: Preparation Of Mounting Area
PREPARATION OF MOUNTING AREA It is of paramount importance that the vessel has sufficient deck reinforcing and total structural strength to sustain the loads that can be transmitted to the mounting area of the windlass and chain stopper. This should be equal to the loading of the equipment to beyond breaking strength of the chain. -
Page 9: Installing The Windlass
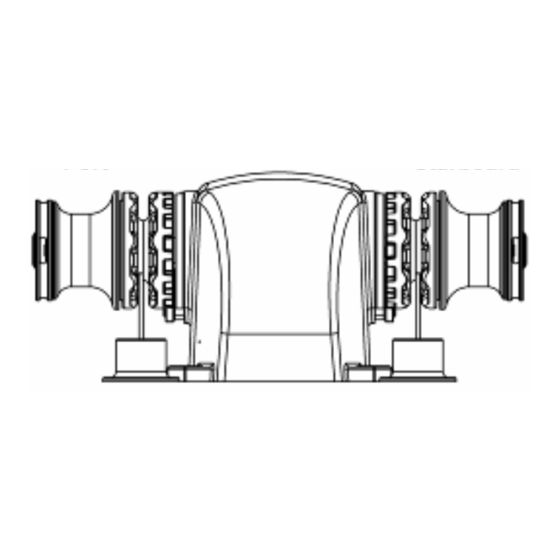
Refer to the drawing in Appendix B for help with identifying components and installing them correctly. Remove windlass from its packing case. Make sure the mounting area on the deck is Extra care should be exercised when properly prepared, as per step 3 above and is handling polished parts to avoid any damage clean. -
Page 10: Power Connections To Hydraulic Motor
Section 1.3. The motor has pressure and return ports. The pressure and return ports should be connected to a solenoid controlled valve (not supplied by Maxwell). After connecting the power lines, spray all ports and fittings with anti-corrosive waterproof coating, “CRC 3013 Soft Seal”... -
Page 11: Installation Of Controls
(“CRC 3097 Long Life”) and wrapped in plastic film. This ensures that your customer receives the windlass from you in the same top quality condition as you received it from Maxwell. -
Page 12: Using The Windlass
USING THE WINDLASS PERSONAL SAFETY WARNINGS As with all load carrying equipment, the consequences of heavy overload, neglect or misuse may be unexpected failure and exposure of crew and/or vessel to risk. Operate the windlass with extreme care at all times. ... -
Page 13: Lowering The Anchor Under Power
LOWERING THE ANCHOR UNDER POWER Ensure the clutch is fully engaged by inserting the As a safety feature the windlass will continue to clutch nut lever in one of the slots on the clutch nut, operate up or down only while the operating and turning clockwise firmly. -
Page 14: 3.5 Retrieving The Anchor Under Manual Control
3.6 OPERATING THE HORIZONTAL WARPING DRUM INDEPENDENTLY (if fitted) Maxwell recommends all warping operations be controlled by the footswitch. This makes it a one- person operation and offers better control of the capstan in case of emergency. -
Page 15: 3.7 Operating The Vertical Warping Drum Independently
3.7 OPERATING THE VERTICAL WARPING DRUM INDEPENDENTLY (if fitted) Maxwell recommends all warping operations be controlled by the footswitch. This makes it a one- person operation and offers better control of the capstan in case of emergency. While handling docking lines with the capstan,... -
Page 16: Maintenance
MAINTENANCE EVERY TRIP Ensure clutch is correctly engaged. The parts external of the case should be washed down with fresh water at the end of every trip. EVERY THREE MONTHS Disassemble all the components of the windlass (external of the case) as described in Section 5.1. Clean all components and check for damage. -
Page 17: Every Three Years
EVERY 3 YEARS Carry out the yearly maintenance and: Remove spacer tube from the gearbox, clean it (as well as top of the gearbox) and apply Res-Q-Steel on mating faces. Drain oil form the Gearbox using the two lowest plugs on the body. Replace seals. -
Page 18: Removal Of Parts External Of Case
REMOVAL OF PARTS EXTERNAL OF CASE If supplied, remove stripper arm (30) from chainpipe (31), by undoing two bolts, nuts and washers (29,32,33). Extra care should be exercised when With a pen knife, or similar, carefully remove cap handling polished parts to avoid any damage (1). -
Page 19: 5.3 Assembly Of Parts
For disassembly of gearbox refer to gearbox assembly drawing and accompanying parts list. For Vertical Drive: Remove cables/hoses from the motor. Remove the shaft by releasing 2 circlips (34) and sliding the shaft through the gearbox (46). ... -
Page 20: Spare Parts
Assemble clutch nut (5). Put retaining washer (4) on top of the main shaft and secure it with the countersunk screw (3). Insert plastic cap (1) into the clutch nut. SPARE PARTS Maxwell recommends a modest quantity of spare... -
Page 21: Tools For Maintenance
parts to be ordered as familiarity with the windlass is developed during installation. Frequently smaller parts are lost during maintenance, so keeping spares (and spare tools) is recommended. We recommend the following list of spare parts to be carried on board: Part no. -
Page 22: Troubleshooting
Disc springs (8) not fitted. Fit disc springs as described in Section 5.3. Pawl (20) engaged. Disengage pawl. Contact Maxwell with correct Chain jumps / slips on the The chainwheel not selected identification of the chain used on chainwheel. correctly. -
Page 23: Appendix A - Dimensional Drawings
APPENDIX A - Dimensional Drawings... -
Page 29: Appendix B - Spare Parts
APPENDIX B – Spare Parts... - Page 32 Item Description Part no. Stainless steel Cap P104750 Countersunk screw 3/8" SP0040 Retaining washer 3267 Label 3856 Clutch nut – No Chainwheel – Chainwheel Port or Starboard side only 5954 – Chainwheel Port and Starboard side 5954 Drum - Horizontal –...
- Page 33 – No Chainwheel 2446 – Chainwheel Port or Starboard side only – Chainwheel Port and Starboard side Spacer – No Chainwheel – Chainwheel Port or Starboard side only 3504 – Chainwheel Port and Starboard side 3504 Pawl Pin – No Chainwheel –...
- Page 34 Key – Gearbox – With vertical capstan 3150 – Without vertical capstan 3150 Gearbox (See page 34 for exploded view) P100979 Motor – 12V – Horizontal Drive only P11165 – 12V – Horizontal and Vertical Drives P11165 – 24V – Horizontal Drive only P11166 –...
- Page 35 {This page intentionally left blank}...
- Page 36 P100979 Gearbox...
- Page 37 P100979 Gearbox Item Part No. Description P90005 Seal Kit (Items 1(x2), 4(x2), 5, 21 and 28) 55 x 70 x 8 oil seal SP0172 M6 x 20 cap screw 3135 Gearcase upper P90005 Seal Kit (Items 1(x2), 4(x2), 5, 21 and 28) 20 x 2 O-ring P90005 Seal Kit (Items 1(x2), 4(x2), 5, 21 and 28) Sight glass...
- Page 38 P12068 Gearbox...
- Page 39 P12068 Gearbox Item Part No. Description SP0722 55 x 70 x 8 oil seal SP0172 M6 x 20 cap screw 3135 Gearcase upper SP0720 20 x 2 O-ring 3223 Sight glass 3168 Bush P14071 Gear Pinion Consists of 3225 – Gear/Pinion SP0650 - Bush 3226 Final drive gear 2200 3500 series...
-
Page 40: Appendix C - Electric Wiring Schematics
APPENDIX C – Electrical Wiring Schematics... - Page 45 VETUS-Maxwell equipment. This Warranty sets out your specific legal rights allowed by VETUS-Maxwell APAC Ltd ; these may be varied by the laws of different countries. In addition, the purchaser may also have other legal rights which vary from country to country.
Need help?
Do you have a question about the HWVC3500 Series and is the answer not in the manual?
Questions and answers