Table of Contents
Advertisement
Available languages
Available languages
Quick Links
English ............................................................... 02-07
Deutsch ............................................................. 08-13
Français ............................................................. 14-19
Español .............................................................. 20-25
REV. 1.0
OPERATION MANUAL
BEDIENUNGSANLEITUNG
MODE D'EMPLOI
MANUAL DE INSTRUCCIONES
WARNING!
To prevent fire or avoid an electric shock
do not expose the device to water or fluids!
Never open the housing!
WARNUNG!
Um Feuer oder einen elektrischen Schock zu
vermeiden, setzen Sie dieses Gerät nicht Wasser
oder Flüssigkeiten aus! Öffnen Sie niemals das
Gehäuse!
ATTENTION !
Afin d'éviter un incendie ou une décharge
électrique, veillez à tenir cet appareil à l'écart
des liquides et de l'humidité ! N´ouvrez jamais le
boîtier !
¡ADVERTENCIA!
Para evitar incendios o descargas eléctricas, ¡no
sumerja este equipo en agua u otras sustancias
líquidas! ¡Nunca abra la carcasa!
Keep information for further reference!
Für weiteren Gebrauch aufbewahren!
Gardez ces instructions pour des utilisations
ultérieurs!
¡Conservar para su uso posterior!
www.reloop.com
Reloop Trademark
Global Distribution GmbH & Co. KG
Schuckertstr. 28
48153 Muenster / Germany
© 2023
1
Advertisement
Table of Contents

Related Manuals for Reloop FLUX


Summary of Contents for Reloop FLUX
- Page 1 Keep information for further reference! Für weiteren Gebrauch aufbewahren! Gardez ces instructions pour des utilisations ultérieurs! ¡Conservar para su uso posterior! www.reloop.com Reloop Trademark Global Distribution GmbH & Co. KG Schuckertstr. 28 48153 Muenster / Germany © 2023 REV. 1.0...
-
Page 2: Safety Instructions
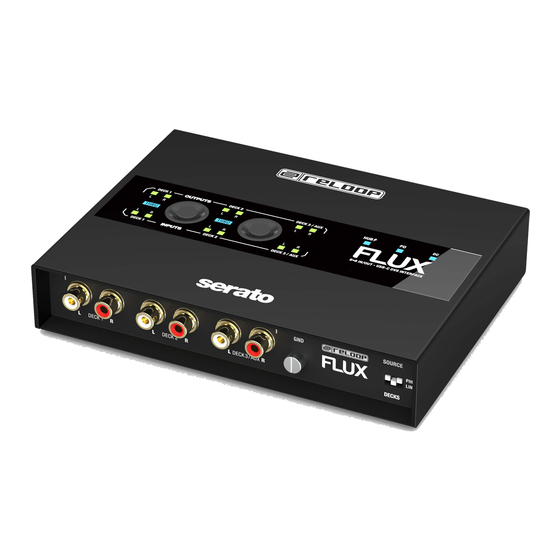
Before operating this equipment we ask you to carefully study and observe all instructions. Please remove the FLUX from its packaging. Check before an initial operation to make sure that the device has not been visibly damaged during transport. - Page 3 CONTROLS FRONT REAR 30 cm 30 cm 25 cm 25 cm DESCRIPTION Output Status LED (Deck 1 - Deck 3) Active USB Hub (x2) Input Status LED (Deck 1 - Deck 3) 10. USB-C PD (Power Delivery) Thru Button (Deck 1 / Deck 2) 11.
- Page 4 3. USB Hub Status LED -5-: - OFF: when the FLUX is connected in the USB-C to PC port via USB-C to USB-A cable - USB Hub is in passive mode. - DIMMED: when a USB-A external power supply is connected to the USB-C DC IN port - USB Hub is in active mode (less than 0.8 A per port).
-
Page 5: Power Supply
Please see the recommended specifications on the download page. After Serato DJ Pro has been installed on your computer, the software will activate itself when the FLUX is connected. You can log in with an existing Serato account or create a new one. If you are using Windows, Serato DJ Pro will prompt you to install the required ASIO driver. -
Page 6: Firmware Update
5. Once finished, click “Close”. The device‘s firmware has now been updated successfully and the FLUX is ready to use. Note: In case of an issue or if the update takes longer than 20 minutes, disconnect the device and repeat the instructions above. -
Page 8: Bestimmungsgemässe Verwendung
Erklärungen und Unterlagen sind beim Hersteller hinterlegt. Vor Inbetriebnahme bitten wir Sie, alle Anweisungen sorgfältig zu studieren und zu befolgen. Nehmen Sie das Reloop FLUX Interface aus der Verpackung. Bitte überprüfen Sie vor der ersten Inbetriebnahme, ob kein offensichtlicher Transportschaden vorliegt. - Page 9 STEUERELEMENTE VORDERSEITE RÜCKSEITE 30 cm 30 cm 25 cm 25 cm BESCHREIBUNG Status-LED Ausgang (Deck 1 – Deck 3) Aktiver USB-Hub (x2) Status-LED Eingang (Deck 1 – Deck 3) 10. USB-C PD (Stromspeisung) Thru-Taste (Deck 1 / Deck 2) 11. USB-C DC-Eingang Status-LED Thru-Taste (Deck 1 / Deck 2) 12.
- Page 10 USB-C 3. Status-LED USB-Hub -5-: - AUS: wenn das FLUX am USB-C-Port über ein USB-C- auf USB-A-Kabel am Computer angeschlossen ist – der USB-Hub ist im passiven Modus. - GEDIMMT: wenn eine externe USB-A-Stromversorgung an den USB-C DC IN-Port angeschlossen ist – der USB-Hub ist im aktiven Modus (weniger als 0,8 A pro Port).
- Page 11 Bitte die empfohlenen Spezifikationen auf der Download-Seite beachten. Nachdem Serato DJ Pro auf dem Computer installiert wurde, aktiviert sich die Software beim Anschließen des FLUX von selbst. Es ist möglich, sich mit einem bestehenden Serato Konto anzumelden oder ein neues Konto anzulegen. Bei Verwendung von Windows fordert Serato DJ Sie zum Installieren des erforderlichen ASIO-Treibers auf.
-
Page 12: Technische Daten
4. Auf „Start“ klicken und die Aktualisierung abwarten (Dauer ca. 3 bis 5 Minuten). 5. Nach Abschluss auf „Close“ („Schließen“) klicken. Die Gerätefirmware wurde nun erfolgreich aktualisiert und das FLUX ist einsatzbereit. Hinweis: Wenn ein Problem auftritt oder die Aktualisierung länger als 20 Minuten dauert, das Gerät trennen und die oben genannten Schritte wiederholen. -
Page 14: Consignes De Sécurité
Retirez le FLUX de son emballage. Avant la première mise en service, vérifiez le bon état de l‘appareil. Si le boîtier ou le cordon USB sont endommagés, n‘utilisez pas l‘appareil et contactez votre revendeur. -
Page 15: Éléments De Commande
ÉLÉMENTS DE COMMANDE RECTO VERSO 30 cm 30 cm 25 cm 25 cm DESCRIPTION Voyant d’état sortie (platine 1 - platine 3) Hub USB actif (x2) Voyant d’état entrée (platine 1 - platine 3) USB-C PD (alimentation électrique) Bouton Thru (platine 1 / platine 2) USB-C entrée DC Voyant d’état bouton Thru (platine 1 / platine 2) Entrée RCA (Cinch) (platine 1 - platine 3/AUX) - Page 16 Brancher les Turntables ou les lecteurs de CD sur les entrées de platine -12- du FLUX. En cas d’utilisation de Turntables, raccorder leur câble de mise à la terre à la borne de mise à la terre -13- du FLUX ou de la table de mixage.
-
Page 17: Alimentation En Courant
Veuillez consulter les spécifications recommandées sur la page de téléchargement. Une fois Serato DJ Pro installé sur l’ordinateur, le logiciel s’active tout seul lorsque vous branchez le FLUX. Il est possible de se connecter avec un compte Serato existant ou de créer un nouveau compte. Si vous utilisez Windows, Serato DJ vous demandera d’installer le pilote ASIO requis. -
Page 18: Mise À Jour Du Micrologiciel
5. Une fois terminé, cliquez sur « Close » (« Fermer »). Le micrologiciel de l’appareil a maintenant été mis à jour avec succès et le FLUX est prêt à être utilisé. Remarque : Si un problème survient ou si la mise à jour prend plus de 20 minutes, déconnecter l’appareil et répéter les étapes ci-dessus. -
Page 20: Instrucciones De Seguridad
Antes de poner en funcionamiento este equipo le rogamos que estudie detenidamente y observe todas las instrucciones. Saque el FLUX de su embalaje. Compruebe antes de una primera puesta en funcionamiento que el aparato no ha sufrido daños visibles durante el transporte. Si detecta algún daño en el cable USB o en la carcasa, no ponga en funcionamiento el aparato. - Page 21 CONTROLES FRONTAL TRASERA 30 cm 30 cm 25 cm 25 cm DESCRIPCIÓN LED de estado de salida (deck 1 - deck 3) Concentrador USB activo (x2) LED de estado de entrada (Deck 1 - Deck 3) USB-C PD (Power Delivery) Botón de „thru“...
- Page 22 USB-C 3. LED de Estado del Hub USB -5-: - APAGADO: cuando el FLUX está conectado en el puerto USB-C a PC mediante un cable USB-C a USB-A - El Hub USB está en modo pasivo. - DIMMED: cuando una fuente de alimentación externa USB-A está conectada al puerto USB-C DC IN - USB Hub está...
-
Page 23: Fuente De Alimentación
Consulte las especificaciones recomendadas en la página de descarga. Una vez instalado Serato DJ Pro en tu ordenador, el software se activará automáticamente cuando conectes el FLUX. Puede iniciar sesión con una cuenta Serato existente o crear una nueva. Si utiliza Windows, Serato DJ Pro le pedirá... -
Page 24: Actualización Del Firmware
5. Una vez finalizada, haga clic en „Cerrar“. El firmware del dispositivo se ha actualizado correctamente y el FLUX está listo para su uso. Nota: En caso de algún problema o si la actualización tarda más de 20 minutos, desconecte el dispositivo y repita las instrucciones anteriores. - Page 26 LEARN MORE ABOUT THE FULL STAND HUB...
- Page 27 RELOOP PRODUCT RANGE...
- Page 28 Reloop Distribution Global Distribution GmbH & Co. KG, Schuckertstrasse 28, 48153 Muenster / Germany Fax: +49.251.6099368 Subject to alterations. Illustrations similar to original product. Misprints excepted. Technische Änderungen vorbehalten. Alle Abbildungen ähnlich. Keine Haftung für Druckfehler. Sous réserve de modifications techniques.
Need help?
Do you have a question about the FLUX and is the answer not in the manual?
Questions and answers