
Related Manuals for Rehatec Galileo


Summary of Contents for Rehatec Galileo
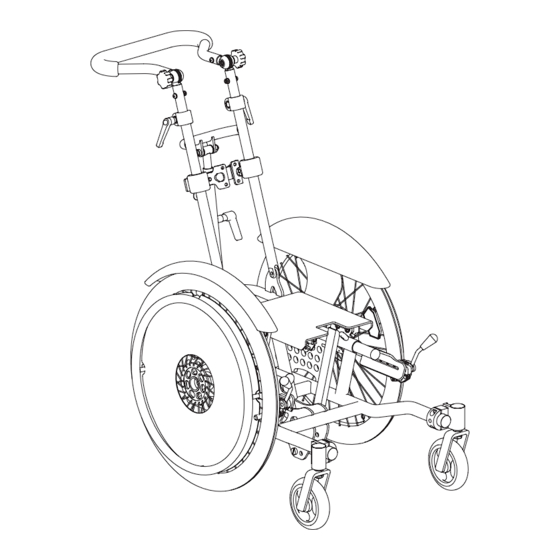
- Page 1 Galileo Mobility Base I N S T R U C T I O N S FO R USE S E R I A L N U M B E R :: English 1024081_EN_1...
- Page 2 Rehatec® GmbH In den Kreuzwiesen 35 69250 Schönau Germany Tel.: 06228 / 91 36 0 Fax: 06228 / 91 36 99 www.rehatec.com © 2023 Rehatec® GmbH Technical changes and rights reserved. Valid since 12.01.2023 - Rev. 1024081_1...
- Page 3 Your Rehatec® GmbH wishes you much pleasure in using your Galileo mobility base. Important! Read these instructions for use carefully before using your new Galileo mobility base for the first time. Peo- ple with impairments, be it sensory impairments, cognitive impairments or learning disabilities, can have the instructions for use translated for comprehensibility if necessary.
-
Page 4: Table Of Contents
Table of contents Inhalt 1. Safety Safety instructions 2. Intended use Purpose / scope of application Responsibility Declaration of conformity Care and maintenance 2.4.1 Maintenance 2.4.2 Inspection plan 2.4.3 Cleaning and disinfection Further use 2.5.1 Reuse or reprocessing 2.5.2 Disposal Warranty and service 2.6.1 Warranty conditions... - Page 5 4.24 Trapezoid adapter (optional) 4.25 Seating system (optional) 4.25.1 Back element without connecting hinge 4.25.2 Seat element without connecting hinge 4.25.3 Extending the seat element to the rear 4.26 Outdoor front wheel accessory, incl. wheel chocks 4.27 Dynamic back 4.28 Armrests standard 4.29 comfort armrests...
-
Page 6: Safety
1. Safety 1.1 Safety instructions Please follow all instructions in this manual carefully. Incorrect operation can impair important functions. All safety instructions and other regulations must always be observed by both the patient and the user. General DANGER The mobility base may only be used by someone who has received an introduction and has read and understood the complete instructions for use! The instruction must be given by the operator/ service provider! DANGER... - Page 7 During all repair and adjustment work, attention must be paid to the danger of pinching and crushing! CAUTION Repair and inspection work may only be carried out by Rehatec® GmbH or operators/care providers! CAUTION Maximum adjustment ranges must not be exceeded. It must be possible to guarantee a...
- Page 8 Environment/ Operation WARNING The use of the mobility base is only possible at an ambient temperature of 15°C to 35°C! CAUTION The mobility base must be protected from moisture! DANGER The mobility base may only be used on firm, level and horizontal ground! CAUTION The mobility base may only be stored indoors at an ambient temperature of 10°...
-
Page 9: Intended Use
2.1 Purpose / scope of application Purpose The Galileo mobility base is used in general living areas, in care homes as well as in domestic situations. It is designed to accommodate seating shells or seating systems in order to support therapeutic applications for people with moderate to severe sitting malpositions and/or sitting posture instabilities, thereby enabling pain-free sitting in a physiologically correct posture. -
Page 10: Responsibility
Only original spare parts and accessories shall be used. Rehatec® GmbH only provides a warranty if the product is used under the specified conditions and for the intended purposes (see also chapter "9 Warranty and service"). -
Page 11: Care And Maintenance
• It is important that all components are undamaged during use. Check them regularly and have them re- paired or replaced if necessary. The Galileo mobility base must be serviced every 12 months, taking into account any earlier pre-increasing maintenance intervals, in accordance with the following inspection plan! 11 from 60 1024081_EN_1 Subject to technical changes and printing errors. -
Page 12: Inspection Plan
Seat Seat plate Trapezoidal adapter Footplate mounting Page 1 12 from 60 1024081_EN_1 Subject to technical changes and printing errors. 21-05-11 Rehatec® GmbH, In den Kreuzwiesen 35, 69250 Schönau, T: +49 6228 9136-0, F: +49 6228 9136-99, info@rehatec.com, www.rehatec.com... - Page 13 Page 2 You can find an inspection plan that can be filled out interactively on our homepage 21-05-11 Rehatec® GmbH, In den Kreuzwiesen 35, 69250 Schönau, T: +49 6228 9136-0, F: +49 6228 9136-99, info@rehatec.com, www.rehatec.com under "Downloads". 13 from 60...
-
Page 14: Cleaning And Disinfection
2.4.3 Cleaning and disinfection The user is responsible for regular maintenance and care. In case of complaints or problems, please contact your care provider/dealer! 2.4.3.1 Safety instructions for cleaning and disinfection DANGER Cleaning or disinfection that is neglected, inadequate or carried out incorrectly (using the wrong agents or procedures) can pose a serious risk to the user and patient! DANGER Maintenance, cleaning, repair and adjustment work shall only be carried out without the patient sitting in the unit! - Page 15 2.4.3.2 General cleaning and disinfection process DANGER Cleaning or disinfection that is neglected, inadequate or carried out incorrectly (using the wrong agents or procedures) can pose a serious risk to the operator and patient! Before selecting a cleaning agent, please contact your dealer. Basic cleaning before first use •...
- Page 16 Daily cleaning • It is recommended that all parts of the unit that have been touched by patients and users, as well as all handles and accessories, are cleaned every day. • Spilled liquids should be removed as soon as possible. Use of the mobility base is only permitted when the device is completely dry and clean.
- Page 17 remain on the surfaces. Dry the parts thoroughly afterwards. Synthetic leather covers The leatherette covers must be disinfected with a CE certified surface disinfectant. The disinfectant must then be wiped off completely with a damp cloth and the synthetic leather covers must be dried thoroughly with a microfibre cloth.
-
Page 18: Further Use
2.5.1 Reuse or reprocessing The operator/care provider is responsible for reuse or reprocessing. The Galileo mobility base is basically suitable for reuse, although products in reuse are subject to special stress. When the product is used again, it is important that all documents belonging to the unit are handed over to the next user. -
Page 19: Warranty And Service
Warranty services refer to defects of the product that are demonstrably due to material or manufacturing defects. For the Galileo mobility base, we provide a 3-year guarantee on the frame parts. Such defects will be re- paired by Rehatec® GmbH free of charge. Cushions, wooden parts, fabrics, castors, gas springs and Bowden cables are excluded from this guarantee. -
Page 20: Product And Delivery Overview
"5. Technical data". The base model of the Galileo mobility base is usually delivered fully assembled. To avoid damage during transport, removable and unattached parts are packed separately in the box. -
Page 21: Accessories
• Calf pad • Vent tray • Seating system For further information and data, please visit www.rehatec.com or send your request by email, fax or post. When selecting and attaching medical accessories, please make sure that the mobility/functionality of the unit is not impaired 3.3 Delivery inspection... -
Page 22: Unit Settings
Only a perfectly adapted mobility base enables cont- rolled use of the device. The Galileo mobility base is primarily intended to be pushed, but it is also suitable for self-propelled use. Taking into account the instructions for use and the individual abilities and knowledge, the decision about self-propelling and the routes to be travelled is at the discretion of the patient or the caregiver. - Page 23 If the front castors are wobbling, reduce the driving speed. Only participate in public road traffic with driving experience. The mobility base shall only be used where pedestrian traffic is permitted. When participating in public road traffic, equip the device with reflectors. The road traffic regulations must be observed.
-
Page 24: User Shifts The Centre Of Gravity
4.2 User shifts the centre of gravity Changes to the centre of gravity always affect the behaviour of the mobility base. The centre of gravity can be affected by changing the body posture as well as by changing the device settings (this documents explains how the device settings affect the centre of gravity). -
Page 25: Transport In Motor Vehicles
To transport patients sitting in the mobility base in a vehicle, the Galileo requires a wheelchair securement adaptor provided by specialist dealers. You may either order it mounted on the device or separately from a specialist dealer. - Page 26 Securing the mobility base Galileo is only approved for transporting patients in a vehicle with a special wheelchair tiedown and occupant restraint system (wheelchair securement adapter). The wheelchair securement adapter is only approved and to be used together with the associated wheelchair tiedown and occupant restraint system.
-
Page 27: Drive Wheel
Straps and belts Belts and straps must not be twisted. Tighten them in a way that the user is adequately secured but still feels comfortable. The belt and belt buckle shall not be guided over parts of the mobility base or the seat shall (e.g. armrests, wheels) and thus kept away from the body. -
Page 28: Front Castor
The steering axle must be perpendicular to the road. 90° These adjustments shall only be carried out by Rehatec® GmbH and authorised specialist dealers and only when mobility base is unoccupied. Ensure sufficient tyre tread. For ideal driving characteristics, align the steering axle perpendicular to the ground. -
Page 29: Alignment Of The Drive Wheel
The selected settings depend on the type of use as well as on the individual skills and experience of the patient and the caregiver. These adjustments shall only be carried out by Rehatec® GmbH or authorised dealers and only when mobility base is unoccu- pied. -
Page 30: Wheel Guard (Optional)
Shifting the wheelbase Remove wheel (see chapter "4.4 Drive wheel"). Unhook the Bowden cable by pushing up the brake release . Loosen the nut then the screw counterclockwise. Remove the drum brake with its spacer bushing. Hold the anti-twist device and remove the screws Change the position of the drive wheel. -
Page 31: Drum Brake
4.11 Drum brake The brake levers allow caregivers to brake while pushing the mobility base. They cannot be used by patients using the mobility base. Always check the functioning of the brakes before use. Precise adjustment of the brakes and regular maintenance are requi- red to ensure safe brake function (see chapter "2.4.1 Mainte- nance"). -
Page 32: Parking Brake On Drive Wheel (Optional)
Parking brakes secure the mobility base against rolling away when stationary and are not suitable for braking while driving. These adjustments shall only be carried out by Rehatec® GmbH and authorised specialist dealers and only when mobility base is unoccupied. -
Page 33: Tilting The Seat
4.13 Tilting the seat You may change the seat angle at any time for a more comfortable or therapeutically reasonable position. Due to increased risk of tipping due to inclined adjustment, use anti-tips. Apply the brakes before adjusting the seat position. Push and hold release lever of the adjustment lever. -
Page 34: Foldable Back
4.15 Foldable back The back can be folded to the seat plate for easy transport. Be aware of the risk of pinching or crushing your fingers! The seat shell must be removed before the back can be folded. No locking is possible when the back is folded. If there is a back attachment, it must be at the top! Fold manually Release the clamp lever... -
Page 35: Adjusting The Seat Depth Through Backrest
4.16 Adjusting the seat depth through backrest These adjustments shall only be carried out by Rehatec® GmbH and authorised specialist dealers and only when mobility base is unoccupied. Adjust wheelbase if necessary since the centre of gravity chan- ges. Adjust only when mobility base is unoccupied. -
Page 36: Push Bar
4.18 Push bar Do not hang any objects on the push bar - there is a risk of tip- ping. The push bar is not suitable for lifting, carrying or tilting the unit. Never put weight on one side! Do not remove or bypass the locking mechanism. The tubes of the back shall be secured against unintentional removal. -
Page 37: Split Back Mounting Bracket For Seat Shell (Optional)
4.19 Split back mounting bracket for seat shell (optional) Be aware of the risk of pinching or crushing your fingers! Tighten the screws alternately until all screws are securely fastened! When you change the position/angle of the back, the seat shell bracket moves automatically. -
Page 38: Anti-Tip (Optional)
4.21 Anti-tip (optional) The anti-tip prevents unintentional tipping backwards with a short wheelbase or extreme seat tilt. For greater stability, we recommend applying anti-tips on both sides. Anti-tip wheels are not suitable as drive wheels! To drive over obstacles, the anti-tip shall be swivelled in. Do not use the anti-tip on soft ground or uneven terrain. -
Page 39: Footplate (Optional)
4.22 Footplate (optional) Feet must not slip off the footplate while using the mo- bility base. Do not stand on the footplate when you sit down or stand up - there is a risk of tipping over. You have reached the maximum length when the ends of the tubes are flush with the guides/brackets. -
Page 40: Calf Pad (Optional)
Assemble and adjust the adapter only when mobility base is unoccupied. Assembly These adjustments shall only be carried out by Rehatec® GmbH and authorised specialist dealers and only when mobili- ty base is unoccupied. Screw the lower part of the trapezoid adapter to the unit Consider the direction of travel. -
Page 41: Seating System (Optional)
Be aware of the risk of pinching or crushing your fingers! Assemble and adjust the adapter only when mobility base is unoccupied. These adjustments shall only be carried out by Rehatec® GmbH and authorised specialist dealers and only when mobility base is unoccupied. -
Page 42: Extending The Seat Element To The Rear
4.25.3 Extending the seat element to the rear For better adjustment of seat cushions in the rear of the seat. Setting Loosen the two nuts on the underside of the seat, adjust the desired dimension by moving the extension in the direction of the slotted hole and then retighten both nuts. -
Page 43: Outdoor Front Wheel Accessory, Incl. Wheel Chocks
4.26 Outdoor front wheel accessory, incl. wheel chocks The outdoor front wheel accessory makes it easier to push the mobility base on rough paths. Not in combination with any electric drives; width extension kits for front castors or front castor stop possible. When using the outdoor front wheel accessory, a maximum speed of 4 km/h shall not be exceeded. -
Page 44: Dynamic Back
The procedure for attaching and detaching is identical. 4.27 Dynamic back DANGER While using the mobility base (manually, in a car or with an electric drive) the dynamic back must be firmly locked! Due to the increased risk of tipping with the tilted back, anti- tips are necessary. -
Page 45: Armrests Standard
Manual adjustment See chapter 4.14 "Back angle adjustment". 4.28 Armrests standard Armrests are not suitable for lifting/carrying the device. Do not hang any objects on the armrest or back - there is a risk of tipping over! Be aware of the risk of pinching or crushing your fingers! Height adjustment Hold the armrest bracket with one hand and loosen the two set screws counterclockwise with the other hand. -
Page 46: Comfort Armrests
Tighten the screws alternately until all screws are securely fastened! Repeat the procedure to adjust the other side. Adjusting the armrest when seat is tilted (4.13) If you want to tilt the seat backwards, we recommend you adjust the armrests inwards as far as possible. To do so, fold the armrests upwards, loosen the mini wing screws at the width adjustment and push the armrests inwards. - Page 47 star knob clockwise until all the toothed segments interlock. Repeat the procedure to adjust the other side. Depth adjustment Loosen both screws counterclockwise and move the armrest pad. Then tighten both screws clockwise. Tighten the screws alternately until all screws are securely fastened! Repeat the procedure to adjust the other side.
-
Page 48: Flip-Up Leg Control Pads
Consider the clearance when driving over obstacles. The leg control pads shall not collide with the front castors. Flip-up leg control pads are available for Galileo size 2 and big- ger. You may only adjust the physiological pivot point in height with the optional footrest height adjustment available. -
Page 49: How To Flip The Leg Control Pads Up Mechanically
Depth adjustment Loosen the two set screws counterclockwise. Now you can adjust the depth of the corresponding footplate and tighten it again clockwise with the two set screws Repeat the procedure to adjust the other side. How to remove/flip away the leg control pads Remove Use the handle to pull the footplate out upwards. -
Page 50: Calf Pads With Flip Away Bracket
move freely and adjust the required foot angle! Then tighten the screw clockwise. 360° inclination adjustment, aluminium Loosen the screw counterclockwise and adjust the desired angle accordingly. Then tighten the screw Footplate height adjustment You may only adjust the physiological pivot point in height with the optional footrest height adjustment available. -
Page 51: Flip-Up Split Footplate, Special Version
4.30.5 Flip-up split footplate, special version Footrests flip up via gas spring To adjust the inclination of the footrest, press the lever down, swivel the footrest to the desired position and release the lever Repeat the procedure to adjust the other side. All other settings comply with chapter 4.30 "Flip-up leg control pads". - Page 52 Be aware of the risk of pinching or crushing your fingers! Only adjust the vent tray when it is empty. When you loosen the screws, the vent tray isno longer fixed and might fall down. When adjusting or attaching the vent tray for medical equip- ment, make sure that the tray is inside the tyre (shaded area).
-
Page 53: Tiping Bar For Vent Tray
4.31.2 Tiping bar for vent tray The tip assist makes it easier for caregivers to overcome height differen- ces. Danger of tipping in case of excessive pressure and extreme tipping angles. If there is an anti-tip, it shall always be swi- velled in. -
Page 54: Technical Data
Minimum seat height with 22" = dimension "h" + 2 cm. Minimum seat height with 24" = "h" +4 cm. Possible seat height adjustment = "h" + 2 cm or + 4 cm. CAUTION! Be careful if the centre of gravity is very high! These adjustments shall only be carried out by Rehatec® GmbH and authorised specialist dealers and only when mobility base is unoccupied. -
Page 55: Product Label
Manufacturer address In den Kreuzwiesen 35 Ӏ 69250 Schönau Tel.: 06228 9136-0 Ӏ Fax: 06228 9136-99 Product name Product size Typ Galileo Gr. Mini 0 1 2K 2L 3 4 5 6 Maximum load Month and Max. Nennlast 80 120... - Page 56 Notes 56 from 60 1024081_EN_1 Subject to technical changes and printing errors.
- Page 57 Notes 57 from 60 1024081_EN_1 Subject to technical changes and printing errors.
- Page 58 Notes 58 from 60 1024081_EN_1 Subject to technical changes and printing errors.
- Page 59 Warranty card Thank you for purchasing a high-quality product from Rehatec® GmbH. The Rehatec® product designated below is of impeccable quality and practical design. Rehatec® GmbH undertakes to remedy any damage resulting from material defects free of charge within the framework of a three-year guarantee from the date of purchase.
- Page 60 Rehatec® GmbH | In den Kreuzwiesen 35 | 69250 Schoenau | Germany Phone: +49 6228 / 91 36 0 | Fax: +49 6228 / 91 36 99 | www.rehatec.com © 2023 Rehatec® GmbH | All rights reserved | 01 / 2023...
Need help?
Do you have a question about the Galileo and is the answer not in the manual?
Questions and answers