Table of Contents
Advertisement
Advertisement
Table of Contents

Related Manuals for Rato R2000iS


Summary of Contents for Rato R2000iS
- Page 1 1.6KVA INVERTER GENERATOR MAINTENANCE MANUAL...
- Page 2 This maintenance manual contents regulations which should comply to in daily maintenance and trouble removal on generator. Please make sure serviceman could read this manual anytime. This maintenance manual describes the correct maintaining methods. Any personal injury or death or equipment damage, which because ignorance on these regulations, our company would remove the responsibility.
- Page 3 SAFETY NOTICE Your human safety and property are very important as well as others .Please ready following safety notice in this manual and on generator decals, each safety notice has a symbol Failure to follow this instruction could result in extreme severe injury. Failure to follow this instruction might result in severe injury.
-
Page 4: Table Of Contents
CONTENTS CONTENTS GENERAL INFORMATION 第一部分 引言 ............... 1 Main components 1-1 发电机组成部分 ......Error! Bookmark not defined. General parameter ......................2 Repair standard ........................3 MAINTENANCE 第二部分 保养 ..................4 Maintenance table 2-1 保养一览表 ................... 4 Engine Oil 2-2 机油 ......................5 Air cleaner 2-3 空滤器... - Page 5 CONTENTS Abnormal sound 3-1-6 异响 ........Error! Bookmark not defined. No DC output 3-1-7 没有直流输出电压 ....Error! Bookmark not defined. 3-1-8 Generator Stator Winding too hot 发电机定子绕组过热Error! Bookmark not defined. Indicator light judgment 3-1-9 指示灯闪烁判定 ..Error! Bookmark not defined. Repair preparation 3-2 维修前的准备...
- Page 6 CONTENTS Inverter 3-5-5 逆变器部件 ........Error! Bookmark not defined. Control panel 3-5-6 控制面板部件 ......Error! Bookmark not defined. Appearance diagram 3-5-7 外观总成 ....... Error! Bookmark not defined. Wire connecting diagram 第四部分 线路接线图 ....Error! Bookmark not defined. Wire connecting schematic diagram 4-1 接线原理图 ..Error! Bookmark not defined. Appendix 附录...
-
Page 8: General Information 第一部分 引言
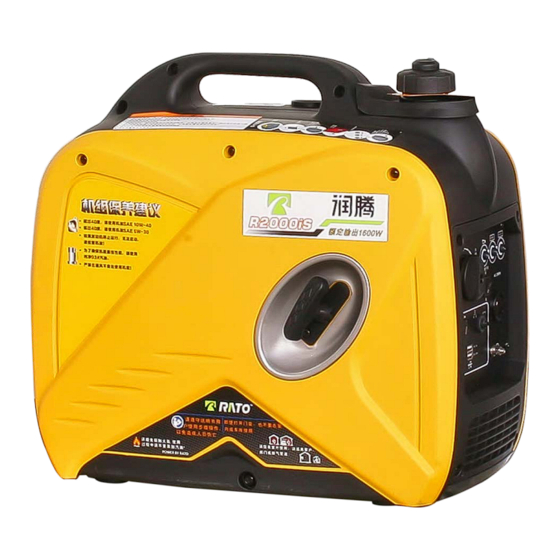
GENERAL INFORMATION GENERAL INFORMATION 第一部分 引言 Main Components 发电机组成部分 Handle Fuel cap Muffler Left Cover Fuel tank Fuel tank Motor assy. Control panel Control panel Recoil starter subassembly 燃油观察窗 Fuel observing hole Right cover 机油尺 Air cleaner Oil level gauge... -
Page 9: General Parameter
GENERAL INFORMATION General parameter Generator model R2000iS/ R2000iSP Type Silent inverter generator Frequency /Hz 50Hz/60Hz Rated voltage /V 100V/120V/220V/230V/240V Max power /kVA Motor Rated power /kVA Power Factor Waveform deviation factor/% ≤3% Noise (3/4 load) 65dB DC output / V-A... -
Page 10: Repair Standard
GENERAL INFORMATION Repair standard Components Items Standard Limitation 5800 Max unload speed Gasoline engine 0.45Mpa at Cylinder pressure 600rpm Cylinder Inner diameter 48.6~48.615 48.655 48.57~48.59 48.52 Piston skirt outer diameter 0.01~0.045 0.135 Piston-cylinder clearance Piston Inner diameter of piston pin hole 11.002~11.01 11.02 Piston pin outer diameter... -
Page 11: Maintenance 第二部分 保养
MAINTENANCE MAINTENANCE 第二部分 保养 Maintenance table 2-1 保养一览表 Regular maintenance contributes to safety, economic, no malfunction and environmental protection. Exhaust contents toxic carbon monoxide, please stop the engine before maintenance. If you have to implement the maintenance when generator running, please make sure the working area is draughty. Regular maintenance table: 20h or the first 300h or... -
Page 12: Engine Oil 2-2 机油
MAINTENANCE Assemble the cover, tighten bolts. Oil 2-2 机油 Note : Every time before use generator, place it Put generator on horizontal plane. on horizontal plane, stop the engine and check oil level. Loosen the bolts as marked, remove the cover. -
Page 13: Air Cleaner 2-3 空滤器
MAINTENANCE Air cleaner 2-3 空滤器 Dirty air cleaner will affect the air into carburetor. For reducing carburetor faulty, please maintain the air cleaner regularly (As maintenance table shows) and increase the maintenance frequency if generator used in dusty area. Use gasoline or inflammable solvent to clean air cleaner element could result in fire or explosion. -
Page 14: Clean Fuel Strainer 2-4 燃油滤清器的清理
MAINTENANCE Clean fuel strainer 2-4 燃油滤清器的清理 Spark arrestor 2-5 火花消除器 Fuel strainer is designed for preventing dust into Gasoline is flammable and carburetor. If generator isn’t used for a long explosive. Smoking, open fire and spark are time, please clean fuel strainer after empty fuel prohibited in working area. -
Page 15: Spark Arrestor 2-6 火花塞
MAINTENANCE Check the spark plug retainer. When Spark arrestor 2-6 火花塞 assemble spark plug, turn it in screw with hand to avoid improper assembly. Use incorrect model or caloricity of spark After put spark plug on retainer, press it arrestor could decrease engine performance tightly with spark plug wrench. -
Page 16: Valve Clearance Adjustment 2-7 气门间隙调整
MAINTENANCE Valve clearance adjustment 2-7 气门间隙调整 There always be clearance between valve end and its transmitted parts, in case of contraction which would affect engine work. If the clearance is in excess, it would result in higher back-pressure and higher noise (abnormal noise from valve) and decrease engine performance. - Page 17 MAINTENANCE Please measure the clearance after engine cool-down. Screwd Ÿ Adjust valve clearance. river Valve Wrench Valve tighten Adjustment steps: loosen the tighten bolt, turn the adjustment nut to a proper position, and tighten the adjustment nut. Intake 0.03~0.08mm Valve clearance Exhaust 0.03~0.08mm Adjust the bolt...
- Page 18 第三部分 故障判定和修理 Part 3 Trouble determine and maintenance 3-1 Trouble determine 3-1-1 Start-up difficult Phenomenon Causes Methods of elimination No fuel oil in the oil tank Add fuel oil The vent hole on the oil tank Evacuate the blocking is blocked The main metering jet is Poor flow improperly adjusted or...
- Page 19 第三部分 故障判定和修理 The clearance between the ignition coil and the flywheel adjust the gap is abnormal phenomenon Causes Methods of elimination Piston ring wearing limit Replace with new piston ring Piston ring break off replace Cementation of the piston Clear away the carbon deposit ring Spark plug gasket not Installed gasket and tighten it...
- Page 20 第三部分 故障判定和修理 Ÿ Let spark plugs of the negative electrode (the threaded portion) through the cylinder head connected to ground, pull the starter handle spark and observed state. 3-1-2 Underpower Phenomenon Causes Methods of elimination There is air in the oil line or the oil line Drain the air, clearing the oil line is blocked Improper adjustment of the main...
- Page 21 第三部分 故障判定和修理 3-1-3 Unstable speed Phenomenon Causes Methods of elimination The piston, cylinder and piston ring wear too Replace the wearing parts seriously Tapping sound The piston pin and the pin hole wear too Replace the piston or the of the generator seriously piston pin The small end of the connecting rod wears...
- Page 22 第三部分 故障判定和修理 The side electrode of the spark Replace the spark plug, and plug falls off eliminate the stuff that falls off The high-voltage cable falls off replace it The ignition coil will breakthrough and cause short Replace the motor stator circuit The stopping line falls on the Find out the short circuit point and...
- Page 23 第三部分 故障判定和修理 Clearing away the Too much combustion-chamber deposit deposit Metallic tapping The fuel marking No. is wrong Replacing the fuel oil sound at explosion Check the cause and Overheat of the generator eliminate it Improper adjustment of the valve Re-adjust the valve clearance clearance Others...
- Page 24 第三部分 故障判定和修理 3-1-9 Indicator flashes 1. Green light on: it means work, generator output; 2. Green light on, red light flashing: overload, generator output 3. Green light off, the red-light flash once, after the interval 3S flash repeat: represents the front end of generatrix voltage is too low, no generator output;...
- Page 25 第三部分 故障判定和修理 3-2 Preparation before maintenance 3-2-1 Safety factors Warning ! If the following precautions are not observed, the warranty of generator will be invalid and generator may be damaged or people may be injured. Therefore, users should be especially careful of the following precautions before using generator: 1)Connecting the load strictly following manual on its rating plate;...
- Page 26 第三部分 故障判定和修理 Please read the warning label carefully before using the generator; our company shall not be liable for the personal injuries or equipment damages caused by ignoring the warning label 3-2-2 Special Tools Tool Name Purpose and Remarks Motor stop lock tooling when motor tighten add torsion Motor Puller The removal of the motor...
- Page 27 APPENDIX 3-3 Disassembly Diagram Lift & right Muffler side 3 in 1 knob Cover plate cover Panel Panel bed Inverter Lift & right shell Fuel tank Baseplate Power motor Muffler wind Fly wheel Muffler assembly scooper filter Motor wind assembly Trigger scooper Carburetor...
- Page 28 APPENDIX 3-4 Engine 3-4-1Recoil Starter/flywheel/ Ignition Coil Disassembly: check whether the flange clearance Disassembly: is too large or other problems.Please update with Should use a special new one if it happens. tool(3-2-2) to remove. Recoil starter parts Oil seal flywheel Assembly: Ventilatio Torque:...
- Page 29 APPENDIX 1) Recoil starter Note Ÿ Be careful when you disassembly, do not make the starter coil spring pop up, please take on the gloves when operating Ÿ Be sure the rope without break or wear before installing. Bolt Coating agent stop Rope Driven CAM Compression spring...
- Page 30 APPENDIX Installation Instructions a. Put the reset spring in the seat cover, the hook on the outside of the reset spring should hang around the cover gaps and to align the rope groove, then assemble the seat cover to pull on the rope tray. With the starter cover card claws coating oil, then turning left when installing, just make the reset spring inside the hook in starting cover card claws.
- Page 31 APPENDIX to test the spark plug cap’s resistance value Spark plug cap resistance value:5Ω Igniter Put the tester terminal with the High-voltage wire coil and iron core, to test the secondary side of the coil resistance. Secondary side of the coil resistance value: 3kΩ Charge Coil Put the tester (follow the picture) with charge coil, to test the charge coil resistance value.
- Page 32 APPENDIX Gasoline is by the fuel tank through the fuel filter into the carburetor, fuel filter can filter out the impurities and the gasoline oxide of the tank. If the quality is flawed, there will be some impurities through fuel filter into the carburetor. At same time, gas contained can form gel ingredients after long time deposit will condense out of the colloid, attached to the carburetor parts (such as main orifice), oil and float on the surface .The air is through air filter into the carburetor, it based on the air intake resistance cannot be too big and other...
- Page 33 APPENDIX Ÿ No fire. 3) Carburetor Installation float a) Check the float valve and float valve seat before installation. Float valve main air bleed b) Use compressed air to clean before installation. c) Use compressed air to clean before installation. Main jet O-ring d) Use compressed air to clean and Lubricate o-ring...
- Page 34 APPENDIX 3-4-4 Cyliner Head 1) Remove/Installation pipe Cylinder head bolt:M6×50(4) one side on the cylinder Unscrew and tighten bolts epicranium, on other side should be according to the pick up in the tank cover cross. Cylinder head cover plate of vertical ventilation Torque value:12~14 N·m double end bolt (in take) Gasket...
- Page 35 APPENDIX Valve adjusting bolt Spark plug Valve rocker Check if there is any Clean the spark plug before Check if there is any damagement before installation. damagement before installation. N·m installation,esprcially the Torque value:25-28 hole and tappet assembly. Locked nut Spring Oil drip pan Intake valve...
- Page 36 APPENDIX Valve spring seat: Remove the front of valve rod from the middle of the spring seat hole. Please noted that if the cylinder head installed on the cylinder, spring seat ring may be dropped in the crankcase. 2)Inspection/Maintenance/Repairing: ①Valve stem diameter Using micrometer to check if the valve stem diameter is lower than the standard limit, visible to the naked eye, more maintenance gas appearance has ablation or crack.
- Page 37 APPENDIX If lower than the standard or out of maintenance period, please use new one. Standard Maintenance Limit 4~4.012mm 4.060mm Replacement: a) To replace the valve guide into the freezer frozen 1 hour or so b) Use the valve guide puller to remove the valve guide pipe from combustion chamber side.
- Page 38 APPENDIX Tool : reamer Check ring b) Thoroughly remove dirt and debris puller on the cylinder head. c) Check valve guide hole, the hole should be located in the central and should be unobstructed. If not, the Installation height:1mm valve guide pipe may have been bent. With this bad situation, you should use a new one.
- Page 39 APPENDIX c) With 45 ° mill to grind cutting, the valve seat to create a smooth concentric valve seat, only clockwise. Tool : Valve grinding machine Gridding handle intake valve:32° outtake valve:32° intake valve:45° outtake valve:45° d) Using 32 ° to 45 ° mill to reduce and adjust the valve seat, to let it contact with the valve cone parts.
- Page 40 APPENDIX g)On the valve seat's cone daub abrasives, use valve grinding tool rotation to the valve seat to get up to speed. Grinding tools h)Check valve clearance after installation. Supplier mark 120° First ring Second ring “▽”mark Oil ring 3-4-5 Crankshaft/Piston ①...
- Page 41 APPENDIX Put the front at the piston groove, then using long nose pliers clamp at the other end, turning install it in the slot at the same time. But you should avoid the gap of the piston ring. c) Connecting rod cover Position mark When installation, you should put the edge of connecting rod and connecting rod at same position.
- Page 42 APPENDIX b) The clearance of piston pin hole and piston pin With inside diameter micrometer to measure the piston pin hole diameter, and outside micrometer to measure the piston pin outer diameter .Then calculated by the measured results. If it beyond the limit, you can change the piston or piston pin with your own need. Standard Using limit 11.002~11.01mm...
- Page 43 APPENDIX Standard Using limit 0.12mm 0.015~0.05 mm e) Piston ring closure gap Put the piston ring into the cylinder, push the piston Piston ring ring head to the work position, and then use the gauge to measure the opening gap .The gap should not too big nor too small .Too big ,it will make the cylinder sealing performance get poor ,when it starts, the piston ring will be expansion and stucked in the cylinder .If the ring...
- Page 44 APPENDIX ④ The detection of the camshaft Camshaft is gasoline engine driving parts, it controls the inlet and exhaust valve opened or closed according to certain rule. Structure characteristics: satisfy the requirement of control inlet and exhaust shaft with CAM and supporting shaft neck. When the camshaft working, it bear the impact load of cyclical, camshaft face friction with the lifter, it is easy to wear or scratch.
- Page 45 APPENDIX ⑤ Timing gear Check the timing gear meshing clearance, it should keep on the involution marks location on both sides of the gear Location mark crankshaft gear Camshaft gear Timing gear main wear by tooth wear, tooth surface spalling or coarse, the deflection of gear, gear tooth broken etc.
- Page 46 APPENDIX 3-5 Generator 3-5-1 Fuel Tank Oil meter To ensure the vent is clean and not blocked. If necessary, use compressed air to clean fuel tank strainer Check whether there blockage damage on mesh first, and then to install. Firstly to remove the dirt at the bottom, and dry thoroughly , and...
- Page 47 APPENDIX Installation attention Note Ÿ Check whether there is any jam on vent oil before installation. Ÿ Weather the fuel filter is blocked or damaged Ÿ Weather the fuel hose is presence of aging and rupture. Ÿ If have any problems, you should replace a new one before installation 3-5-2 Muffler Muffler Gasket for outlet...
- Page 48 APPENDIX Note Disassembly muffler as above picture Muffler long-term use can cause carbon deposits, that can give the exhaust system a serious impact. In order to make sure exhaust system work better, we generally remove carbon deposits in muffler. When removing carbon deposits in mufflers, plastic hammer is available to tap and use compressed air to remove If the muffler reservoir drops, corrosion severely, so that the exhaust noise increases, should be replaced with new parts.
- Page 49 APPENDIX 3-5-3 The chassis base composite Chassis suspension seat Installation according cushion rubber combination of mounting holes in the rack chassis installation. Installed under Make sure no cracking rubber, electric motor to ensure hardened or wear. that no rubber cracking, hardening or wear.
- Page 50 APPENDIX 3-5-4 Motor parts 1) Disassembly and assembly: Rotor Clean dust or oil on the tapered portion crankcase and the rotor, and then install. Plug Nut: M12×1.25 Torque value: (26-30) N•m 螺栓(M5×12) 扭矩:5-7N.m Put the main output winding wire in the bottom of the engine, and then put the engine in the engine damping seat on the baseboard...
- Page 51 APPENDIX Stator Bolt: M6 × 30 (5) Make the motor stator Torque: (8~12)N•m wires through the supporting hole, positioning the setting holes on the motor support Bolt:M5 × 30 (2) Torque: (6-8)N•m Support Bolt: M6 × 12 (2) Torque: (8~12)N•m Nut: M12×1.25 Torque: (28~30)N•m Stator...
- Page 52 APPENDIX 2) Check The main winding / winding power / DC winding. No direct current output check whether the DC over current tripping, whether the DC socket is damaged. If damaged, replace the outlet. alternating current output check the AC outlet whether damage.
- Page 53 APPENDIX Warning Once the winding insulation resistance decreased, which means between the winding and the insulation has been damaged, if not promptly take measures to repair which would cause leakage, and endanger the people’s and equipment safety. Learn for early winding insulation, be sure always measure the winding insulation resistance. Ÿ...
- Page 54 APPENDIX 3-5-5 Inverter unit. 1) Removing and installing: Shock Pads Support, Inverter fuel tank Rectifi Inverter Bolt M6 × 12 (6) Bottom Plate Refer...
- Page 55 APPENDIX Checking Invert Parts Inverters need to be detected in the generator operating state Checking the wire on the inverter whether have color change. The upper inverter filled resin whether have blister-like projections. Checking all electrical components on the inverter, connectors and wiring no visible color change or damaged .
- Page 56 APPENDIX Sensitive Switch When spring is in the bounce state sheet, with an ohmmeter measure resistance between two output terminals. If the resistance is zero, replace the micro switch. When the spring plate in a compressed state, with an ohmmeter measure resistance between two output terminals.
- Page 57 APPENDIX Red Pin Test Tip 1: "Continuous" refers to a diode conducting Multimeter Blue Blue Blackk special Blue Black Resistance Blue which is different from the short circuit when the check fails for any period, Black Replacement of a bridge rectifier. Rectifier 3-5-6 Control Panel Componts Multim...
- Page 58 APPENDIX Checking Combination Switch When the combination switch in each position. Checking the ignition circuit, fuel switch, choke switch status Close switch is "OFF", the ignition circuit is turned off, namely two micro switch output terminal is turned on, the ignition grounding; oil switch is turned off, the engine would not run.
- Page 59 APPENDIX NOTE: Use tongs when removing and tipping harness, to avoid damage to the wire and wire connectors with appropriate force. Oil Alert Indicator ( Red ) When the crankcase oil drops below the safety line, oil protection system will automatically shut down the engine, and the oil warning indicator light;...
- Page 60 APPENDIX again, set the DC switch Press the "ON" position . Checking continuity between the terminals of the DC circuit breaker with a multimeter. The conduction should be on when the button of Circuit breaker is pressed。 3-5-7 Exterior Assembly cover,decor ative Support...
- Page 61 Fourth Parts W ART Wiring diagram agram...
- Page 62 Attachment Attachment Torque Sheet Item No. Items Thread Size Grade Torque(N m) · Shroud, Muffler ST4.8×16 4.8-A 4±1 Starter rope guide plate M5×12 4.8-A 4±1 combination Cover, RH LH(底板连接 M6×19(六角台 8.8-B 9±1 处) 阶螺栓) Side cover, muffler M5×16 4.8-A 4±1 Fuel switch combination M6×12 8.8-B...
- Page 63 Attachment Absorber, Frame M6×14 8.8-A 4±1 Standard torque parameters Fastening Parts Thread Size Torque(N m) · 5mm SCREW,BOLT 4.5-6 6mm SCREW,BOLT 8-12 8mm SCREW,BOLT 18-25 10mm SCREW,BOLT 29-34 12mm SCREW,BOLT 49-59 4mm SCREW 1.5-2.6 5mm SCREW 3.5-5 SCREW,BOLT 6mm SCREW 7-11 5mm Flange bolts 3.6-6.9...
Need help?
Do you have a question about the R2000iS and is the answer not in the manual?
Questions and answers