
Subscribe to Our Youtube Channel
Related Manuals for BOMANN KSG 239.1 G


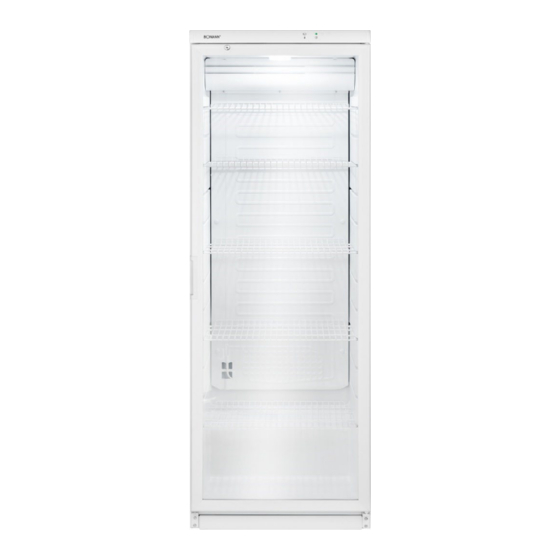
Summary of Contents for BOMANN KSG 239.1 G
- Page 1 KSG 239.1 LASTÜR ÜHLSCHRANK EVERAGE OOLER Bedienungsanleitung/Garantie Instruction Manual...
-
Page 2: Table Of Contents
Inhalt Einleitung ……………………..………………………………………………………………………..Seite 3 Allgemeine Hinweise …...……………………………………………………………….………….…. Seite 3 Spezielle Sicherheitshinweise für dieses Gerät ……………………..…………………………..Seite 4 Transport und Verpackung ...………………………………..………………………………………… Seite 5 Geräteausstattung ……………………..…………………………………………………….………..Seite 5 Installation …...……………………………………………..………………………………………..…. Seite 5 Inbetriebnahme / Betrieb ……………………..………………………………..….……………..Seite 7 Reinigung und Wartung ……...……………………………..…………….…………………………… Seite 9 Störungsbehebung ……………………..………………...………………………….……………….. -
Page 3: Einleitung
DEUTSCH Zweck. Dieses Gerät ist nicht für den privaten Ge- Einleitung brauch bestimmt. Vielen Dank, dass Sie sich für unser Produkt ent- • Es darf nur in der Art und Weise benutzt werden, schieden haben. Wir wünschen Ihnen viel Freude mit wie es in dieser Bedienungsanleitung beschrie- dem Gerät. -
Page 4: Spezielle Sicherheitshinweise Für Dieses Gerät
Spezielle Sicherheitshinweise für dieses Gerät • Dieses Gerät ist ausschließlich für den gewerblichen Gebrauch be- stimmt. WARNUNG: • Stellen Sie sicher, dass die Belüftungsöffnungen im Gerätegehäuse oder im Einbaugehäuse nicht blockiert werden. • Gebrauchen Sie keine mechanischen Einrichtungen oder sonstigen Mittel um den Abtauvorgang (falls notwendig) zu beschleunigen, außer den in der Anleitung beschriebenen Hilfsmitteln (Modellabhängig im Lieferumfang enthalten). -
Page 5: Transport Und Verpackung
Bei Entsorgung nutzen Sie die von Elektrogeräten vorgesehenen Sam- • melstellen. Entsorgen Sie nicht mehr benötigte Verpackungs- Kühlmittel materialen gemäß den örtlich geltenden Vorschrif- ten. WARNUNG • Überprüfen Sie das Gerät auf eventuelle Trans- vor feuergefährlichen Stoffen portschäden, um Gefährdungen zu vermeiden. Der Kühlmittelkreislauf enthält das Kühlmittel Isobu- •... -
Page 6: Installation
Lieferumfang Setzen Sie das Gerät keinerlei Witterungsein- flüssen aus. 5x Gitterablage, 2x Schlüssel für Türschloss, 2x Wandabstandhalter Gerät ausrichten Über die vorderen Standfüße können geringfügige Installation Bodenunebenheiten ausgeglichen werden. Voraussetzungen an den Aufstellort Prüfen Sie, ob das Gerät waagegerecht steht. Wenn das Gerät nicht im Gleichgewicht steht, müssen die •... -
Page 7: Inbetriebnahme / Betrieb
• Schließen Sie den Netzstecker an eine vor- Die Leistungsstufen regeln die verschiedenen Werte schriftsmäßig installierte Schutzkontakt-Steck- der Innentemperatur. dose an. Leistungsstufe • Wenn der Netzstecker nach der Installation nicht niedrigste Stufe, wärmste Innentem- 1, 2 frei zugänglich ist, muss zur Erfüllung der ein- +8°C ∼... - Page 8 HINWEIS: Betriebsgeräusche Für die effizienteste Energienutzung platzieren Sie Geräuscheart Ursache alle Ablagen/Einschübe in ihre Originalposition. Murmeln Kompressor in Betrieb Flüssigkeits- Zirkulation des Kühlmittels Ablageflächen entnehmen / einsetzen geräusche • Zur Entnahme, Gerätetür vollständig öffnen, Ab- Klick- Temperaturregler schaltet Kom- lage ggf. anheben, schräg stellen und nach vorne geräusche pressor ein oder aus herausziehen.
-
Page 9: Reinigung Und Wartung
• Gerätetür nur so lange wie nötig geöffnet lassen. • Nachdem alles gründlich getrocknet wurde, kön- • Beleuchtung nur bei Bedarf einschalten. nen Sie das Gerät wieder in Betrieb nehmen. Modellabhängig: • Die Dichtung muss vollkommen intakt sein, damit Wischen Sie mindestens einmal •... -
Page 10: Störungsbehebung
Abtauen • Kippen Sie das Gerät nach hinten und blockieren Sie es in dieser Position, um ein Herausrutschen ACHTUNG: der Gerätetür zu verhindern. Gebrauchen Sie niemals Metallgegenstände (z.B. Messer), um Eis vom Verdampfer zu entfernen. An- derenfalls kann dieser beschädigt werden. Das Gerät taut automatisch ab. -
Page 11: Technische Daten
Abmessung H x B x T / Gewicht……...……………….. Störung / Ursache / Maßnahme Geräteabmessung: …………..173,0 x 60,0 x 60,0 cm Geräteinhalt ist zu warm Nettogewicht: …………………..………..ca. 65,0 kg - Überprüfen Sie die Temperatureinstellung / Umgebungstemperatur. Für weitere Informationen zum Produkt scannen Sie - Die Gerätetür ist nicht richtig geschlossen, prüfen den QR-Code auf dem beiliegenden Energielabel Sie die Türdichtung. - Page 12 oder gemeinschaftlich nutzen. Ist das Gerät zur Schadensersatz und Minderung) werden durch gewerblichen Nutzung geeignet, leisten wir beim diese Garantie nicht berührt. Kauf durch Unternehmer für das Gerät eine Ga- Garantieabwicklung rantie von 6 Monaten. Im Falle eines technischen Defekts während oder 3.
-
Page 13: Entsorgung
Hinweise zum Austausch ausgewählter Ersatzteile, ßerhalb der Garantie, finden Sie auf die für dieses Modell verfügbar sind, entnehmen Sie unserer Homepage: dem Inhalt dieser Bedienungsanleitung. www.bomann-germany.de/service Telefonische Reparaturannahme für Österreich: 0820.90 12 48* (*Kosten laut Konditionen Ihres Vertragspartners für Festnetz / Entsorgung oder Mobilfunkanschlüsse) -
Page 14: Introduction
ENGLISH other purpose. Any other use is not intended and Introduction can result in damages or personal injuries. Thank you for choosing our product. We hope you • This appliance is not intended to be used as a will enjoy using the appliance. built-in appliance. -
Page 15: Special Safety Information For This Unit
Special safety Information for this Unit • This appliance is intended for commercial use only. WARNING: • Keep ventilation openings, in the appliance enclosure or in the built-in structure, clear of obstruction. • Do not use mechanical devices or other means to accelerate the de- frosting process (if necessary), except those described in this manual (depending on the model included the scope of delivery). -
Page 16: Transport And Packaging
Coolant • In case of damage, do not put the appliance into operation. Contact your distributor. WARNING: Risk of fire / flammable NOTE: Production residue or dust may have collected on the materials appliance. We recommend cleaning the appliance The coolant circuit of this unit contains the refrigerant “Cleaning and Maintenance”... -
Page 17: Installation
Fastening the wall spacer Installation For a reasonable minimum distance to the back wall, Conditions for the installation location use the spacers supplied. • Good ventilation is required around the appliance to dissipate the heat properly and to guarantee ef- ficient cooling operation at low power consump- tion. -
Page 18: Startup / Operation
Basically, the temperature changes depending on the Startup / Operation ambient temperature (place of installation), the fre- Prior to first use quency of opening the door and the equipment. CAUTION: For initial operation, first set the lowest possible inter- After transport, the appliance should be left standing nal temperature (= highest power level) until the ap- upright for four hours before connecting to the power pliance has reached the desired operating tempera-... -
Page 19: Cleaning And Maintenance
Door lock Tips for energy saving The appliance has a child safety lock by means of a • Disconnect the appliance from the power supply if lockable appliance door. Lock the door if necessary it isn’t in use. and keep the enclosed keys in a safe place inacces- •... - Page 20 Cleaning the appliance including interior door and the groove below the rubber and remove any adhesive residue. To keep dirt and germs at bay, clean the appliance • Attach the new rubber. If necessary, heat the rub- regularly! ber seal with a hair dryer or hot water and shape it •...
-
Page 21: Troubleshooting
• Remove the contents of the appliance and the Problem / Cause / Action movable interior parts. Loading is too warm • Tilt the appliance backwards and block it in this - Check the temperature setting / ambient temper- position to prevent the door from sliding out. ature. -
Page 22: Disposal
For more information about the product, scan the QR code on the supplied energy label and/or visit the of- ficial website of the product data bank: https://eprel.ec.europa.eu The right to make technical and design modifications during continuous product development remains re- served. - Page 24 C. Bomann GmbH www.bomann-germany.de Made in P.R.C.
Need help?
Do you have a question about the KSG 239.1 G and is the answer not in the manual?
Questions and answers